[100% Working] How to Feather Edges in Photoshop
Feathering is one of the most essential parts of any photo editing operation, and using it in Photoshop could get slightly tougher. You could face difficulty while using Feather Edges Photoshop because this tool offers highly professional and advanced features that could be difficult for newcomers.
Hence, if you want to learn how to feather edges in Photoshop in a slightly manageable way, you can dive into the insightful guide.
Part 1. How to Feather Edges in Photoshop
Feather edges in Photoshop soften the hard edges, making the images look relevant and breathtaking. Although Adobe Photoshop offers attractive photo editing features, it could take a lot of time to master using the feather edges Photoshop feature.
Here's the step by step guide to learn how to feather edges in Photoshop.
Step 1
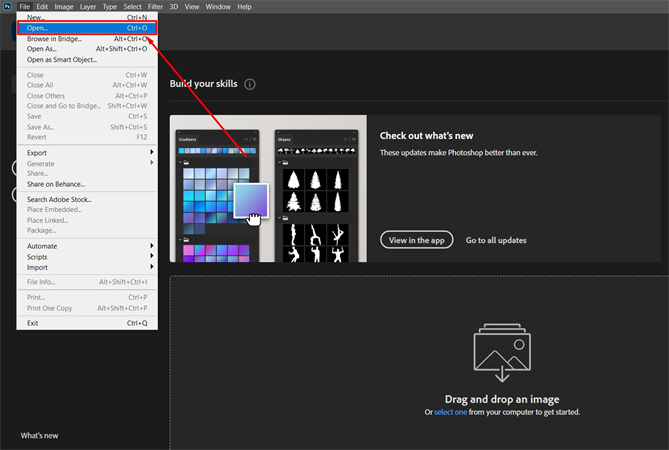
Launch Adobe Photoshop on your computer after installing it and click the Open button to upload the image you'd like to feature.

Step 2
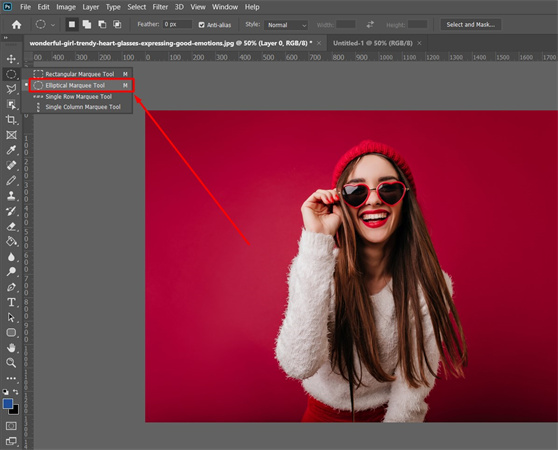
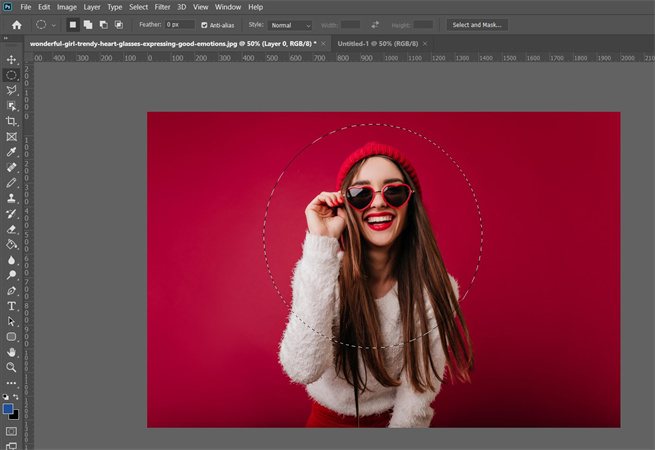
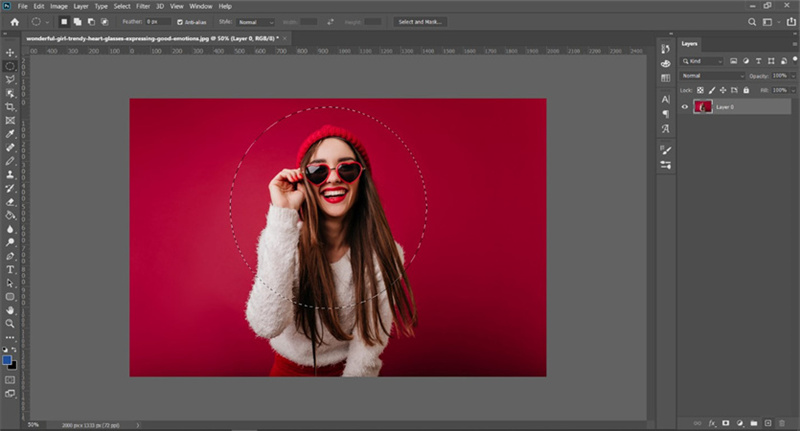
In this phase, you'll need a portion of an image, and for that purpose, selecting the Elliptical Marquee Tools makes complete sense. After selecting the area you'd like to feather, the selected area will contain the dotted circle there.
Step 3
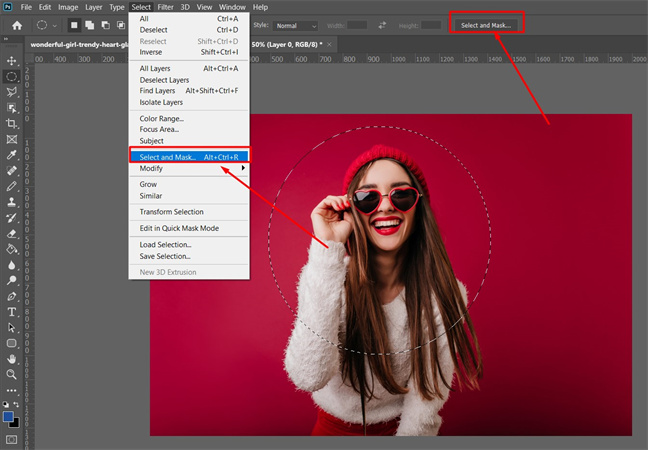
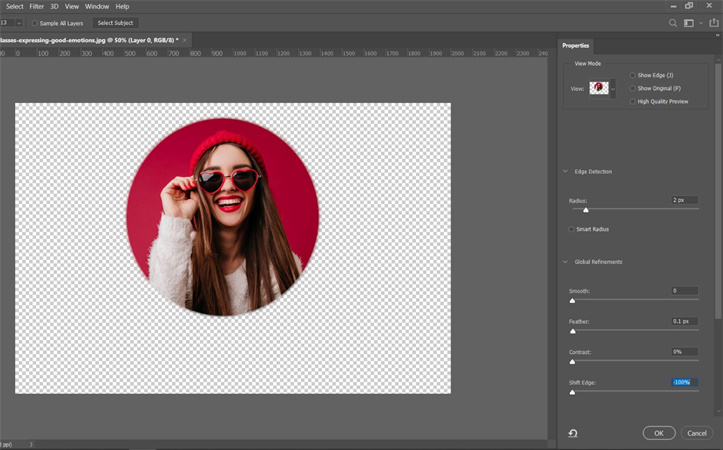
After choosing the area you'd like to feather, you'll need to tap on the Select button and find the Select and Mask button afterward. After clicking on this option, you can access the Properties menu.
Step 4
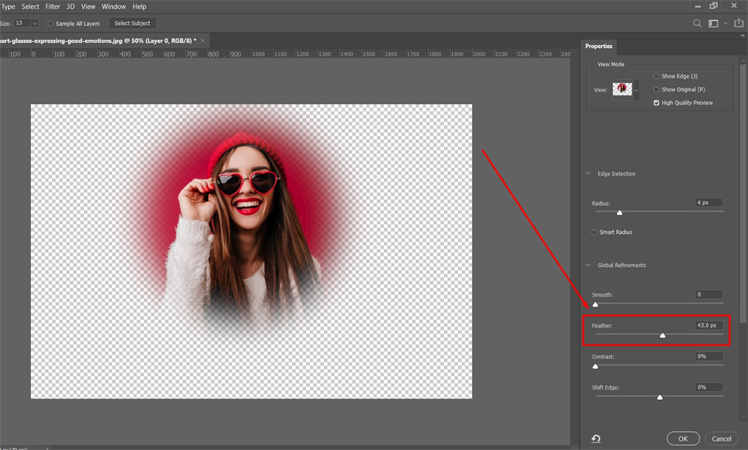
Visit the Feather icon, and this helps you to see the results in the frame. You'll need to remember that if the value of the feather is higher, it will make the edges more blurred. Thus, selecting the 40-60 pixels is the most recommended option to go ahead.
You must prepare for blurred images, provided you've chosen the higher scale. However, selecting the lower feather will make your image appear like a circle, and we don't want to be in that situation.
Step 5
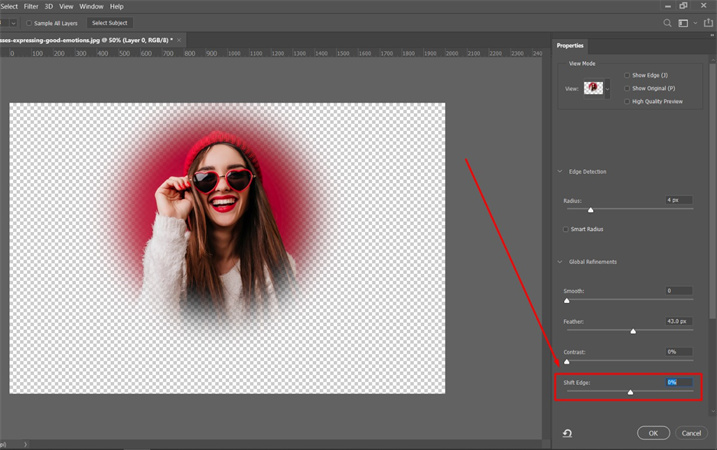
You can click on the OK button to make the changes to the selection. Clicking the ''OK'' button will make the Feather option disappear from the screen, but you can still see it in the image's selection.
Step 6
In this phase, you can copy the selection out of your image, and placing it on another image is also possible. You can copy the selection by using the Ctrl+C on Windows, and if you're a Mac user, you'll need to press the Command+C to do the same.
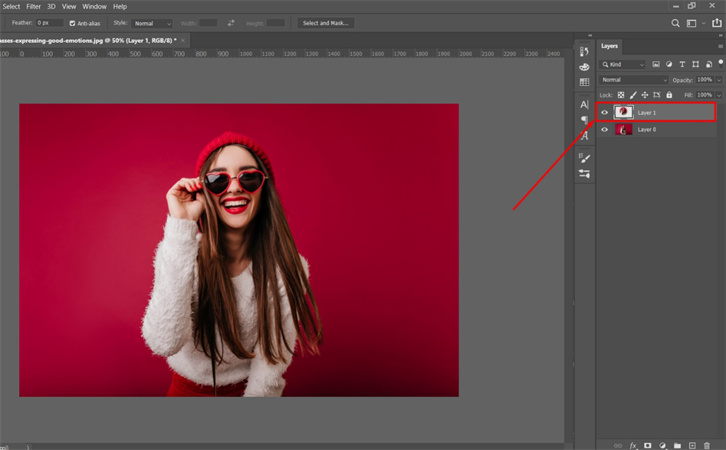
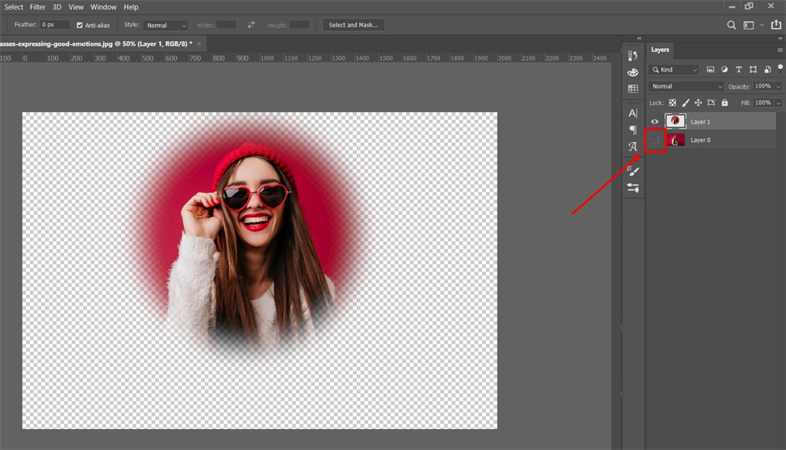
Next, you'll need to use the Ctrl+V after creating a new layer before pasting it in the Windows. That's all you need to do to opt for the ''Photoshop how to feather edges'' operation.
Step 7
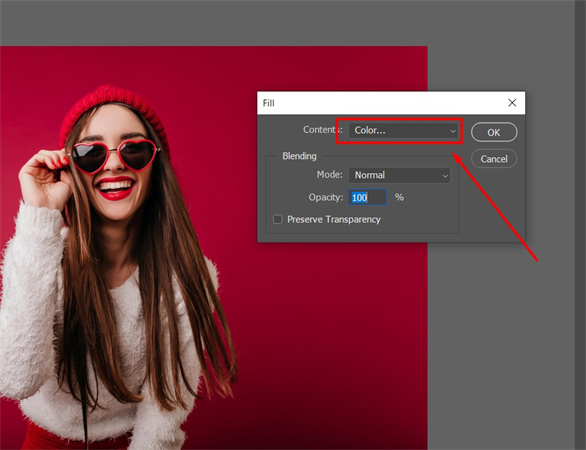
After applying the feathering effect, you can make more changes to the images. To change the image background, you'll need to press the Edit button before hitting the Fill icon. Select the background color and press the ''OK'' icon to complete the job.
Part 2. The Best Alternative to Enhance Photos with HitPaw FotorPea
If using the feather edges Photoshop doesn't help your cause and instead of softening the image's edges, you lose the image resolution, it's time to look for a better alternative to Adobe Photoshop. With offering 6 AI models and an effortless user interface, HitPaw FotorPea emerges as the dream alternative to Adobe Photoshop.
Unlike Photoshop, HitPaw FotorPea doesn't require prior knowledge of the software to enhance the image quality. Instead, it only asks you to import the photo and apply the preferred AI model before turning it into a mesmerizing and stunning image.
Features- It allows you to enhance the image quality automatically.
- HitPaw FotorPea doesn't compromise the quality of the images.
- It comes up with an effortless user interface.
- You can eliminate the noise from the images.
- It allows you to resize the images, making them perfect.
- You can explore the 6 outstanding AI models with minimal effort.
- It enables you to colorize the black and white images without breaking a sweat.
- Supports Mac and Windows
- Allows you to process multiple images simultaneously
Here's the step by step guide to learn how to enhance the image quality through HitPaw FotorPea.
Step 1:Visit the official website of the HitPaw FotorPea and install the software on the computer. Next, you must start the program and hit the Choose File button to drag the image you want to improve the quality. You can import the images in several formats, including TIFF, WEBP, JPG, JPEG, PNG, etc.

Step 2:HitPaw FotorPea blesses you with 6 flawless AI models, including color calibration, colorize model, Denoise Model, and general Denoise Model. You can apply all the AI models to your image to make it look stunning and exciting.
Colorize Model allows you to colorize the black and white images, and the General model assists you in enhancing the images of real scenes. The Denoise Model deals with low light or high ISO images. You can make the blurred images less blurry courtesy of the Face Model. You can select the Color Calibration method if you intend to put the light into the dark image.
Step 3:Click the Preview button, and after satisfying the results, hit the Export button to download the images.

Part 3. FAQs of Feather Edges Photoshop
Q1. How do I soften edges in Photoshop?
A1.
If you're struggling with the hard edges of the images, you can soften the edges courtesy of Feather Edges Photoshop. You can look at the part 1 credentials to learn how to feather edges in Photoshop, which allows you to soften the edges of the images.
If you aren't satisfied with the credentials of Photoshop while softening the edges of the images and would like to go for another tool, looking at the HitPaw FotorPea could be your best decision. It allows you to make the images look breathtaking without wasting your time.
Q2. How do you feather edges in Photoshop with brushes?
A2. You can feather edges in Photoshop with brushes without putting in a lot of hard yards. You must choose the Brush tool and click on the canvas to launch the Brush Preset Panel. Now, you can access the Hardness slider controlling the amount of feathering your brush. You can opt for the 0% hardness icon for soft edged brushes followed by 100% did your hard edged brush.
Final Words
If you're unfamiliar with Adobe Photoshop and want to learn how to feather edges in Photoshop, you can take notes from this post. We have revealed the step by step guide to help you learn using the edge feather Photoshop feature.
All you need to do here is to pay complete attention to these steps to soften the hard edges of the images. If Photoshop doesn't help you improve the images' credentials, HitPaw FotorPea is the most recommended solution. It offers 6 amazing AI models to assist you in improving the image quality by eliminating all the shortcomings from the photos.


 HitPaw VikPea
 HitPaw Photo Object Remover




Share this article:
Select the product rating:
Daniel Walker
Editor-in-Chief
My passion lies in bridging the gap between cutting-edge technology and everyday creativity. With years of hands-on experience, I create content that not only informs but inspires our audience to embrace digital tools confidently.
View all ArticlesLeave a Comment
Create your review for HitPaw articles