How to Make a Picture Not Blurry with Easy Steps
You might benefit from knowing how to make a picture less blurry whether you're a professional photographer or just love taking pictures of special occasions. The method is straightforward with today's technology.
In reality, you can learn to fix blurry images without having any prior experience. It's simple to enhance your photos using your phone or computer.
Here you'll find some easy-to-implement tips for enhancing your picture editing experience. Let’s take a look at what causes blurry pictures and how to make a picture not blurry.
Part 1. What Cause Blurry Pictures?
It's probable that some of your images may turn out blurry, even if you take a lot of them. It is important, however, to understand the causes of blurriness in photographs in order to avoid it in the future. Some of these common causes are as follows:
- Blur due to subject movement
- Bad photography method
- Severely dirty camera lens.
- The wrong focus
- Focus depth
Part 2. Best Way to Fix Blurry Photos with AI Tool in Fast Speed
HitPaw FotorPea is one of the best options out there for those looking for a solution to blurry photos. It's user-friendly and can let you do things like edit photos, make videos, and even animate visuals from your photos.
It is an AI Photo Enhancer that can help people improve the quality of photos and remove blur from photos with easy steps. You don't need to be equipped with professional skills because the trained AI tech will fix the details of the photo automatically.
The following are the most common features of HitPaw FotorPea:
- There are a variety of AI models that can adjust colors, get rid of noise, and otherwise improve your photos of people, animals, and scenery.
- Use the batch processing tool to effortlessly and quickly enhance the quality of over a hundred images all at once.
- Allows photos to be enlarged indefinitely without losing quality.
- One simple click drastically enhances images.
- With this simple automated picture blur remover, you can easily improve your photos by 100% with no work at all.
Here is how to make a photo not blurry using HitPaw FotorPea:
-
Step 1.The first step is to get the program onto your computer. Open the program by double-clicking its icon on the desktop.
-
Step 2.After opening the app, you may import the image you want to edit. You may choose the file you want to use by clicking the button or dragging the picture you want to use into the box that appears.

-
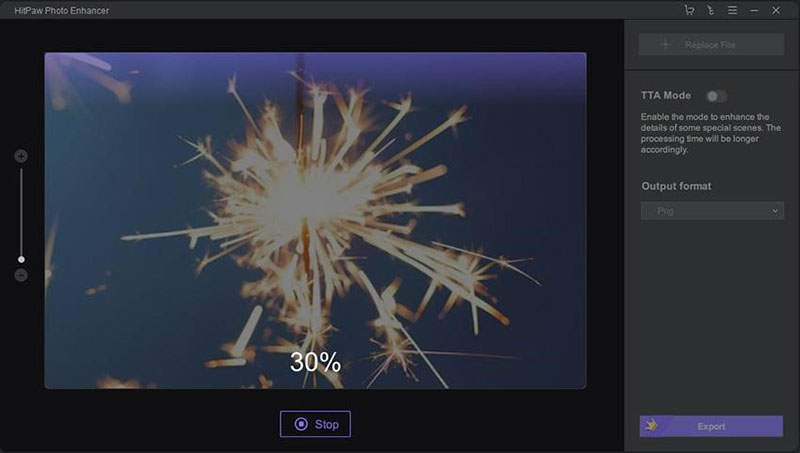
Step 3.Preview the final result on your photo now by clicking the preview button. Turn on TTA mode to have the photo reprocessed if the result is not satisfactory.

-
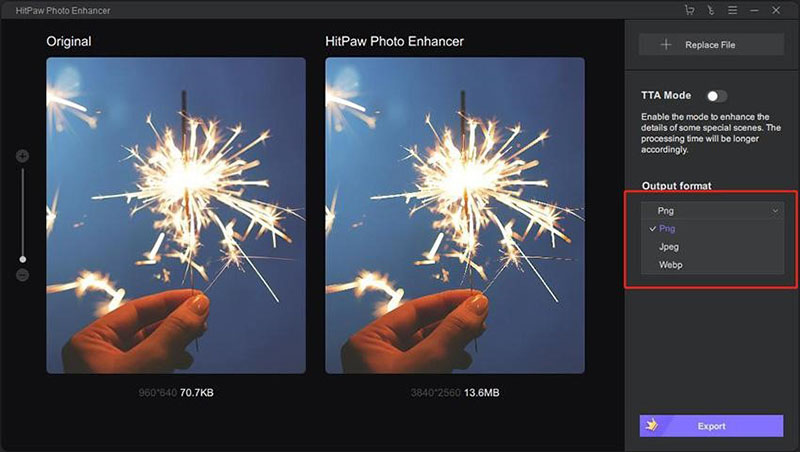
Step 4.After that, you may choose to either save your photo in one of three different formats or export it. WEBP, PNG, and JPG are these formats. Select the file type you'd like to use to export your finished photo edit.

Click the video to learn more about how to sharpen blurry pics with HitPaw FotorPea:
Part 3. How to Fix Blurry Pictures in Online Way
We can understand that in today’s busy world, you may not have time to fix the blur images offline on your computer. For this reason, you can use some of the online photo enhancer applications such as Fotor.
Are you totally clueless at photo editing? You shouldn't bother. With just a single click, you can significantly increase the quality of your photos with Fotor's built-in image enhancer.
To have Fotor instantly identify and fix the lighting and colors, enhance the details, and repair blurry for your photo, simply upload it and click the "1-Tap Enhance" button. Have fun editing your pictures quickly and easily using Fotor.
Here is how to make a pic not blurry using Fotor:
-
Step 1.Visit the Fotor homepage and click on Photo Editor under the Get a Quick Start option. Once you select Upload a photo, the editor will open.
-
Step 2.You may either drag and drop a picture here or use the Open Image button to pick one from your computer or mobile device.
-
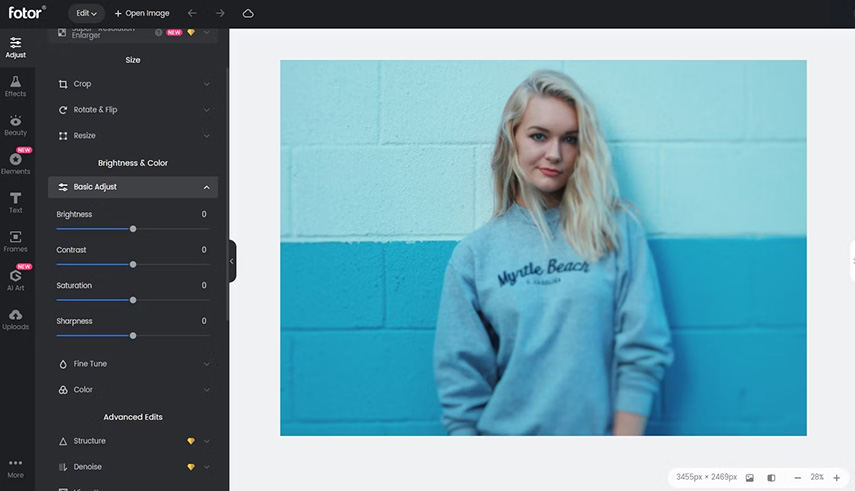
Step 3.On the left side, click the Adjust tab.

-
Step 4.Go to Basic Adjust. Sharpness is the tool you need here. Adjust the slider to your preference. If you turn it up too much, the picture will look grainy.
-
Step 5.While you're in the "Basic Adjust" mode, we suggest increasing the Contrast slider a little.
-
Step 6.Click Download in the upper right, edit the image's properties, then choose a destination to save your photo.
Part 4. How to Make Blurry Image Clear on iPhone and Android
Enhancing blurry images is much easier on smartphones like iPhone and Android. You can enhance your images with a few taps on your mobile phone.
For iPhone and Android Snapseed is the best photo enhancer application. Snapseed, available in both the Google Play Store and the Apple App Store, is a widely used and simple picture editor.
Here is how to make photo not blurry:
-
Step 1.To fix your blurry shot, launch Snapseed and press the plus sign.
-
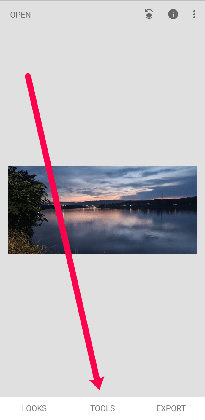
Step 2.Select the Tools menu from the page's footer.

-
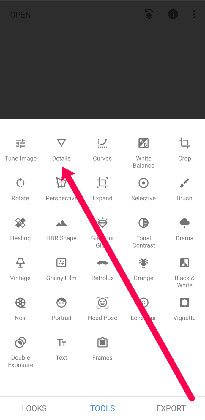
Step 3.On the menu for making changes, select Details.

-
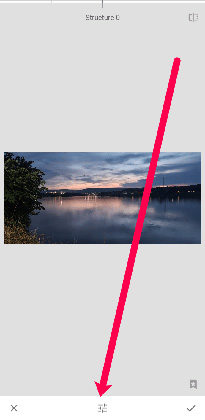
Step 4.Find the "Selections" button at the page's bottom and tap it.

-
Step 5.Click the Sharpen tab and adjust the slider to fine-tune your image.
Check the box when you're done making changes. After that, you can save the picture to your smartphone without having to pay anything or worry about watermarks.
Part 5. How to Make Blurry Photos & Pictures Clear with Adjustments?
We've all been there, trying to capture a once-in-a-lifetime moment with a quickly snapped photo taken on a smartphone. We don't realize the photo was blurry until much later. Here are several ways for how to make pictures not blurry and take clear pictures with your smartphone's camera.
Be sure to keep your phone stable
When taking images, camera shaking is a common cause of blurriness. This occurs when the subject of the shot is blurred due to the photographer's movement while taking the photo, usually because the phone was shaken too much.
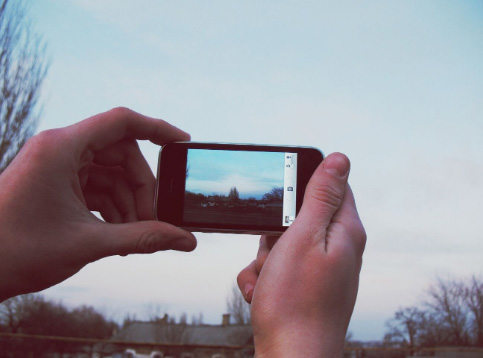
Hold your breath, put your elbow close to your side, and use both hands to keep your phone still, which should reduce any blurring caused by movement.
Prop your phone
Putting your phone on a stable surface can also help eliminate camera shaking while taking photos or videos. Depending on the situation, this may be a floor, wall, or table. As an alternative, you may use a tripod, of which there are now numerous varieties designed for mobile phone use.
Gently press the shutter button
Whether you're holding the camera with both hands or using a tripod, there's still a chance that the camera will shake when you push the shutter release. Tap more gently to avoid any blurriness, even though the little movement won't matter much most of the time.
Stand still for the photo
Keep absolutely still before, during, and after snapping a photo until you know for sure that the shot was captured.
Don't use the digital zoom
If you use digital zoom, the image will become pixelated and grimy. It's best to shoot the picture without the zoom and then crop it in an app if you want a close-up. If you're already seeing blurriness because of the camera shake, zooming in will just make it worse.
Part 6. How to Fix Blurry Photos using Your Camera Settings
Taking sharp photos by adjusting your camera settings will make editing much easier. Here is how to make picture not blurry using your camera settings:
-
Step 1.Deblur an area of focus using the "develop" module's detail panel. Make sure you're sharpening the proper parts of the image by increasing the magnification.
-
Step 2.Change the sharpening settings to suit the image you're working on by increasing or decreasing the amount of sharpness applied.
-
Step 3.More sharpening can be applied to a landscape photo than to a close-up portrait. Find the optimal level of sharpness for your image and composition by using the "amount" slider.
-
Step 4.A radius and detail slider can be used to adjust the size of the blurred details as you remove them from the image.
-
Step 5.A lower radius is preferable for landscapes, while a greater radius is ideal for portraits or close-ups. Use the detail slider after sharpening the image to bring attention to the edges.
Part 7. Conclusion
There should be no longer any need to worry about taking a blurry shot, with the abundance of tools and software accessible at our fingertips.
The process of using HitPaw FotorPea is simple and fast. No special adjustments to any tools or use of other methods are required. You can always count on the program to do an excellent job for you. So, we recommend you use HitPaw FotorPea to fix blur.



 HitPaw VikPea
 HitPaw Univd (Video Converter)


Share this article:
Select the product rating:
Daniel Walker
Editor-in-Chief
My passion lies in bridging the gap between cutting-edge technology and everyday creativity. With years of hands-on experience, I create content that not only informs but inspires our audience to embrace digital tools confidently.
View all ArticlesLeave a Comment
Create your review for HitPaw articles