[Up-to-date] How to Blur Edges in Photoshop with Easy Steps
In this up-to-date guide, we'll walk through the easy steps to blur edges in Photoshop. We'll cover the basics of selecting edges and applying blur effects like Gaussian Blur and Radial Blur.
While Photoshop delivers powerful blurring capabilities, we'll also look at HitPaw as a simpler alternative for enhancing photos with edge blurring presets and AI editing features. Read on to learn how to blur edges in photoshop.
Part 1. How to Blur Edges in Photoshop
Adding a dreamy, blurred edge effect can transform your photos by drawing the eye toward your main subject. While there are many ways to artistically blur images in Photoshop, one of the most versatile approaches is to specifically target the edges.
With some careful selections and filters, you can create custom edge blurring that leaves your main subject crisp and clear. Here is how to blur the edges of a photo in photoshop:
1. Make a selection using any selection tool
Use the Elliptical Marquee, Rectangular Marquee, or any other selection tool to select the area you want to keep in focus. This will be your base selection.
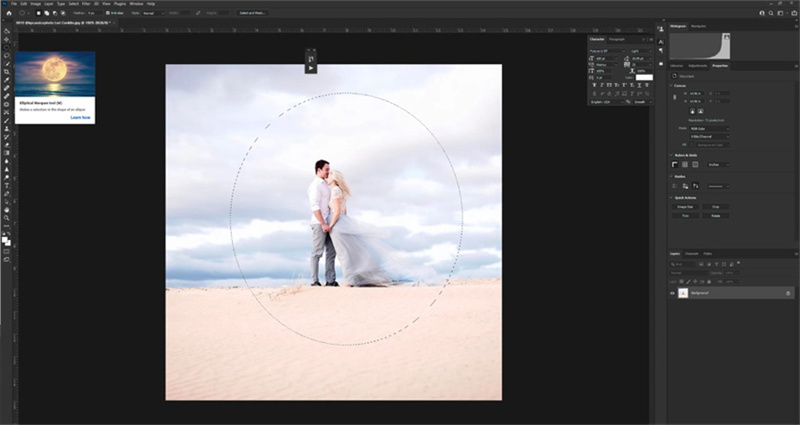
2. Feather the selection
Go to Select > Modify > Feather and enter a Feather Radius between 20-40 pixels. This will create a soft fade between the selected area and the edges.
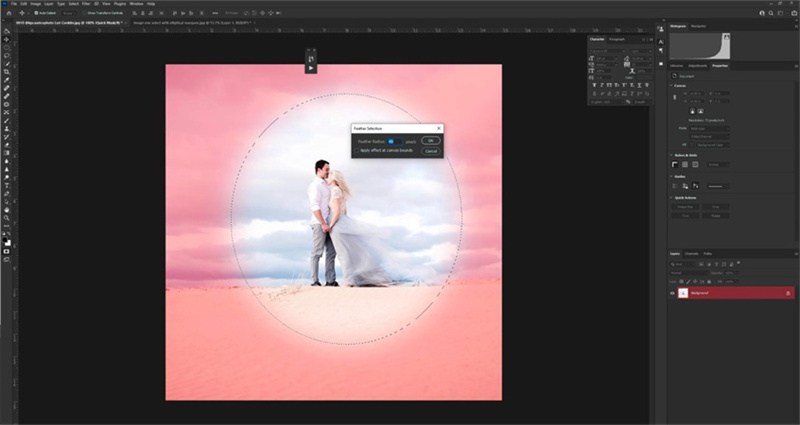
3. Inverse the selection
Go to Select > Inverse to switch the selection to the edges rather than the subject. The marching ants border will now be around the edges rather than the subject.
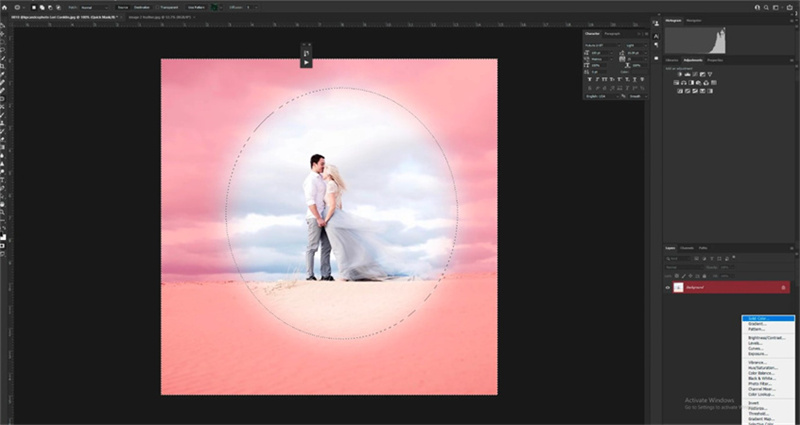
4. Add blur filter
With the edges selected, go to Filter > Blur and choose Gaussian Blur. Adjust the blur strength as desired. This will blur just the selected edges.
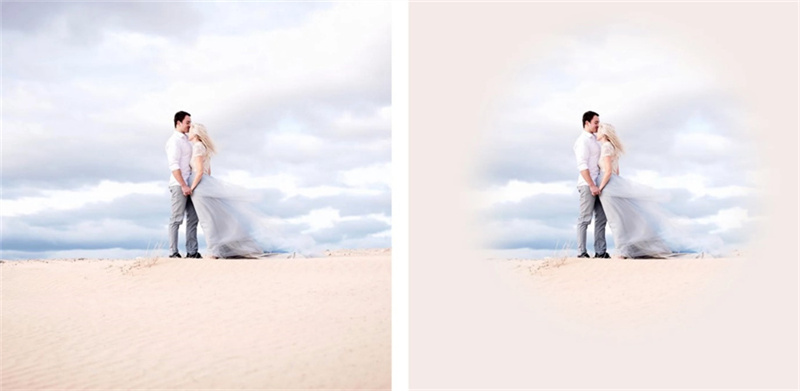
5. Adjust edge color (optional)
Go to Layer > New Adjustment Layer > Solid Color to add a solid color fill layer. Choose a color to tint the edges. Lower the opacity as needed. So, this was how to blur photo edges in photoshop.
Part 2. The Best Alternative to Enhance Photos with HitPaw FotorPea
While Photoshop provides powerful tools for selectively blurring edges, the process can be complex for beginners when it comes to how blur edges in photoshop. If you're looking for an easier way to artistically enhance your photos, consider using an AI-powered photo editing software like HitPaw FotorPea.
HitPaw FotorPea is an automatic photo enhancement tool that leverages cutting-edge AI technology to improve image quality with just one click. It can not only blur edges for a dreamy effect but also sharpen details, reduce noise, enlarge images, and more. The AI is specially trained on millions of professional photos to apply enhancements that make your images pop.
FeaturesHere are some key features that make HitPaw FotorPea a great alternative to manually editing in Photoshop:
- AI Models - Choose from different AI models specialized for tasks like denoising, face enhancement, and colorization.
- One-Click Enhancement - Instantly improve image quality without tedious manual adjustments.
- Deblur and Super Resolution - Sharpen blurry photos and enlarge images without quality loss.
- User-Friendly - Simple interface for enhancing photos in just a few clicks.
- Batch Processing - Enhance multiple photos all at once.
Step 1:Download and install HitPaw FotorPea from the official website. You can click the "Download Now" button on their site to get the latest version for your Mac or Windows PC.
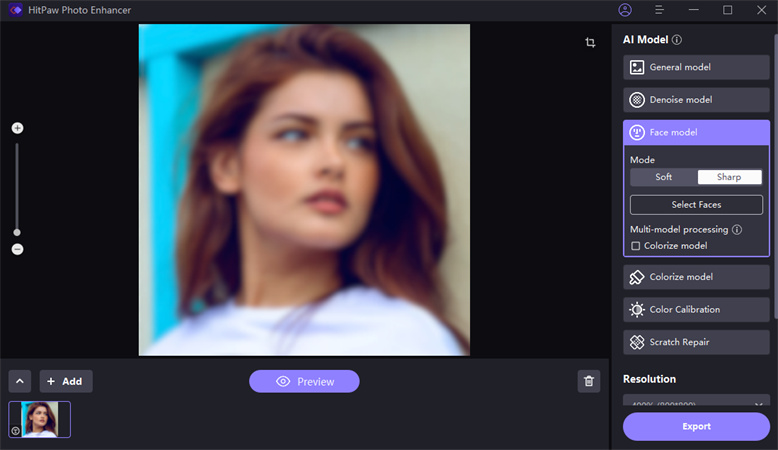
Step 2:Import a photo into HitPaw FotorPea. You can open images directly from your computer by clicking "Choose File" or by dragging and dropping photos onto the interface. HitPaw supports common formats like JPG, PNG, TIFF and more.

Step 3:Select an AI model. HitPaw offers specially trained AI models for different enhancement tasks. Choose General to improve overall image quality, Denoise for removing noise/grain, Face to sharpen portraits, Colorize to add color to black and white photos, and more.

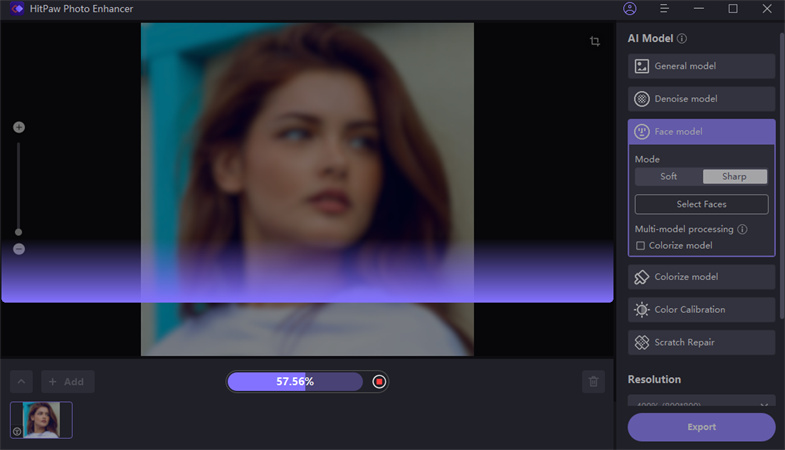
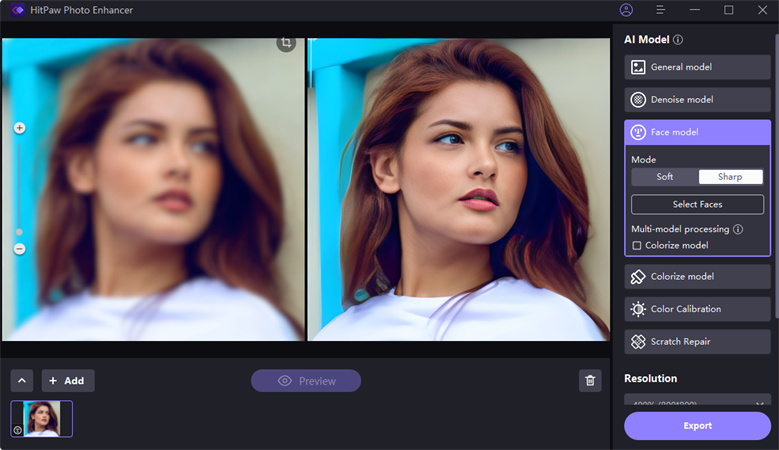
Step 4:Click the "Preview" button to see the AI-enhanced version of your photo. The AI will instantly analyze your image and apply professional-level improvements.

Step 5:Export the enhanced photo by clicking the "Export" button once you're satisfied with the results. The high-quality photo will be saved to your computer.

Part 3. FAQs of How to Blur Edges in Photoshop
Q1. How do I soften the edges of a mask in Photoshop?
A1. To soften the edges of a mask in Photoshop, you can use the Feather command. Simply select the mask in the Layers panel, then go to Select > Modify > Feather. Enter a Feather Radius value between 1-100 pixels depending on how much softening you want. This will blur the edges of the selection border to create a smooth transition between the masked and unmasked areas.
Q2. How do I soften all edges in Photoshop?
A2. There are a couple of options to softly blur all the edges in a photo with Photoshop. You can go to Filter > Blur > Gaussian Blur and apply light blurring to the entire image. Or, you can use a large feathered selection around the edges, invert it, and apply a Gaussian Blur to just the selected edges. This creates an overall soft vignette effect around the photo. Adjust the feather amount and blur strength to control the edge softening.
Takeaways
Blurring edges in Photoshop takes several careful steps, like making selections, feathering, and applying targeted blur filters. It gives you precise control but can be complex. HitPaw FotorPea provides an easier alternative using AI-powered one-click enhancement. It instantly improves image quality in seconds.
HitPaw FotorPea includes specialized AI models for different needs like reducing noise, sharpening faces, colorizing, etc. This makes the enhancements customized for each photo.



 HitPaw Photo Object Remover
 HitPaw VikPea (Video Enhancer)

Share this article:
Select the product rating:
Daniel Walker
Editor-in-Chief
This post was written by Editor Daniel Walker whose passion lies in bridging the gap between cutting-edge technology and everyday creativity. The content he created inspires audience to embrace digital tools confidently.
View all ArticlesLeave a Comment
Create your review for HitPaw articles