[Solved!] How to Lighten a Photo in Photoshop
Regardless of how much effort you've put into clicking the images, ending up having dark images is common, and no one can deny it. The thing you can do to make your images look relevant is to learn how to lighten a photo in Photoshop.
Apart from being a professional photo editing tool, Photoshop also ensures that the quality of the photo doesn't get compromised while lightening the images. Dive into this guide to learn how to lighten a picture in Photoshop.
Part 1. How to Lighten a Photo in Photoshop naturally For other
Photoshop is one of the most reliable and earliest image editing tools that can edit images massively. Although Photoshop comes up with a hectic user interface, which could be a problem for newcomers, it must not be an issue for users who know Adobe Photoshop.
The advantage you carry with Adobe Photoshop is that it doesn't affect the resolution of the images and keeps the original quality of the photos intact. We'll reveal the three immaculate ways to help you learn how to lighten an image in Photoshop.
Using the Exposure Adjustment Layer.
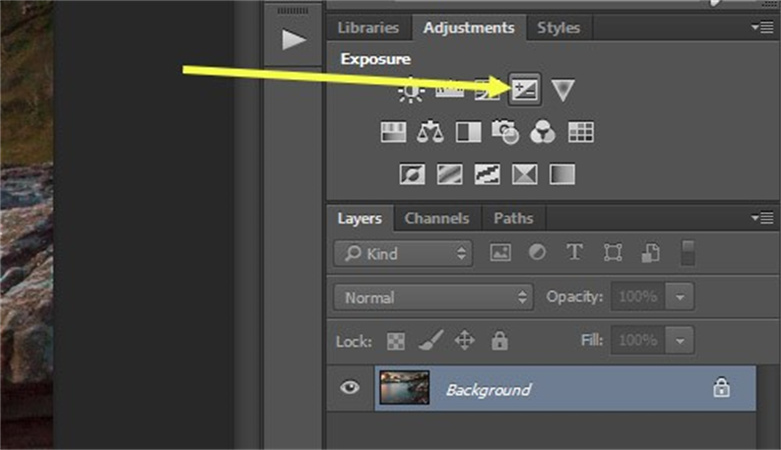
1.Launch the Adobe Photoshop after getting it installed and then import the photo into the timeline of the Adobe Photoshop. Next, you'll need to tap on the Adjustments button and press the icon given below.

2.After going into the layer palette, you'll notice the new adjustment layer there. The adjustment layer of exposure comes up with the 3 sliders that can work together to change the image: gamma correction, exposure, and offset. You can drag the exposure icon to the right to the right side to brighten the image.

3.The offset aldose will surely create an image on the photo's shadow areas. In this phase, you'll need to drag the slider toward the right side to brighten the shadows. The gamma slider is most likely to leave a significant impact on the photo's mid-tones. The gamma slider also enables you to drag the slider to the left side to lighten photo in Photoshop.
You'll need to be careful while lightening the image through the exposure adjustment layer, as fairly few changes can alter the dimensions of the photos altogether. You can look at the picture shown below, where we've set the gamma correction slider to 1.15 and the Exposure option to 0.50.
Using the Curves Adjustment Layer
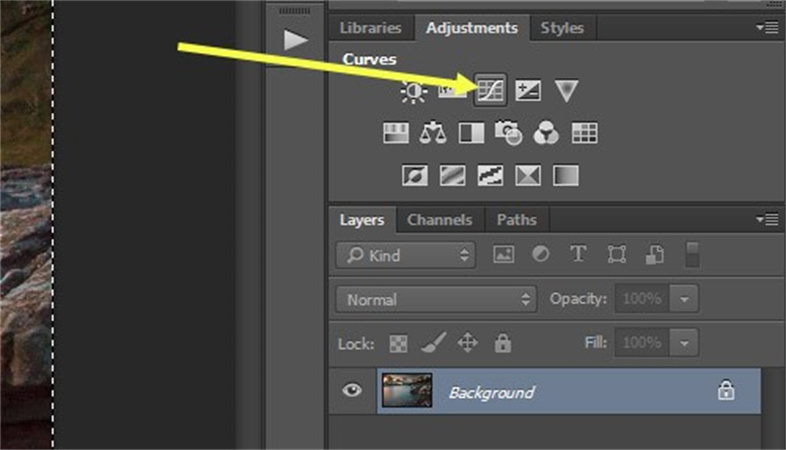
1.You can also use the curves adjustment layer to lighten picture in Photoshop. The curves could be annoying, to begin with, but things will get improved eventually. You can tap on the option given in the screen below to add a curve adjustment layer.

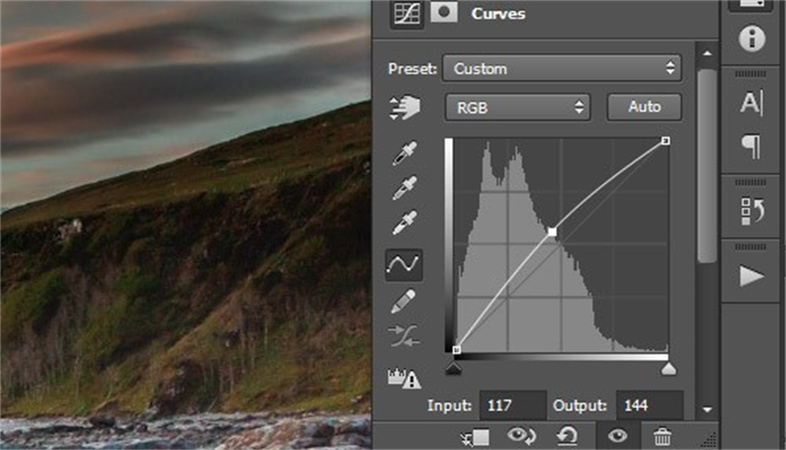
2.You can use the curves to choose the parts of the image you'd like to lighten. The curve's right end will impact the photo's highlights, with the left end impacting the Shadows. Moreover, the middle end will impact the mid tones.
The way of using the curve will depend upon the image you'd like to lighten, but the simpler way is lighting the image's mid tones by lifting the RGB curve's center side.
3.You can see the results after lightening the image through curves.

Using the Levels Adjustment Layer.
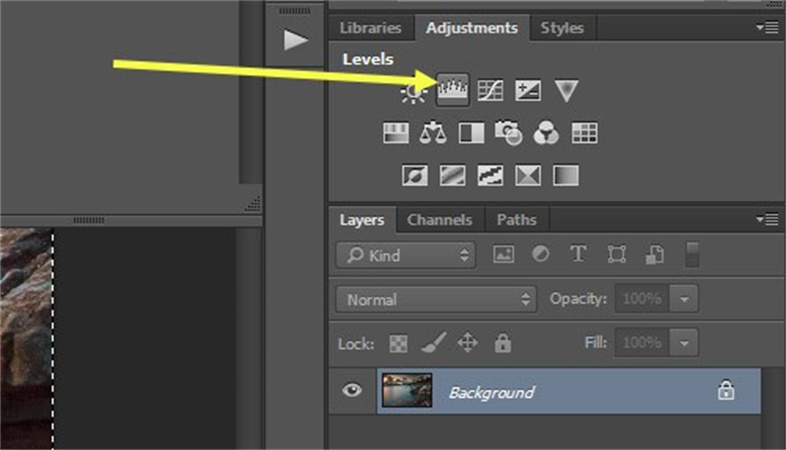
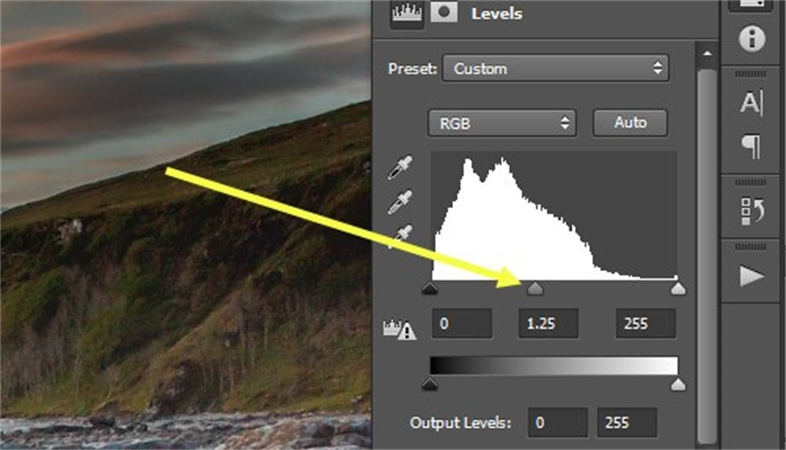
1.You can opt for the Levels adjustment layer to know how to lighten a photo in Photoshop. You can use levels to customize the control contrast. You can press on the option shown below to use the levels adjustment layer.

2.Using the Levels, you've got the opportunity to move the middle end of the Levels to the left side to begin lightening the mid tones.

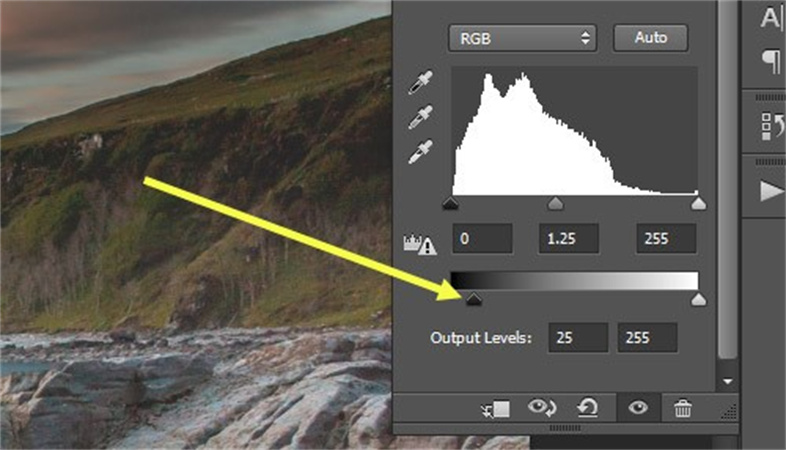
3.Moving the black output slides towards the right side is also possible, which comes up with a hazy type of lightness.

4.You can watch out for the results given below after applying the Levels adjustment layer.

Part 2. The Best Alternative to Lighten Photos with HitPaw FotorPea
Since using Adobe Photoshop could be difficult for newcomers, HitPaw FotorPea emerges as the better alternative to Adobe Photoshop. It is a remarkable tool that allows you to lighten the images by using the color calibration AI model, and it doesn't ask you to do anything to put things in order.
Instead, HitPaw FotorPea comes up with 6 outstanding AI models that allow you to edit the image parameters automatically. On top of that, HitPaw FotorPea doesn't compromise the quality of the images, keeping the original quality intact. Apart from supporting multiple image formats, HitPaw FotorPea also allows you to process multiple images simultaneously.
Features- Allows you to lighten the image automatically
- Allows you to eliminate the noise from the images
- Helps you to make the images less blurry
- Allows you to upscale and enlarge images automatically
- It doesn't cause image quality loss while lightening the photos
- Helps you to colorize the black and white images
- Lets you resize the photos without putting in any effort
Here's the step by step guide to lighten the image through HitPaw FotorPea.
Step 1:Visit the official website of the HitPaw FotorPea and download the software on your computer. Next, you'll need to press on the Choose File button to import the photo you'd like to lighten.

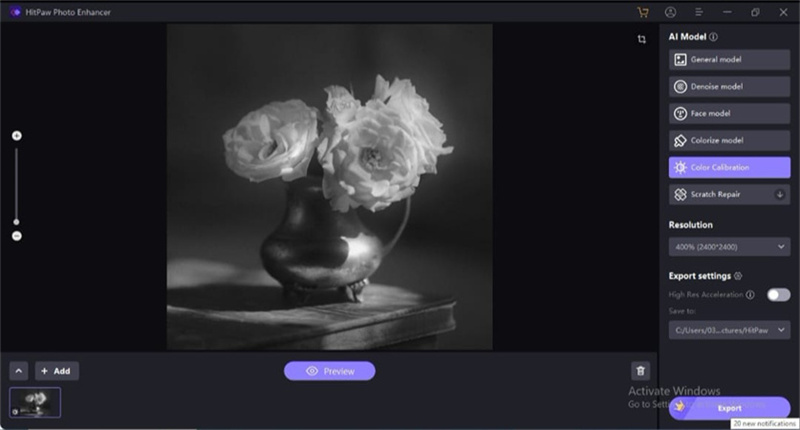
Step 2:After dragging the image into the timeline of the HitPaw FotorPea, you'll be able to see the 6 outstanding AI models there. You can apply all these AI models to enhance the quality of the image. However, if you're looking to lighten the image, you'll need to choose the Color Calibration method.

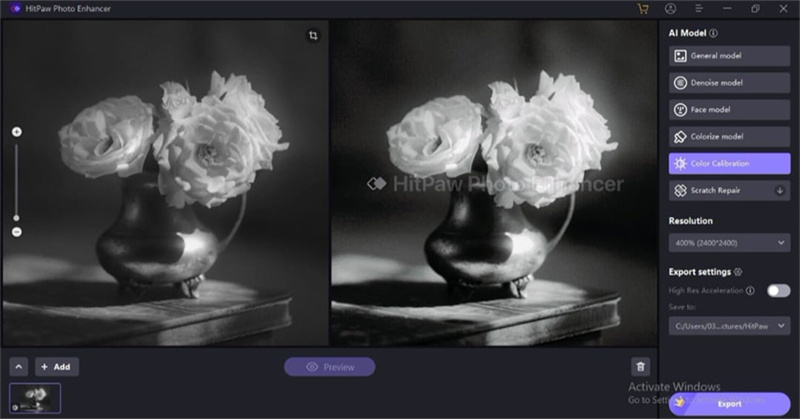
Step 3:Once the Color Calibration method is added, you'll need to press the Preview icon to review the recent changes you've made to your image. Hit the Export icon to download the image into your computer.

Part 3. FAQs on How to Lighten a Photo in Photoshop
Q1. How do I lighten a layer in Photoshop?
A1. If you want to lighten a layer in Adobe Photoshop, you'll need to navigate to the Layers Panel and select the Image Menu. Next, choose the Brightness contrast after selecting the Adjustments icon. Doing so will help you to access the Brightness or Contrast box. Now, you can use the Brightness option to change the brightness of a particular layer in Adobe Photoshop.
Q2. How do I selectively lighten an image in Photoshop?
A2. Lightening the parts of the images selectively is possible courtesy of the Curves adjustment Layer in Photoshop. You can select the Curves Adjustment Layer after launching Adobe Photoshop before choosing the parts of the image you'd like to lighten.
Final Words
Learning how to lighten a photo in Photoshop has become effortless, courtesy of this insightful guide. We have revealed the step by step guide to help you learn how to lighten a picture in Photoshop by following their wonderful methods.
Although Photoshop will help you to get the desired results, it could be fairly difficult to use this HitPaw FotorPea as the most recommended way to lighten the image. HitPaw FotorPea enables you to apply the eye catching light to the photos automatically courtesy of the color calibration method.







 HitPaw VikPea
 HitPaw Photo Object Remover


Share this article:
Select the product rating:
Joshua Hill
Editor-in-Chief
I have been working as a freelancer for more than five years. It always impresses me when I find new things and the latest knowledge. I think life is boundless but I know no bounds.
View all ArticlesLeave a Comment
Create your review for HitPaw articles