Catalog
To meet the needs of professional users who demand detail and clarity, HitPaw VikPea introduces the Professional Denoise Model. This model is designed to remove noise from videos shot in low-light or nighttime environments, restore pure and natural image quality, and give creators flexible control with both one-click optimization and custom fine-tuning options.
Why Use the Denoise Model?
- Remove noise effectively: Especially useful for footage captured in low light or night scenes where noise is common.
- Restore pure visual quality: Delivers cleaner, smoother results while maintaining natural details.
- Flexible control: Choose between one-click auto optimization or manual fine-tuning of denoise strength.
When to Use the Denoise Model
The Denoise Model is best suited for:
- Videos shot in nighttime environments.
- Footage captured in poor or uneven lighting conditions.
- Clips where distracting grain and noise reduce clarity.
How to Use the Professional Denoise Model
Step 1. Download and Launch HitPaw VikPea
Open the HitPaw VikPea application on your PC or Mac. Make sure you are using the latest version to access the newest AI models and features.
Step 2. Import Your Video to Denoise
Import your video file by dragging it into the Video Enhancer workspace from the Home tab.
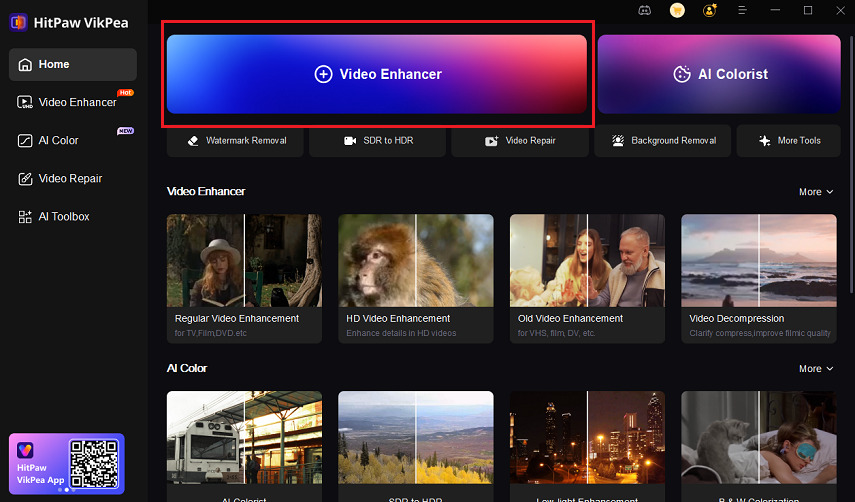
Or, you can switch to the Video Enhancer tab and upload your video file to the workplace.
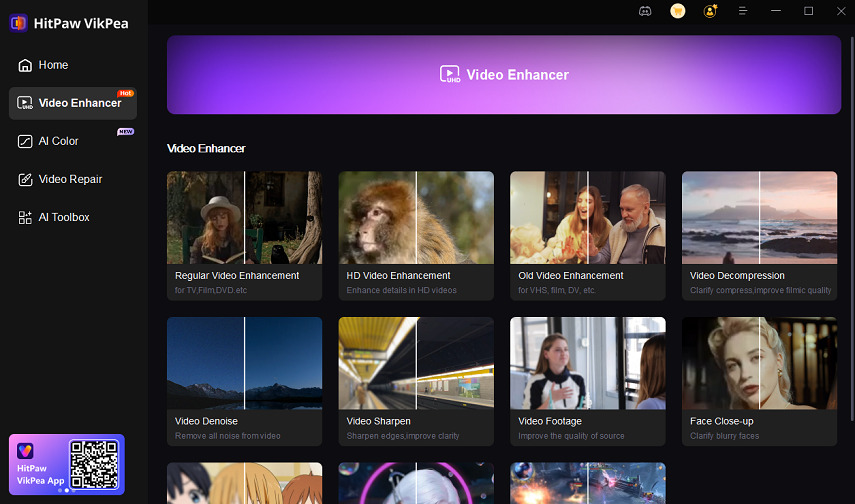
Step 3. Select the Professional Model
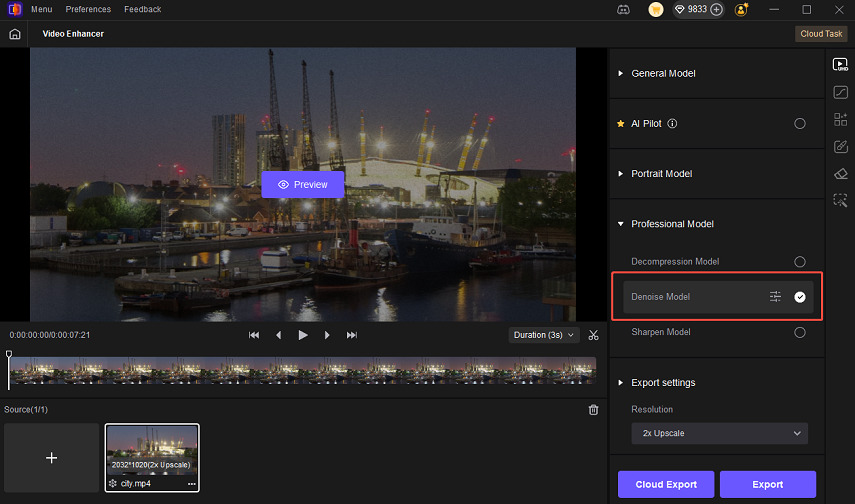
After you have imported your video files, choose Professional Model from the module list. You will find options like Denoise, Sharpen, and Decompression.
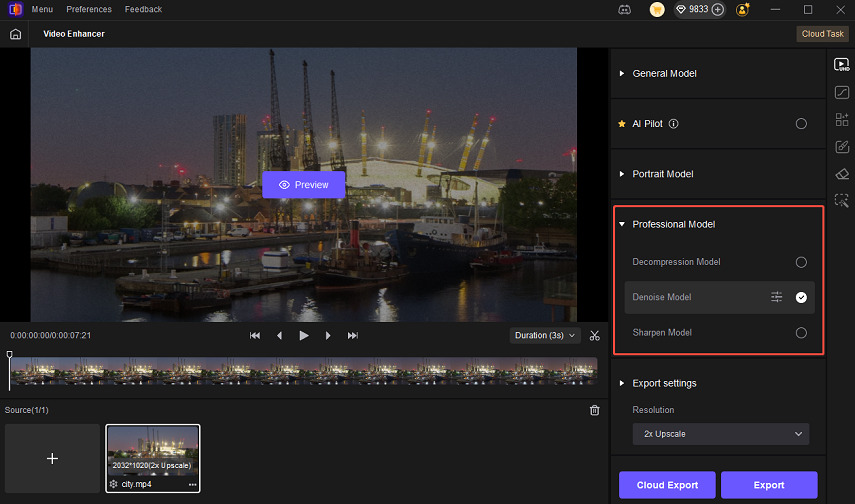
Step 4. Choose the Denoise Model
Click on Denoise Model to activate noise reduction mode.
Step 5. Customize Video Processing Mode
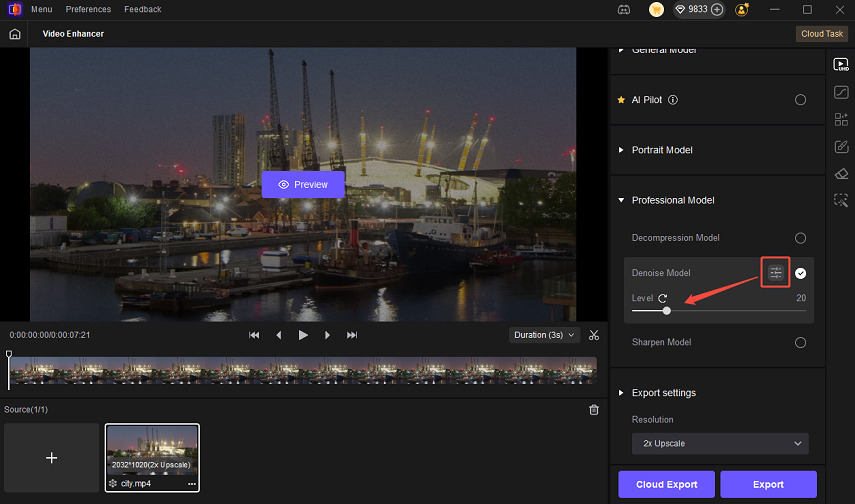
- One-Click Auto Processing: The system will automatically analyze your video and apply the best denoise effect. Recommended for users who want fast, optimal results with no manual setup.
- Custom Processing: Adjust the denoise strength slider to increase or decrease the intensity of noise removal. Ideal for users who want precise control over the balance between noise reduction and natural details.
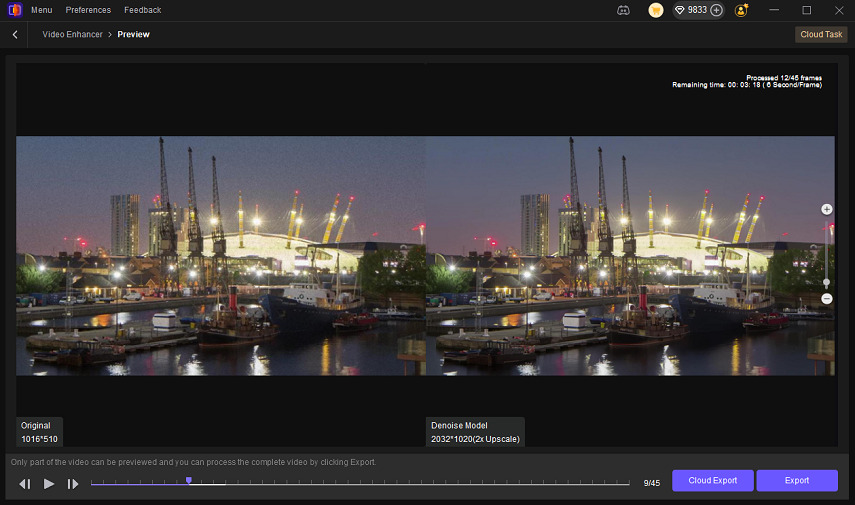
Step 6. Preview and Export Denoised Video
Use the Preview function to compare the original video with the denoised version before exporting. Once satisfied, click Export or Cloud Export to save the clean video to your device.
