Catalog
How to Stabilize Videos with HitPaw VikPea AI Video Stabilization
Whether you’re filming action-packed sequences, travel vlogs, or impromptu moments on your phone, camera shake is inevitable and it can undermine even the most compelling story. HitPaw VikPea addresses this challenge head-on with its AI-driven Stabilization feature. Within minutes, you can transform your shaky clips into smooth, professional quality videos without any manual tweaking. Let’s explore how this powerful shaky video stabilizer works and how you can get started.
What Is Video Stabilization?
Video stabilization is the process of reducing unwanted camera movement to produce smoother, more professional-looking footage. Whether you’re capturing action sports, a walking tour, or handheld vlogs, any slight shake can distract viewers from your content. By analyzing each frame and compensating for motion, stabilization software intelligently repositions and crops video to eliminate the jitters.
Modern AI-powered tools like VikPea take this a step further, automatically detecting and correcting shakes caused by hand tremors, uneven terrain, zoom lens adjustments, or sudden pans, delivering polished, stable video without demanding manual keyframe adjustments.
What Can VikPea Stabilization AI Do?
HitPaw VikPea’s Stabilization AI harnesses cutting-edge machine learning models to transform shaky clips into smooth masterpieces. It’s designed for both novice creators who want a one-click fix and professionals seeking fine-tuned control.
- Automatic Shake Removal: Utilizes advanced AI stabilize video algorithms to detect and remove jitter caused by handshakes, walking, vehicle motion, or zoom lens adjustments.
- Batch Processing: Import multiple videos at once and apply the same stabilization settings across your entire library.
- High-Resolution Export: Upscale and stabilize videos up to 4K or 8K without sacrificing clarity.
- Preview & Adjust: Instantly preview results in the built-in player and tweak export settings before finalizing.
How to Stabilize a Video(s) in VikPea?
Step 1. Download & Install VikPea
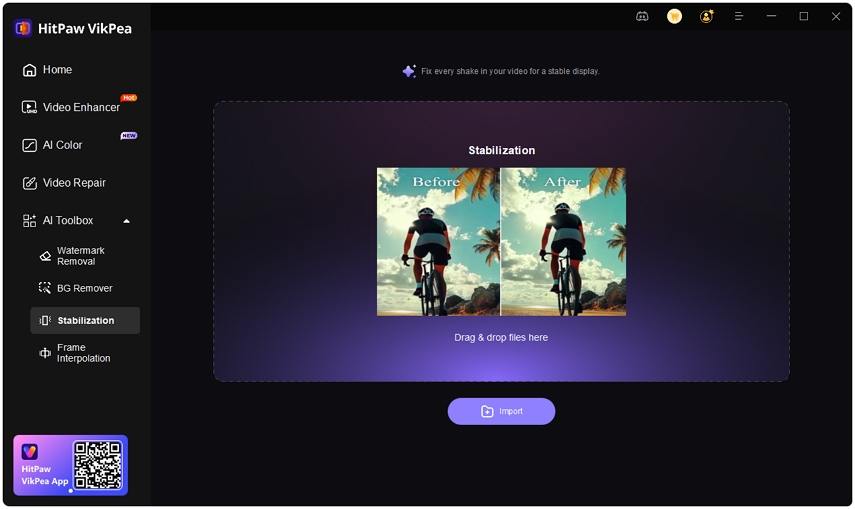
Download and install the latest version of HitPaw VikPea on your Windows or Mac computer. Open VikPea, from the lefthand menu choose AI Toolbox -> Stabilization.
Step 2. Import Your Clips to Stabilize
Click Import (or drag & drop) to load the video you want to stabilize. If you have multiple files, click the “+” in the lowerleft to batch import and apply the same AI model across all.
Step 3. Adjust Video Export Settings
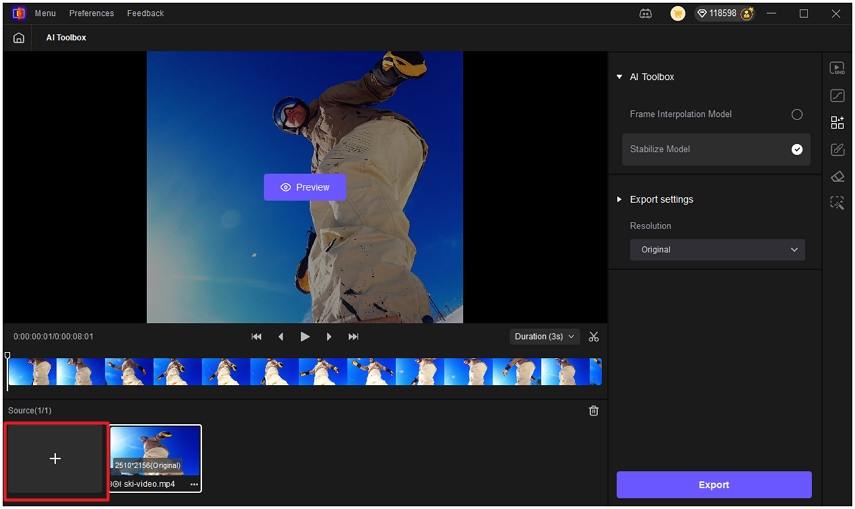
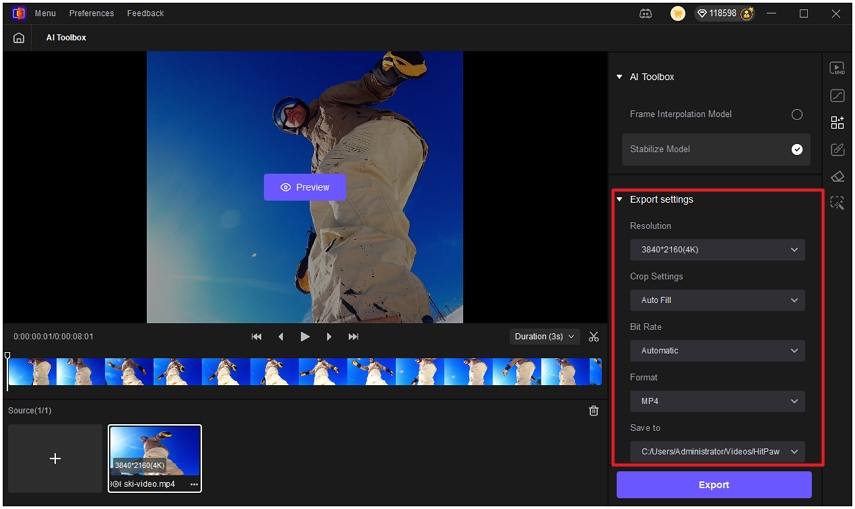
Under Export Settings, choose your desired resolution. VikPea supports upscaling up to 4K or 8K. Then set Cropped Settings (e.g., “Auto Fill” to keep the video frame intact), select Bit rate (you can use “automatic” for simplicity or customize as needed), choose the output Format (MP4 is a common choice for wide compatibility), and specify the “Save to” path to determine where the stabilized video will be stored on your computer.
Step 4. Preview Video Stabilization Effect
Hit Preview. VikPea’s AI will analyze the footage, auto-detect shakes, and apply corrections in real time. You’ll see a splitscreen comparison (Original vs. Stabilized) and a frame counter showing progress.
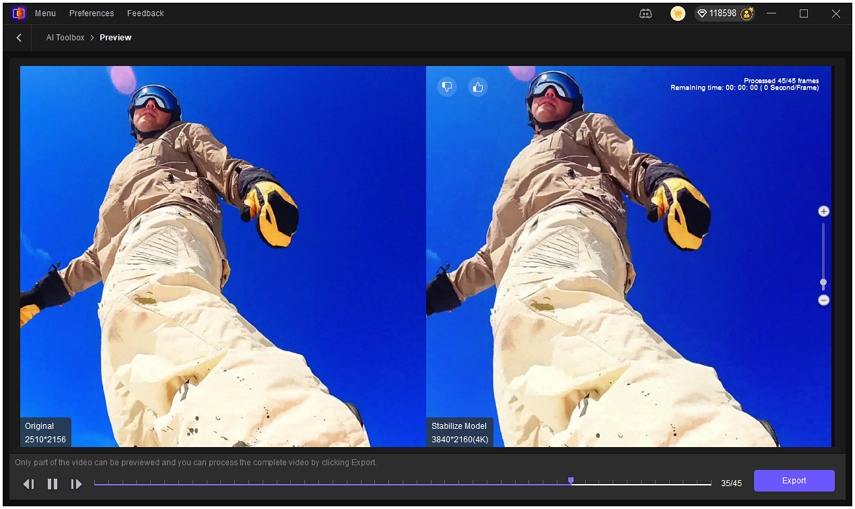
Step 5. Export the Stabilized Video
Click Export to start stabilizing a video. Within minutes, HitPaw VikPea’s AI-driven stabilization transforms unstable footage into smooth, watchable videos, perfect for YouTube, social media, and professional presentations.
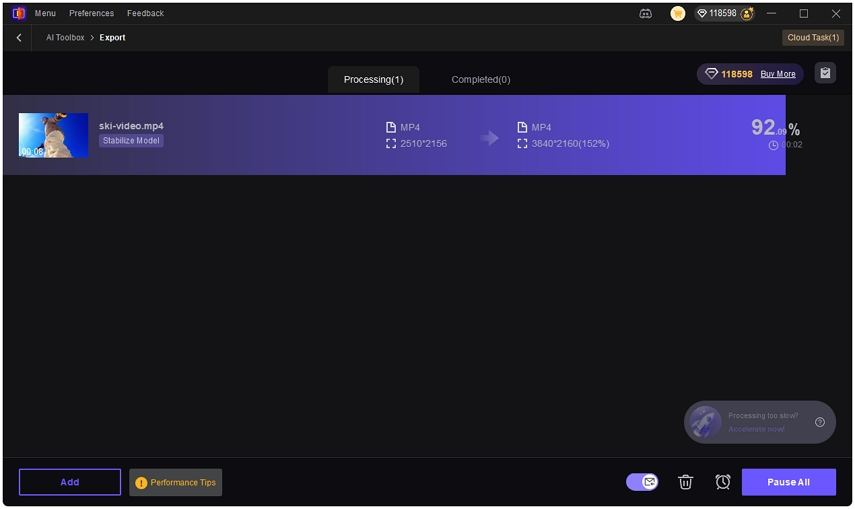
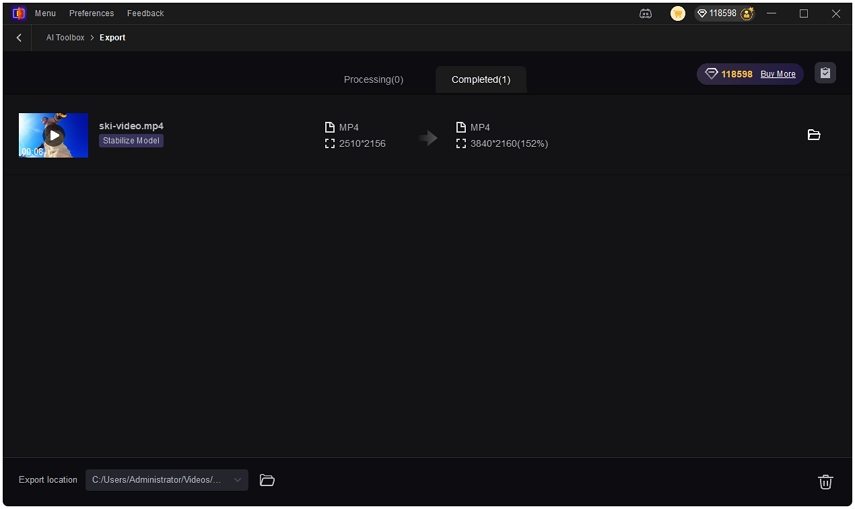
Within minutes, HitPaw VikPea’s AI-driven stabilization transforms unstable footage into smooth, watchable videos. Once the export is completed, you can click the “Completed” tab to find and check the stabilized video.can can click the “Completed” tab to find and check the stabilized video.
