Catalog
Unlock VikPea's full potential with this visual interface guide. Master playback controls, AI enhancement workflows, and batch processing tools through annotated screenshots – optimize your video editing efficiency in minutes.
Part 1: User Interface
Understand the HitPaw VikPea user interface.
Part 2: Import Video File(s)
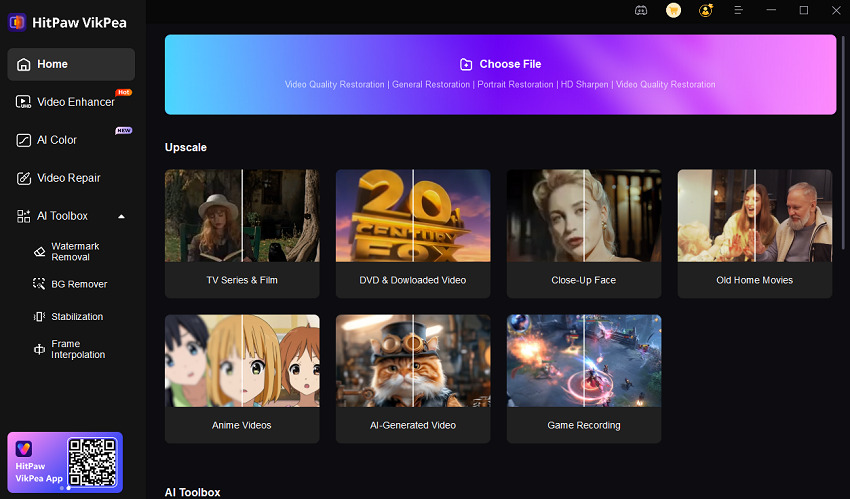
After launching the program, you need to import a video file to start the enhancement process. You can click Video Enhancer or AI Colorist to navigate to the location of your file, or drag-and-drop a video file directly into the program.
Part 3: Menu & Preferences & Feedback
After importing the video file, you will enter a new workspace for enhancement settings.
The top-right Menu button provides access to account management, subscription purchases, software updates, localization settings, etc.
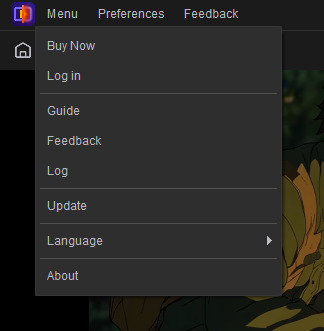
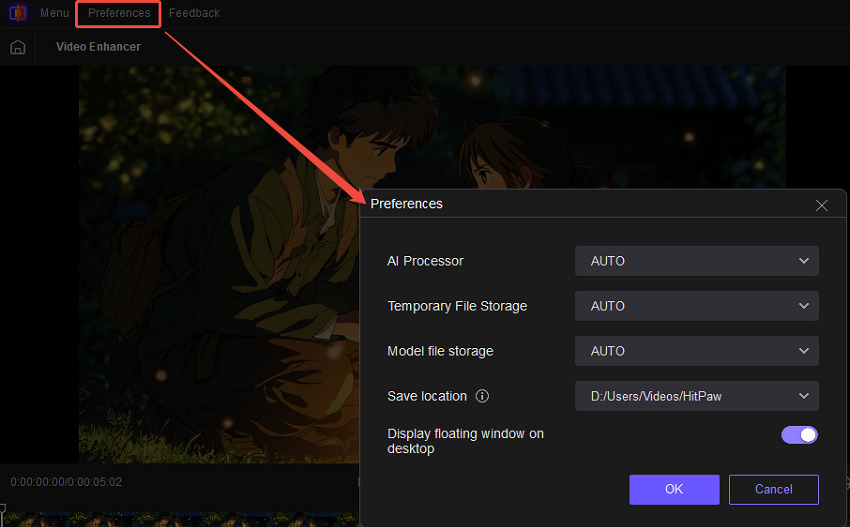
Access Preferences to configure your settings, such as default save locations and video processor selection.
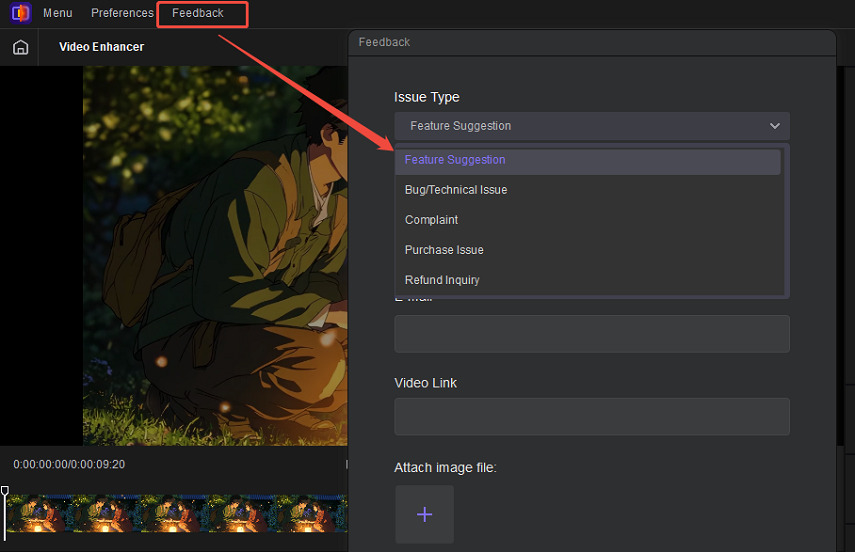
Click the Feedback button to open a submission window for: product suggestions, technical questions, purchase inquiries, or any other feedback.
Part 4: Control Playback and Edit Video
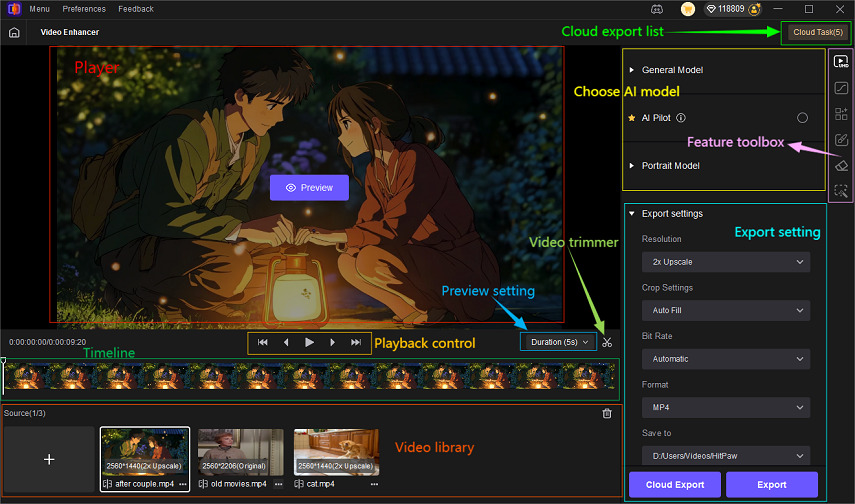
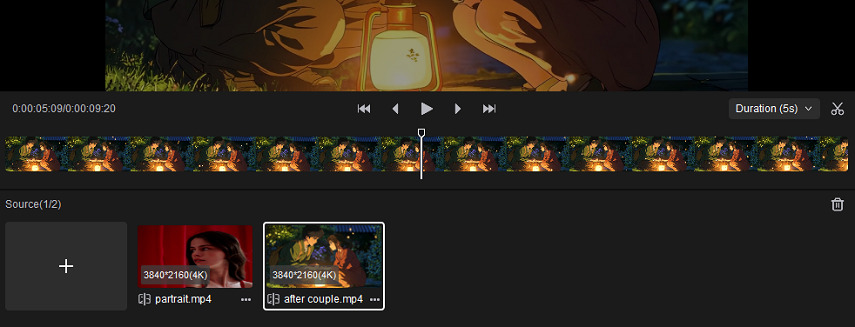
In this interface, you can use the playback and cutting tools to control video preview, export duration, and manage the video source library (add & delete).
Video Playback & Preview Settings
Playback controls are located directly below the video interface, managing media playback:
- ⏪-Fast Backward: Rewinds video by 10 frames.
- ◀-Step Back: Moves playback backward by 1 frame.
- ▶/❚❚-Play/Pause: Click to start/pause playback. Icon toggles between play arrow (▶) and pause bar (❚❚).
- ▶-Step Forward: Advances playback by 1 frame.
- ⏩-Fast Forward: Jumps ahead by 10 frames.
To the right of the playback controls, a drop-down menu allows you to set the video preview duration.

Trim Video
The scissors icon trims video clips. Use the control sliders on the timeline to define the segment for preview and export.

Manage Video Library
To manage your video library, you can click "➕” icon to add new video(s). Right-clicking a video thumbnail allows you to delete the current clip or apply the selected enhancement model/setting to all selected videos.

Part 5: AI Model and Feature Toolbox
The right sidebar of the playback panel offers multiple AI enhancement models. You can switch between feature modules by clicking the icon on the far right. For example:
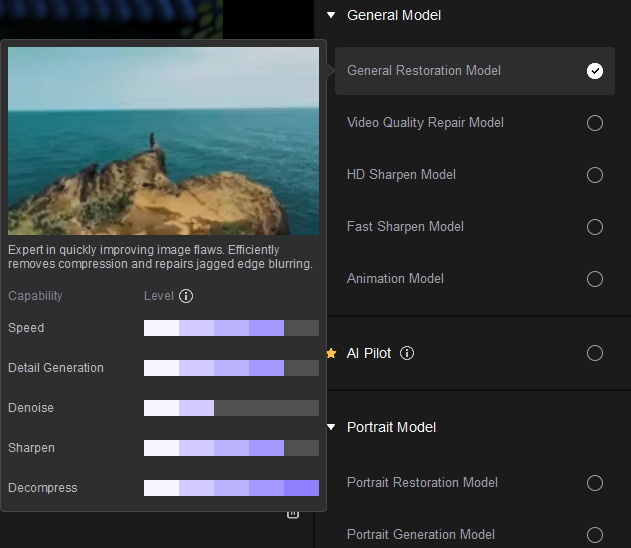
- Video Enhancer module includes: General Model, AI Pilot Model, Portrait Model and Professional Model;
- AI Color module offers: AI Colorist Model, SDR to HDR Model, Colorize Model, Color Enhancement Model, and Low-light Enhancement Model;
- AI Toolbox module provides two options: Frame Interpolation and Stabilize Model;
- Additional tools include: Video Repair, Watermark Removal, and BG Remover.
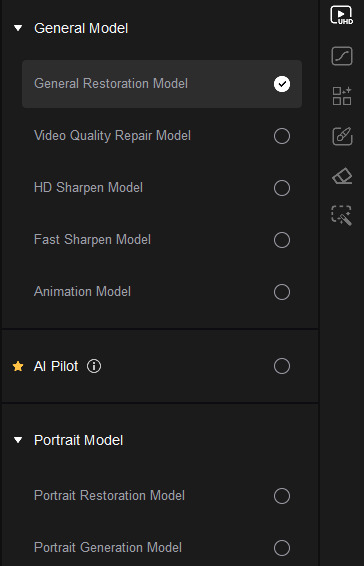
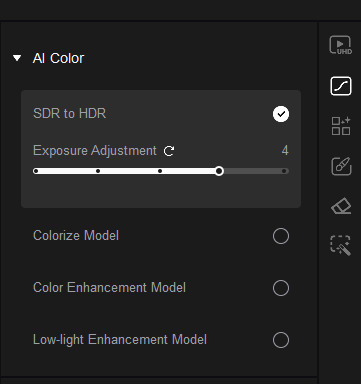
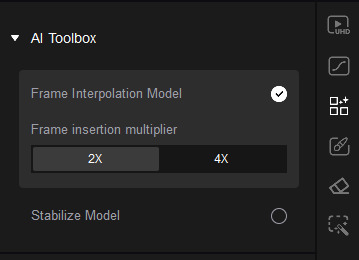
Tips: To view the introduction of each AI model, hover your mouse over the corresponding model to trigger an info card. Select the optimal model for your video content based on specific needs.
Part 6: Preview Enhanced Video
Once the enhancement model is chosen, click the Preview button to process the video and check the enhanced effect.
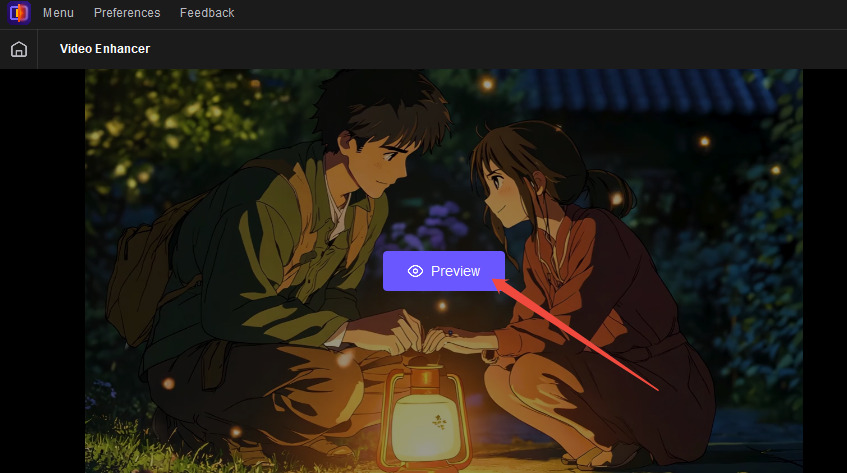
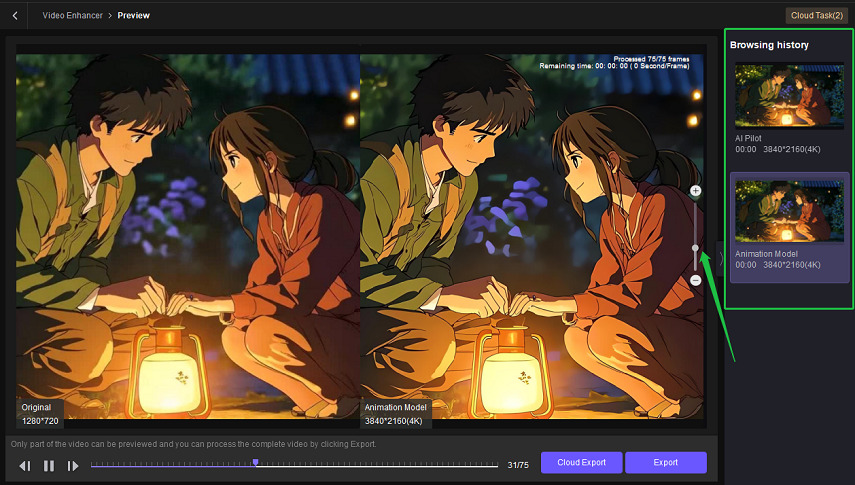
On the main preview interface, a split-screen displays original and enhanced video feeds synchronously. Use the zoom controls on the right to inspect enhancement details. The Browsing History sidebar displays all previously applied AI models – toggle between them to preview effects in real-time.
Part 7: Cloud Export and Local Export
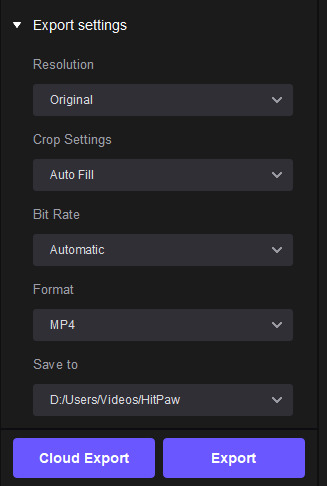
Once you finalize the optimal settings and are satisfied with the preview, you're ready to export. HitPaw VikPea offers two export options: Cloud Export and Local Export. Cloud Export leverages powerful cloud computing resources to process videos more efficiently and faster than local systems.
