How to Master Cave Photography with the Right Gear and Techniques
Cave photography sits at the intersection of adrenaline-fueled exploration and visually compelling storytelling, requiring both technical skill and artistic sensibility.
Whether it is glistening underground castles or ancient rock shapes, shooting in caves tests your equipment to the limit, as well as your imagination.
Nevertheless, it also requires profound knowledge of light, camera settings, and safety. Fortunately, tools like HitPaw FotorPea Photo Enhancer make it easier to enhance cave images, improving sharpness, contrast, and detail, even in low-light environments. Let's explore how to master this exciting field.
What is Cave Photography?
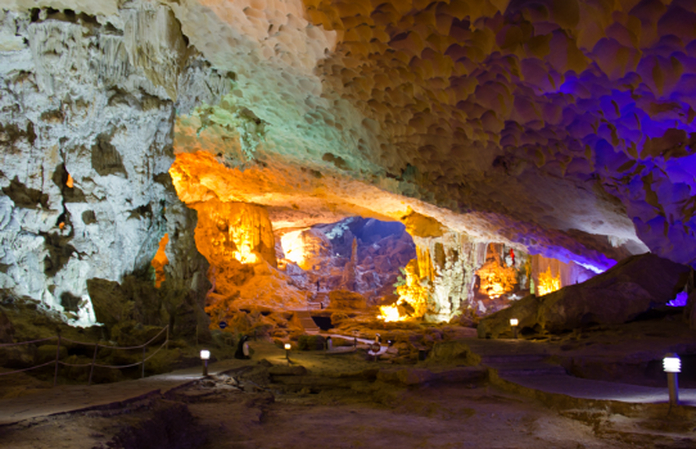
The underground photographs or cave photography entail the pictures of the underground and features such as stalactites, stalagmites, water bodies, as well as special rock formations. It is commonly conducted either in dark or low-light conditions, and it takes special equipment along with light plans.
This type of photography asks photographers to explore additional methods and strategies besides traditional techniques, which include planning one's safety, protection from moisture, and stylistic arrangements.
Whether you're a professional adventurer or a curious hobbyist, knowing how to take photos inside a cave is the first step toward producing remarkable images in an environment unlike any other.
Essential Equipment for Cave Photography

Best Camera and Lenses for Cave Photography
Selecting the best camera for low light cave photography is crucial. An excellent low-light performance makes it possible to take clear images even when there is low light in the environment, using either a full-frame DSLR or mirrorless camera.
Canon, Nikon, and Sony models can usually be a success since their ISO levels are much higher.
Hercules 14mm Lenses to 24mm-Do use when in tight cave systems. The lenses allow you to shoot vast underground scenes, but maintain sharply focused subjects. Fast aperture (f/2.8 or larger) and sharpness of the lens's edge-to-edge should be sought.
Additionally, consider cameras that support long exposure cave photography tips, like in-body stabilization and bulb mode. Such characteristics will assist you in handling exposures that extend past the 30-second mark, which is usually required in pitch-dark regions.
Lighting Gear
Knowing how to light a cave for photography is vital, and your lighting equipment will make or break the shot. Begin with a powerful LED headlamp with a number of lumens to light your way and the setting. This should be used in combination with portable continuous lights or strong strobes to give the right effects.
The harsh shadows that occurred can be minimized by the application of the external flashes, accompanied by soft diffusers, that would ensure that the texture of the rock surfaces is pulled out. Water bodies or narrow spaces can be well photographed with waterproof and shock-resistant lights to ensure them to be safe and reliable.
Accessories You Should Pack
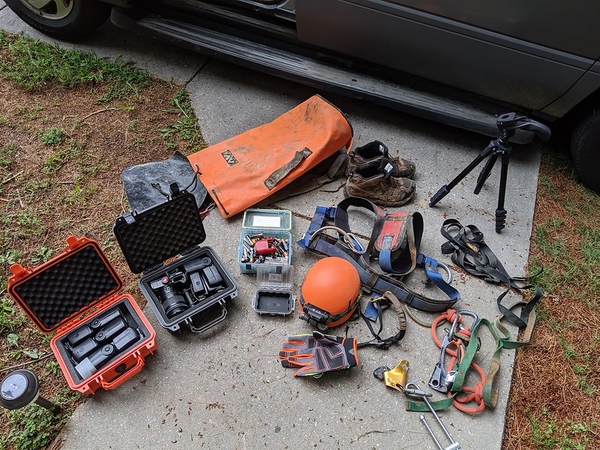
Accessories can be used significantly in cave photography. The tripod should be strong with malleable spikes or legs to enable shooting on uneven rocky places. Tripods are needed in long exposure shots as they cannot be blurry.
Take more than one lens cloth so you can clean up fog and waterproof bags in order to dry your equipment. Don't forget to bring extra memory cards and batteries, long exposure cave photography tips often involve longer shoots that drain power quickly.
Camera Settings for Stunning Cave Shots

ISO, Shutter Speed, and Aperture
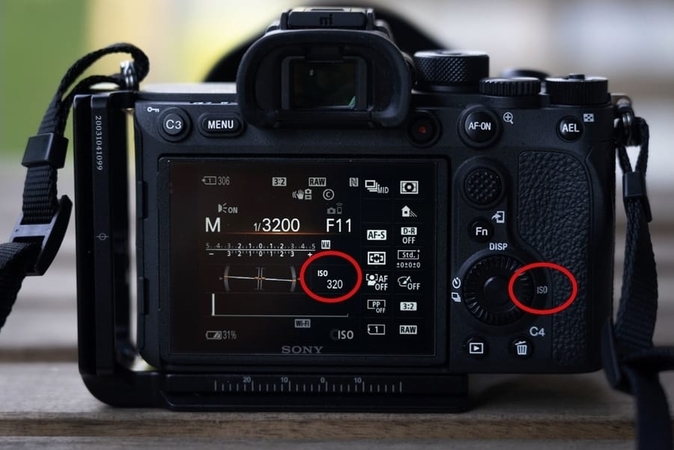
The best camera settings for cave photography usually involve high ISO (800-3200), a wide aperture (f/2.8 or wider), and long shutter speeds. Begin with ISO 1600, f/2.8 aperture, and a shutter speed of 10-30 seconds. Adjust to your light sources and your desired exposure.
Manual Focus and White Balance
Low light is a frequent problem in auto focusses systems. Switch off autofocus and use Live View for more precise control. White balance can be set manually or choose RAW format so that you can fix color casts at a later date during editing, which is essential in premises lit with a combination of light sources.
How to Light a Cave for Photography

Natural vs Artificial Light
Understanding how to light a cave for photography means recognizing the absence of natural light. There are no skylights or caves here, so it is just artificial lights that you have as a choice. With LED panels, strobes, and flashlights, you can paint that cave with light.
Light Positioning Techniques
Try some side lighting to emphasize the formations of textures and shadows. Backlight should be used to increase depth, particularly when the subject of photography is a translucent mineral or water. Lighting efforts should always be in such a way that direct lighting into the lens is avoided, and causing plays of shadows can be done by moving these lights around.
Composition and Creativity in Cave Photography
Framing and Perspective
Cave photography composition tips include leading lines, symmetry, and the rule of thirds. Give a compositional element of the cave walls, the tunnels, or the rivers, to direct the attention of the viewer. Having a person or an object framed in a close-looking passage, one may achieve dramatic scale.
Capture Textures and Depth
Shoot close-up of mineral textures or dripping shapes with a macro lens. Try to cover several focus points to display the foreground and background in the picture. These cave photo ideas for Instagram can make your images stand out with rich details and storytelling.
Safety Tips for Shooting in Caves
Know the Cave and Plan Ahead
Caves are unpredictable environments. One should always do their research on the cave setup, the possible dangers, and the accessibility. Be accompanied by a guide or a veteran spelunker, particularly on your first visit. This is one of the most essential cave photography safety tips.
Travel Light but Prepared
Find a balance between safety and usefulness. Carry only the necessary items, but do not forget to take the most essential equipment. A small, fully equipped kit would make you less tired and agile in confined areas. Make someone know what you are planning to do before setting out into a cave.
Post-Processing Cave Images
Editing for Contrast and Detail
Good equipment notwithstanding, cave pictures can end up looking flat due to the extreme lighting challenges involved. While advanced software like Lightroom or Photoshop allows for manual adjustments-intensifying shadows, boosting contrast, and recovering highlights-these can be time-consuming and complex for beginners.
This is where HitPaw FotorPea Photo Enhancer proves useful, offering a more intuitive way to restore clarity and sharpness in low-light images with just a few clicks.
Color Correction and White Balance
LED lights or mixed lighting sources often indicate a false color tinge in caves. Make the white balance adjustments in post, bringing back natural tones. Use some tweaks of temperature, tint, and saturation to give realism and atmosphere.
Common Challenges and How to Overcome Them
Low Light and Long Exposure Issues
Motion blur and noise often occur when shooting in complete darkness. Use high-isolation cameras with an in-body stabilizer and use heavy tripods. Where necessary, use bracket exposures and remove noise during post-processing.
Lens Fog and Moisture
It is easy to find moisture underground. Before and after a shoot, have your store gear in air-tight containers. Put silica gel packets and wipe lenses at regular intervals. These precautions tie back to essential cave photography safety tips.
Real-Life Cave Photography Examples

Cave with Water Reflections
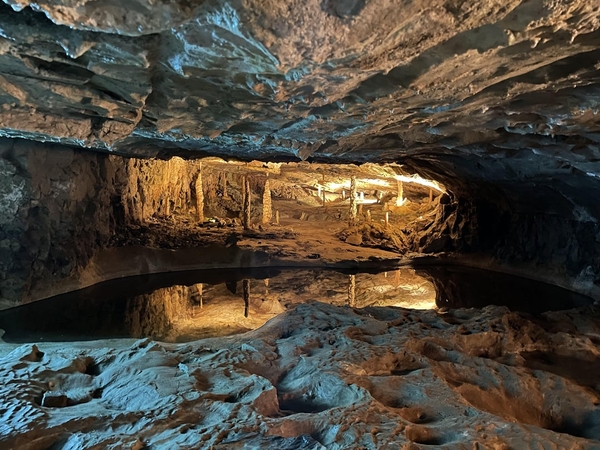
During still water, the position lights should be taken at a low angle to reflect the shimmering of the water. Use a wide lens and prolonged exposure to smooth out ripples and bring out symmetry-perfect cave photo ideas for Instagram.
Rock Formations Close-up
Macro focus or zoom in to bring out any complex textures existing on the formations of rocks. Use sidelights with soft lights on them when dramatic lighting is used and details are required in shadows.
Final Thoughts on Shooting in Caves
Learning the art of cave photography involves preparation, creativity, and tools. From choosing the best camera for low-light cave photography to applying thoughtful cave photography composition tips, every step counts.
Don't forget to explore editing tools like HitPaw FotorPea Photo Enhancer to polish your cave shots and bring out the magic hidden in the darkness. It is with time and practice that your underground escapades will become breathtaking photography tales.
FAQs
Q1. Can I use a smartphone for cave photography?
A1. The modern smartphones that have Pro mode can shoot fair cave shots, provided that they are used with stable lights and tripods, although it is not ideal. Nonetheless, they do not have the dynamic range and low-light performance of dedicated cameras.
Q2. What's the best way to protect my gear in a wet cave?
A2. Take waterproof bags, silicone covers, and lens hoods. Store your equipment in its sealed state whenever it is not in use, and always have a microfiber cloth with you to clean your equipment after every use.
Q3. How do I light large open chambers in caves?
A3. Make use of numerous sources of light in strategic locations. Light painting, long exposure during illuminating areas, and Wide-open chambers respond well to light painting techniques.
Q4. Is flash photography safe in all caves?
A4. Not always. Flash use in some caves is prohibited because of an issue with wildlife or conservation. Strobes or flash should always be used with a check to the management or local guide.


 HitPaw Univd (Video Converter)
 HitPaw VoicePea
  HitPaw VikPea (Video Enhancer)


Share this article:
Select the product rating:
Daniel Walker
Editor-in-Chief
This post was written by Editor Daniel Walker whose passion lies in bridging the gap between cutting-edge technology and everyday creativity. The content he created inspires the audience to embrace digital tools confidently.
View all ArticlesLeave a Comment
Create your review for HitPaw articles