How to Use Voice Isolation in DaVinci Resolve (and the Best Alternative)
Have you ever recorded a video outdoors only to find it ruined by wind noise or background chatter? Whether you're filming a vlog, podcast, interview, or tutorial, unwanted sounds like traffic, wind, or nearby conversations can seriously affect your audio quality. These common issues make videos feel unprofessional and distract viewers from your message. Fortunately, DaVinci Resolve offers a powerful voice isolation feature that helps reduce background noise and brings the speaker's voice to the forefront for a cleaner, clearer sound.
This entire guide walks through voice isolation in DaVinci Resolve in a step-by-step manner, fixes the most common issues that users experience, and presents the AI tool HitPaw Univd as a convenient and better option. The tool is intended to tidy up voice noise within seconds.
Part 1: What Is Voice Isolation in DaVinci Resolve?
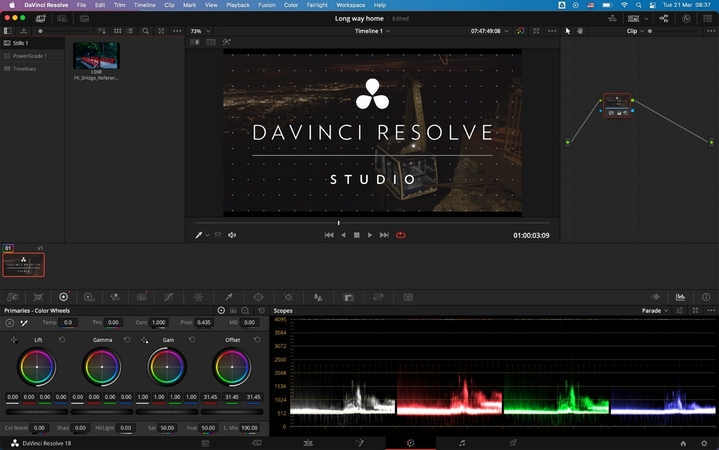
DaVinci Resolve is a widely used video editing platform employed by creators, filmmakers and editors around the world. In DaVinci Resolve Studio version 18 (paid), a voice isolation function was introduced. It is an AI-based feature for lowering or removing background noise from voice tracks, which makes the speaker's voice clearer and more understandable. Particularly helpful for videos with unnecessary noises like wind, traffic noise, crowd noise in interview, vlog, or background.
Key Benefits of Using DaVinci Resolve's Voice Isolation
- Intelligently separates speech from background noise such as wind, traffic, fan hum, or crowd chatter without distorting the voice quality.
- Ideal for creators working in uncontrolled environments, including outdoor vlogs, on-the-go interviews, or live event recordings where clean audio is hard to capture.
- Preserves the natural tone of the speaker's voice, making your content sound more polished and professional without needing advanced audio skills.
- Speeds up the editing process by reducing the need for manual noise removal or layering multiple audio effects.
- Enhances viewer engagement and clarity, especially in content where the spoken message is central like tutorials, podcasts, or explainer videos.
Available In:
Voice isolation is found only in the paid version of DaVinci Resolve Studio. The free version does not have this functionality.
Part 2: How to Use Voice Isolation in DaVinci Resolve Step by Step
Here's how to apply voice isolation in DaVinci Resolve Studio 18 and above. Ensure the Studio version is installed.
Step-by-Step Instructions:
Step 1.Open DaVinci Resolve and launch your project. Make sure your audio or video clip is placed on the timeline.

Step 2.Navigate to the Fairlight page by clicking on the "Fairlight" tab at the bottom of the interface. This is where all audio-related tools and features are available.
Step 3.Select the audio clip you want to clean. Then, on the right side of the screen, click the "+" sign to open the effect library.

Step 4.From the list, go to "Restoration," then select "Fairlight FX," and click on "Noise Reduction." This will apply the Noise Reduction effect to your selected audio.
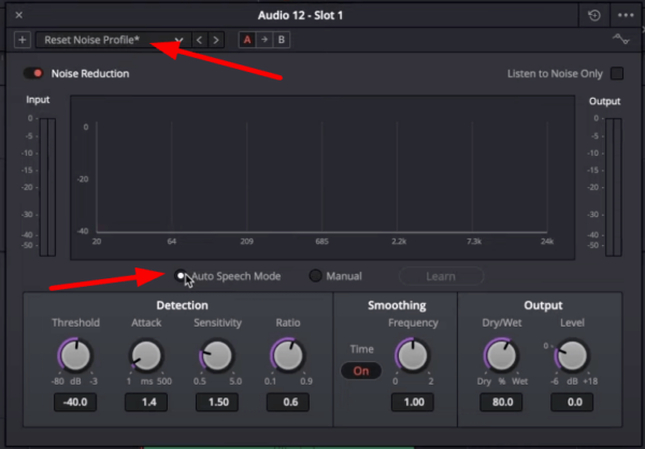
Step 5.Once the Noise Reduction tab appears, choose the "Reset Noise Profile" preset to start fresh. This ensures that no previous settings affect your current editing.
Step 6.Enable "Auto Speech Mode" so DaVinci Resolve can automatically detect which parts of the audio are speech and which are background noise. It will then clean the unwanted noise based on that analysis.

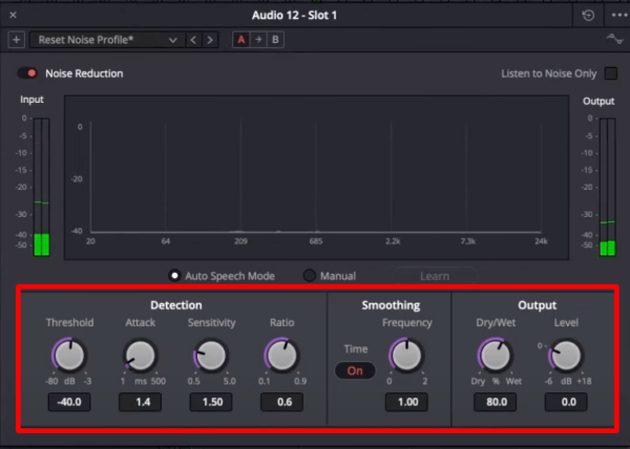
Step 7.If needed, fine-tune the effect using available parameters under the Detection, Smoothing, and Output sections. For example, adjust the Threshold to control how much noise reduction is applied, Sensitivity to determine how responsive the filter is to noise, and Ratio to define how the filter behaves relative to your voice signal.
Step 8.Under Smoothing, use the Frequency setting to fix any harmonic ringing caused by the filter. In the Output section, balance the Dry/Wet mix and adjust the Level to control how much of the cleaned audio is applied.

Step 9.Play the audio back and make small adjustments until your voice sounds clean and natural without losing quality.
Step 10.Once satisfied, save your project. Your audio is now processed with DaVinci Resolve's voice isolation using the Noise Reduction effect.
Part 3: Common Issues with DaVinci Resolve Voice Isolation and How to Fix Them
When applying this feature, users sometimes encounter issues. Here are some of the most common issues and solutions:
1. Voice Isolation Not Showing Up
Reason: This facility is not available in DaVinci resolve free voice isolation. Although most people are mistaken that all tools are alpha-alpha, voice isolation DaVinci Resolve can only be found in Studio (paid) versions released after version 18.
Fix: In order to use voice isolation, you must upgrade to DaVinci Resolve Studio. Once upgraded, go to Fairlight page and the voice isolation option is found in the Audio FX section of the Inspector panel.
2. Voice Sounds Unnatural
Reason: When you increase the isolation level too much, the software may go past the processing of the audio and turn into a sound like a robot or a harsh sound. It is due to the fact that it begins deleting the frequency of the audio as well as background noise.
Fix: Move the Inspector slider down to lower the voice isolation intensity. Monitor the playback and decrease it gradually, finding the perfect balance to clean the audio without eliminating the background noise.
3. Lag or Audio Delay
Reason: Real-time audio effects like voice isolation DaVinci resolve lead to excessive system loads, resulting in rags, audio delays, or pauses in playback, particularly when RAM and CPU are absent.
Fix: To resolve the lag, lower the playback resolution, disable other effects, and close the background app. For smoother results, use Render in Place to process audio before previewing to reduce the load on your system during editing.
4. Noise Still Present
Reason: Speech separation is not perfect. It is effective for stable background sounds, but it may be difficult to cope with large noise mixed with complex noise and audio. Even if the effect is applied, some noise may remain.
Fix: Fairlight merges voice separation with noise reduction or EQ settings to achieve improved results.
That said, if you need a cleaner and quicker solution, utilize HitPaw Univd, an AI-powered tool that eliminates all types of background noise with just one click.
Part 4: The Best Alternative to DaVinci Resolve Voice Isolation - HitPaw Univd
If you seek a more straightforward and efficient method to eliminate background noise from video or audio, HitPaw Univd is an ideal alternative. Different from DaVinci Resolve, HitPaw Univd utilizes smart AI to clean up sounds automatically without edit knowledge and simple to operate for novices. It provides multiple formats of video and audio, hence available to edit different contents. Features like wind sound, keyboard sound, traffic sound, etc. automatically recognize and eliminate these and maintain the speaker's voice clear and natural.
Key Features of HitPaw Univd:
- Automatically removes background noise like wind, traffic, tapping, and reverb using advanced AI.
- Supports over 1000 video and audio formats for maximum compatibility.
- Enhances audio to deliver professional, studio-quality sound output.
- Powered by smart machine learning to isolate voices accurately and efficiently.
- Reduces the need for expensive soundproofing or manual audio editing.
How to Remove Background Noise from Audio and Video Using HitPaw Univd
Step 1.Go to the official HitPaw website and download HitPaw Univd for your Windows or Mac device. Follow the installation instructions to set up the software on your computer.
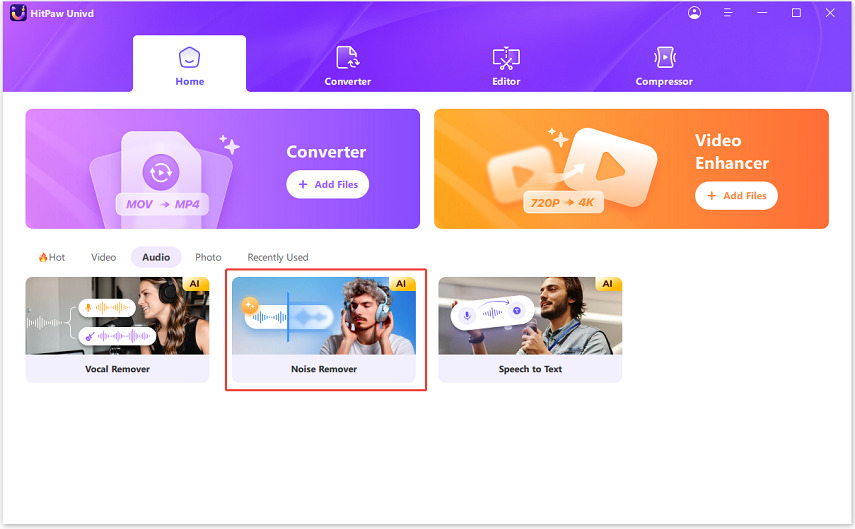
Step 2.Open HitPaw Univd and navigate to the Home interface. Scroll to the Audio tab and select the Noise Remover feature.

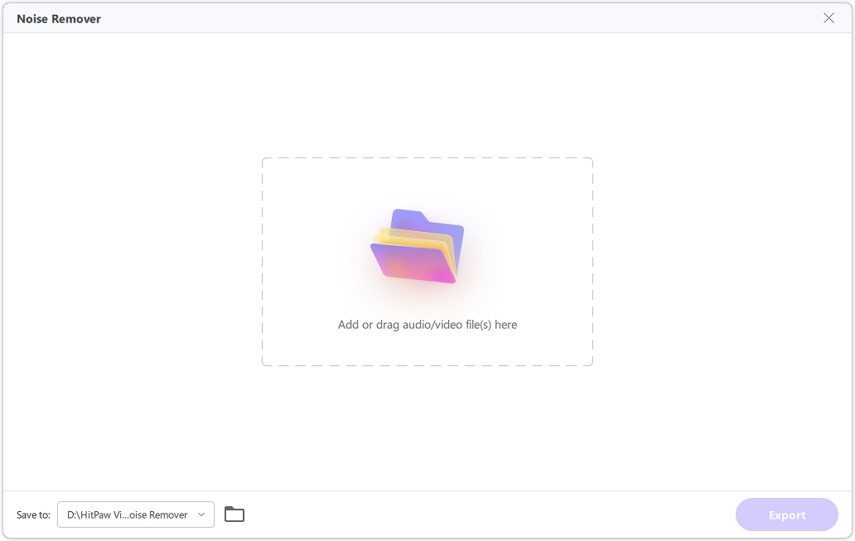
Step 3.After launching the Noise Remover, you'll arrive at the main interface. Click to add or simply drag and drop the audio or video file you want to process.

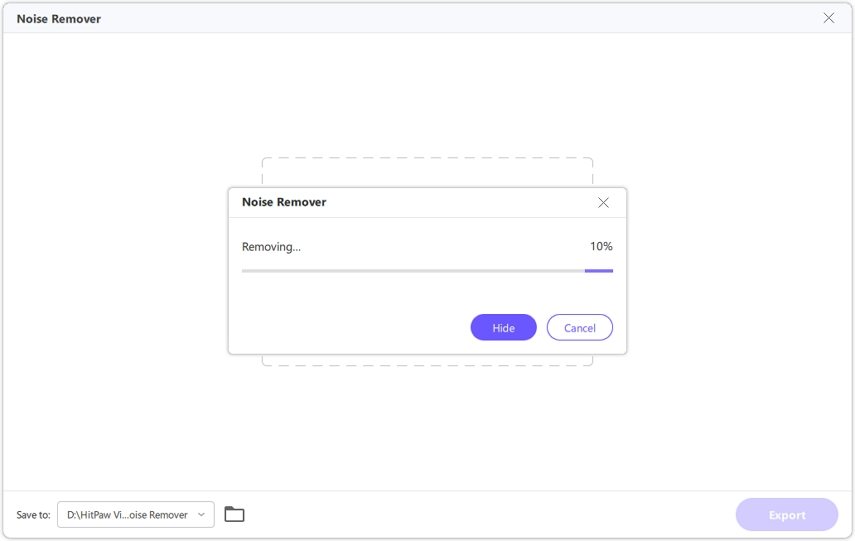
Step 4.Once your file is added, the AI engine will automatically analyze it and begin removing unwanted background noise no manual setup needed.

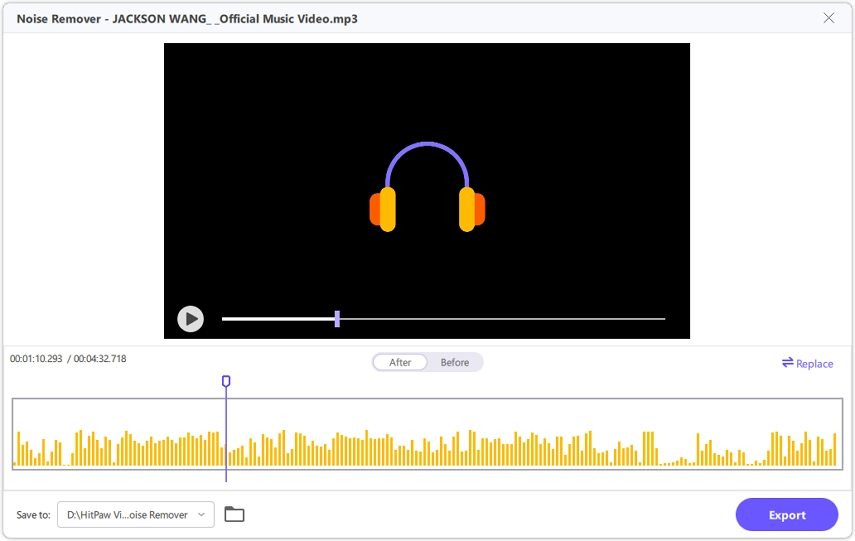
Step 5.When the process is finished, preview the result to compare before and after. Click Export to save the cleaned file. If you'd like to clean another file, click the Replace button.

FAQs About Voice Isolation in DaVinci Resolve
Q1. Does DaVinci Resolve have voice isolation?
A1. Yes, but only the product version (paid) after version 18. The free version does not support this feature.
Q2. How to isolate voice in DaVinci Resolve?
A2. Go to Fairlight page, select audio, open Inspector, and enable Voice Isolation in Audio FX.
Q3. What is the best alternative to DaVinci Resolve voice isolation?
A3. HitPaw Univd is an excellent alternative. Easy to operate and very clear results with minimal settings.
Conclusion
DaVinci Resolve's voice separation capabilities help improve voice quality, especially in noisy recordings. But it only comes with the paid version of Studio and could not possibly achieve the ideal result. If you are seeking a quicker, simpler and more precise solution, HitPaw Univd is a savvy alternative. Employ sophisticated AI to automatically identify and eliminate unwanted background noises. Produce clear, clean audio without complex editing skills in any scene, such as podcasts, videos, online courses, and narration editing. Easy, functional and dependable tool for daily use.



 HitPaw VoicePea
  HitPaw VikPea (Video Enhancer)
 HitPaw FotorPea

Share this article:
Select the product rating:
Daniel Walker
Editor-in-Chief
This post was written by Editor Daniel Walker whose passion lies in bridging the gap between cutting-edge technology and everyday creativity. The content he created inspires the audience to embrace digital tools confidently.
View all ArticlesLeave a Comment
Create your review for HitPaw articles