


How to Change Color Space in CapCut Web to Fix Color Issues
Summary
- Explain what color space means in CapCut Web and why choosing the right option (such as Rec.709 or sRGB) directly affects color accuracy, contrast, and cross-device playback consistency.
- Show how to change color space in CapCut Web step by step, helping users fix washed-out, oversaturated, or mismatched colors during online video editing.
- Offer a practical solution when CapCut Web color space control is limited, introducing an AI-based workflow to enhance and correct video colors more precisely for export and sharing.
If you want to learn how to adjust the color space of your video while using CapCut Web, this article is for you. And a color space adjustment has a significant impact on the appearance of your videos. It can make colors more crystal and well-balanced for viewing on the device.
This article will guide you through the process of effortlessly change color space CapCut Web. Whether you're looking for more precise colors or a specific style, these tools make it as simple as it gets.
Part 1. What Is Color Space in Capcut?
Color space represents the colors used in a video. The majority of your adjustments will be for color consistency, especially if you plan on sharing your footage across numerous platforms or devices. Color space in CapCut allows you to start altering the way your colors look based on the specific criteria of your original video.

What is Color Space?
Color space is an arrangement of distinct colors found in video. It determines how hues, brightness, and saturation are represented. Common color spaces include sRGB, Adobe RGB and DCI-P3. Each of these represents a certain set of colors. For example, most web content uses sRGB, whereas DCI-P3 is clearly chosen for cinematic quality. The color space you choose determine how viewers will interpret your colors in the video.
Color Space adjustment in CapCut is very useful when you want to:
- Improve Color Accuracy: The color should appear uniform on any screen
- Quality Maintenance: The right color space can ensure that the color quality is fully maintained in the export.
- Mood: Color space adjustment can make the color tone come alive, which you want in your film-that warm or cool look.
Part 2. Detailed Steps to Change Color Space Capcut Web
One very good reason for changing the color space of your video in CapCut Web is to ensure that it is displayed equally, colorfully, and accurately on any device. As long as you're looking for a specific look or vibe, this keeps your video looking good overall. Learn how to adjust color space in CapCut Web by following thesesteps.
Steps to Change Color Space in CapCut Web
Step 1. Open Your Project in CapCut Web
Open CapCut Web and select the project you wish to modify. Make sure your footage is color-ready for subsequent actions before editing.
Step 2. Access to Project Settings
Go to the project options or settings menu, which is usually located in the upper right corner of CapCut's UI. You can gain access to your video configurations using the menu.
Step 3. Locate the Color Space Option
Open the settings menu to find the color space option. This feature, which indicates the color spectrum of your video, is crucial if you require consistent color output.
Step 4. Select a Color Space
Select a color space from the available space. Standard Dynamic Range (SDR) and High Dynamic Range (HDR) are the two options you will typically see. Depending on which you need to employ, SDR is appropriate for basic web material while HDR works best for high-quality photographs that stand out with color.
Step 5. Save and Apply Settings
Save the change after you've chosen a color scheme so your project may use it. Your video's color modifications will then be generated by CapCut as a result of this modification.
![]() Pros
Pros
- Enhanced Color Accuracy: By selecting the appropriate color space, colors are guaranteed to look as intended on various devices, preserving visual impact and quality.
- Smart Control: You can try out various looks by adjusting color space such as vivid HDR for a dramatic effect or SDR for clarity on the web.
- Compatibility Across Devices: Using the appropriate color space make sure thar your video appears the same across screens and devices, which enhances consistency in color representation.
![]() Cons
Cons
- Color space conversion may change colors at times, thus requiring extra color correction to return back to the correct look.
- Data or rather file size for the high dynamic range such as HDR, is bigger and, may influence storage and uploading time.
- To fully exploit HDR settings, a compatible display is required as ordinary screens do not display the improved color visibly.
Part 3. Advanced Capcut Alternative to Elevate Your Color Grading
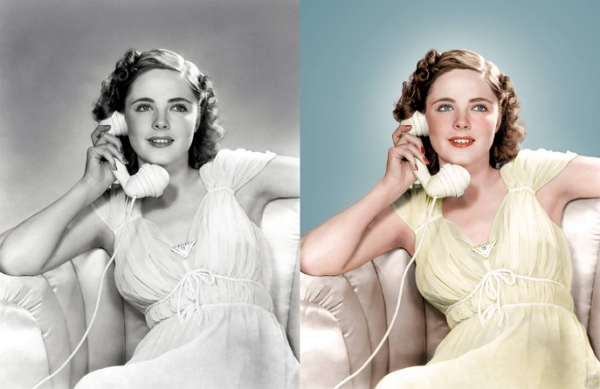
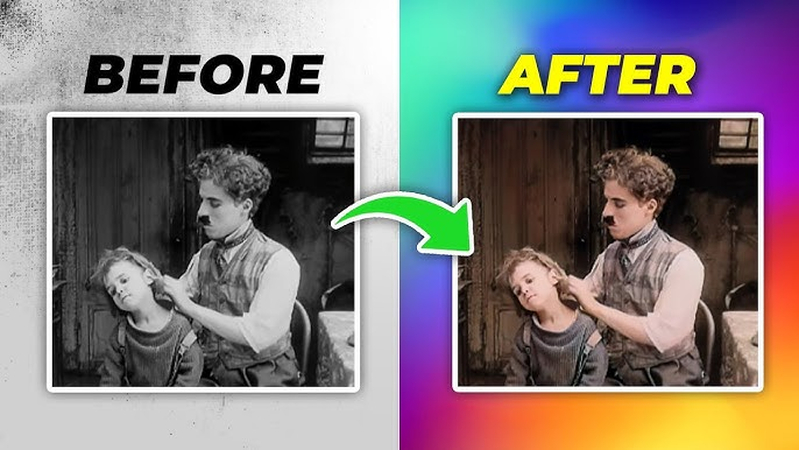
If you're looking for an even more powerful and intelligent tool to elevate your color grading and visual quality, HitPaw VikPea is your go-to AI video enhancer. Built with creators in mind, VikPea uses advanced AI models to color correct, upscale, and enhance video quality, especially in challenging lighting environments. Whether you're working with low-light footage or converting SDR to HDR, HitPaw VikPea offers precise control and professional results with ease.
For creators looking to improve their visual storytelling, this tool is worth investigating because it is perfect for those who want more flexibility and depth in their video colorization.


Why Choose HitPaw VikPea Video Color Enhancer
- AI Color Enhancement: Automatically boosts dull or faded colors to restore natural vibrance.
- SDR to HDR Conversion: Adds cinematic depth by expanding color range and brightness.
- Low-Light Video Optimization:Brightens dark scenes while retaining sharpness and detail.
- colorize Video: Change black and white videos to true-colored in one click.
- AI Video Generation: Create videos in color from text and images.
- Noise Reduction with Detail Retention: Removes grain while keeping video textures crisp.
- 4K/8K Smart Upscaling: Enhances both resolution and color quality for ultra-clear output.
SDR to HDR Conversion with HitPaw VikPea
The SDR to HDR Model intelligently converts standard dynamic range (SDR) footage into HDR-like visuals. It enhances contrast, luminance range, and color depth, giving your video a more vivid, cinematic look.
Step 1.Download and install HitPaw VikPea on your computer. Run VikPea after installing, click on AI Color, and then choose SDR to HDR Model. Import the low-res videos you want to convert to HDR.
Step 2.Drag the Exposure Adjustment slider to fine-tune the brightness level of your video after the dynamic range has been enhanced.
Step 3.Under Export Settings, choose your desired resolution. VikPea supports upscaling up to 4K or 8K. Preview the changes to view a side-by-side comparison, then click on Export to transfer your color-balanced video to your computer.
Part 4. FAQs of Change Color Space Capcut Web
Q1. What is the color space setting?
A1. A color space setting defines how colors are recorded, displayed, and exported in a video. In CapCut Web, it controls color range and accuracy, helping ensure your video looks consistent across devices, browsers, and online platforms.
Q2. How do I change the color space in CapCut Web?
A2. In CapCut Web, color space is adjusted through project or export settings. Select your video, open export options, and choose a compatible profile such as sRGB to avoid color shifts when uploading to web or social media platforms.
Q3. What is the best color space in CapCut?
A3. The best color space in CapCut depends on your output platform. sRGB is recommended for web videos and social media to maintain consistent colors, while Rec.709 is better suited for HD video workflows requiring accurate color reproduction.
Q4. Why do colors look different in CapCut Web?
A4. Color differences usually occur when the color space of your source footage, CapCut Web project, and export platform do not match. Using a unified profile such as sRGB from editing to export helps prevent unexpected color shifts.
Conclusion
Adjusting the color space in CapCut Web is a fast and effective way to fix color inconsistencies and enhance visual quality. But if you're aiming for truly professional results with AI-enhanced performance, HitPaw VikPea is the ultimate solution. From SDR to HDR upgrades to low-light correction and 8K upscaling, VikPea offers everything you need for cinematic color.

 HitPaw Univd (Video Converter)
 HitPaw VoicePea
  HitPaw FotorPea
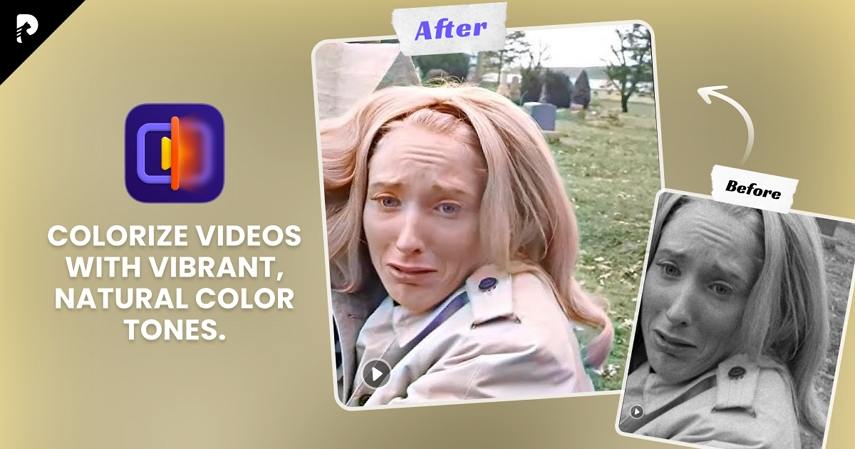

Share this article:
Select the product rating:
Daniel Walker
Editor-in-Chief
This post was written by Editor Daniel Walker whose passion lies in bridging the gap between cutting-edge technology and everyday creativity. The content he created inspires the audience to embrace digital tools confidently.
View all ArticlesLeave a Comment
Create your review for HitPaw articles