Mastering Night Cityscape Photography: How to Capture the City’s Soul After Dark
"What does a city whisper when the lights come on?"
That question haunted me one chilly evening on a rooftop in Tokyo. The city below buzzed quietly, lights flickering like stars tangled in glass and steel. No sunrise could ever reveal this secret energy - it's a story only night can tell.
Night cityscape photography is about capturing that story. It's about turning the fleeting magic of urban nights into an image that stops time and pulls you in. Not just buildings or skylines - but mood, movement, and emotion woven into every pixel.
If you've ever looked at a nighttime city photo and felt something stir inside - a sense of wonder or loneliness or raw beauty - then you know exactly why this form of photography is so addictive.
In this post, I'm going to take you deep into the art and craft of night cityscape photography. You'll learn how to capture the city's heartbeat after dark, from choosing the right gear and settings, to composition secrets, timing, creative techniques, and post-processing. Along the way, I'll share my own stories - the moments that taught me what it really means to photograph a city at night.
So grab your camera and come with me. Let's uncover what the city is whispering once the sun slips away.
Part 1. Why Night Cityscapes Speak Louder Than Daylight Shots
There's something almost sacred about the city after dark. Daytime photos are practical, literal - sharp buildings, crowded streets. But night? Night reveals the soul.
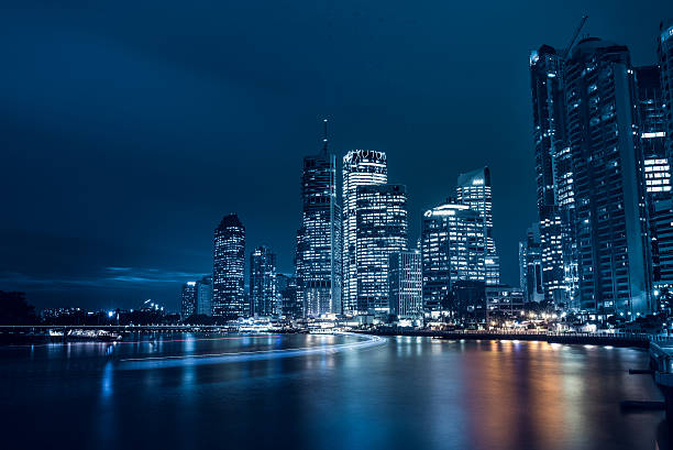
When the neon glows and shadows deepen, the city loosens its mask. You see it breathing, restless and alive. The rush of headlights becomes rivers of light. Reflections dance on wet sidewalks. Faces blur into anonymity, stories hidden in half-light.
I'll never forget my first real night shoot in New York. The cold bit through my jacket as I stood on the High Line. Below, the streets thrummed with traffic, the skyscrapers reaching for the stars like silent sentinels. The image I captured wasn't perfect technically - my ISO was too high, the exposure a bit off - but it held a pulse, a feeling I still chase. That photo was less about the city's skyline and more about its heartbeat.
Night cityscape photography isn't just a technique; it's an emotional journey. The way you see the city changes, and your photos carry that change with them.
Part 2. The Gear That Lets You Catch the Night's Whisper
You don't need to be a gearhead, but the right tools do make a difference.
First, your camera. A full-frame DSLR or mirrorless with good low-light capabilities is ideal, but don't let that stop you if you have a crop sensor or even a smartphone with manual controls.
The lens is your next big decision. Wide-angle lenses - something between 16mm and 35mm - give you room to capture sprawling skylines or narrow urban canyons. Look for a lens with a wide aperture (f/1.8 to f/2.8) so you can shoot handheld if necessary.
But the real MVP? Your tripod. Stability is everything for long exposures. Without it, your photos will blur, no matter how steady you think your hands are.
I learned this the hard way during a foggy night shoot in Hong Kong. I tried shooting handheld, hoping to freeze the moment - but every frame was a disappointment. The next night, I lugged my tripod onto the rooftop. The difference was astonishing: crisp lines, glowing lights, details in shadows I hadn't noticed before.
Don't forget a remote shutter or use your camera's timer to avoid even the slightest shake when pressing the shutter.
Part 3. Getting Your Camera Settings Just Right: The Night Trinity
Night photography is a dance of three settings: ISO, shutter speed, and aperture.
- ISO: Keep this as low as your camera can manage while still exposing correctly, usually between 100 and 800. Higher ISO means more noise-grain that muddies your image. Modern cameras handle higher ISOs better, but less is more.
- Shutter Speed: Long exposures are your friend here. Anywhere from 10 to 30 seconds lets you capture light trails, reflections, and hidden details. Too short, and you lose the magic of motion and glow.
- Aperture: Around f/8 to f/16 keeps everything in focus, from the nearest streetlamp to the farthest skyscraper.
On a cold winter night in Chicago, I set my camera to ISO 200, f/11, and a 25-second shutter. As the shutter clicked open, cars became rivers of light flowing through the streets below. The contrast between still buildings and moving lights told the city's story more than any daylight shot could.
Learning to balance these settings takes practice. Don't be afraid to experiment and review your results immediately. Night photography rewards patience.
Part 4. Composing the City's Story: Framing Your Night Shot
Photography is storytelling. The city is your subject, but your composition is your voice.
Use these principles to guide your framing:
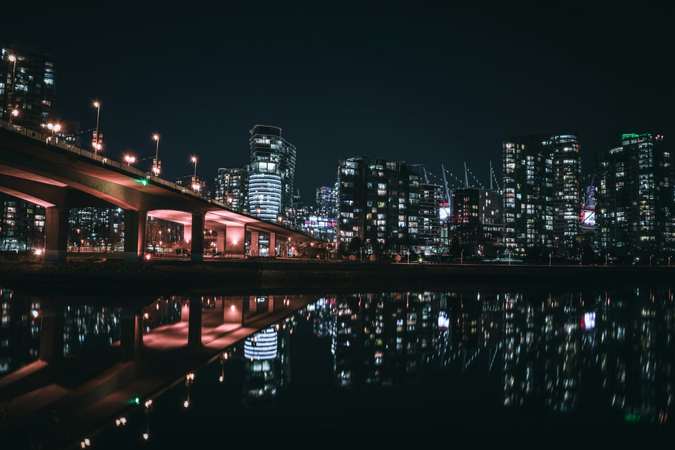
- Leading Lines: Roads, bridges, and railings pull the viewer's eye deep into your image. Look for streets curving into the distance or bridges arching overhead.
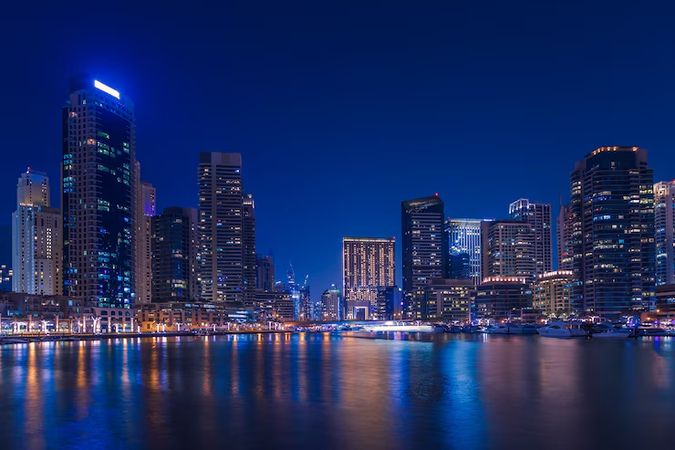
- Reflections: Rain-soaked sidewalks, puddles, or glass buildings double your visual impact. A single neon sign reflected on wet pavement can add mood and depth.
- Foreground Interest: Including a person, bike, or streetlamp in the foreground gives scale and life. The city becomes more than concrete - it becomes experience.
- Symmetry and Patterns: Urban architecture often offers symmetry. Position your camera to emphasize balanced shapes or repeating elements like windows or columns.
In Seoul, one rainy evening, I framed the skyline behind a street vendor's umbrella shimmering with raindrops. The blurred umbrella's red color contrasted beautifully with the cool city lights. It wasn't the perfect skyline shot, but it told a story about the city's pulse - life carrying on, rain or shine.
Part 5. Timing Your Shots: Blue Hour, Golden Hour, and the Deep Night
When you shoot changes everything.
- Golden Hour: The warm light just before sunset bathes the city in soft gold. Buildings glow; shadows stretch long.
- Blue Hour: That brief time after the sun sets, when the sky turns an electric blue. City lights balance perfectly with the ambient light, making it the magic window for photographers.
- Deep Night: After the sky darkens fully, neon and street lights dominate. This is where contrast spikes and mood thickens.
One night in Paris, I arrived during blue hour and stayed until deep night. Each stage gave me radically different images from the same spot - warm, vibrant, then stark and mysterious.
Plan your shoot to catch these transitions. Arrive early, stay late, and watch how the city's character shifts.
Part 6. Editing Your Night Cityscape Photos: Modern Software Techniques to Bring Your Vision Alive
Capturing the city at night is only half the journey. The real magic happens when you bring those raw images into your editing software and sculpt them into the masterpiece you saw through your lens.
Let me share how I do it with Adobe Camera Raw (ACR) in Photoshop, plus a few tips on other modern software that can elevate your night cityscapes.
Editing with Adobe Camera Raw: The Photographer's Swiss Army Knife
After a night of shooting, I drag my RAW files directly into Photoshop, and ACR opens automatically. If you've bracketed exposures - say, a 15-second long exposure for light trails combined with a shorter exposure for sharp details - you can hit Select All in the top left corner. This lets you apply any adjustment uniformly across all images, saving tons of time and keeping consistency.
Here's the step-by-step on correcting distortion and perfecting your frame, something every urban shooter battles:
- 1.Lens Corrections Tab: Head here first. ACR has powerful automatic profiles that understand your lens's quirks.
- 2.Go to Manual: Switch over to Manual correction for fine control.
- 3.Show Grid: Turn this on to get a visual guideline. Trust me, a grid is invaluable when you want your buildings perfectly vertical and horizons level.
- 4.Try Auto: Hit the Auto button (marked "A") and watch ACR intelligently straighten your lines. This usually gets you most of the way there.
- 5.Fine Tune Distortion: Use the Distortion slider to correct barrel or pincushion distortion. I often bump mine up to around 12 to tame those bulging edges.
- 6.Adjust Vertical Perspective: The Vertical slider lets you push or pull the vertical lines until your buildings stand tall and proud - no leaning allowed.
- 7.Sync Results: Don't forget this! Sync all your edits to every exposure you're working with to keep everything cohesive.
Adding Mood with Color: From Desaturation to Futuristic Blues
Colors tell a story - and with night cityscapes, you can push them to create atmosphere, whether it's eerie, futuristic, or nostalgic.
Here's a simple trick I love:
- First, desaturate your image almost completely using a Hue/Saturation adjustment layer. This mutes distracting colors and focuses the viewer on light and form.
- Then, add a blue Photo Filter layer or tweak the blues through a Color Balance adjustment layer. The cool blues echo neon lights and urban steel, evoking that classic "Blade Runner" vibe.
Play around with these layers until the mood feels right - don't be afraid to push the blues just a bit for drama.
Other Modern Tools to Keep Your Editing Sharp
While Adobe remains the industry standard, plenty of photographers swear by other powerful tools:
- Luminar Neo: Its AI-powered tools let you enhance details, reduce noise, and even replace skies effortlessly, great for night scenes.
- Capture One: Known for exquisite color grading and tethered shooting, it offers deep control over RAW files for professionals.
- Darktable: A fantastic free and open-source alternative to Lightroom and ACR, perfect for photographers on a budget.
- Affinity Photo: A cost-effective Photoshop competitor with strong RAW editing and layering capabilities.
HitPaw FotorPea

For effortless, professional-quality photo enhancement, try HitPaw Fotorpea. Its AI-powered tools sharpen details, remove noise, and upscale images up to 16K-all with just one click. Whether you want to restore old photos, retouch portraits, or bring your night cityscapes to life, HitPaw makes editing simple and powerful. Plus, it offers a free 7-day trial to explore all its features risk-free.
No matter which software you choose, the key is to experiment. Night photography editing is as much an art as the shooting itself.
My Editing Philosophy
When I edit night cityscapes, I always ask: Does this photo make me feel the city's pulse?
If the answer is yes, I know I've succeeded.
Part 7. The Emotional Core: Why Night Cityscapes Move Us
Photography isn't just about technique - it's about feeling.
That night in Tokyo, standing on that rooftop, I wasn't just shooting a city. I was holding onto a feeling: quiet loneliness mixed with vibrant life.
A few nights later, I showed that photo to a friend who'd never been to Tokyo. She said, "It's like the city is alive but tired. It's holding its breath."
I realized then that my job isn't to make perfect photos, but to capture the city's emotions - and invite others into that experience.
Night cityscape photography is an emotional language. It speaks of solitude in crowds, beauty in imperfection, mystery in light and shadow.
Part 8. Tips to Elevate Your Night Cityscape Shots
- Scout your location: Use Google Maps, Instagram geotags, and photography forums to find unique spots.
- Check the weather: Clouds add drama, rain creates reflections, fog evokes mystery.
- Shoot in RAW: Maximum flexibility in editing.
- Bring spare batteries: Cold nights drain power fast.
- Be patient: Wait for the right moment - a car passing, a pedestrian walking through your frame.
Part 9. Pushing Boundaries: Creative Night Techniques
Want to go beyond the basics?
- Light Painting: Use a flashlight or LED to illuminate objects in the frame during long exposures.
- Multiple Exposures: Blend images to capture different elements sharply.
- Zoom Blur: Slowly zoom your lens during exposure for abstract, dynamic effects.
- Panoramas: Stitch several images for ultra-wide cityscapes.
Part 10. Sharing Your Work: Building Community and Growing
Photography thrives in community. Share your night cityscapes on Instagram, Flickr, or photography groups. Tag locations, describe your process, invite feedback.
Seeing how others capture the same city reveals new perspectives and inspires growth.
Final Thoughts: The City's Nighttime Story Is Waiting
Night cityscape photography isn't just a craft - it's a conversation between you and the city.
When the sun sets and lights flicker on, the city speaks. It's waiting for someone to listen and translate its whispers into images.
So go out, explore the night, and capture the soul hiding in shadow and light.
Because every city's story deserves to be told - and every night is a new chance to tell it beautifully.
If you want feedback on your night city photos or want to share your favorite cityscape moment, drop a comment. Let's tell the city's story together.


 HitPaw Univd (Video Converter)
 HitPaw VoicePea
  HitPaw VikPea (Video Enhancer)

Share this article:
Select the product rating:
Daniel Walker
Editor-in-Chief
This post was written by Editor Daniel Walker whose passion lies in bridging the gap between cutting-edge technology and everyday creativity. The content he created inspires the audience to embrace digital tools confidently.
View all ArticlesLeave a Comment
Create your review for HitPaw articles