Catalog
To make the most of saving your enhanced images, here’s a full guide to help you master customizing save paths, file formats, quality levels, DPI settings, and more. Now let’s dive in.
1. Open HitPaw FotorPea
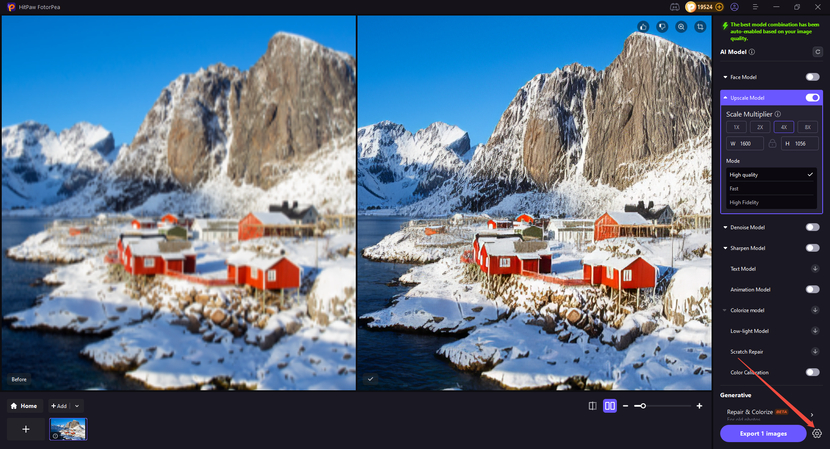
Open HitPaw FotorPea and click the settings icon. This will open the main settings panel, allowing you to adjust preferences.

2. Settings
General Settings
- Set Export File Location: Navigate to “Setting” to choose the save path for exported images. You can change the path at any time.
- Processor: Select “CPU” or other available hardware to handle tasks. Choosing the right processor can speed up AI - based editing.

AI Enhancer Settings
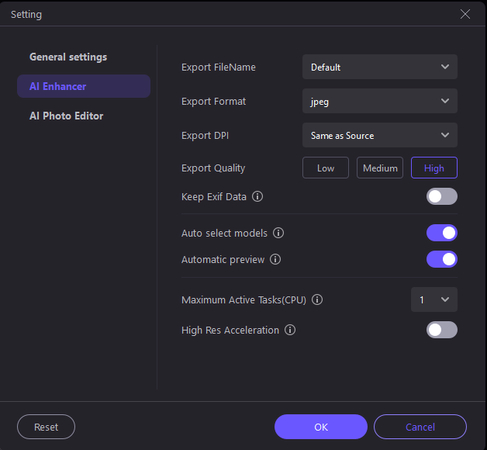
- File Basics: Naming (Export FileName), format (Export Format like JPEG), DPI (match source or custom).
- Quality & Data: Choose export quality (Low/Medium/High) and decide to keep Exif metadata.
- Performance: Toggle auto model selection, preview, set max CPU tasks, and enable high - res acceleration.

AI Photo Editor Settings
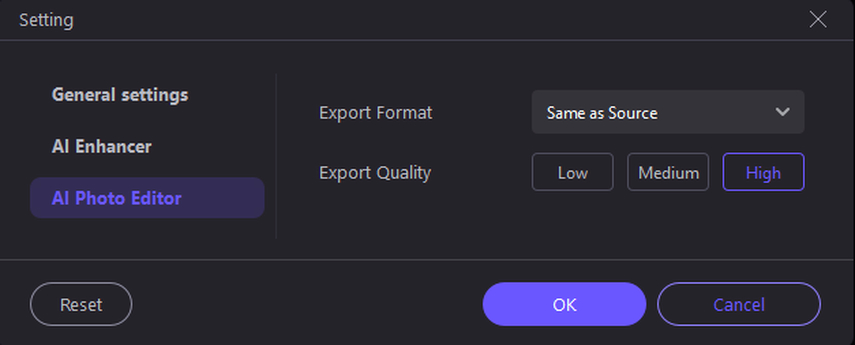
- Export Format: Match the original file format, or choose PNG/JPEG from the list.
- Export Quality: Select Low, Medium, or High to balance file size and image clarity.

3. Export Settings
After using the AI model to process the image and being satisfied with the result, click the settings icon next to “Export”. Customize the export format, output location, quality, etc.

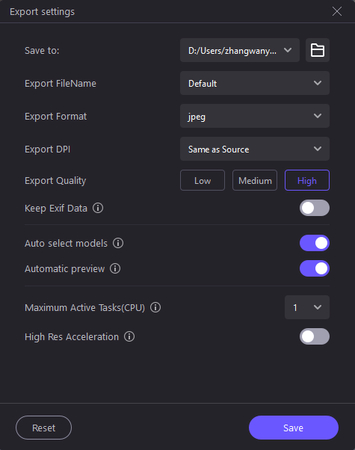
Using the following versatile export settings, you can make personalized adjustments to save enhanced images that fully meet your needs.

Save to
Choose the folder path on your computer to store the exported image.
Export File Name
Set a custom name for the file, or use the default.
Export Format
Keep it “Same as Source” for consistency, or switch to common formats like JPEG/PNG as needed.
Export DPI
“Same as Source” retains the original resolution density. To meet specific print quality needs, adjust it—300 for printing, 72 for digital copies.
Export Quality
Select Low/Medium/High. “High” preserves the best visual details for important projects.
Keep Exif Data
Enable to retain the original photo’s metadata, such as camera settings, capture time, location, ISO, etc.
Auto Select Models
Intelligently matches the best AI model for enhancement based on the image, ensuring optimal photo results.
Automatic Preview
Automatically enables to compare before - and - after enhancement effects. Keeping it on is more convenient.
Maximum Active Tasks(CPU)
Controls how many processing tasks run at once—adjust if your device struggles with speed.
High Res Acceleration
The acceleration mode can speed up the processing of high - resolution images but may affect the processing quality.


