Sunset Picture Tips and How to Make It Stunning in 2026
Sunset photos are loved by its warm colors and soft light. New rice photographers and veteran photographers are attracted. However, it is difficult to take good sunset picture. Lighting changes are fast, photos are too bright, too dark, and particles are often rough. This guide introduces simple tips for taking better sunset photos and solving common problems. You can learn how to shoot at the right time, adjust the basic settings, and improve photos that you cannot take as expected. Let's look at the features of sunset shooting and how to get the best results.
Part 1: Why Sunset Pictures Are Special but Tricky?

Sunset picture is special. The natural light during that time period gives soft shadows and warm colors. The sun is low, the clouds receive light, everything shines. There is no need for fancy tools, mobile phones, cameras, appropriate time, and appropriate angles.
However, the same thing that makes the sunset beautiful makes it difficult to film the sunset. The light changes fast. One moment is perfect, but the next moment is too dark. If you wait too long, you will miss the best shot. As early as the color is not there yet.
Part 2: Typical Problems You'll Face Shooting a Sunset Picture

Taking a picture of a sunset sounds simple, but it often ends with unfortunate results. Because the light changes very quickly, it is difficult to adjust the timing. Even if the eye looks rich in color, the photo is too dark or too bright. Sometimes the sky looks flat or the color does not stand out. Also, noise, blur, and lens flare may ruin the photo.
- Too Bright or Too Dark: The sky is very bright and the ground can be too dark. The camera cannot always balance both.
- Color does not Look Right: The actual sky looks orange or red, but the photo becomes dull or gray.
- Noise and Granulation in the Photo: When light is weak, the camera increases the ISO sensitivity. Especially for mobile phones, there may be more noise.
- The Sun is Blurred or Too Big: If the focus is not met, the shape of the sun will collapse or blur.
- Lack of Sharpness in the Foreground: When you focus on the sky, the trees and figures in front of you can be seen blurred.
These problems are normal. But the good news is that you can fix many of these. First, I will explain how to take better photos. Next, I will show you how to fix using the free tool.
Part 3: Tips to Capture the Perfect Sunset Picture Every Time
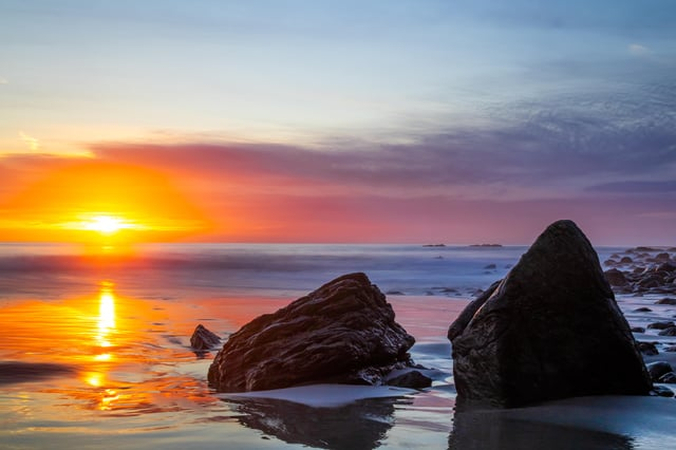
Shooting the pictures of sunsets is both exciting and difficult. Changing light and vivid colors give you a great chance, but you also need to be careful. This section introduces practical tips for taking better sunset photos. It can be taken easily by any level.
1. Be Early, Stay Late
Arrive at the spot at least 15 to 20 minutes before sunset. That way, you can take enough time to look around and choose a shooting location. Sometimes the best colors appear after sunset. So, let's wait a little longer before packing.
2. Use a Tripod or Hold Still
It is very important to stabilize the camera to capture the sunset. If there is a tripod, it is best, but if not, use both hands or put the camera on something hard. By doing this, you can prevent blurring and take sharp photos. Even if it is a little blur, the good photos will be ruined.
3. Turn Off Flash
The flash ruins the soft and warm atmosphere of the sunset photo. It creates harsh light that does not match the natural environment. Be sure to turn off before shooting. Let's leave it to natural light.
4. Try Different Angles
Don't just shoot straight at sunset. Let's move around and shoot from various perspectives. If you put a tree, put a rock, or put a standing person in, the interesting will increase. Sometimes the picture looks better when it gets lower or lower back.
5. Use Grid Lines and Rule of Thirds
Most phones and cameras have grid wires. Let's place the horizontal line at 1/3 above or 1/3 below the center of the screen. This simple tip improves the balance of photos. It also helps keep the subject in a better position.
Part 4: How to Revive a Noisy or Washed-Out Sunset Photo by HitPaw FotorPea
Sometimes, the finish may become unnatural even if everything is done correctly. The particles in the sunset pictures become coarse, the color is visible by dulling, the whole scene looks flat. Especially if you expect better results, you may be frustrated. That's where HitPaw FotorPea comes in. It is an easy-to-use online tool that solves such a common problem without editing experience for sunset photos. Just upload a photo and the tool will do it. Removes noise, returns color, and shows images more naturally. This is an easy way to save your sunset shot.

- Smart AI photo enhancer for Windows and Mac.
- Make photos clearer with 16K enhancement in one click.
- Fix blurry images and clean up noise with ease.
- Enlarge pictures while keeping the original quality.
- Generate fresh images with the DeepSeek AI tool.
How to use HitPaw FotorPea to repair noisy sunset picture?
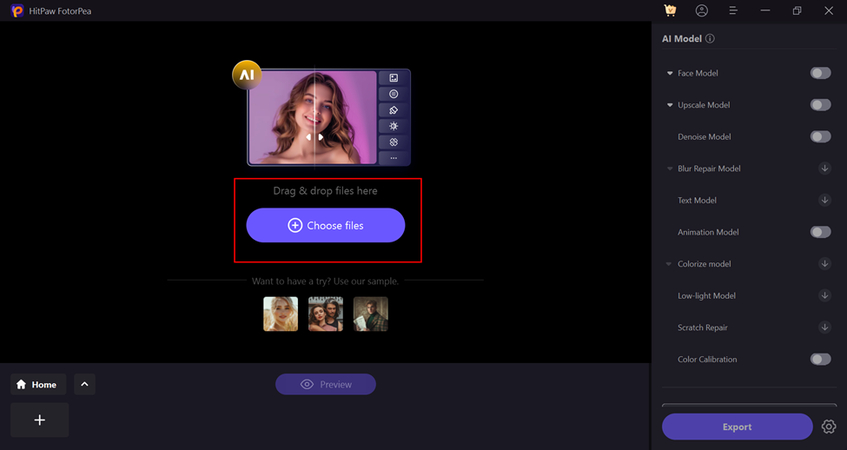
Step 1:Launch HitPaw FotorPea, then either click to upload or drag and drop your sunset photo into the workspace. This tool supports various image formats and gives you a quick start for editing.

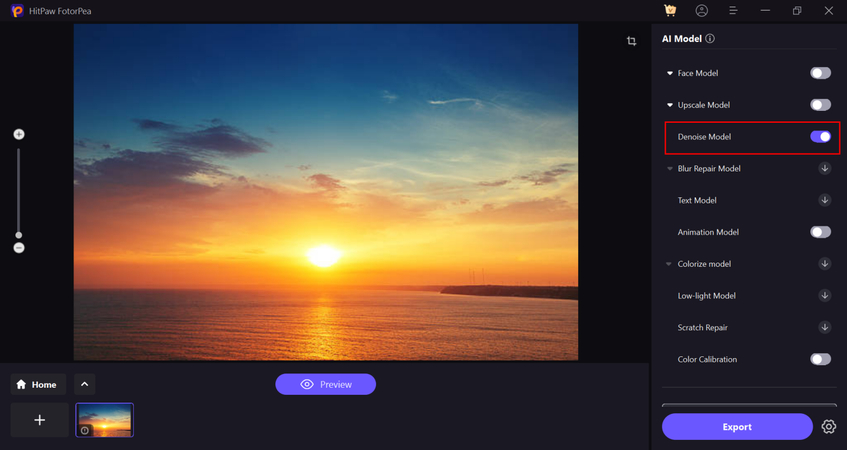
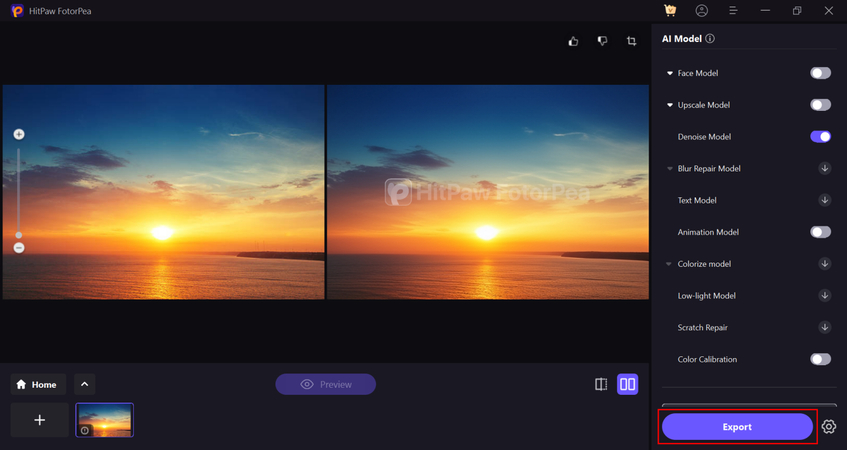
Step 2:Once your image is uploaded, select the Denoise model from the available enhancement options. This is ideal for removing grain and smoothing out noise, which is often present in low-light sunset shots.

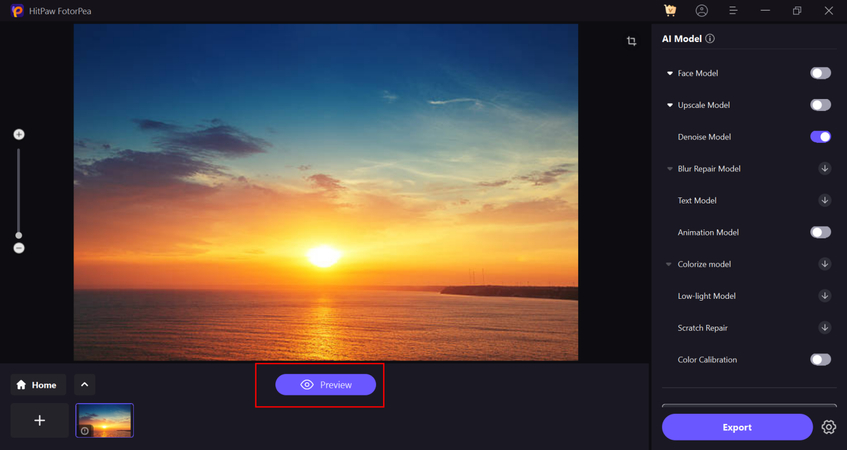
Step 3:After selecting the Denoise model, click on the Preview button. This allows you to see how the AI-enhanced image will look before finalizing any changes.

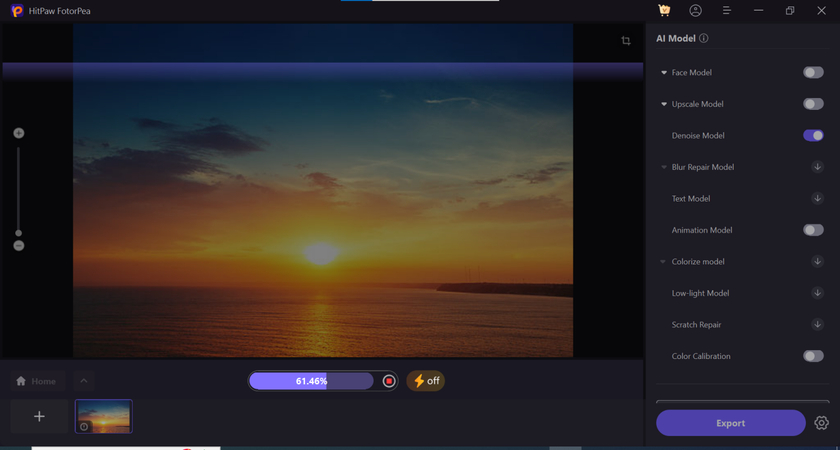
Step 4:Once you click Preview, HitPaw FotorPea begins processing your photo. This step may take a few moments, as the tool applies detailed enhancements to bring out the vivid colors and clarity of your sunset scene.

Step 5:After processing is complete, you'll see a preview of your improved image. If you're satisfied with the result, simply export and save it to your device-ready to share or print as your perfect sunset capture.

FAQs about Sunset Picture
Q1. Why do sunset photos look different from what I see with my eyes?
A1. The camera is different from our eyes. Our eyes adapt to brightness and color rather than camera. Therefore, even if the sunset looks great to you, you can see it in the photo.
Q2. How can I make my sunset photo look more colorful?
A2. There are some things you can actually do to take photos of a better sunset. First, reduce ISO sensitivity and manually adjust camera settings.
Q3. What's the best time to take sunset photos?
A3. The golden hour of about 20 minutes before and after the sun touches the horizon is the best. During this time, the color is soft and the light is just right.
Conclusion
Sunset picture is great, but it's not always easy to take them correctly. Light changes quickly, and settings such as ISO and white balance may affect the final finish. Even if I was able to take a beautiful picture, the photograph would be dull and full of noise. This does not mean that efforts are wasted. Even if you don't have editing skills, you can fix photos with fading and noise. With HitPaw FotorPea, you can make your photos clearer and more colorful with a few clicks. Just upload a photo and leave it to the tool.




 HitPaw Univd (Video Converter)
 HitPaw VoicePea
  HitPaw VikPea (Video Enhancer)


Share this article:
Select the product rating:
Daniel Walker
Editor-in-Chief
This post was written by Editor Daniel Walker whose passion lies in bridging the gap between cutting-edge technology and everyday creativity. The content he created inspires the audience to embrace digital tools confidently.
View all ArticlesLeave a Comment
Create your review for HitPaw articles