Rainbow Shadow Effect: Adding Colorful to Your Pictures
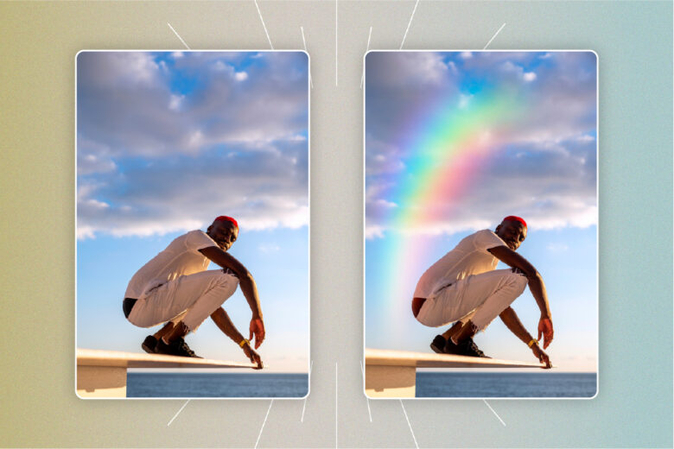
When you add color to photos it creates an impact on artistic and emotional levels. The red rainbow effect is one of the most used ways that give you a dreamy gradient to these images. If you are looking for a retro Y2K look or something futuristic, this red rainbow shadow effect should be your top choice, especially if you are a photographer or content creator.
Here is this guide, we will walk you through all the ways that are used and also effective. Also, there will be a detailed step-by-step guide on how to use top tools.
Part 1. What is the Rainbow Shadow Effect?
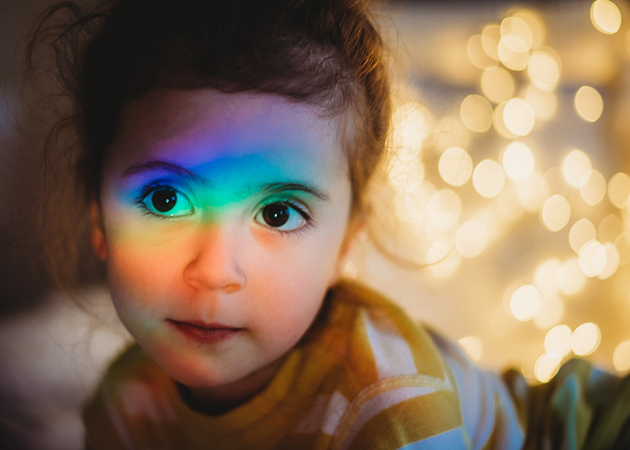
The red rainbow shadow effect mimics the optical dispersion of light through a prism. This shows a full spectrum rainbow that appears behind the focused subject. This can also be created via sunlight for natural effect but the majority of people rely on editing tools to make it digitally perfect.
With this, for still images such as portraits or even selfies, the overlay of color will add motion. The red photo rainbow effect also adds dimension by casting a soft or sharp hue for the face, object, and even the background. If you look beyond the visual appeal, you will find that these effects target joy, fantasy, and even sometimes nostalgia and surrealism, all these things make it a go-to thing.
If you look at the editorial spread, you will find these stories there and even on cover art, and Instagram carousels only because it has the power to evoke emotion in a naturalistic way. If you are looking to make a statement with an image, there is nothing better than the red rainbow effect on a photo.
Part 2. Detailed Guide on How to Add Rainbow Effect to Photo
1. How to Add the Photo Rainbow Effect with Photoshop
Photoshop is the pioneer as it gives you full authority over layers and effects and this would be the first recommended tool when it comes to the red picture rainbow effect.
Step-by-Step Guide to Add Rainbow Effect:
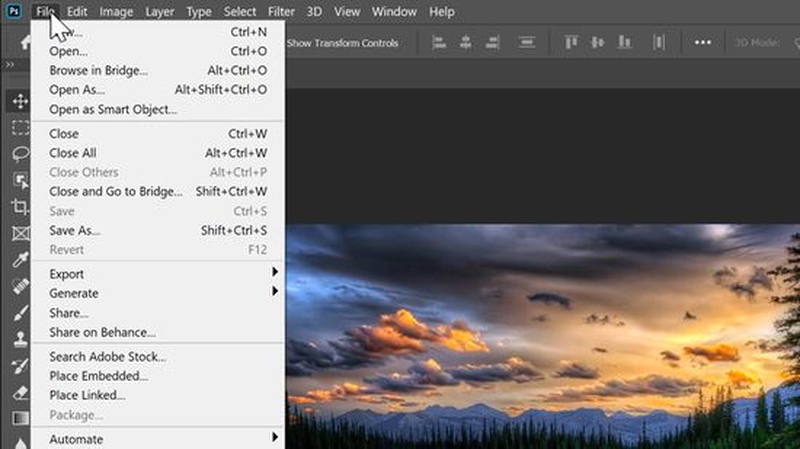
Step 1: Open Your Image
Launch Adobe Photoshop and load the image.
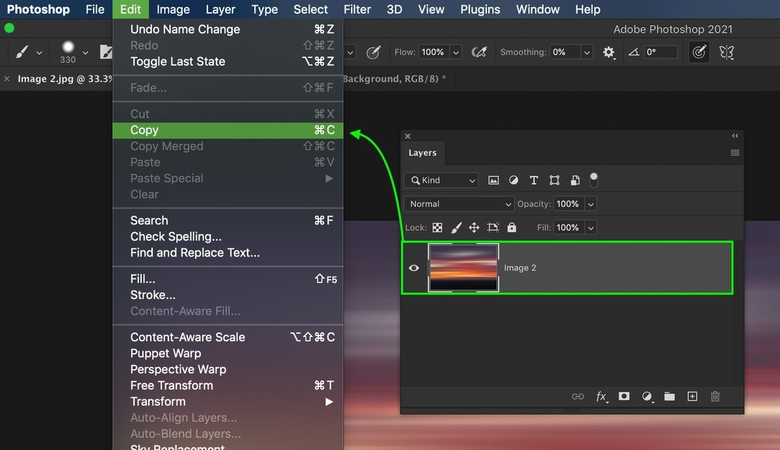
Step 2: Add a New Layer
Go to Layer > New > Layer so that your rainbow edit remains non-destructive.
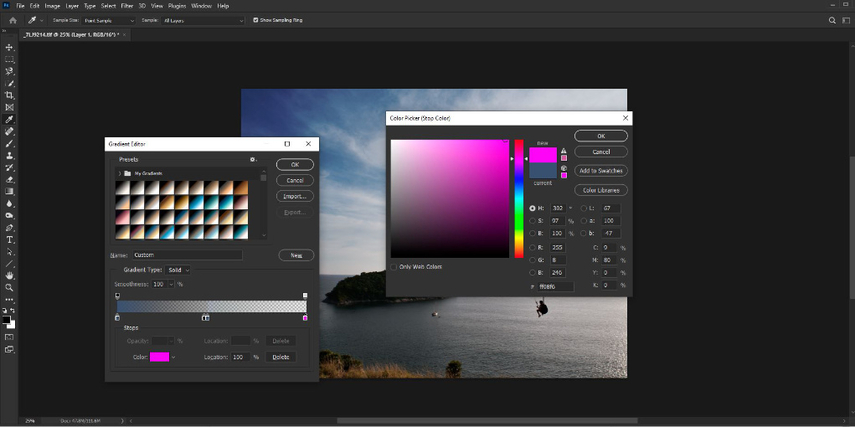
Step 3: Select the Gradient Tool
Press (G) on your keyboard and select a rainbow gradient preset. If not available, make one in the Gradient Editor with red, orange, yellow, green, blue, indigo, and violet segments.
Step 4: Drag Across Image
Click and drag the gradient across your canvas. Play with linear, radial, or angle styles for different rainbow orientations.
Step 5. Blend with the Photo
Change the blending mode of the gradient layer to "Soft Light" or "Overlay." This makes the red rainbow effect on pictures blend naturally with the original tones.
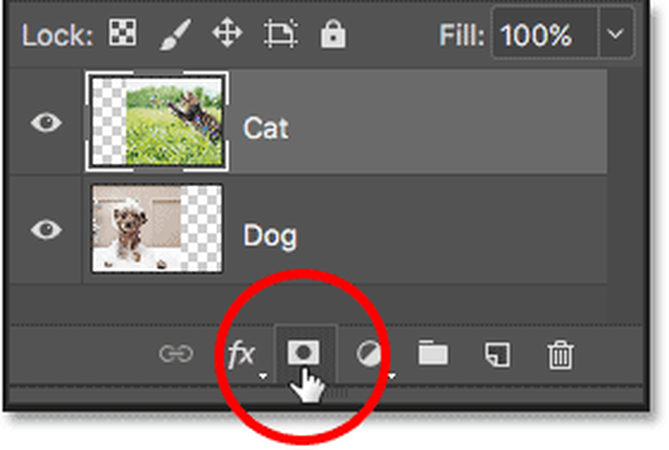
Step 6. Apply a Layer Mask
Add a layer mask and use a soft brush (black) to erase parts of the rainbow that feel too overpowering or misaligned.
Step 7. Fine-Tune
Adjust the layer opacity and mask feathering to smooth out transitions.
Step 8: Save Your Work
Export as JPG or PNG for social media, or PSD if you want to keep editing.
This method results in a realistic, layered red rainbow effect with full precision.
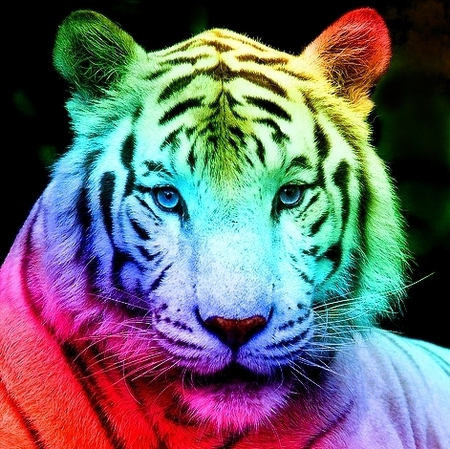
2. How to Add Picture Rainbow Effect Online
There are some online tools available such as Picsart that are quite useful for people who want quick results without getting tangled in professional software. Tools offered add rainbow effect to photos online in a few simple steps.
How to Use Picsart for Rainbow Editing:
Step 1: Open Picsart in Your Browser
Visit the Picsart Rainbow Guide, sign in, and upload your image.

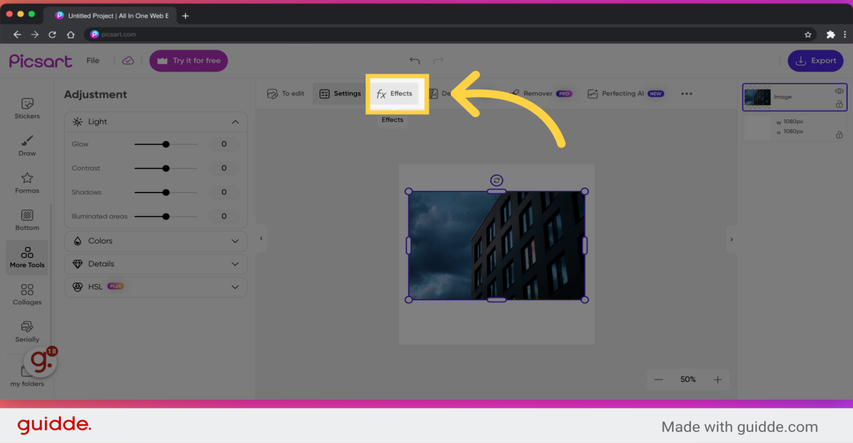
Step 2: Navigate to "Effects"
On the left-side panel, click on "Effects" and search for "Rainbow."
Step 3: Choose a Style
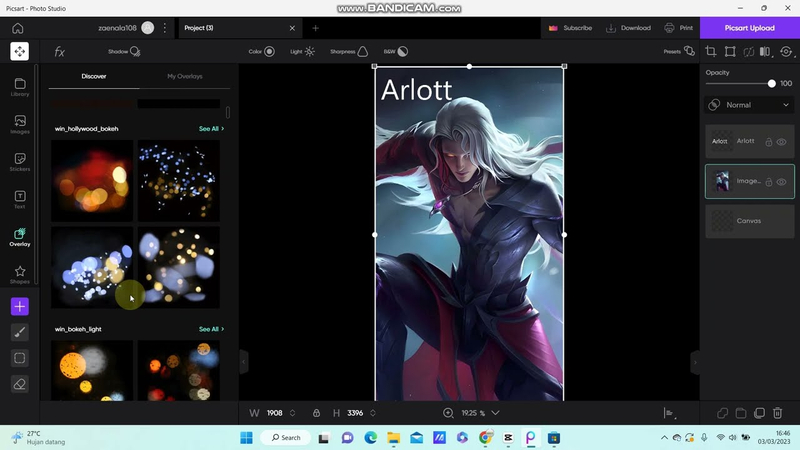
Several rainbow overlays will appear, such as "Rainbow Light," "Rainbow Spectrum," or "Neon Rainbow." Choose one that aligns with your tone.
Step 4: Adjust Overlay
Use sliders to change the hue, brightness, and location. Picsart gives you the option to move the rainbow to specific parts of the image.
Step 5: Layer More Effects
You can stack effects like blur, vignette, or sparkle to enhance the red rainbow effect on the photo.
Step 6: Download Your Image
Click "Export" and save the final image as a .jpg.
This option is easy to use, especially for beginners, and is ideal for fast, colorful edits without the learning curve.
Part 3. Extra Tip: Add Rainbow Filter to Photo with HitPaw FotorPea
If you are looking for the easiest and most professional way to AI boost, then look no further than Hitpaw Fotorpea, which will let you apply vibrant filters such as punk-style rainbow shadow effects without much hustle.
What Is HitPaw FotorPea?
Hitpaw Fotorpea is a very useful AI-powered photo editor that gives you the option of artistic filters, removing background, and improving the images automatically. There are no special skills required for design or layer, simply upload and use the filter.
Key Features of the AI Photo Enhancement:
- One-click AI photo enhancement
- Artistic and color-rich filters, including punk-style rainbow
- Auto light adjustment
- No downloads needed (web-based access)
- Works on both desktop and mobile
Steps to Use Rainbow Filter in HitPaw FotorPea:
Step 1. Go to HitPaw FotorPea.
Visit HitPaw AI Editor and choose "AI Photo Enhancer."
Step 2. Upload Your Photo
Click "Upload" to select your file.

Step 3. Select the Punk Filter
In the style gallery, choose "Punk" which adds a rainbow-colored aesthetic to your image.

Step 4. Customize Look
Use the sliders to control color depth and vibrance.
Step 5. Preview and Export
Click "Apply," preview the changes, and download your edited image.

This tool is the easiest and quickest way to apply a red photo rainbow effect, especially for those people who are short on time or learning about editing knowledge.
Part 4. FAQs about the Rainbow Effect on Photo
Q1. Is it possible to make the Rainbow effect in my room?
A1. It is possible. You have to use objects like CDs, crystal beads, or water-filled glass that will give you prism effects when you put it in front of sunlight. Now this gives rainbow lights on surfaces that will be captured in photos for a natural red rainbow shadow effect.
Q2. How to Make a Rainbow Photography?
A2.
There are two ways to do it.
Conclusion
The red rainbow effect is not just a visual gimmick but is quite a useful storytelling tool. There are several tools available with the most common ones being Photoshop, picsart, and hitpaw fotorpea, that can add flair and emotion to the pictures. These tools are versatile and offer style and vast options and you can see that in the results. Experiment with them and try various combinations of how to add rainbow effects to photos online and even offline.


 HitPaw Univd (Video Converter)
 HitPaw VoicePea
  HitPaw VikPea (Video Enhancer)


Share this article:
Select the product rating:
Daniel Walker
Editor-in-Chief
This post was written by Editor Daniel Walker whose passion lies in bridging the gap between cutting-edge technology and everyday creativity. The content he created inspires the audience to embrace digital tools confidently.
View all ArticlesLeave a Comment
Create your review for HitPaw articles