How to Crop an Image in Photoshop: A Step-by-Step Guide
Accessing the perfect dimensions of the images right after clicking them isn't a possibility. It implies that sometimes you may need to crop the images to make them in accordance with the requirements.
A lot of tools, though, offer the cropping credentials, but few of them will ensure that the quality of the images remains the same. In Adobe Photoshop, you've got the professional tool to crop the image, and learning how to crop an image in Adobe Photoshop is also on the cards.
This post reveals a detailed guide to help you know how to crop an image in Photoshop, and we'll also introduce the majestic way to undo or adjust the cropped images. Plus, we'll also talk about the best alternative to Adobe Photoshop to crop the images in a better fashion and quickly.
Part 1. How to Crop an Image in Photoshop
We all know how old and classic the image editing tool Photoshop has been for quite a few years now. A lot of people just love the idea of editing images through Adobe Photoshop. Despite containing a pretty difficult user interface, more and more people are still adamant to go for this tool to crop the various dimensions of the images. It is an engaging way to crop the images during the image cropping credentials; this tool tends to maintain the overall image quality.
If you've got prior knowledge of using Adobe Photoshop, you don't have to spend any extra time cropping the images to great and prolific effects. You can look at the simple and detailed guide given below to learn how to crop images in Photoshop for multiple purposes.
Step 1: To begin with, you are required to install Adobe Photoshop and then start it afterwards.

While starting the tool, you'll need to import the photo and drag it into the timeline of Adobe Photoshop. Next, navigate to the Tool panel and then choose the Crop Tools icon.
You can also hit the keyboard shortcut key ''C''.
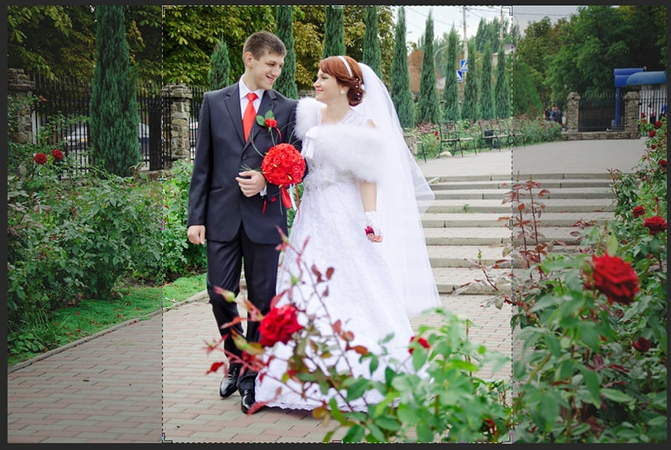
Step 2: Choose the Crop tool, and you'll be able to see the cropping border in the images.
Remember, if you've worked with the crop tool in any other image, the settings might be adjusted to the earlier settings. Thus, making any progress, you are required to reset the settings of the crop tool.

Step 3: In this phase, you'll need to select the dimensions of the images and tap on the Done button to get the desired results. In the next stage, you'll need to preview the photos and then select the Export button to download the photos to the computer.

Part 2. How to Undo or Adjust a Crop
After cropping the images, it may happen that you find the dimensions of the images incorrect. In this scenario, you could easily undo the cropping credentials you applied during the image cropping in Adobe Photoshop. The thing you must be careful of is that you undo the cropping functions prior to exporting the images, as otherwise you won't be able to undo the image cropping.
Here's the complete guide on undoing the cropping functions with the undo shortcut or History panel.
Step 1: Click on Ctrl+Z or CMD+Z on Mac, as doing so helps you to undo the cropping function you applied in Adobe Photoshop.
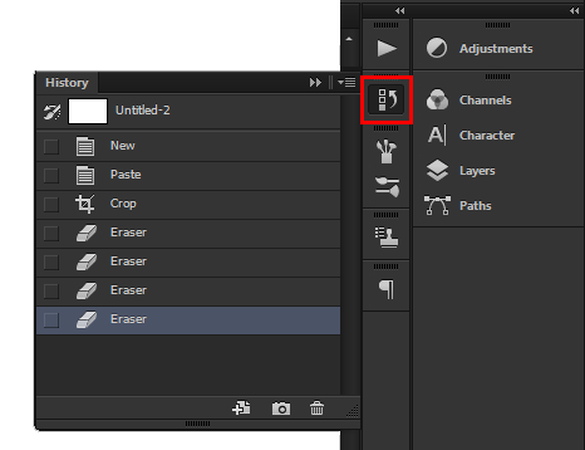
Step 2: You can also undo the cropping credentials or adjust them by going into the Windows icon and then choosing the History section. Pressing on the step before the crop was applied to restore the original images is also crucial.

Part 3. The Best Alternative to Crop Images with HitPaw FotorPea
It takes a lot of time and work to crop photos properly, even if Adobe Photoshop is one of the most prestigious methods. Thus, you've got the leverage to look at the HitPaw FotorPea that offers the powerful image cropping function that enables you to crop the images without affecting the quality of the photos.
Luckily, HitPaw FotorPea also supports batch cropping which makes it look possible to crop multiple photos simultaneously.
Apart from performing several types of image cropping functions, HitPaw FotorPea also lets you access a plenty of other image editing techniques, including adding filters to images, eliminating unwanted objects from images, or customizing the background of the photos.
Features
- Enables you to crop the images efficiently
- Crop the multiple photos simultaneously
- Works on Mac and Windows
- Retains image quality during image cropping
- Change the image cropping dimensions automatically
- Perform several outstanding image cropping credentials
- Lets you to crop multiple photos simultaneously
How to crop an image with HitPaw FotorPea?
Step 1: Visit the HitPaw FotorPea's official webpage and then install the software on the computer. After launching the tool, press on the AI Photo Editor and then upload the photo you'd like to adjust the cropping dimensions of.

Step 2: After uploading the photo, you'll need to select the Adjust button, as doing so helps you to access the cropping dimensions. You can also select from several image posting requirements of the social media platforms, including the Facebook Cover, Instagram Post, Facebook Post, and Pinterest Post.

Step 3: By pressing the Apply icon, you can implement the changes you've made to the images and then you're required to preview the images.

Step 4: If you want to download the cropped images, hit the Export icon to download the photos to computer.

Part 4. FAQs of How to Crop Image in Photoshop
Q1. What’s the shortcut key for the Crop Tool in Photoshop?
A1. The shortcut for activating the Crop tool in Adobe Photoshop is the letter ''C'' on the keyboard. After pressing the C, the crop frame is bound to automatically appear around the images. This aspect enables you to quickly make adjustments without searching through the menus. It is real time saver if you intend to perform frequent work or edits with large batches of images.
Q2. Is cropping destructive in Photoshop?
A2.
Cropping in Adobe Photoshop could be either non-destructive or destructive, depending on the settings. If the ''Delete Cropped Pixels'' is checked, any of the pixels outside the crop area will be deleted permanently. It is well known as the destructive cropping, and you won't be able to recover these parts of the images later on.
However, if you tend to leave the ''Delete Cropped Pixels'' unchecked, Photoshop tends to hide the cropped area, helping you to revert or re-adjust the crop area at any time. This thing is called non-destructive cropping as it remains the recommended method for keeping full control over the edits, especially while working on layered or profession projects.
Final Words
Knowing how to crop an image in Photoshop has become fairly simple thanks to all the steps listed in this post. Apart from introducing the cropping function, we've also listed the detailed guide to undo the cropping you've applied to the images.
In HitPaw FotorPea you've got the best way to crop the images as it lets you to adjust the cropping dimensions automatically and you'll also be able to crop multiple images simultaneously.


 HitPaw VoicePea
  HitPaw VikPea (Video Enhancer)
 HitPaw Univd (Video Converter)


Share this article:
Select the product rating:
Daniel Walker
Editor-in-Chief
This post was written by Editor Daniel Walker whose passion lies in bridging the gap between cutting-edge technology and everyday creativity. The content he created inspires the audience to embrace digital tools confidently.
View all ArticlesLeave a Comment
Create your review for HitPaw articles