How to Fix Faces In Photos? Learn All About Face Restoration
Sometimes, the face in a photo doesn't show up the way you want it to. It might look blurry, just off because of bad lighting, scratched, or show facial imperfections. That's where face restoration comes in. You can now clean up the damage, sharpen the details, and bring back the natural look with AI. It works on old photos, selfies, or even scanned prints that need a fresh touch.
Part 1. What Is Face Restoration in an Image?
When a photo doesn't do justice to the person's face, it's not always about filters or angles. Sometimes, the issue is deeper, like blurred outlines, faded textures, or random artifacts that mess with the natural look. Face restoration corrects those problems. It returns the original look of a face that got lost in a bad photo using editing methods that fix the details without altering how someone actually looked.
In most cases, face restoration applies when you deal with an image that has some spots, like pimples, on it, or is too soft. It doesn't rely on glam effects or fake beauty. It targets the flaws that shouldn't have been there in the first place. You don't try to change someone's face; just bring it back to how it appeared in the original shot.
This works well for a bunch of different photos, especially old ones that faded over time or digital ones taken in bad lighting. The whole point is to bring back realism, not chase perfection. If you're cleaning up portraits, fixing group shots, or trying to show someone's eyes and smile the way they actually looked in person, face restoration keeps the result natural. It focuses on correction instead of decoration but with amazing output.
Part 2. Common Reasons Faces Get Affected in Photos
Not every photo turns out sharp, especially when the face doesn't appear the way it should. Sometimes the camera causes it, and sometimes the moment does. A few common reasons explain why the face might lose detail in your shot.
Motion Blur or Poor Focus
When the camera moves, or the subject shifts slightly at the time of the photo, the result loses clarity. The face stretches or smears just enough that important features lose shape.
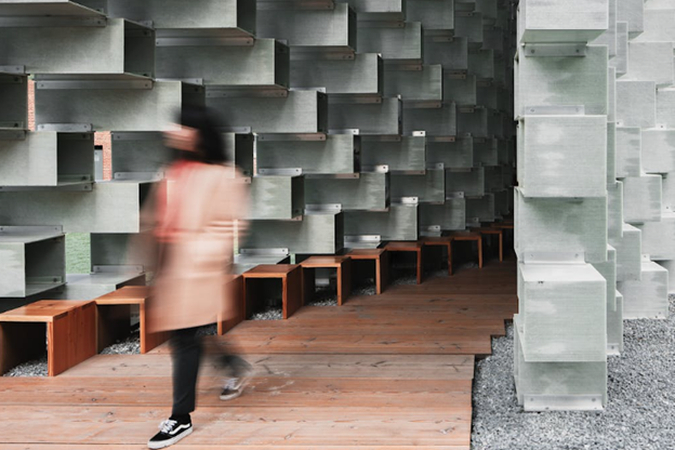
This issue affects quick shots or low-light conditions the most. Even a slight shake ruins the sharpness, and that loss affects the facial result directly.
Image Compression Artifacts
If the image is edited through apps or is saved repeatedly, compression cuts into the quality. You might notice blocky sections, blurred outlines, or unusual texture on the face. This problem doesn't start in the original image. It appears later when the file shrinks to save space or upload faster. Facial features usually take the biggest hit.
Physical Scratches or Noise in Old Photos
Printed photos wear down with time and end up with scratches, fading, or visual noise. If you scan them, it doesn't hide the marks on them. In most cases, it highlights them more.
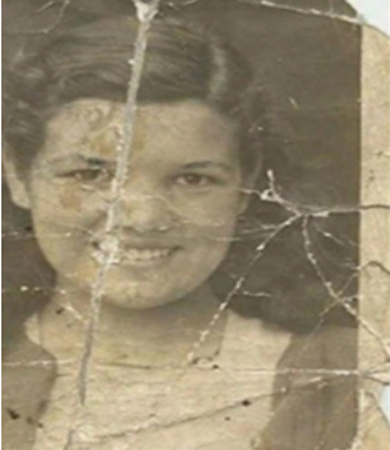
The face may show lines, dots, or streaks that didn't exist in the original. These distractions take away from the expression.
Poor Lighting or Overexposure
Excessive lighting used while capturing a photo removes detail from the face. You may notice eyes, skin, and outlines blend together in a flat tone, or a harsh shadow buries one side completely. In either of these cases, bad lighting throws off the balance and leaves the face uneven.
Part 3. Tips for Best Results in Face Restoration
Even with the right tools and a decent photo, the result can still feel off if you miss a few key things. Face restoration isn't just about fixing what's broken-it's about doing it in a way that doesn't mess with how someone actually looks. These tips help you get that balance right.
Use a High-Quality Base Image
The better the source photo, the easier it becomes to restore the face without guessing too much. If the original file already has a lot of missing parts, there's only so much any method can recover.
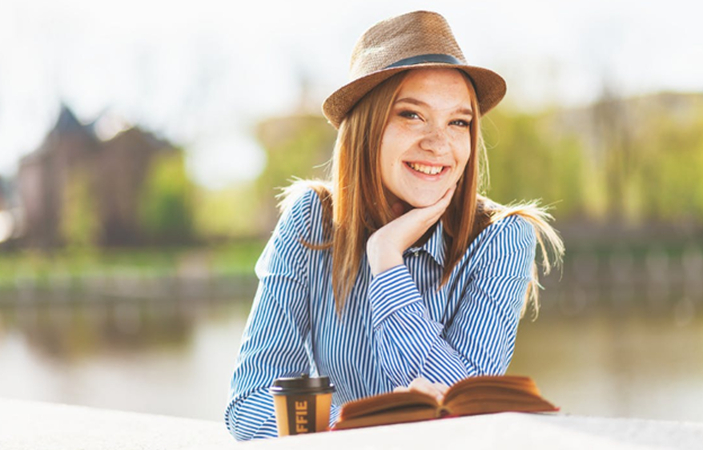
When you start with a sharp or decently lit shot, even if it's slightly damaged, the edits sit more naturally. AI face restoration tools rely on visible structure, so the more information your image contains, the more accurate the result will be.
Avoid Over-Smoothing or Plastic Effect
A common mistake is going too far with filters or enhancement tools. Over-smoothing can remove natural textures, flatten the skin, and erase small but important details. Instead of looking clear, the face ends up being artificial. Try to stop just before that point where the person's features start blending together. If pores, smile lines, or shadows vanish completely, the photo loses its human touch.
Check Results on Different Screens
Once you've restored the face, it helps to preview the result on more than one device. What looks fine on your editing screen might show weird colors or noise on another. Try viewing the image on your phone, or laptop, or even print it out. This step helps you catch things like unnatural tones, blown highlights, or areas where the face might still seem off.
Preserve Facial Details and Expression
While fixing facial flaws, keep an eye on the original expression. Eyes, eyebrows, and mouth shape say a lot, and over-editing can shift the mood completely. Small signs of age or emotion give a photo its character, so hold onto them. The goal is to clean up, not erase what makes the face recognizable.
Part 4. Ways to Restore a Face in an Image
When a face doesn't come out right in a photo, there are a few different ways to bring it back into shape. Some people go in with manual editing, while others let AI tools handle the heavy lifting. Depending on how the damage shows up, you might even combine both approaches to get a more natural outcome.
Manual Retouching and Photo Editing Apps
If you're used to working with photo editing tools or mobile apps, manual retouching gives you a hands-on way to correct facial details. You can clone over scratches, fix small blur patches, and adjust contrast or brightness manually. This approach is great when you know what you're trying to fix and where to focus. It doesn't rely on presets or filters but instead gives you direct control over each tweak you apply to the face.
Using AI Tools for Automatic Fixes
Some image editing apps include AI-based features that handle the restoration process automatically. You can upload a photo, and the system identifies parts of the face that look blurry or broken and attempts to sharpen, fill or clear those areas. This method takes less time since the tool guesses the corrections based on facial structure. It doesn't always nail every detail, but for general use, it can clean up a face enough to make it clear and recognizable again.
When to Combine Manual and AI Edits
Sometimes, you don't get the full result from just one method. If AI fixes most of the photo but leaves a few strange spots, manual retouching can step in to handle the rest. You might notice odd textures or unnatural blending in the eyes or mouth, which you can smooth out by hand.
Using both techniques back-to-back gives you the option to clean up the bulk of the face quickly and then fine-tune the parts that still look off. It works better when the photo needs precision in some areas but also benefits from automated fixes elsewhere.
Part 5. Restore Face In Your Photo Using HitPaw FotorPea
If you want to restore a face automatically with the help of AI, HitPaw FotorPea is your best bet. It doesn't just guess what to fix-it gives you control through dedicated face models that repair blurry areas, correct textures, and remove visual flaws from the subject's face. You don't have to go in and fix everything by hand. The tool identifies what looks off and brings the facial features back into shape using one of its trained models.
Whether you're dealing with a scanned old portrait or a digital selfie that didn't turn out right, this tool adapts to the face and focuses only on the areas that need work. The result stays realistic because the AI targets expressions, contours, and structure without wiping out the natural look. You just upload your photo, choose a face model, and let it run the restoration for you.
Here's how you can do it:
Step 1.To start restoring a face in your photo, download and open HitPaw FotorPea on your Windows or Mac PC. Once the app launches, look to the left-hand side and click on the Face Restoration option.

Step 2.This opens the editor where all the restoration tools live. After that, import the photo you want to repair by uploading it directly from your device. As soon as the image loads, the face model applies on its own, so you don't need to select it manually.

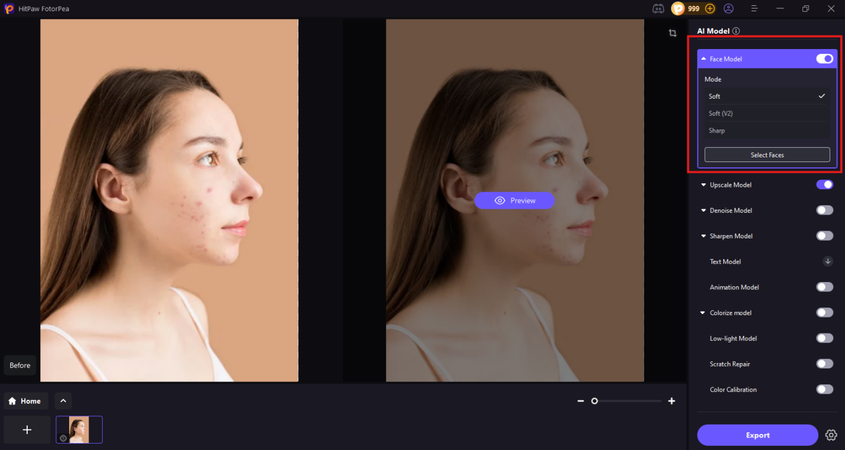
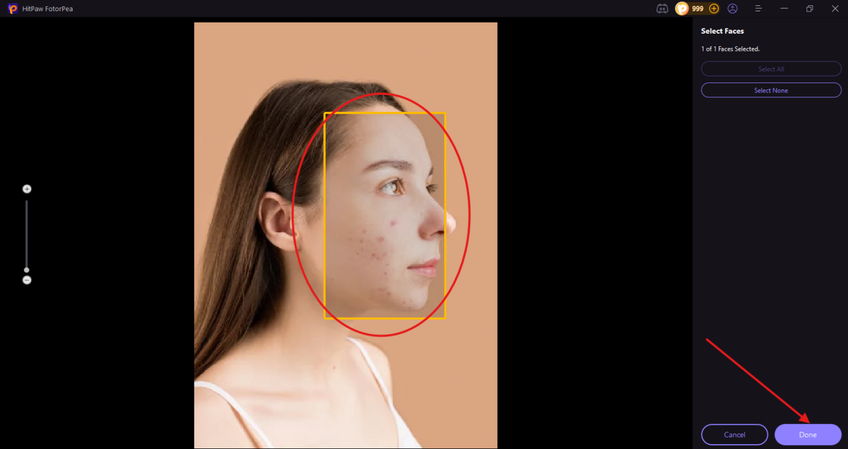
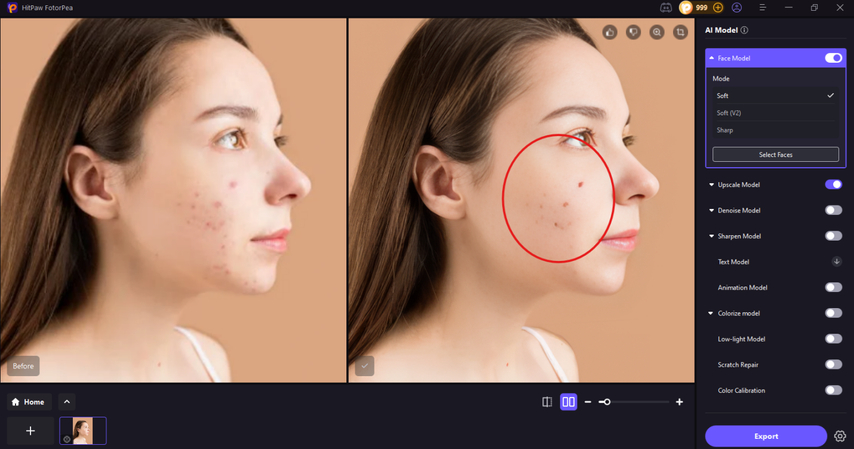
Step 3.Now that the face is detected, you can move into adjusting how the restoration effect shows up. Under the Face Model options, choose between Soft (V2) or Sharp Face Model, depending on how subtle or defined you want the changes to appear. Once you pick an option and click Select Faces, the tool lets you select one or more faces and the respective facial areas you want to restore. Next, click Done.

You can also use the Scratch Repair model to fix the photos that have lines or bends. After making your adjustments, click Preview to allow the tool to work on the face to restore it while keeping it natural.

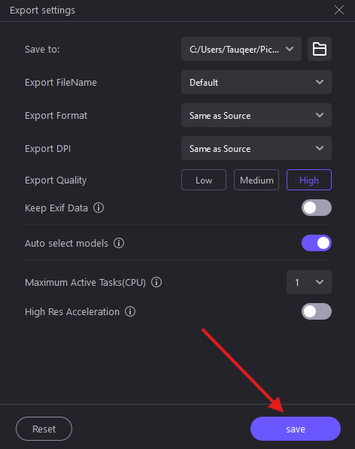
Step 4.To prepare for saving, click the settings icon next to the Export button. This opens a small panel where you can adjust things like image quality or match the file format to the original photo. You also get the option to choose whether you want the result optimized for print or for a digital copy, depending on what you plan to use it for.

Once you're happy with the outcome and export settings, click Export to save the image. HitPaw automatically sends the restored file to a local folder on your PC, so it's ready to access anytime you need it.
Part 6. FAQs of Face Restoration
Q1. What is the best face restoration model?
A1. The best face restoration model depends on the photo and the type of correction you want, but if you're looking for a quick and reliable fix, HitPaw FotorPea gives you a solid set of options. Its face restoration feature includes Soft, Soft V2, and Sharp models that target different levels of detail. You can apply one of these effects, select the area of the face that needs repair, and preview the result before saving. It gives you control without requiring deep editing skills.
Q2. Can face restoration fix low-resolution images?
A2. Face restoration can improve low-resolution images to some extent, but it depends on how much original detail remains. If the photo is heavily pixelated or lacks facial structure, most tools struggle to rebuild it accurately. However, tools like HitPaw FotorPea apply face models that detect core facial points and add clarity without changing how the face originally looked. It won't rebuild what's missing entirely, but it improves what's already there.
Conclusion on Face Restoration
In this guide, you learned about what face restoration means and how it applies to photos where the face doesn't turn out right. You also explored why a face might lose detail due to motion blur, bad lighting, compression, or aging prints. On top of that, you saw which tips matter most when aiming for the best outcome using manual edits in photo editing apps or AI tools. Both of these methods serve a different purpose, depending on the type of damage in the photo. If you want a faster solution, HitPaw FotorPea gives you a quick way to repair faces automatically.




 HitPaw Univd (Video Converter)
 HitPaw VoicePea
  HitPaw VikPea (Video Enhancer)

Share this article:
Select the product rating:
Daniel Walker
Editor-in-Chief
This post was written by Editor Daniel Walker whose passion lies in bridging the gap between cutting-edge technology and everyday creativity. The content he created inspires the audience to embrace digital tools confidently.
View all ArticlesLeave a Comment
Create your review for HitPaw articles