Google Stitch: Redefining the Efficiency Revolution of UI Design
With AI advancements each passing day, Google Chrome has introduced an AI-driven tool, "Google Stitch," in 2025 at the I/O developers' conference. This tool bridges the gap between designers and developers, making creation easier for professionals and newcomers.
Part 1. Overview of Google Stitch
If you are the one who wants to understand Google Stitch’s structure more effectively, the following guidebook will cover you:
Definition
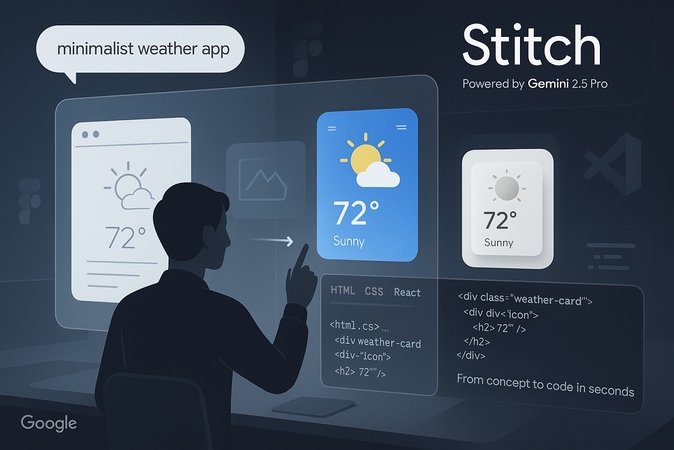
It is based on a 2.5-Pro multimodal, designed to convert your simple prompt to a complex front-end code and functional UI designs within a few minutes. This tool allows users to add a detailed prompt, including ideas like designs, colors, layouts, screenshots, and pictures for better reference. Furthermore, it creates multiple results for you to select from and allows you to alter them by giving prompts.
Core Values
Let's dive into its core values, depending on their philosophies and capabilities introduced by Google I/O 2025:
1. Accessibility: This tool is created to make UI designs and codes easily accessible to everyone, whether professionals or seasonal newcomers. It lessens the complexity of generating designs by enabling users to add a text or image prompt.
2. Efficiency: Stitch accelerates the traditional front-end code workflow process by generating the desired outcome in just minutes. This reduces the need to repeat the same process and focuses more on implementing the project faster than ever.
3. Creativity Empowerment: Instead of replacing UI designers and code developers with AI, it increases creativity by offering designers unlimited design options and allowing them to alter. This will enable them to experiment more often with their ideas to make them unique.
Development Background
The life of Google Stitch started with a different brand, Galileo AI, an independent startup that combined AI with UI designs. At that time, it was just offering text prompt input, but it gained popularity and got attention from tech giants. After acquiring it, Google added the Gemini 2.5 model and renamed it Google Stitch. After entering the AI market, it instantly competed with AI giants like Figma, MakeUI, and Vercel v0.
Part 2. Core Functions and Technical Architecture
Now that you know the basic structure of Google Stitch, here's a breakdown of its core functions and technical architecture through which it works:
Multimodal Input and Intelligent Parsing
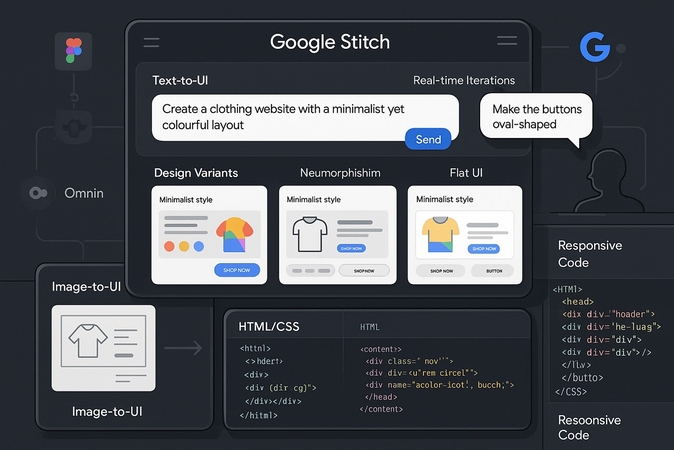
Text Input: Supports natural language descriptions, requiring structured requirements including layout, color scheme, and interaction details.
Image Input: Can recognize sketches, wireframes, competitor screenshots, etc., and convert them into high-fidelity interface designs.
Real-time Design and Code Generation
UI Design Generation: Outputs multiple design schemes within 30 seconds, supporting A/B testing-style iteration (e.g., switching between Material Design and Neumorphism styles).
Front-end Code Generation: Automatically generates HTML/CSS, React/Vue component code, supporting responsive layouts and dynamic effects.
Seamless Collaboration and Integration
Figma Linkage: Exports designs to Figma with one click, preserving layer structures for team collaboration.
Development Process Integration: Code can be directly embedded into projects or docked with enterprise design systems via plugins.
Intelligent optimization design
Version Control & History Tracking: Manages design iterations with version snapshots and comparison tools.
Intelligent Optimization: Automatically adjusts designs for cross-device compatibility and performance optimization.
User Testing Integration: Directly integrates prototype testing feedback to refine designs iteratively.
Part 3. Application Scenarios and Values
As you are now aware of its structure and core functions, if you want to know the scenarios and values of the application, then keep reading this section:
Target User Groups
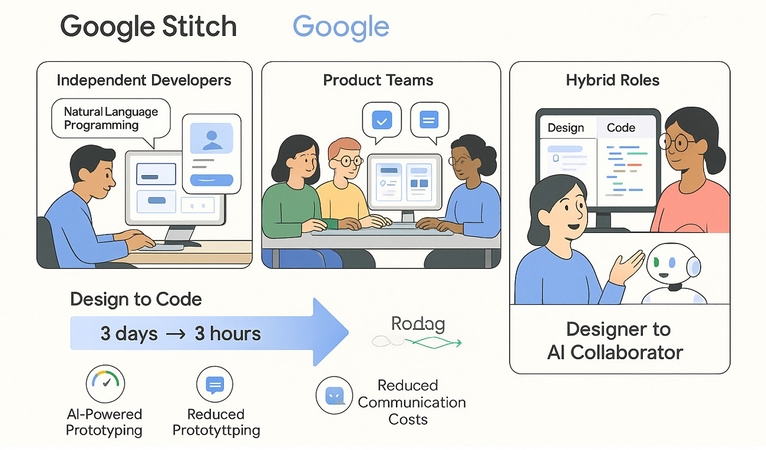
1. Independent Developers: Quickly generate MVP interfaces, reducing design barriers and costs.
2. Product Teams: Accelerate prototype development and optimize user experience through multi-solution exploration.
3. Design-Development Hybrid Roles: Reduce tool-switching frequency and enhance full-chain efficiency.
Efficiency Improvement Dimensions
1. Shortened Design-Development Cycle: The time from requirements to usable code is compressed from days to hours, reducing the cycle by over 60%.
2. Reduced Communication Costs: AI-generated intermediates minimize misunderstandings between designers and developers.
Design Paradigm Shift
1. Natural Language as Interface: Promotes using natural language as its interface, boosting non-technical stakeholders like marketers and creators to participate directly in it.
2. Designer Role Transformation: Shift from executors to requirement definers and AI collaboration optimizers.
Part 4. Usage Guidelines and Best Practices
After understanding its working and functions, if you want to use Google Stitch, the following guidebook will help you:
Standard Operating Procedure
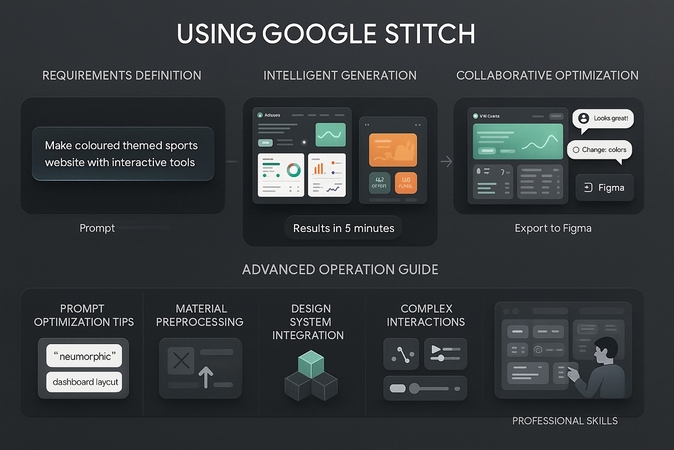
1. Requirements Definition Stage: Describe your intent clearly through your prompt. For example, use a prompt like “Make colored themed sports website with interactive tools.”
2. Intelligent Generation Stage: One can generate numerous designs in just 5 minutes by describing their format, such as web or mobile versions, including their themes and layouts.
3. Collaborative Optimization Stage: After generating the output, you can import it to Figma or GitHub and adjust the colors, typographies, and other elements further.
Advanced Operation Guide
1. Tips for Optimizing Prompt Words: Output quality relies on the prompt; the more precise and detailed it is, the better result it will generate, such as “Make a website following these instructions.”
2. Material Preprocessing Suggestions: If you are uploading hand-made sketches, then precisely add every key point, such as the location of taskbars and other elements, to get accurate results.
Professional Advanced Skills
1. Design System Integration: Users can customize their websites and designs according to the client’s guidelines, such as adding the brand’s color palettes and its themes.
2. Complex Interaction Implementation: As of now, one can add JavaScript handlers to boost interaction manually, while the upcoming 2.0 will be offering automated interactions.
Part 5. Technical Challenges and Countermeasures
When using Google Stitch to quickly generate UI prototypes, designers gradually discovered a core pain point - AI-generated image materials have a significant visual quality bottleneck. For example, animal images generated by Stitch often lose hair details, face images lack facial details and naturalness, and material details of e-commerce product images are severely distorted.
HitPaw FotorPea was created for this purpose. As a professional AI photo enhancement tool, it can accurately repair the detail defects of Stitch images: whether it is detail recovery, noise removal, resolution improvement or color optimization, one-click operation can upgrade the design draft image from "usable" to "stunning".
Key Features
- AI super-resolution enables 8K lossless upscaling, restoring microscopic details like hair and product textures.
- Intelligent denoise model precisely eliminates color blotch noise in AI-generated images while preserving valid textures.
- Face model restores biological details such as pupil reflections and skin pores, eliminating mechanical artificiality in AI portraits.
- Smart background removal supports one-click cutouts and AI-generated product backgrounds, adapting to diverse product display needs.
- Scratch restoration models and intelligent colorization achieve photo color restoration and damage repair.
Steps to Use HitPaw FotorPea
Now that you have tried to generate UI/UX designed pictures, but the outcome isn’t worthy, so follow this step-vise guide to upscale your pictures:
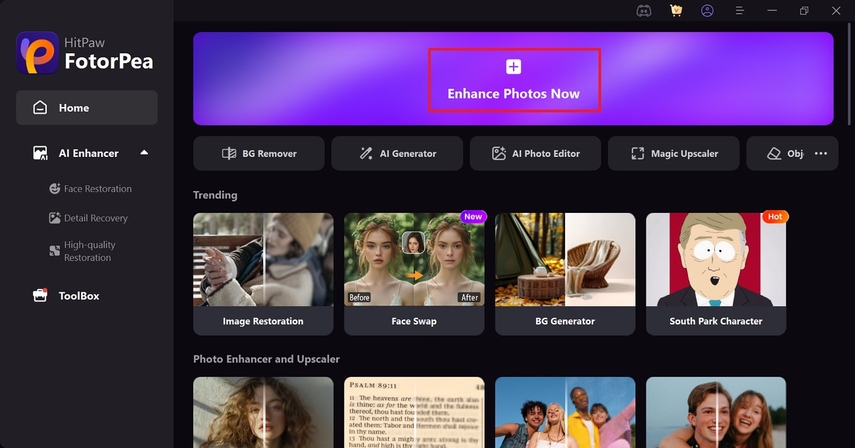
Step 1. Initiate the Platform to Enhance Photos NowAs you enter the app, choose the “+ Enhance Photos Now” button to import the required photo from your device.
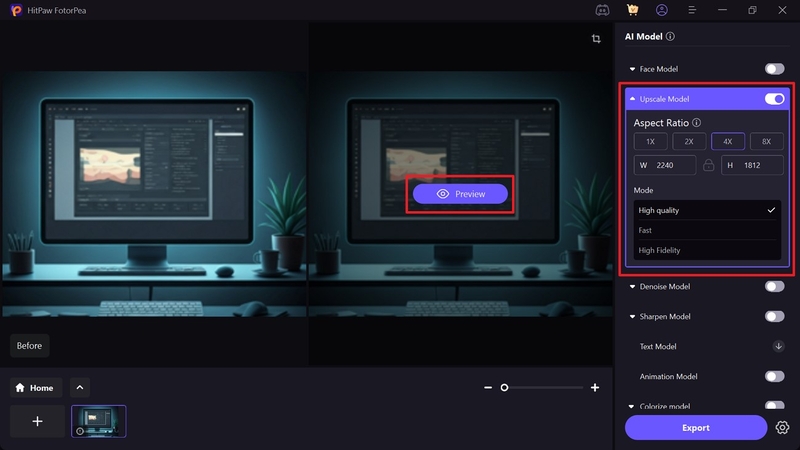
Step 2. Enable the Models by Choosing Aspect Ratios and Models
As the picture is visible on this interface, activate the “Upscale Model” by selecting its aspect ratio and “High Quality” Mode. To begin with photo enhancing by hitting the “Preview” button.
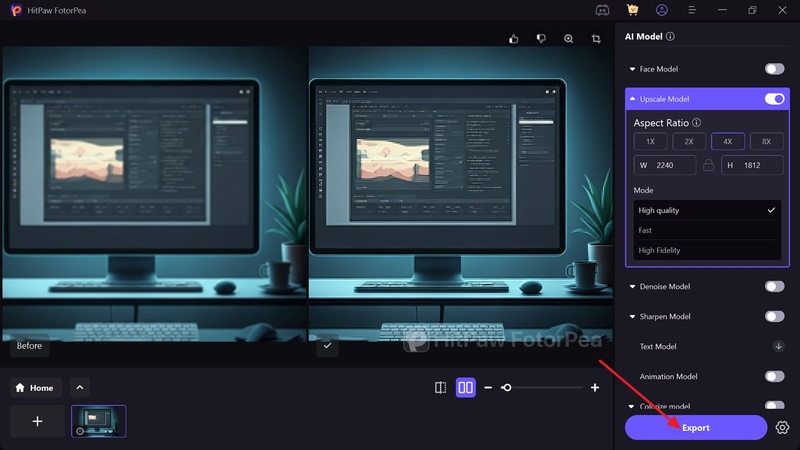
Step 3. Transfer the Upscaled Outcome to the Folder
Finally, after the pictures are upscaled, preview the comparison photos and choose the “Export” button to save them in a folder.
Conclusion
Summing up, Google Stitch is an AI-driven tool used to generate instant UI/UX designs by just giving text or photo prompts. This article covered all with its key functions, application scenarios, and tool usage guidelines, although the picture generated by AI sometimes gets pixelated. To tackle this issue, we introduced you to an upscaling tool like HitPaw FotorPea, which enhances your photos with AI models.


 HitPaw Edimakor
 HitPaw VikPea (Video Enhancer)
 HitPaw Univd (Video Converter)


Share this article:
Select the product rating:
Daniel Walker
Editor-in-Chief
This post was written by Editor Daniel Walker whose passion lies in bridging the gap between cutting-edge technology and everyday creativity. The content he created inspires the audience to embrace digital tools confidently.
View all ArticlesLeave a Comment
Create your review for HitPaw articles