VLC Snapshots: Capture Perfect Video Frames in Seconds
Capturing a perfect still from a video can elevate your presentations, tutorials, or social media posts yet many overlook VLC's powerful snapshot features. If you've ever paused a movie to grab a candid moment, you know how frustrating fumbling for print-screen can be. VLC media player snapshot tools let you instantly take screenshot VLC frames at full resolution, embed precise metadata, and store them in custom folders. In this guide, you'll learn multiple methods from VLC screenshot shortcut hotkeys to menu options and advanced controls, so you can effortlessly take a snapshot in VLC every time.
Part 1. How to Take a Snapshot in VLC?
Before diving into specific methods, it's helpful to understand why VLC player snapshot features stand out. Unlike generic print-screen tools, VLC snapshots preserve original video quality, maintain aspect ratio, and embed timestamp data. Whether you're documenting key moments or creating tutorials, knowing how to take a snapshot in VLC ensures crisp, high-fidelity images without external software.
Solution 1: Screenshot in VLC with Hotkeys
Using a VLC snapshot hotkey is the fastest way to capture an exact frame without interrupting playback. Hotkeys are ideal for seizing split-second expressions or action scenes, and they work across Windows, Mac, and Linux. Once memorized, these shortcuts let you take a snapshot in VLC with no more effort than a quick keypress.
- For Windows users: Press Shift + S to grab a certain frame
- For Mac users: Press Command + ALT + S
- For Linux users: Hit the Ctrl + ALT + S keys on the keyboard
Solution 2: Capture Video Frame in VLC with Menu
If you prefer a visual approach over keystrokes, VLC media player snapshot via the menu offers a clear, guided way to capture frames. This method is perfect for users who like navigating toolbars and dropdowns, and it shows exactly where VLC take snapshot functions reside, making it easy to teach or document for others.
1.Open VLC Media Player and begin playing your chosen video.
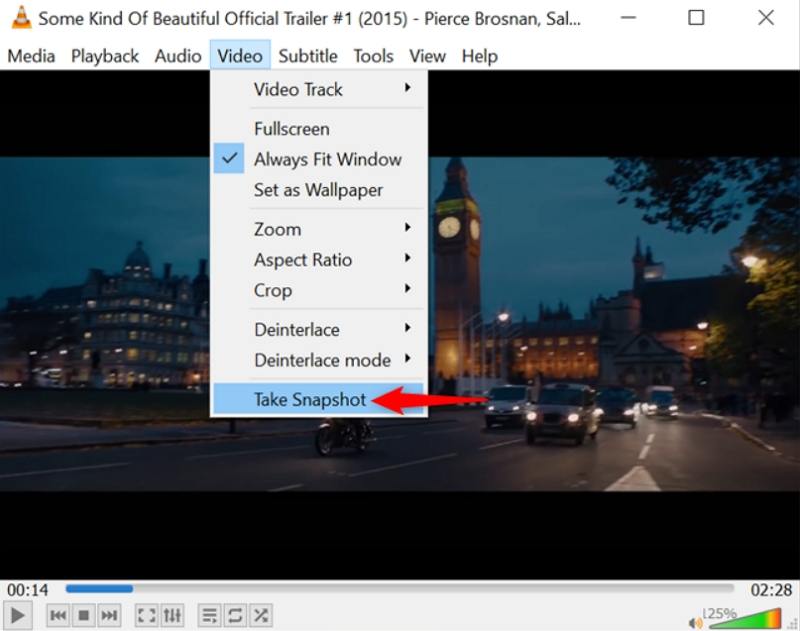
2.When you reach the moment you want to save, click Video in the top toolbar.
3.Select Snapshot from the drop-down menu to take a screenshot in VLC.

4.A thumbnail notification and the snapshot's save path will briefly appear on screen.
Solution 3: Snapshot VLC with Advanced Controls
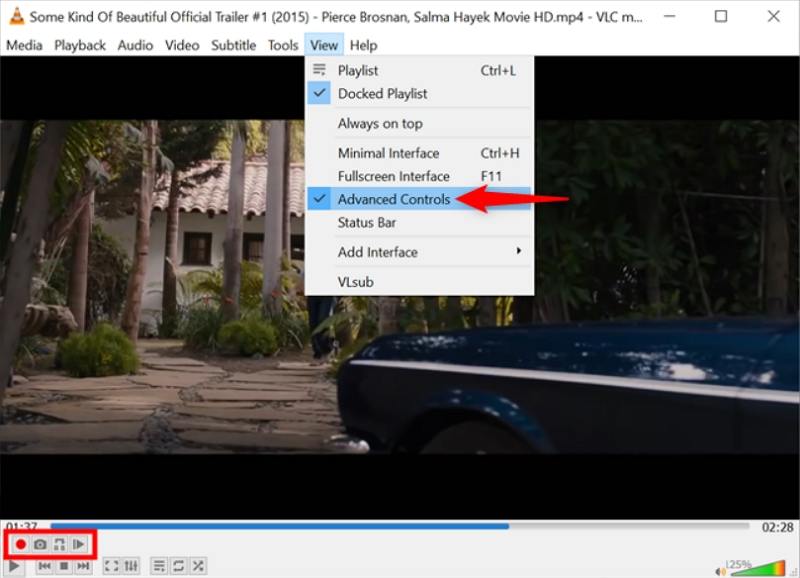
For those who want a dedicated on-screen button, VLC's advanced controls include a snapshot camera icon right on the playback interface. Enabling this option adds extra buttons like playback, record, and snapshot at the bottom, giving you one-click access to VLC take a snapshot anywhere, anytime.
1.While your video is playing, go to View > Advanced Controls to reveal extra controls.

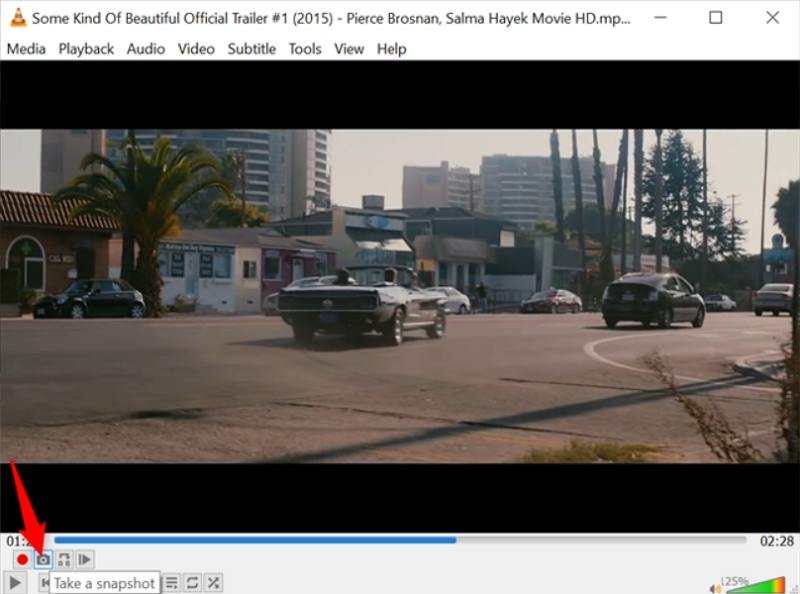
2.Click the camera-icon Snapshot button in the new control bar to instantly save the current frame.

Part 2. Where Does VLC Save Snapshots on Windows and Mac
After capturing a scene, you'll want to know where VLC player snapshot images live. By default, VLC media player snapshot files are sent to your system's Pictures folderbut the exact location depends on your operating system. Knowing the path lets you quickly locate, organize, and share your screenshots.
Default Snapshot Locations:
- Windows: C:\Users\<YourUsername>\Pictures\
- Mac: /Users/<YourUsername>/Pictures/
Part 3. How to Change the Default Snapshot Save Location in VLC
If you prefer to direct all your VLC snapshots into a project-specific folder, a tutorial assets directory or a shared drive, you can override the default save path. Customizing the VLC take snapshot location streamlines your workflow and keeps images organized exactly where you need them.
1.Open VLC and navigate to Tools > Preferences (or press Ctrl + P).
2.At the bottom-left corner, switch from Simple to All settings.
3.In the left-hand menu, scroll down to Video.
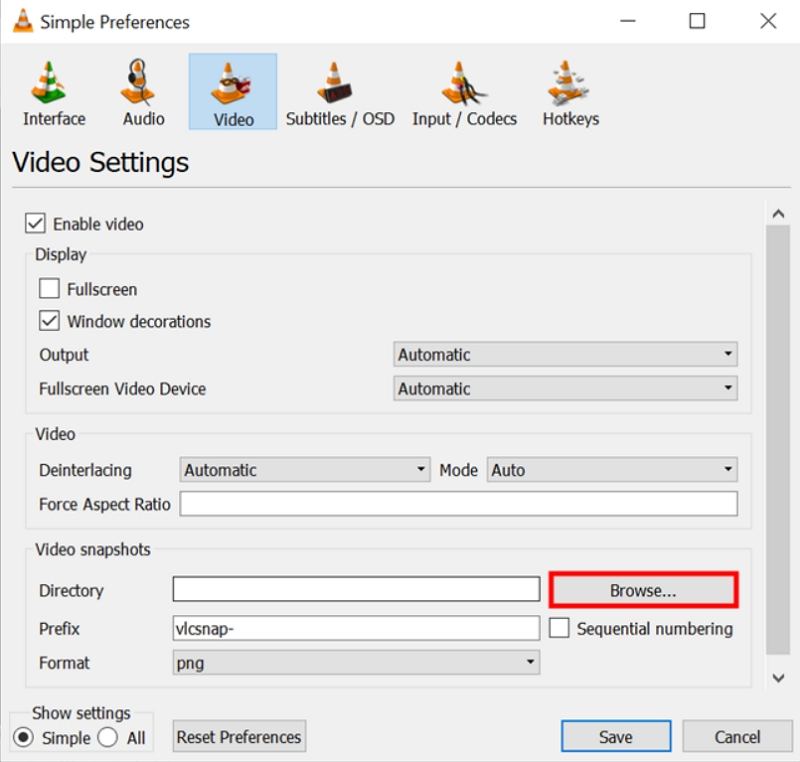
4.Under Video snapshots, locate the Directory field.
5.Click Browse, pick your preferred folder, and confirm.

6.Click Save to apply the change, now every snapshot in VLC goes directly to your chosen directory.
Part 4. VLC Snapshot Not Working, How to Fix?
Occasionally, the VLC take snapshot feature might stop responding due to system conflicts or misconfigurations. Whether you find no thumbnail appearing or nothing saves to disk, these troubleshooting tips cover the most common VLC snapshot not working issues, so you can get back to capturing frames without reinstalling.
1.Check Hotkey Conflicts: Ensure no other app is intercepting Shift+S, ⌘+⌥+S, or Ctrl+⌥+S.
2.Verify Permissions: On macOS, grant VLC full disk access under System Preferences > Security & Privacy.
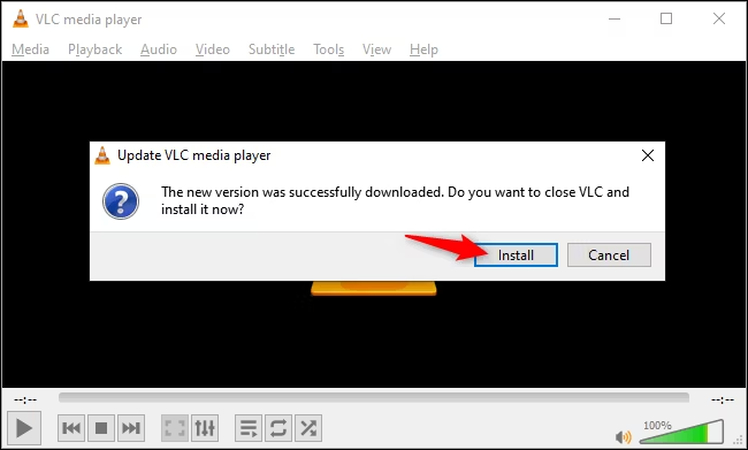
3.Update VLC: Download the latest VLC media player version to fix known bugs.

4.Reset Preferences: Go to Tools > Preferences and click Reset Preferences, then restart VLC.
5.Run as Administrator: On Windows, right-click VLC and choose Run as administrator to avoid folder permission issues.
6.Change Snapshot Format: In Tools > Preferences > Video, confirm snapshot format (PNG or JPEG) is supported by your system.
Further Reading: Best VLC Alternative to Convert Videos
While VLC player snapshot tools excel at capturing stills, you may need a more robust solution for batch video conversion and editing. HitPaw Univd combines fast, high-quality conversion with intuitive editing features, ideal for content creators who want more than just snapshots. Explore why Univd is the go-to VLC alternative for transforming, trimming, and enhancing videos.
- Batch convert multiple videos at lightning-fast speeds
- Preserve original quality and embedded metadata
- Trim, crop, and merge clips with built-in editor
- Support for over 500 formats including MP4, MOV, MKV
- GPU acceleration for ultra-fast processing
- Customizable output: adjust resolution, frame rate, bitrate
Step 1.Get HitPaw Univd, open it, and go to the Converter tab. Click Add Video to import your file.

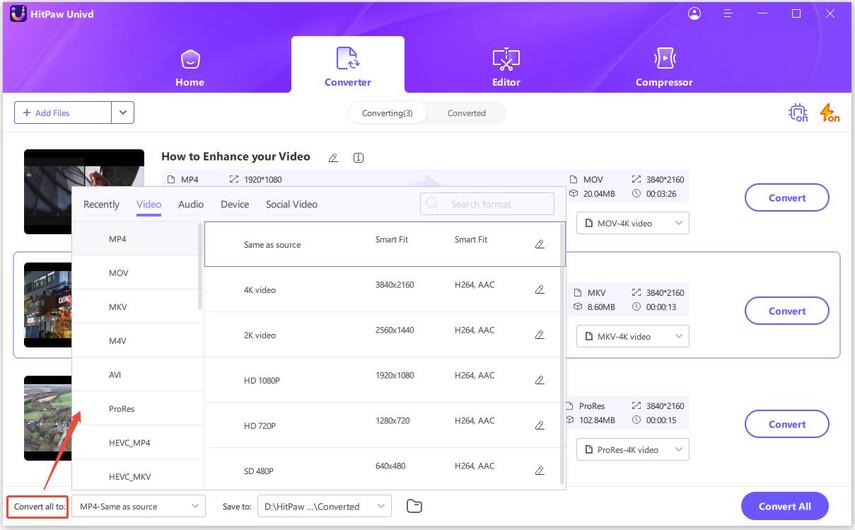
Step 2.Click Convert All to, choose your desired format. Click the edit (pencil) icon next to your chosen format, set frame rate, resolution (e.g., 1080p), and other parameters.

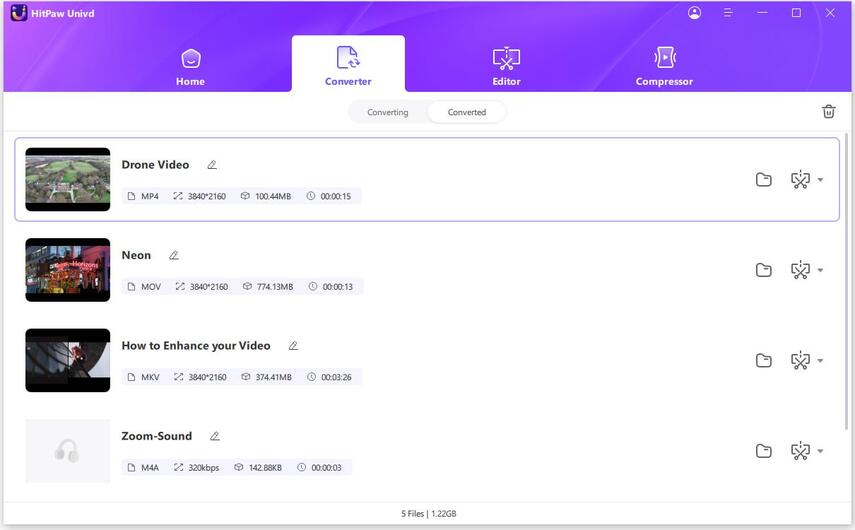
Step 3.Press Convert All, then find your converted videos under the Converted tab.

Conclusion
Whether you need a quick VLC screenshot shortcut or a full editor for batch conversion, these tools put you in control of your footage. From hotkeys and menu commands to advanced controls, mastering how to take a snapshot in VLC ensures you capture every detail in perfect quality. And when you're ready for more extensive video editing, consider HitPaw Univd as your powerful VLC alternative combining speed, versatility, and ease of use in one seamless package.





 HitPaw VoicePea
  HitPaw VikPea (Video Enhancer)
 HitPaw FotorPea



Share this article:
Select the product rating:
Daniel Walker
Editor-in-Chief
This post was written by Editor Daniel Walker whose passion lies in bridging the gap between cutting-edge technology and everyday creativity. The content he created inspires the audience to embrace digital tools confidently.
View all ArticlesLeave a Comment
Create your review for HitPaw articles