


Everything You Need to Know About Valorant Error Code Van 79
Valorant is a popular shooter video game created by Riot Games. It is a free-to-play game where you can do various things, such as spray patterns, access the buy menu, shoot people, and more. Since this game is famous, it also has some issues, such as Valorant Error Code VAN 79. Many people find this error frustrating as it disturbs their gameplay. If you are also getting the same error on your screen, don't worry, below we have mentioned the top methods to resolve this issue.
Part 1: What is Valorant Error Code VAN 79?
VAN-79 is an error that occurs when Valorant is unable to connect with Riot Vanguard. There could be many reasons for it, such as software conflicts, outdated drivers, server down, and more. This is an annoying error because it prevents you from launching the game or connecting to the server. However, the good news is that you can easily fix the Valorant error code VAN 79 by following a few simple techniques.
Part 2: How to Fix Valorant Error Code Van 79
If you have encountered a connection error commonly known as VAN-79 and it's stopping you from using the game, this section is for you. Below, we have discussed the top methods that you can use to resolve this error in no time. Let's try these ways to see which will work for you.
1. Restart Your Game and Computer

Rebooting your PC can easily resolve all common errors, including Valorant error code VAN 79. Once you are done, re-launch your game to see if the issue is resolved.
2. Reinstall Riot Vanguard
After rebooting your PC, if the issue is still there, it means the issue is with Riot Vanguard, which is an anti-cheat software. We suggest reinstalling it to fix the issue. Here is how you can do that.
- Go to the Control Panel or Settings menu.
- Look for the Riot Vanguard program and click the uninstall option. You can also use the following command to delete the program.
- -sc delete vgc
-sc delete vgk - Once it is uninstalled, launch your Valorant game. Launching the game will automatically reinstall the program.
Hopefully, reinstalling Riot Vanguard will resolve Valorant error code van -79. If the error is still there, then it is not a connection issue, so try other methods, such as updating drivers, checking the firewall, etc.
3. Update Windows and All Your Drivers
Sometimes updating your Windows and Drivers can also resolve all your errors. If you haven't updated Windows for a long time, this is the right time to do that. Below, we have discussed how to update Windows and Drivers.
- Windows: Open Settings and visit Windows Update. Now, click the "Check for Updates". If there are any updates available, download them and restart your PC.
- Drivers: Press Win+X and choose Device Manager. Look for the Network adapters section and click on the network adapter. From there, choose Update Driver. Now, look for the Drivers that you want to update.
4. Reset Network
Resetting your network is an ideal way to clear all the old configuration, network settings, and more. In fact, resetting your network also helps to resolve numerous issues related to games. If Valorant error code van -79 still annoys you, then you should definitely reset your network. Here is how you can do that.
- Press Win + I to open your Settings and look for the Network & Internet option
- Scroll down a bit and search for the "Advanced Network Settings" option.
- You will see the "Network Reset" button, so click it and choose the "Reset" button.
- Confirm the process, and your PC will automatically restart after a few minutes.
5. Check Your Riot Vanguard Service
Sometimes, you encounter a Van 79 error on your screen because of a slow Riot Vanguard Service. We recommend cross-checking Riot Vanguard Service to see if it's running or not. Here are the steps that you can follow to check it.
- First, open your CMD on your PC and type services-msc.
- Look for vgc and click it.
- If the service is not working and shows a "Stop" status, click the "Start" button.
- After that, choose the Automatic option and click the "Apply" button.
- Repeat the steps to open Virtual Disk.
- Again, open your command prompt and run the following commands
-bcdedit.exe /set testsigning off
-bcdedit.exe /set nointegritychecks off - Launch Valorant again and go to the Profile section and look for the "TWO-FACTOR AUTHENTICATION" option.
- Log out from all the devices and click "Confirm."
6. Contact Riot Support
If the above methods didn't work for you, the only solution left is to contact Riot Support. You can contact them and ask them about the error. Hopefully, they will resolve your issue within 24 hours.
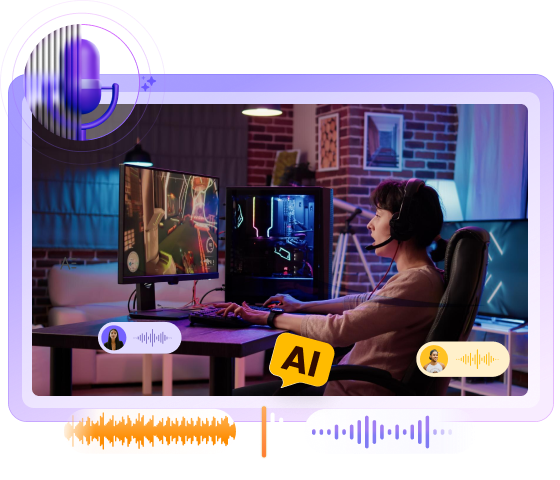
Part 3: Bonus Tip: Best Valorant Voice Changer- HitPaw VoicePea
If you are looking for the best real-time voice changer for Valorant, HitPaw VoicePea is a great pick. It is an all-in-one voice changer that allows you to change voices in the game. It has a straightforward interface and works seamlessly across all your devices. What's more, it offers around 300+ voices that you can try while playing games online. What's more, you can use its soundboard and try different effects with other platforms, such as Twitch, Discord, Zoom, etc.
Key Features of HitPaw VoicePea
- Real-Time Voice Changer: You can use this software to change voice while playing games and streaming as well. It allows you to change voices in Discord and Twitch as well.
- Soundboard: You can use the soundboard to try different AI voices. It also offers shortcuts for the most used sound effects.
- Noise Reduction Feature: Are you frustrated because of unwanted noise in your videos? Don't worry because HitPaw VoicePea allows you to adjust your noise reduction settings according to your requirements.
- Straightforward Interface: The tool offers a simple and easy-to-use interface, so anyone with less experience can easily use it.
- Compatible: This software can be downloaded on both Windows and macOS.


How to Create Voice for Valorant Using HitPaw VoicePea
Step 1: Choose Input & Output Devices
Go to "Settings", click the drop-down menu, and select the microphone and headphones you're using to match your Valorant in-game voice chat.
Step 2: Select Voice and Sound Effects
Choose your favorite voice effect-like a robotic warrior, anime character, or secret agent. Click to apply and your voice will instantly transform in-game!
Step 3: Adjust Global Settings
Turn on "Voice Changer" and "Hear myself", then speak into your mic to test your voice. If the environment is noisy, click the "speaker icon" to enable noise reduction-but don't set it too high or it might cut off your voice.
Step 4: Fine-Tune Your Voice Settings
Once you've picked your sound effect, hover over the cartoon avatar to open advanced settings. Adjust pitch, speed, or tone to make your in-game voice truly stand out!
Conclusion
Valorant Error Code VAN-79 is a common error that can be frustrating. But by using the above method, you can easily resolve this issue in no time. Moreover, if you want to use an AI voice for your game, you can try HitPaw VoicePea. It is a user-friendly software that offers numerous AI voices for gaming and streaming purposes. You can also try their free trial to check the features.
 HitPaw Univd (Video Converter)
 HitPaw VikPea (Video Enhancer)
 HitPaw FotorPea


Share this article:
Select the product rating:
Daniel Walker
Editor-in-Chief
This post was written by Editor Daniel Walker whose passion lies in bridging the gap between cutting-edge technology and everyday creativity. The content he created inspires the audience to embrace digital tools confidently.
View all ArticlesLeave a Comment
Create your review for HitPaw articles