How to Post Landscape Photos on Instagram: The Ultimate Guide
Instagram is one of the most used platforms to share photos with friends, followers and the public. However, posting horizontal images can be frustrating. Instagram is often trimmed sideways in order to match the horizontal photo to your preferred format, and the way the image looks may change. Important parts of the scene may be cut or resized, which may affect the final finish. You are not the only one that has happened. This guide introduces how to post landscape photos on instagram without trimming landscape photos or dropping image quality.
Part 1: Instagram's Default Photo Sizes: Including Landscape Photos
When sharing photos on Instagram, it's important to know how the platform handles different image sizes. Instagram supports square, vertical and horizontal formats, but still prefers specific ratios. If the photos do not match these ratios, Instagram may crop or resize automatically. This leads to loss of detail, especially in wide landscape photographs.
Landscape, Square, and Portrait Format Ratios
Instagram mainly supports three formats:
- Square (1:1): is the original format of Instagram. Still common and safe.
- Portrait (4:5): Vertical. High screen occupancy, often used in vertical photos.
- Horizontal length (1.91: 1): wider than vertical length. Ideal for wide view of nature, cityscape, travel etc.
How Instagram Auto-Crops or Resizes Uploads?
When you know how to post multiple landscape photos on Instagram that do not match the ratio of Instagram, the app attempts to resize and trim. In the case of horizontal photos, Instagram often zooms in or cuts out the side to match the image to a square or vertical format. Therefore, the details may be lost or the framing may become strange.
Recommended Size for Posting Horizontal Images
To stay sharp and clear, here are the best sizes for Instagram landscape photos:
- Image size: 1080 × 566 pixels
- Aspect Ratio: 1.91: 1
Before uploading, make sure the photo matches this ratio. By doing this, most trimming problems can be avoided and images can be kept clear.
Part 2: 3 Ways to Prepare Landscape Photos for Instagram Posting
You can save time and effort by preparing horizontal photos before posting on Instagram. Since Instagram prefers a vertical format, the horizontal image often does not fit well. If you upload it as it is, part of the photo may be cut. Therefore, it is helpful to prepare photos in a way suitable for the Instagram layout.
1. Add Borders to Fit the 4:5 Ratio
If the photo is too wide, you can place it on a 4:5 canvas (1080 x 1350 pixels) and add a white or black border around it. By doing this, you can display the entire photo within the tolerance ratio of Instagram.
- How do you do that?
- Use Canva, InShot, Snapseed, etc.
- Select 4:5 layout
- Place horizontal photos in the center
- Export and upload to Instagram
This method is ideal if you want to leave your photos full without cropping and also fit your Instagram feed.
2. Use Instagram's Built-In Resize Option
Instagram has a button to resize while uploading. After selecting a photo from the gallery, tap the Recise icon (two arrows) at the bottom left of the preview. You can now fully fit the horizontal image in the post.
But be careful:
- The image may be compressed.
- By default, the background is black.
3. Convert Landscape to Square Layout with Apps
If you want to post a square image with almost no scenery left, you can use the app to square landscape photos with smart trimming.
Try the following tools:
- No cropping
- Square Fit Photo Editor
- Instant Size
With these apps, you can adjust the padding, zoom, and border to make a square-compatible photo with almost the original view.
Part 3: Bonus Tip - Improve Landscape Photo Quality Before Posting on Instagram
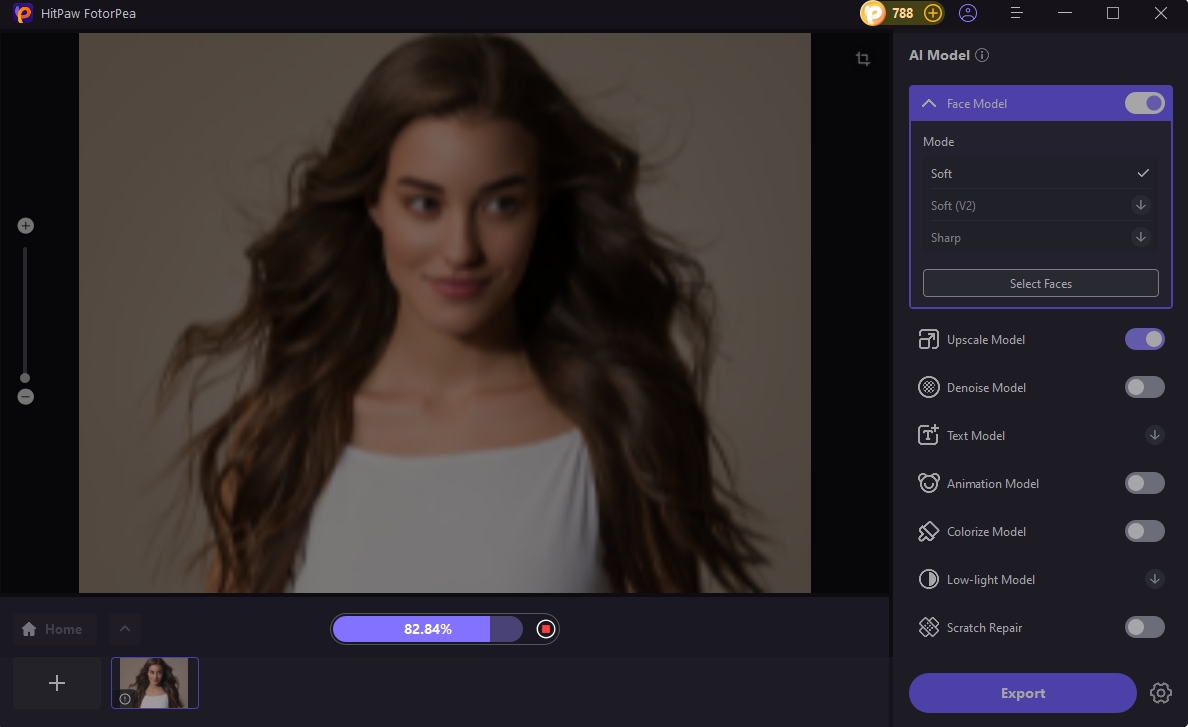
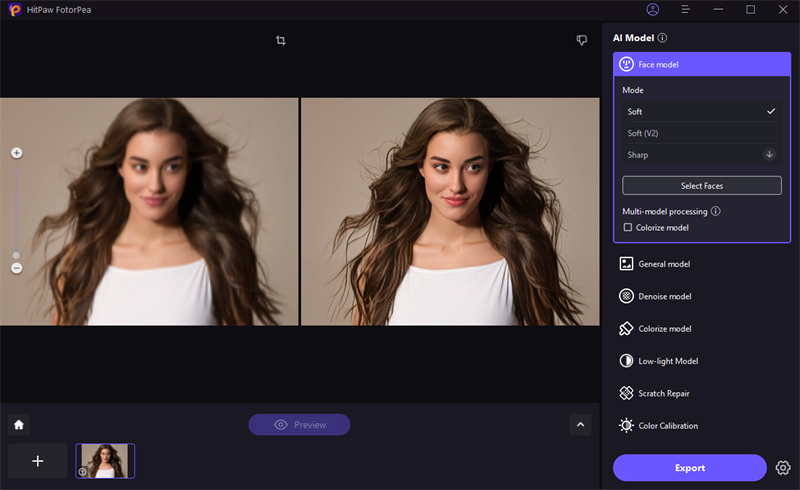
HitPaw FotorPea is a useful tool for those who want to post landscape photos on Instagram without losing quality. Sharpness is adjusted, color is modified, and the blur is reduced to improve the clarity of the photo. Learn how to post landscape photos on Instagram will be clean and fresh. No editing skills required, please upload the image and leave it to the tool. In particular, it is useful when the photograph looks dull or unclear after resizing. By using HitPaw FotorPe before posting, you can create a clear photo on Instagram while leaving a full view of the landscape.
Key Features of FotorPea to Enhance Photos:
- Top AI photo enhancers for Windows and Mac.
- Boost image quality instantly with a 16K photo enhancer.
- Quickly blur photos and eliminate noise with ease.
- Enlarge and sharpen images while keeping quality intact.
- DeepSeek's AI image generator unlocks advanced creative possibilities.
How to Use FotorPea to Enhance Photo Quality:
Step 1: Install HitPaw FotorPea
Download the installer from the HitPaw FotorPea official website and finish installation following the setup wizard.
Step 2: Upload an Image
Click on "Enhance Photos Now" and choose an image file (PNG, JPG, JPEG, WEBP, or TIFF).

Tip: Use built-in samples to test enhancements quickly.
Step 3: Apply AI Model
Tap Preview to initiate processing. Choose from 9 different AI models to suit your image type.

Step 4: Download the Output
When the enhancement looks good, press Export to save the file.

FAQs About How to Post Landscape Photos on Instagram
Q1. Does Instagram compress horizontal images when uploading?
A1. Yes, Instagram compresses all photos. Horizontal photos are no exception. Therefore, it is recommended to resize to the correct size (1080 x 566 pixels) before uploading.
Q2. Can I post wide landscape photos without cropping on Reels or Stories?
A2. It is not. Reels and stories use vertical (9:16) format. Horizontal photos can be trimmed or large spaces. If you still want to share landscape photos, add them to your canvas using apps like Canva and InShot.
Q3. How do I stop Instagram from auto-cropping my post?
A3. Please use the Zoom out button when uploading. If the image still does not fit, add a frame or resize the image according to Instagram's allowable size. Be sure to preview before posting.
Conclusion
Learning how to post landscape photos on Instagram doesn't have to be frustrating. If you protect the right size (1080 × 566 pixels), add a frame or resize the image using the tool, and avoid common mistakes such as uploading large files or blurry screenshots, you will get much better results. Don't forget to check what your post looks like on both your feed and profile grids. To get the best image quality, go to FP Photo Enhancer before posting. This helps keep your landscape sharp and clean to stand out.


 HitPaw Univd (Video Converter)
 HitPaw VoicePea
  HitPaw VikPea (Video Enhancer)
![[4 Solutions] How To View One-Time Photo in WhatsApp Again:](https://images.hitpaw.com/topics/photo-enhancer-tips/view-one-time-photo-again.jpg)


Share this article:
Select the product rating:
Daniel Walker
Editor-in-Chief
This post was written by Editor Daniel Walker whose passion lies in bridging the gap between cutting-edge technology and everyday creativity. The content he created inspires the audience to embrace digital tools confidently.
View all ArticlesLeave a Comment
Create your review for HitPaw articles