What Is the Panning Technique in Photography and How to Master It
Panning is one of the most exciting and creative techniques in photography, where the photographer attempts to capture movement that feels alive. In this photography method, the subject remains sharp. At the same time, the background becomes blurry, creating a sense of speed and action in a single frame. Capturing such shots may sound tricky at first, but it is actually easy to learn and fun to do.
Wondering how? In this article, we will discover what panning is and how you can master the panning shots. Besides this, we will explore the Panning technique in photography, common challenges in panning photography, and how to enhance your photos afterward using HitPaw Fotorpea.
So let's get started:
Part 1. What Is Panning Photography?
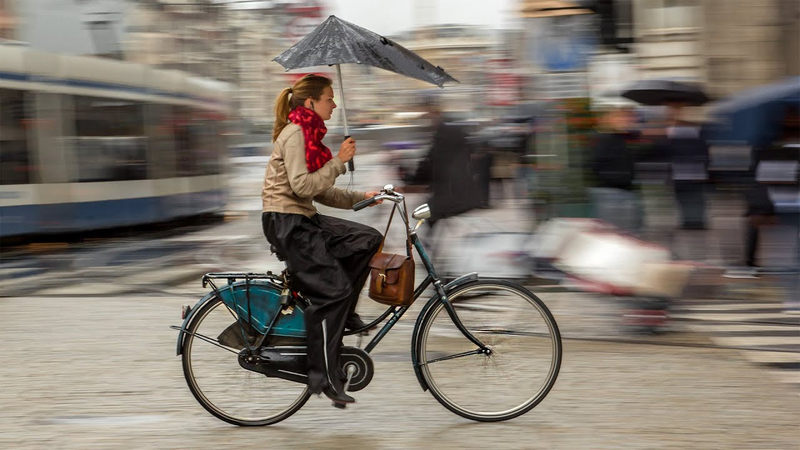
Have you ever considered capturing a moving train or a car passing by? Well, this is actually a panning photograph. In this photography technique, you move your camera along the moving subject while taking the photo. This means, instead of keeping your camera still, you follow the subject's direction of motion. As a result, your subject remains sharp, but the background appears blurred. This blur gives your image a sense of speed and direction.
Imagine you're photographing a car as it passes by. As you press the shutter, you smoothly move your camera in the same direction as the car. When done right, the vehicle will appear clear and crisp, while everything behind it will seem to flow as soft, flowing lines. That's the magic of panning!
When does panning work best?
- Moving vehicles like cars, trains, or bikes
- Runners, cyclists, or skaters
- Sports such as soccer, tennis, or horse racing
- Wildlife, including birds in flight or animals on the run
Part 2. Camera Settings & Gear for Panning
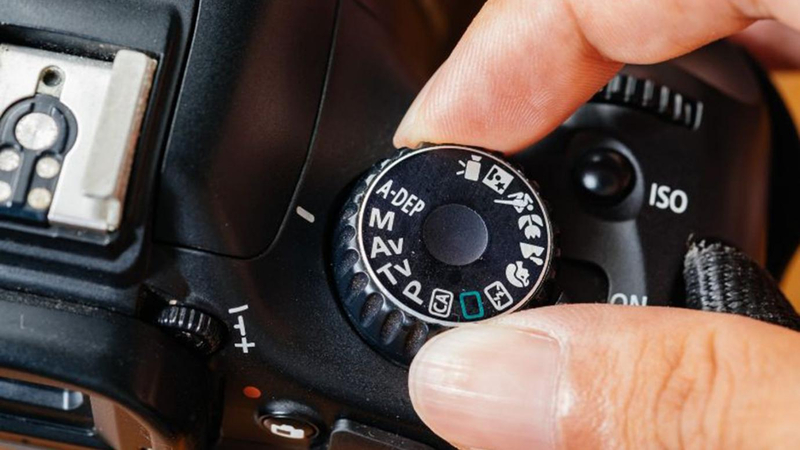
To capture a smooth panning shot, getting the right camera settings is crucial. Here are a few steps that will ensure your panning photography looks its best:
- Shutter Speed:
- Aperture & ISO:
- Continuous Autofocus (AI Servo/AF-C):
- Lenses:
- Stabilization:
- Burst Mode:
Set your shutter speed between 1/30 and 1/125 of a second. The simple rule for shutter speed is that the faster the subject is, the faster the shutter speed should be, but still slower than the subject to create motion blur. The slower shutter speed will allow motion blur in the background as you move the camera with the subject.
Aperture and ISO are equally important, as they help you balance the exposure. When you slow the shutter speed, more light enters the camera, so you need a smaller aperture to avoid overexposure. Generally, a smaller aperture (higher f-number, like f/8, f/11, or f/16) will help you keep more of the moving subject in focus. For ISO, make sure to use between 100 and 200 to reduce noise and keep the image clean.
Always use continuous autofocus, as this automatically adjusts the focus distance with your pan and keeps your subject sharp even as it moves toward, away from, or across your frame.
Lenses are critical, as they determine how much motion blur you can get. Additionally, to track your subject and maintain a sharp focus, lenses play a crucial role. Therefore, make sure to use a medium telephoto lens (50-200 mm) with image stabilization in panning mode (Mode 2).
Do not forget to use a tripod or monopod to steady your pan. However, handheld shots also work, but for that, you need to do a lot of practice.
Burst mode, also known as continuous shooting mode, is highly recommended for panning photography because it enables your camera to capture several frames per second while you hold down the shutter button. This will make it easier for you to capture that perfect shot, where the subject is sharp and the background is beautifully blurred.
Part 3. Step-by-Step Guide: How to Do a Panning Shot
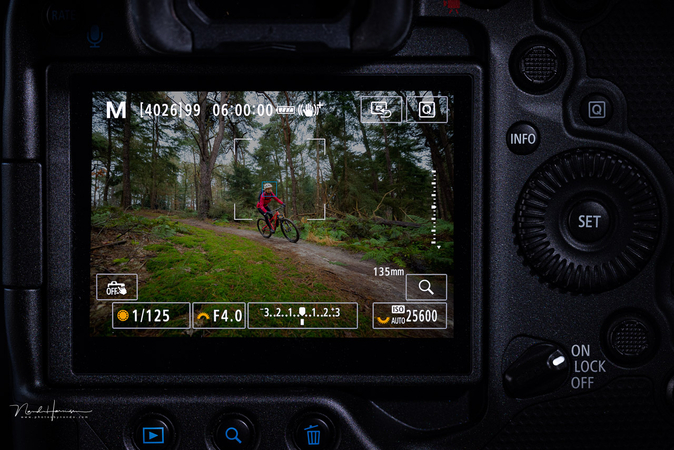
If you're new to panning photography, follow these steps like a tutorial:
- Choose the right subject—pick something predictable, like a car or a runner.
- Switch to Shutter Priority (S/Tv) or Manual Mode—This gives you control over shutter speed.
- Lock or Track Focus—Use continuous autofocus to keep the subject sharp.
- Start Moving Before Pressing the Shutter—Begin following your subject smoothly with your camera before you click.
- Shoot and Follow Through – Press the shutter, but continue moving your camera in the same direction until the subject exits the frame.
- Review and Adjust—Check results and fine-tune shutter speed or angle.
This process may feel tricky or awkward at first, but remember, it's all about practice. With practice, you will achieve smoother movements quickly.
Part 4. Tips & Techniques to Improve Panning
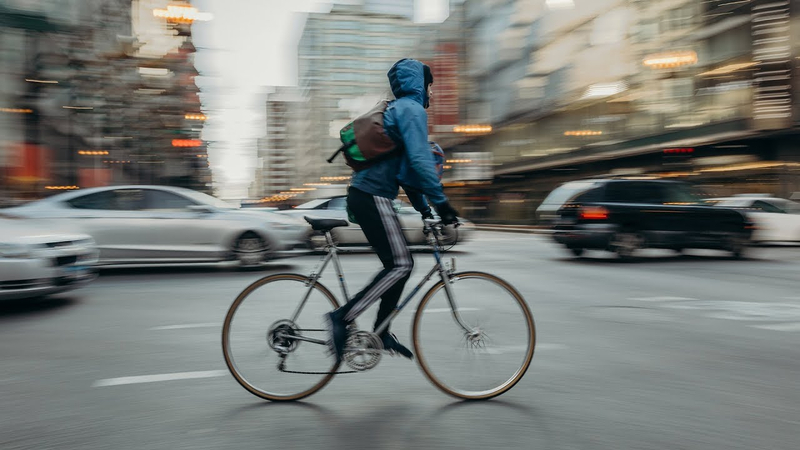
Although knowing the steps is helpful, small adjustments can significantly improve your results. Here are some panning tips and tricks that will refine your photography for sure:
- Pivot from your hips—During panning photography, stance and body mechanics matter a lot. Therefore, instead of moving only your arms, pivot smoothly from your hip to create a stable horizontal swivel.
- Keep movements steady—stand with feet shoulder-width apart and left foot slightly forward for more stability. Besides this, jerky or shaky hands can ruin the effect, so make sure to address that.
- Practice with predictable motion—start with cars on a road before trying sports or wildlife.
- Experiment with shutter speeds—faster speeds keep more detail, while slower ones add dramatic blur. So, experiment with different shutter speeds first to get accustomed to them.
- Leave extra space—leave space in the frame in front of the subject and some extra room around the subject to allow cropping later.
Ultimately, consistent practice is the fastest way to master the camera panning technique.
Part 5. Enhance Your Panning Photos with HitPaw FotorPea
Even after capturing the perfect panning shot, the raw image doesn't always appear visually appealing. Sometimes it is the unwanted noise, while other times the subject may appear soft, which kills the vibes. However, you need not worry, as HitPaw FotorPea is here to help.
What is HitPaw FotorPea?
HitPaw FotorPea is an AI-powered photo editing tool that excels at photo enhancement. Unlike traditional editing software that requires hours of manual adjustments, HitPaw FotorPea automatically enhances photos with just a few clicks. Whether it's the brightness issue, sharpness, color adjustment, or unwanted noise, you can simply upload the images, and HitPaw FotorPea will give you a clear, vibrant, and high-quality result in just seconds. This makes it ideal for professional photographers and beginners alike who want professional-looking results without complicated workflows.
Some of the main features of HitPaw FotorPea include
- Easy-to-use interface
- AI algorithm
- Auto adjustment
- Upscale image
- Batch Processing
- High-quality output
Wondering how to enhance your panning shots using HitPaw FotorPea? Follow these steps:
Step 1: Download and Install HitPaw FotorPeaVisit the official HitPaw website and download the latest version of HitPaw FotorPea on your computer. After the download is complete, open the setup file and follow the installation steps.
Step 2: Open HitPaw FotorePeaOnce the installation is done, open the software. From the main dashboard, click “Enhance Photos Now.” This feature helps improve image quality and sharpness to make your panning photography shots look smoother and more professional.

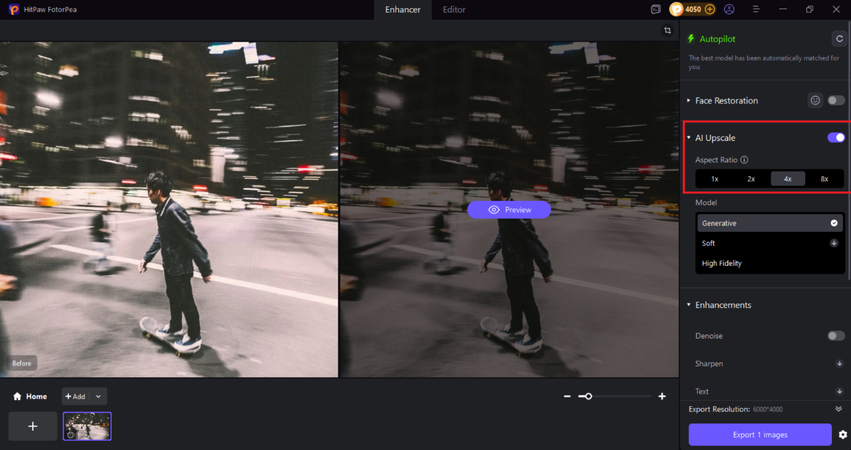
Step 3: Upload Your Panning Shot
Click Upload and select the photo you want to enhance. For best results, turn on the AI Upscale option. This feature will not only help you boost clarity and details but also reduce motion blur while keeping your subject crisp
Step 4: Let AI do its magic
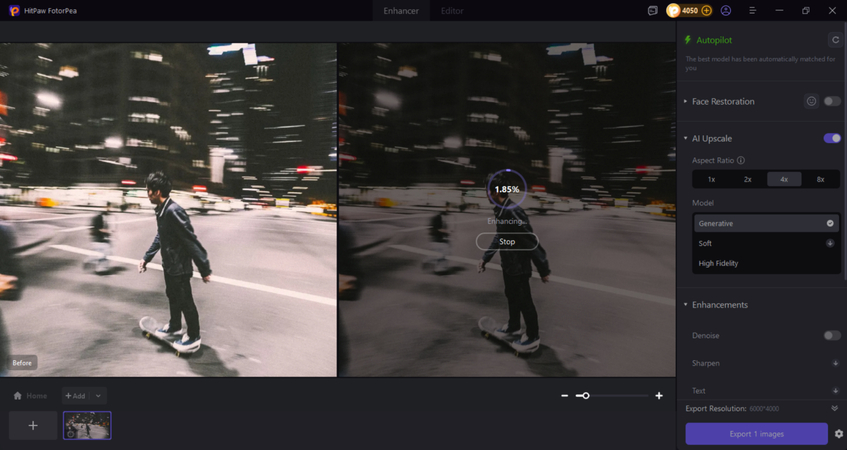
Click on Preview to begin processing. The AI enhancement engine will automatically analyze your photo, reduce blur, and sharpen the moving subject while maintaining a natural motion effect.
Step 5: Export
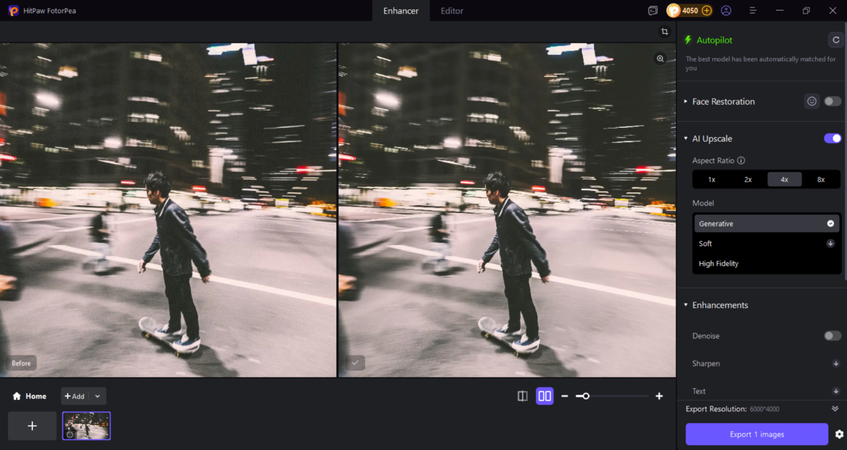
Once the enhancement is done, compare the before and after image to see how HitPaw FotorPea have enhanced your panning shot. And if you are satisfied with the outcome, click on Export and download the photo.
Conclusion
The panning photography is everyone's favorite, as it adds life and motion to a photograph. Unlike frozen shots, it allows you to tell a story by showing both speed and direction. However, to master Panning technique in photography, you need the right tool, tricks, and, most importantly, patience and practice. With the combination of all these factors, the results would be worth watching.
But if you are already doing panning photography and taking some amazing panning shots, but the results are still dull, you need to use HitPaw FotorPea. Powered by advanced AI algorithms, HitPaw FotorPea enhances details, reduces noise, and makes images look professional without extra effort. In short, it provides the most important finishing touch that will make your panning photos stand out.
Leave a Comment
Create your review for HitPaw articles


