Long Exposure Noise Reduction: Everything You Need to Know
Have you ever taken a photo of a glowing sky, light trails, or a smooth waterfall, only to have it turn out messy and grainy with strange dots? This issue is quite common in long-exposure photos, and photographers refer to it as "noise." To solve this, modern cameras come with a feature called long exposure noise reduction. While it sounds technical, it's actually easy to understand once you break it down. In this guide, we'll explain what long exposure noise reduction is, how it works, and when you should use it. Besides this, we will explore its pros and cons and even how editing tools like HitPaw FotorPea can make your long exposure photos look crystal clear.
So, let's get started:
Part 1: What Is Long Exposure Noise Reduction?
Before jumping into how it works, let's first understand what exactly long exposure noise reduction is.
Long exposure noise reduction (often labelled as LENR or NR in camera settings) is a camera setting designed to reduce unwanted noise in your photos. When you keep the camera shutter open for an extended period, the camera's sensor stays active for a longer time and heats up. This results in a tiny colored spot, grainy texture, or distortion called "hot pixel." This problem is most noticeable in night photography, also known as astrography, where the dark areas of the sky make noise stand out even more.
To handle this, modern cameras are equipped with long exposure noise reduction. This means you don't require any editing, and by simply changing the setting in the menu, the camera will automatically clean up your images.
Part 2: How Does Long Exposure Noise Reduction Work?
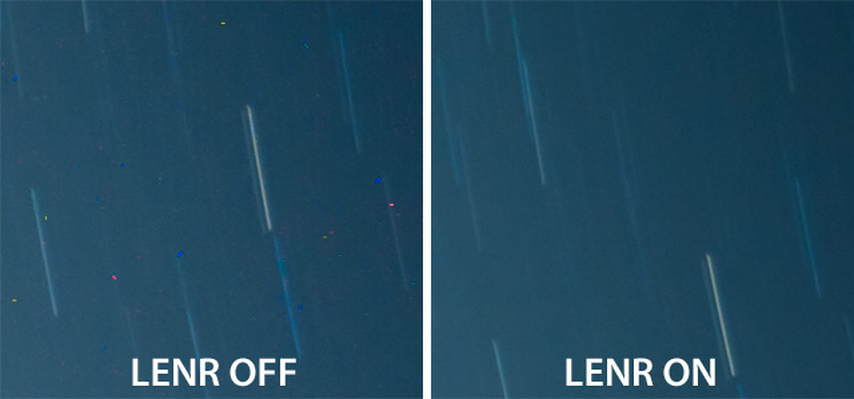
Now comes the real question: how does long exposure noise reduction work? Well, this may sound complex, but it is actually quite simple.
Here's how it works:
When you enable long exposure noise reduction and press the shutter button, your camera actually takes two pictures, one immediately after the other.
The first one is your real photo, the scene you want to capture. Then, the camera automatically takes another picture, but this time with the shutter closed. That second picture is called a dark frame because no light gets in. Since no light enters the sensor, it only records the unwanted stuff, such as tiny bright dots or static noise.
After that, your camera does something innovative. It compares the dark frame with the original photo. Because the dark frame shows only noise, the camera subtracts it from your main image. As a result, you get a cleaner, smoother, and more professional-looking image straight out of the camera.
Part 3: How to Use Long Exposure Noise Reduction
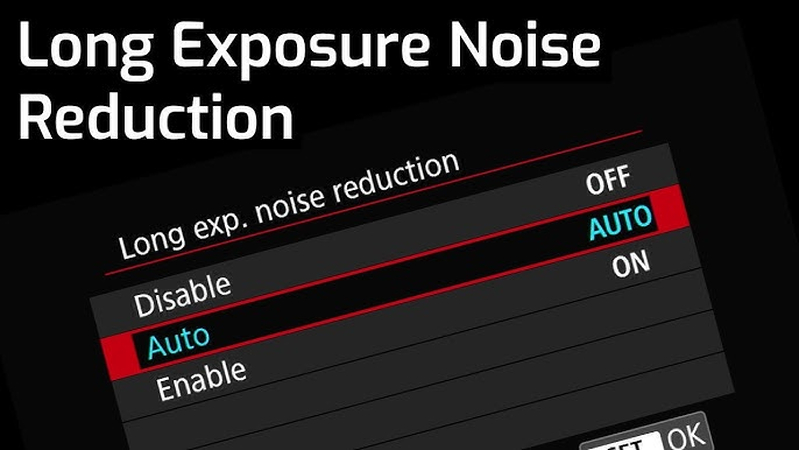
Using Long Exposure Noise Reduction (LENR) is extremely easy, as most modern cameras already have this feature built in. Whether you are using a Canon, Nikon, or Sony camera, you can easily find it in the shooting menu, where it is often marked with a small camera icon.
However, it is sometimes disabled when using the electronic shutter. But if you notice that the long exposure noise reduction feature is grayed out, you can take a look at the camera manual under the "long exposure noise reduction" section to see what's causing it.
Once you turn it on, that's it. Now you don't have to make any further changes! Your camera will automatically handle the noise reduction when you shoot long exposures (usually longer than one second). For shorter exposures, it won't activate, which is excellent because it means you can leave it on all the time without slowing down your normal shooting or burst shots.
Part 4: Benefits of Using Long Exposure Noise Reduction
The benefits of long exposure noise reduction are hard to ignore, especially when doing night photography or astrophotography. Let's take a look at some of the biggest benefits the long exposure noise reduction feature provides:
- Cleaner images: The main advantage is obvious that it enhances your photos. As your photo will have less noise and fewer glowing pixels, it will have a smoother overall appearance.
- Professional results: Whether you're photographing the night sky, a quiet city street, or a glowing waterfall, noise-free images will look sharper and more professional.
- Automatic process: Unlike using the editing software, LENR happens right in your camera. This means you don't need to spend extra time on a computer cleaning up your shot.
Because of these benefits, many photographers love this feature, and they turn on long exposure noise reduction by default when capturing landscapes at night or shooting astrophotography.
Part 5: Drawbacks of Long Exposure Noise Reduction
However, despite being an amazing and helpful feature, it isn't perfect. Like any other tool, it also has some downsides.
Let's take a look at some of the cons of LENR:
- Double the wait time: Since your camera has to capture a second dark frame, the total shooting time doubles. For example, a 30-second exposure turns into a 60-second process. This can be frustrating if you're shooting many images in a row.
- Not great for fast-paced work: If you need to capture multiple moments quickly, waiting for the noise reduction process may cause you to miss shots.
- Possible detail loss: Sometimes, LENR can also remove tiny image details along with noise. While this isn't always noticeable, advanced photographers sometimes prefer manual editing to keep maximum detail.
So, while long exposure noise reduction is helpful, it's not always the right choice for every situation.
Part 6: Reduce Noise in Long Exposure Photography Using HitPaw FotorPea
While in-camera noise reduction is powerful, sometimes you want even more control over the process. This is where smart editing software like HitPaw FotorPea comes in handy.
HitPaw FotorPea is a user-friendly photo editing tool designed to address common photography challenges, including noise, blur, and poor lighting. This AI-powered photo editor automatically refines the contrast, exposure, and color balances, helping your long-exposure photos shine. The best thing is that you can remove the noise and unwanted spots with just one click. Whether you're a beginner or a professional photographer, using HitPaw FotorPea can help you turn your raw clicks into clean, crisp, and vibrant photos without hours of editing.
Some of the main features of HitPaw FotorPea include:
- Automatic Noise Reduction
- Easy-to-use interface
- Multiple AI models to choose from
- Auto photo enhancement
- Batch Processing
- High-quality output
Wondering how to remove noise using HitPaw FotorPea?
Step 1: Download HitPaw FotorPea
Go to the HitPaw FotorPea official website and download the software. After downloading the software, open the file and follow the onscreen instruction to install.
Step 2: Launch HitPaw FotorePea
Once the installation process is completed launch the software and from the main interface click on "Enhance Photos Now" to start removing the noise.

Step 3: Upload the Image
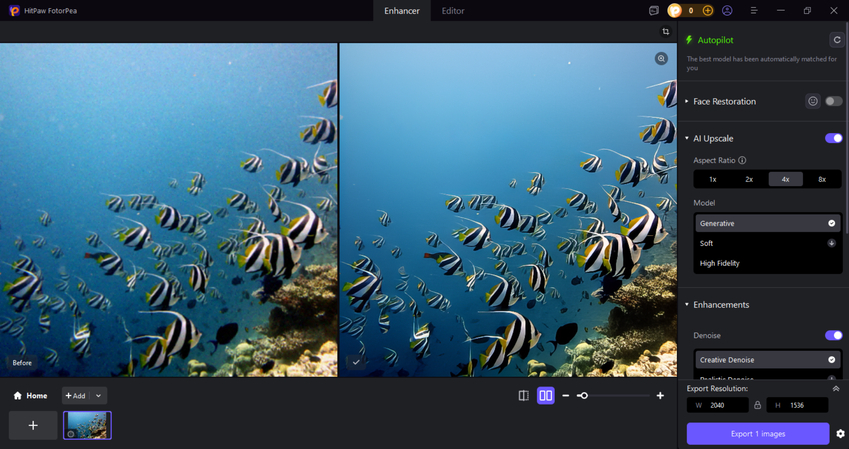
Next, upload the photo long exposure image that has the noise. Then go to the enhancement feature and "Denoise".
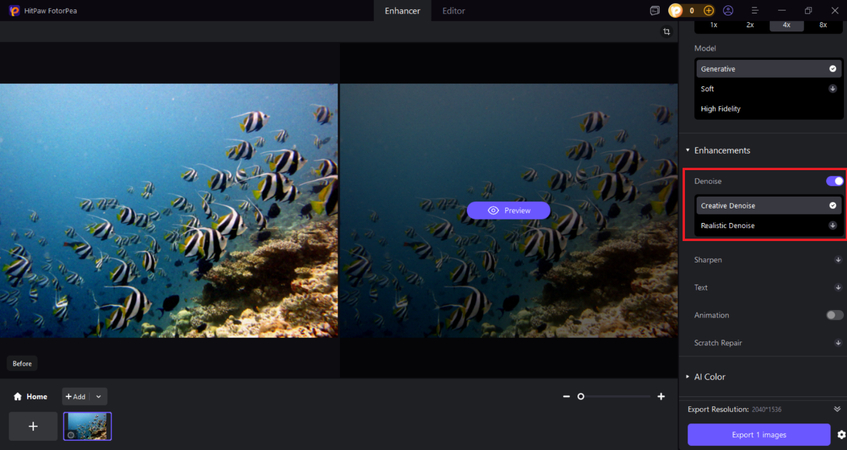
Step 4: Start Denoising the Image
Now, click on "Preview" and let the AI do its magic. The powerful ai of Hitpaw FotorPea will scan the image and start removing the noise automatically.
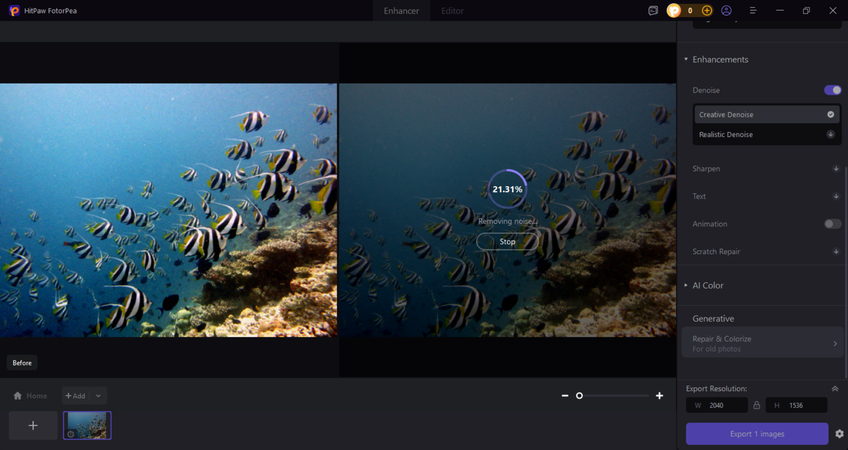
Step 5: Export
Now compare the before and after image. Once satisfied, click on Export and download the photo.
Conclusion
Long Exposure Noise Reduction might sound technical, but it's one of the simplest ways to instantly improve your motion photography. Now, with advanced cameras, this feature comes built-in, quietly enhancing your images to make them smoother, sharper, and more professional. With the right settings, steady equipment, and a bit of patience, you can capture breath-taking long-exposure photos without any noise or grain.
However, if you think it takes too much time or the results are not perfect, you can use AI editing tools like HitPaw FotorPea. This fantastic tool enhances photos with precision and ease, ensuring your long exposure shots look their absolute best with minimal effort.
Leave a Comment
Create your review for HitPaw articles


