Astrophotography on iPhone: Professional & Complete Tips
Capturing the stars used to require high-end cameras, tripod stands, and manual settings back in the day. However, the high-quality cameras installed in our smartphones have made astrophotography a lot more convenient and simple. The newer iPhones have become increasingly accessible when it comes to capturing the sky or other scenes in low-light scenarios.
However, many iPhone users do not know which settings to enable to capture the perfect starry night right from their smartphones. In this article, we will discuss the top iPhone astrophotography tips and techniques to make the most out of your stargazing experience.
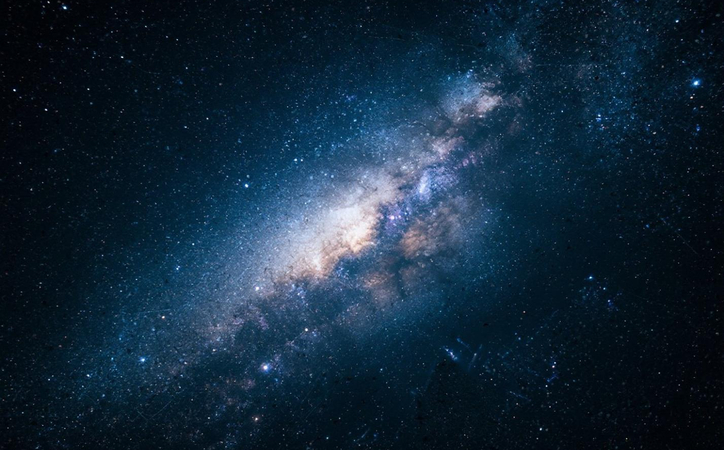
Part 1. Preparing for iPhone Astro Photography
Before starting to directly jump to click pictures, there are certain preparations that you need to do. Mentioned below are some of the ways to prepare for the perfect shot:
1. Gather Essential Gear
While the iPhone is a powerful gadget that captures the stars perfectly without any grain, a few accessories will help you enhance the results:
- Tripod: You can place your phone on a Tripod and prevent shakiness while shooting the stars.
- Remote Timer/Shutter: These remote control timers help you snap the picture at the right time without any shakiness.
- Portable Lens Attachments: The clip-on lens expands your creative possibilities by making the results clearer and crisper.
2. Optimize Best Condition
Besides the perfect gear, another thing that matters while capturing stars is the condition. These pictures should be taken under specific environmental conditions, such as moonless and no-cloud nights. Usually, the best time is when there is a new moon and the sky is darkest.
3. Consider Recommended Locations
Location is another factor that plays a crucial role in astrophotography. Go for less polluted areas where the sky is a bit darker. Avoid areas that have tall buildings and trees, as they may obstruct the view. Moreover, if you cannot travel far, try to find a park or open space nearby where you can stargaze and perform astro photography on iPhone.
Part 2. iPhone Camera Settings for iPhone Astronomy Photography
If you have recently switched to this smartphone and do not know which camera settings to configure, consider the section below:
1. Use Night Mode for Longer Exposures
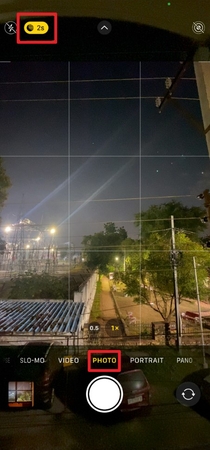
The night mode on newer iPhones is perfect for astrophotography as it automatically activates in low-light conditions. It enables the phone camera to take longer exposures and allows more light to hit the sensor. This helps in revealing stars and celestials, which are invisible otherwise, and generates results of high quality. Once Night Mode is enabled automatically, adjust the exposure by tapping the option and selecting the longest one.
2. Adjust Focus Manually
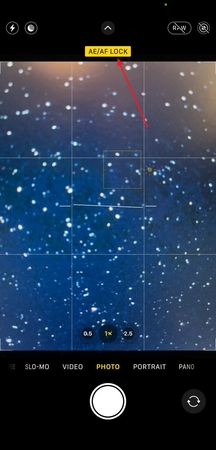
The Camera app on iPhone lets users manually adjust the focus for astrophotography for effective results. For this, you have to launch the camera application, and once you are ready to shoot the sky, tap and hold on a bright star to see the AE/AF Lock indicator. This locks the focus and exposure to prevent the camera from readjusting the focus automatically.
3. Exposure Control Through Brightness
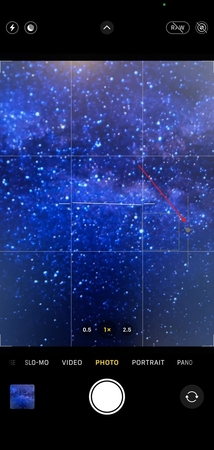
Besides locking focus through the tap-and-hold methods, adjust the exposure manually by dragging the brightness slider while taking the picture. You simply swipe up or down on the screen and change the brightness level before taking the shot. It is recommended to lower the brightness and exposure to avoid overexposing bright stars in astrophotography.
4. Adjust Other Settings With Third-Party App
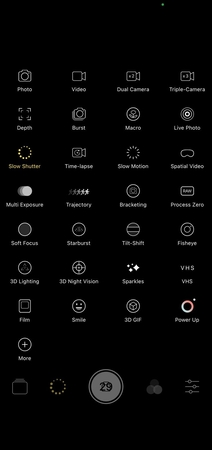
To capture detailed images, download third-party apps like Pro Camera to manage photos with RAW settings. This third-party app offers various fine-tuned settings for a crisp look at night when doing iPhone astronomy photography. You can enable the following settings to get the most desired results:
- Adjust Shutter Speed: You can adjust the shutter speed to 15 to 30 per second for capturing the starlight successfully.
- Setup ISO: The ISO can be set up between 800 and 1600 to enhance the sensitivity of the camera and capture more accurate results.
- Set the Focus: Lock the focus while the view is clear to shoot the sky in its peak beauty.
Part 3. Pro Tips of Astro Photography on iPhone
Achieving the desired results while taking pictures of the sky takes more than just pointing and capturing. Mentioned below are some of the tips that you can consider to get the desired visual results from your smartphone astrophotography:
1. Compose and Adjust Exposure: Use the grid function in the camera to help with composition. For pure star shooting, you can appropriately reduce the exposure, while for starry sky photos with a foreground, you may need to increase the exposure.
2. Use time-lapse shooting: Set a 2-second or longer time-lapse shooting timer to avoid shaking when pressing the shutter button and ensure clear photos.
3. Adopt the stacking shooting method: Continuously take multiple photos from the same position, and then use image processing software to stack them later. This can enhance the clarity of star trails and reduce noise.
4. Incorporate foreground elements: Choose foreground elements such as trees, hills, or buildings. This not only adds layers and interest to the photo but also provides a scale reference for the starry sky, making the scene more narrative.
Part 4. Post-Processing: Enhancing iPhone Astro Photos With HitPaw FotorPea
Many iPhone users struggle with noisy, blurry, or washed-out night sky photos due to sensor limitations and lack of advanced editing skills. Manual fixes are often time-consuming or lead to overprocessed results. HitPaw FotorPea solves these issues by automatically reducing noise, enhancing star detail, and restoring contrast—making astrophotos clear, vibrant, and ready to share in just a few clicks.
Coherent Features Offered by HitPaw FotorPea
1. The Upscale model of FotorPea offers multiple quality modes to enhance the overall quality of the picture while keeping the aspect ratio intact.
2. For blurry and shaky astrophotography images, the tool's Sharpen model provides various unblur techniques, such as Repair Lens Blur and Repair Motion Blur.
3. To enhance the exposure of images taken in the dark, the Low-Light model brightens up the picture while keeping it crisp and clear.
4. With its Denoise model, you get the ability to remove unnecessary noise from your images through creative or realistic modes.
5. If you have an old sky picture that now has grain and noise, the Image Restoration feature of FotorPea preserves originality.
Steps to Enhance iPhone Astro Photos With FotorPea
If the pictures taken from the Astro mode iPhone turn out grainy and noisy, you can use FotorPea to make them clear. Provided below are the steps for using this image enhancer for efficient results:
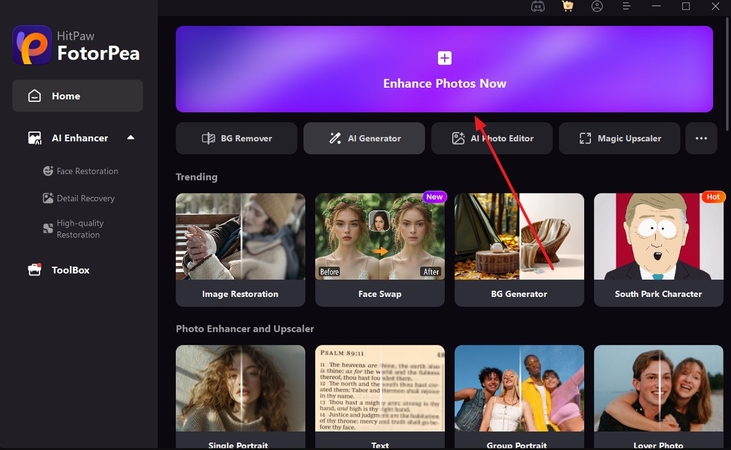
Step 1. Launch FotorPea and Click Enhance NowTo begin the process, launch FotorPea on your device and press the “Enhance Photos Now” tab from the homepage.
Step 2. Import Images and Choose Models
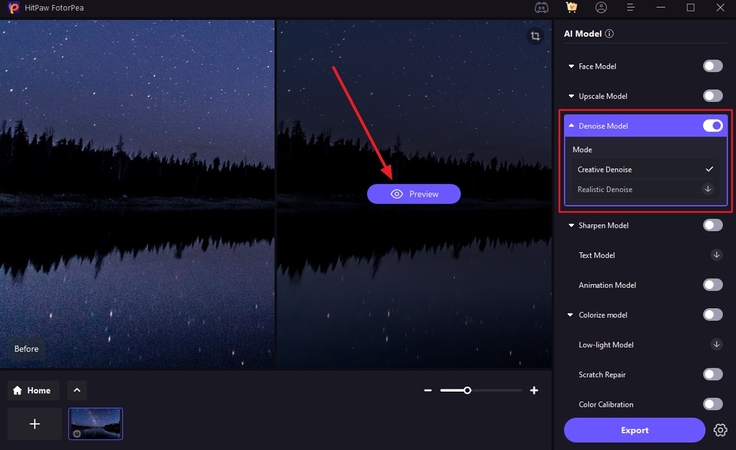
In the following interface, import the sky picture and turn the toggle on for “Denoise Model” located on the right. Next, select the mode and press the “Preview” button located within the interface to execute the press.
Step 3. Preview and Save Enhanced Image
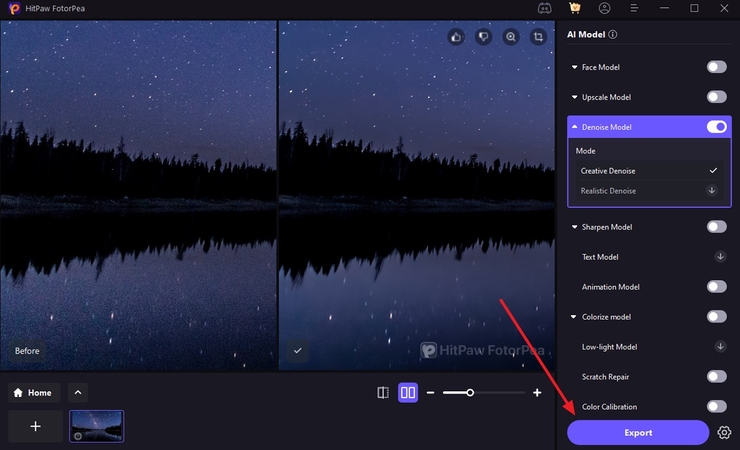
Once the picture is successfully enhanced, review it within the preview window and hit the “Export” button located at the bottom right to save the picture to your device.
Part 5. FAQs on Astrophotography on iPhone
Q1. Can you photograph the Milky Way with an iPhone?
A1. Yes, you can capture the Milky Way with an iPhone, especially with the newer ones. You can get the most optimal results by placing your phone on the tripod with the Night Mode enabled in the camera.
Q2. Is the iPhone 16 good for night photography?
A2. Yes, the iPhone 16 is good for night photography as it has an auto-enabled Night Mode with maximized focus to capture every star visible in the sky in detail.
Q3. How to set ISO on iPhone?
A3. The built-in camera app on iPhone does not provide you the option to set up ISO. However, you can use third-party applications to adjust the ISO for more starlight.
Q4. How do I turn on astrophotography on my iPhone?
A4. You do not have to enable the iPhone astro photography as the newer models have the ability to automatically enable the Night Mode for capturing perfect and clear shots even in low light.
Conclusion
To sum it up, this article discussed the top tips and techniques to perform iPhone astrophotography effortlessly. The article suggested various settings on how to capture images without any grain and noise. However, if the picture still comes out grainy, you can use tools like HitPaw FotorPea to denoise the picture efficiently.


 HitPaw Edimakor
 HitPaw VikPea (Video Enhancer)
 HitPaw Univd (Video Converter)

Share this article:
Select the product rating:
Daniel Walker
Editor-in-Chief
This post was written by Editor Daniel Walker whose passion lies in bridging the gap between cutting-edge technology and everyday creativity. The content he created inspires the audience to embrace digital tools confidently.
View all ArticlesLeave a Comment
Create your review for HitPaw articles