How to Make a Photo Look Old in Photoshop - Step-by-Step Guide
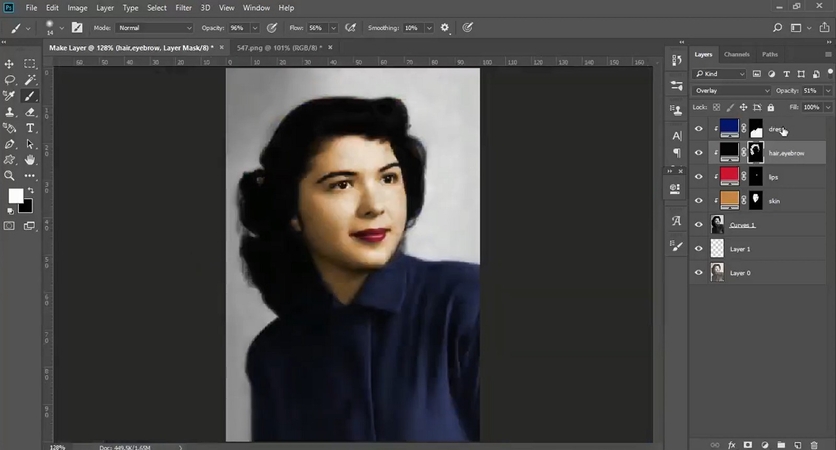
There is something magical about vintage photography, which always adds life to every moment of the captured photo. Learning how to make a photo look old in Photoshop unlocks endless creative opportunities for everyone. Here, we are going to reveal how you can make photos look old and new in this guide.
Part 1. How to Make a Photo Look Vintage in Photoshop
To begin playing around with older effects, here is how to give a photo an old-fashioned look using Photoshop:
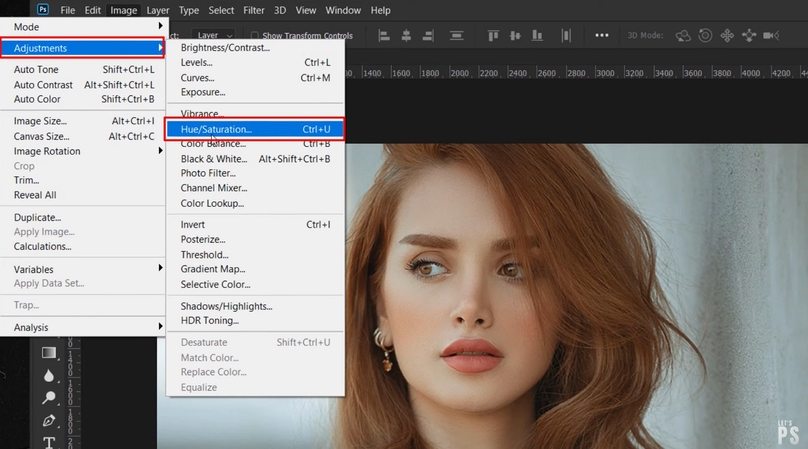
Step 1.First to edit the photo, get it into Photoshop, and under adjustments, it will give you the option of "Hue/Saturation".

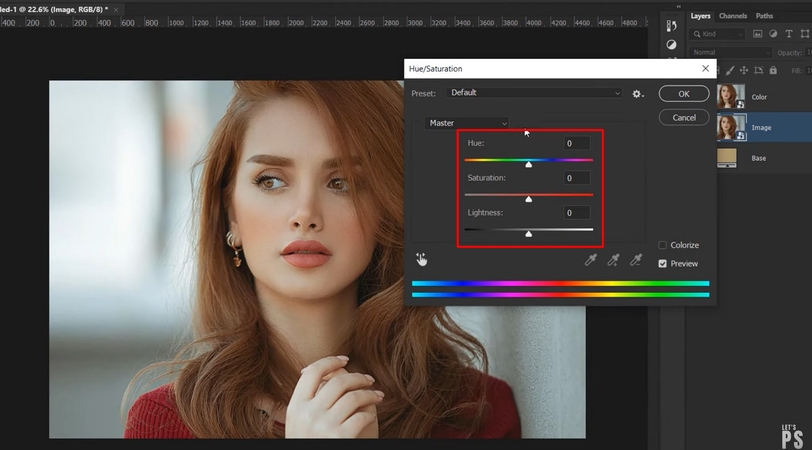
Step 2.Next, you see a tab of "Hue", "Saturation", and "Lightness;" adjust them according to your desire to give your image a perfect vintage look.

Part 2. How to Create Retro and Film Effects in Photoshop
Film and retro effects give images their unrefined nature of analog photography, rendering strong contrast, grain, and depth. Knowing how to do a retro effect in Photoshop would enable you to mix noise, curves, filters, and tones to recreate film imperfections. This turns the regular imagery into life-lasting, communicative, and nostalgic pieces of art.
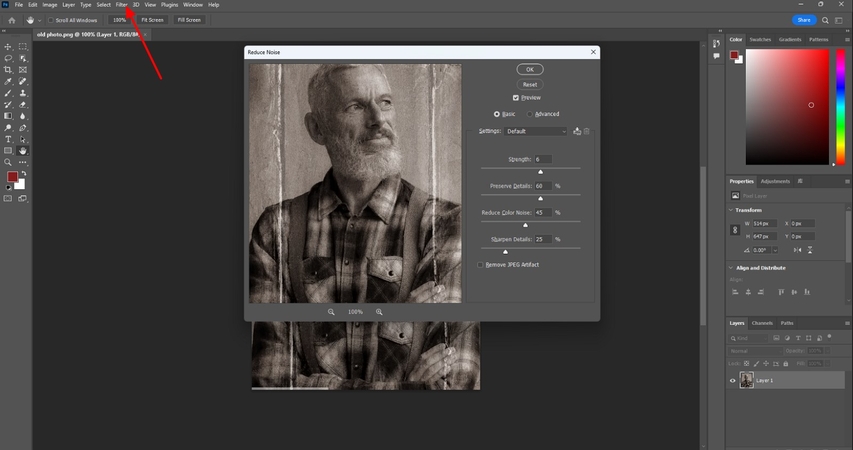
Add Noise/Grain
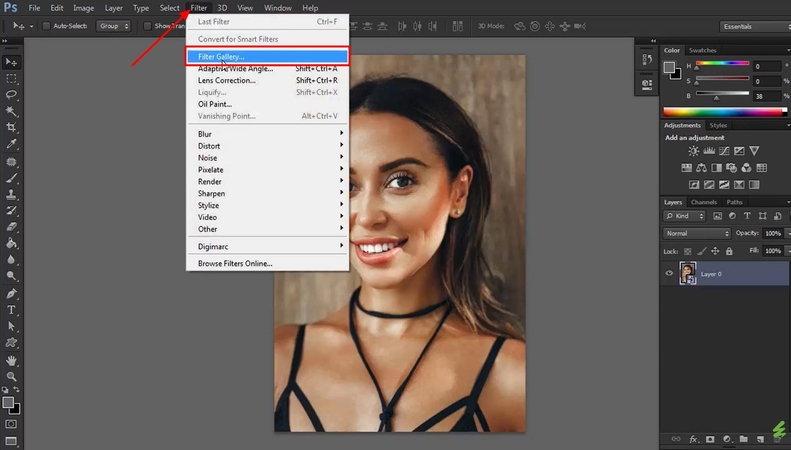
It is used to add a textured, vintage, or film-like appearance to images by overlaying small, randomly scattered pixels. To achieve this, after uploading the photo in Photoshop, go to "Filter" and choose "Noise" and add "Noise" by adjusting the amount slider.
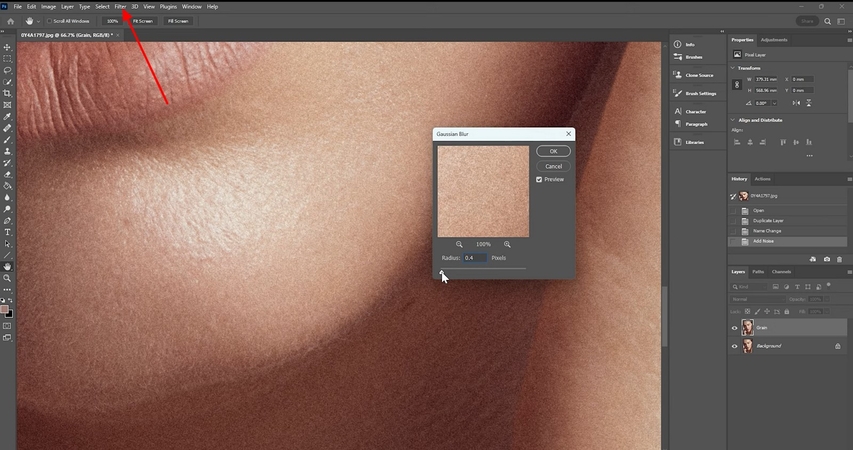
To put grain in your image, go to the filter and select Blur or "Gaussian Blur" to smooth the grain out.
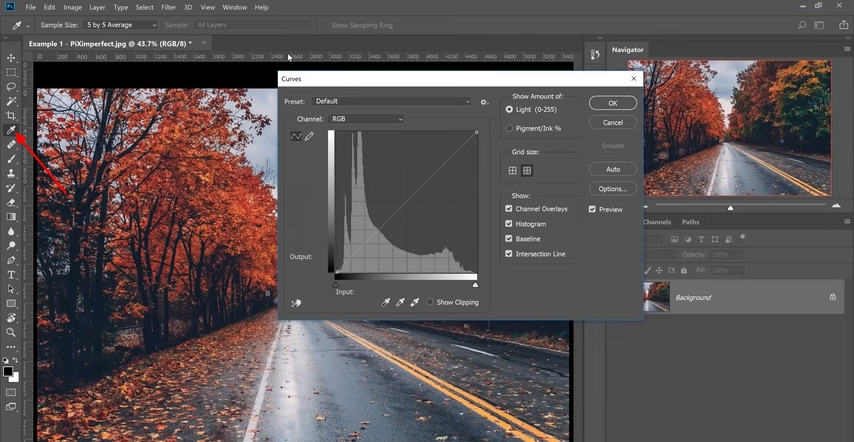
Curves Adjustment
This enables the ability to control brightness, contrast, and balance of color perfectly within the tonal range of the image. To do it, open the "Layers Panel" and choose the adjustments layer icon, and click the "Curves" option.
Add a Photo Filter
Gives the photo a tint or coloring to replicate the appearance of the old film lens filters, like warming or cooling, which are common in film photography. To accomplish this, begin by selecting the icon of "Adjustment" and then select a "Photo Filter" and choose a preset color or a custom color.
Add a Gradient Map
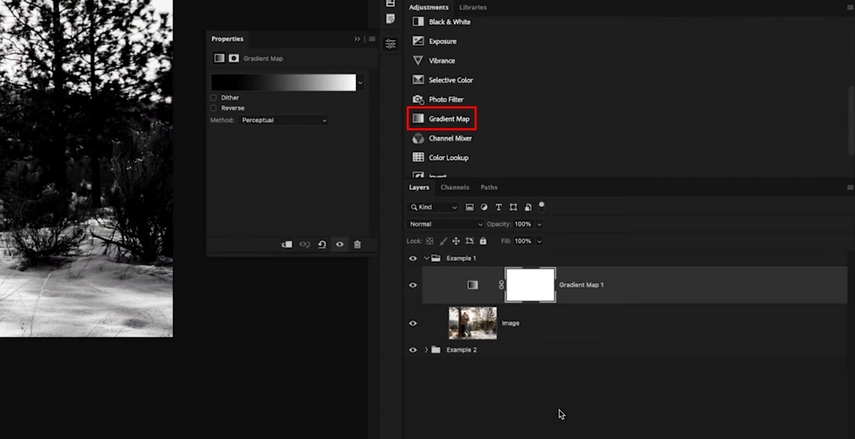
It maps specific colors to the image's tonal values, creating artistic color grading effects or a stylized look. To achieve this, locate the "Adjustment Layer" icon to select "Gradient Map". Edit the gradient with the left stop for shadows and the right stop for highlights.
Adjust Vibrance Settings
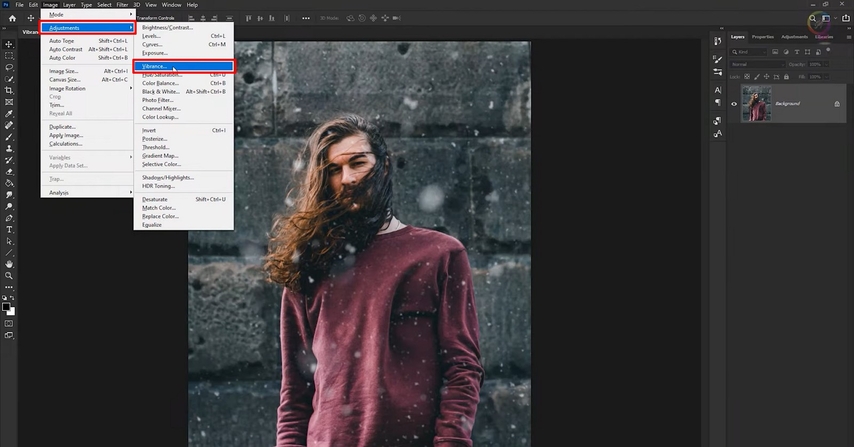
This enhances dull colors but does not over-saturate already vivid colors; maintains skin tones and does not give them an artificial look. In order to adjust the vibrance, add a "Vibrance Adjustment Layer" and apply the vibrance slider to make a selective boost.
Part 3. How to Make an Old Photo Look New in Photoshop
Bringing back life to faded memories is easier than it seems when you know how to make an old photo look new in Photoshop. If you want to make your old photo new with Photoshop using the Spot Healing Brush, follow the steps below:
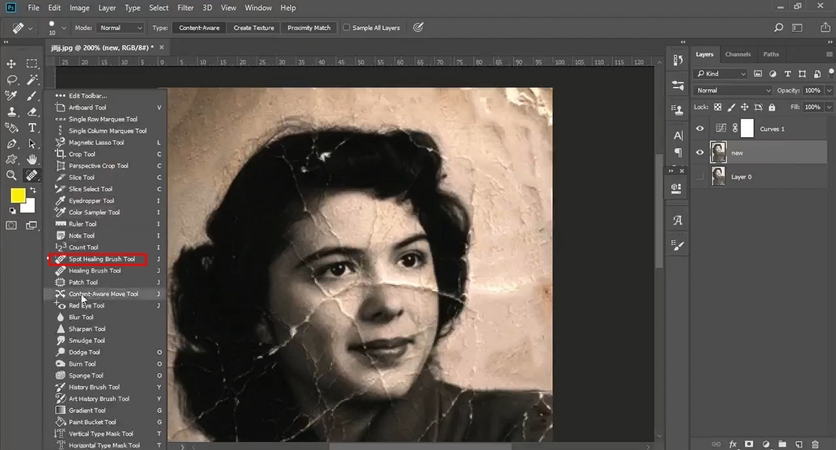
Step 1.Upon launching Photoshop, upload your photo and select "Spot Healing Brush" from the left side panel.

Step 2.After selecting the Spot Healing Brush, adjust the "Brush Size" and start clicking on the scratches in the photo to remove them.

Pro Tip: How to Make a Picture Look Old in HitPaw FotorePea
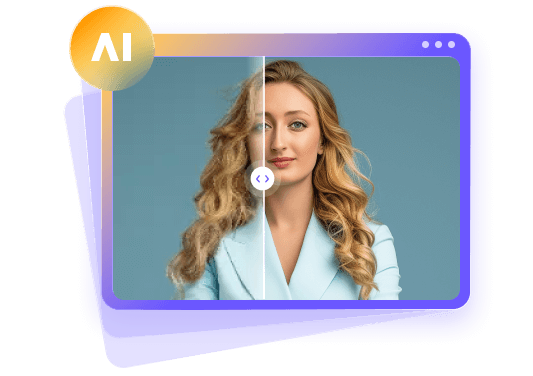
Imagine you just found an old picture of your Dad in the old cupboard of your house, and you loved that scratchy old look of that picture. Now you want to create a vintage photo, but unsure how to make a photo look old, then HitPaw FotorePea (formerly HitPaw Photo Enhancer) makes it surprisingly simple. Unlike Photoshop, which requires complex layering and manual textures, FotorePea uses AI to handle everything.
For more creative control, the AI Replace feature allows you to type your prompt. You can easily transform your picture into a realistic vintage photo without technical efforts with this feature.
Key Features
- 1.Edits images with text prompts; AI adapts changes without any technical effort.
- 2.Improves sharpness, clarity, and removes blur and low light using the enhance option.
- 3.Increase the resolution to 16K with AI super-resolution, without losing the natural details.
- 4.Cover scratches and stains on damaged or old photos in order to recover the facial detail.
How to Make Pictures Look Vintage in HitPaw FotorePea
With AI Replace, you can transform photos using simple text prompts, making the process faster and more customizable than traditional filters. Let's walk through the stepwise guide to how to make a picture look old and scratched for a vintage vibe with FotorePea's AI Replace:
Step 1. Access the AI Photo Editor in FotorePea
Upon launching the tool, select "AI Photo Editor" to further make the photo look vintage.

Step 2. Navigate to Toolbox and Select AI Replace
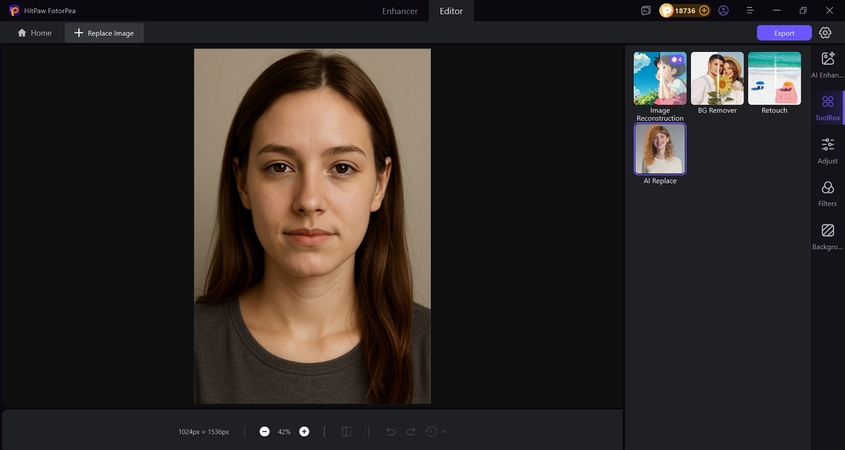
Next, locate the "Toolbox" in the right-side panel to select "AI Replace" to proceed further.
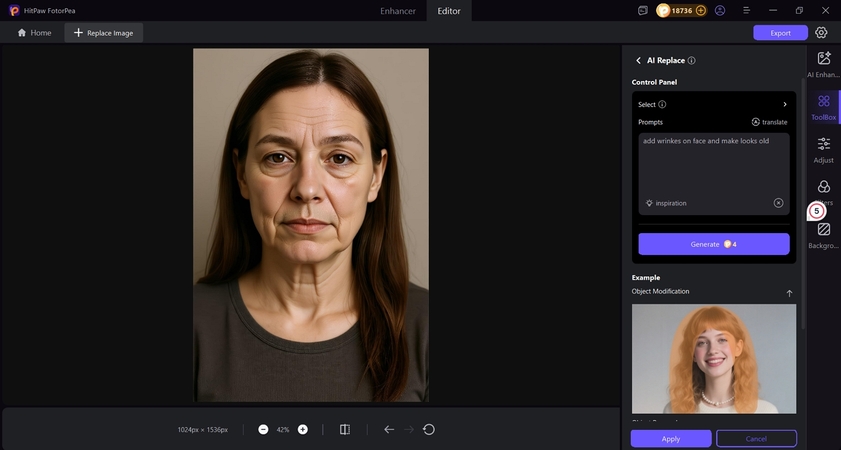
Step 3. Enter Prompt and Generate AI Replacement
Describe your requirements for making old photo within the "Prompt" section before hitting "Generate".
FAQs for How to Make a Photo Look Old and Scratched
Apply the Liquify tool to add just enough wrinkles, fix facial droopiness, and add detail. Next add Hue/Saturation and Color Balance effects to make them look like they have aged and then add texture overlays to make it look like realistic skin effects.
Start by adding grain noise and a slight fade with Curves to create softness. Use Gradient Maps and Photo Filters to create the cinematic colors and reduce vibrance a notch to create the imperfection of a real film
Conclusion
In conclusion, the artistic charm of photography is its ability to change in line. With the trends of creative ideas, vintage fashion is one that has not stopped being captivating. We have shown you techniques on how to make an image look vintage in Photoshop, using adjustments, filters, and restoration tools to transform the image. If you want faster, easier, and professional results, HitPaw FotorePea makes editing effortless with AI.
Leave a Comment
Create your review for HitPaw articles


