How to Make a Custom Keyboard with Personalized Keycaps and Switches
A keyboard is not merely a tool, a continuation of your hands and everyday tunes. Yet, most prebuilt users feel generic and fail to offer comfort and style. The keyboard sound can be boring, and the design can be cramped or broad to use on a daily basis. It is easier to work on a keyboard that suits your style and makes every task more natural and satisfying.
Learning how to make a custom keyboard helps you personalize all of the parts according to your requirements. This guide will bring you the design, build, and customization of your own keyboard.
Part 1. How to Make a Custom Keyboard Layout and Case
Before moving forward with how to build a custom keyboard, the first step is to plan its layout and choose a case that makes the keyboard last longer.
Select a Suitable Layout
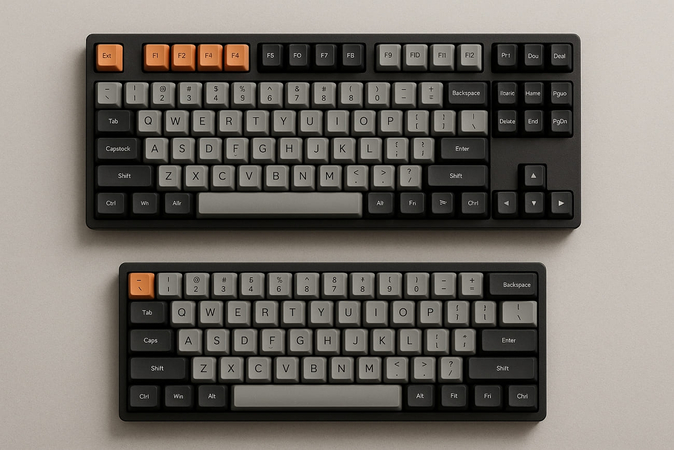
Selecting a keyboard layout that matches your desk setup is essential for comfort and productivity. Full-size keyboards provide a complete key range with a dedicated numpad, function row, and navigation cluster. For more compact workspaces, the 75% layout offers key accessibility with a smaller footprint to retain arrows and function keys in a denser arrangement. Meanwhile, the 60% layout strips things down to just letters, numbers, and basic modifiers.
Case Material Selection
Distinct case materials offer a unique blend of style and strength that allows users to tailor a keyboard's look and durability to their taste. Let's explore case materials with their strengths and shortcomings to help you decide which suits your needs.
- Acrylic: Acrylic cases are perfect for users who want RGB lighting without spending too much. Some users also 3D print mechanical keyboard cases using acrylic-like materials for custom shapes and finishes at a lower cost.
- Aluminum: This case material gives a premium hand feel and durability at the same time. Many typist prefer them for their long-lasting build, though they can be more expensive than other options.
- Plastic: It has the advantage of more colour customizations and is easier to modify than other materials. However, they may flex over time and feel less strong compared to metal builds.
Part 2. How to Build a Custom Keyboard With The Right Switches
The right switches for your keyboard decide how your keyboard feels and sounds. After finalizing the layout and case, the next step is to choose the right switches for how to build your own keyboard project.
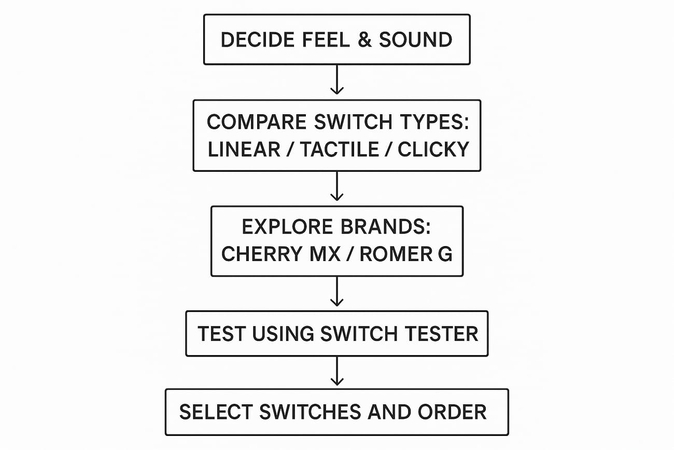
- First, decide what type of feel and sound you expect from your keyboard.
- Compare linear, tactile, and clicky switches to find out the differences between feedback and noise.
- Explore brands like Cherry MX and Romer G, regarding the differences in the actuation force and the travel distance.
- Try a switch tester to feel each type before making your decision.
- Once you find the switches that fit your typing style and comfort, order a complete set for your keyboard build.
Part 3. How to Make a Custom Unique Keycaps: Some Creatives Design Ideas
Before you start assembling your keyboard, let's explore some unique keycap ideas to understand how to make custom keycap designs.
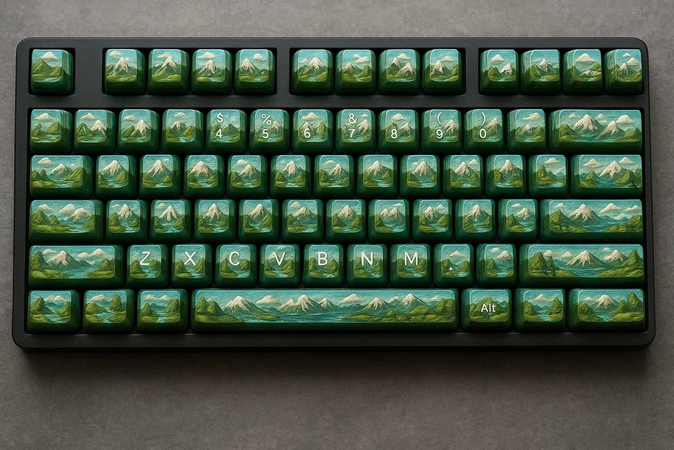
1. Sculpted Resin Landscapes
This design turns keyboards into tiny worlds with mountains or oceans inside clear keycaps. The layered resin creates a deep 3D look that makes every key unique and fun to press. These designs mix art and function, giving your keyboard a creative touch.
2. Anime Artisan Keycaps
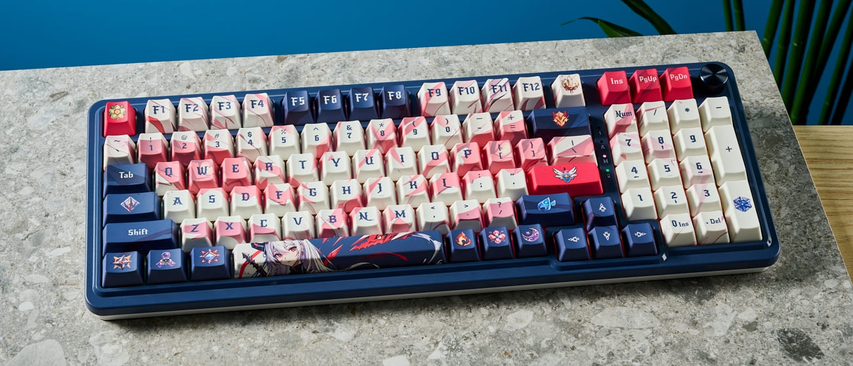
Keycaps inspired by anime allow the fans to show their characters or symbols on their keyboards. The poses, chibi figurines, or popular icons are available in bright colors and detailed designs. Each key adds a nostalgic and personal touch to your setup.
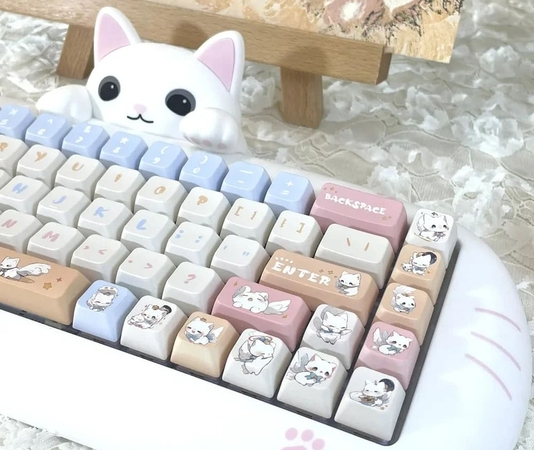
3. Kawaii Animal Keycaps
Kawaii animal keycaps bring playful shapes like cats, frogs, or bears to your keyboard. Soft pastel colors and smooth, rounded designs create a cheerful look that brightens your workspace. Each animal adds a cute and friendly charm to your typing.
4. Galaxy Keycaps
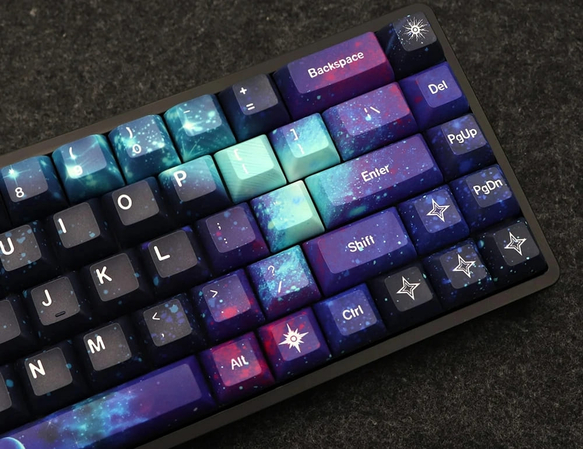
Galaxy keycaps are attractive and have a look of space with dark blues, dark purple, and twinkling stars. The design is dreamy and mysterious and is ideal for astronomers or creative individuals. The tap is glittered and has a ridged resin to shimmer like starlight.
5. Personalized Engraved Keycaps
Engraved keycaps allow you to give names, first initials, or brief quotes to your keyboard. The text is clear and durable because of laser etching or custom printing. They are very useful as gifts or a way to make the keys that are used most prominently in a personal manner.

Part 4. How to Make a Custom Keyboard: Step-by-Step Assembly
Now that we have explored the unique ideas to customize a keyboard that matches the user's style. Follow the assembly steps below on how to make your own keyboard:
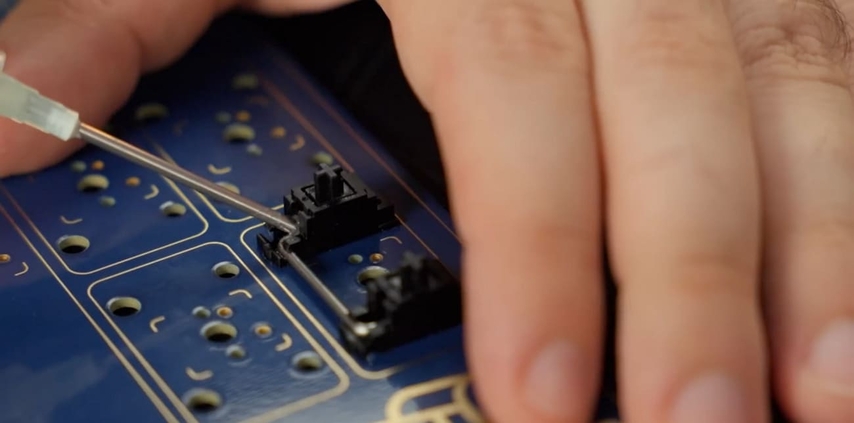
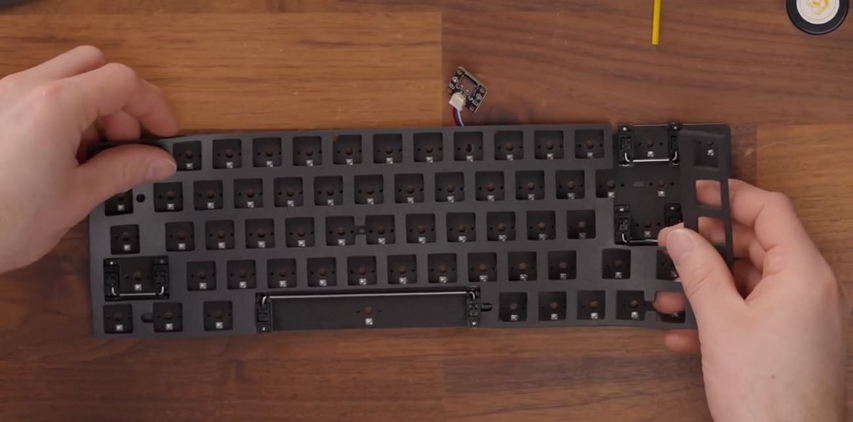
Step 1.Place the PCB on a flat surface and add stabilizers on keys like space, shift, and enter using grease or pasting material.

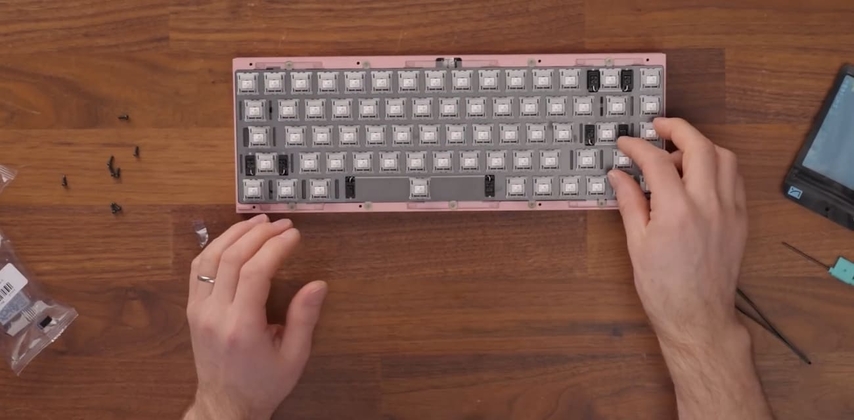
Step 2.Insert switches into the PCB and make sure pins are straight before pressing in.

Step 3.Place any foam or dampening layers underneath or above the PCB if your kit includes them.

Step 4.Install the assembled board into the case and fasten the screws firmly from each side for proper fit.

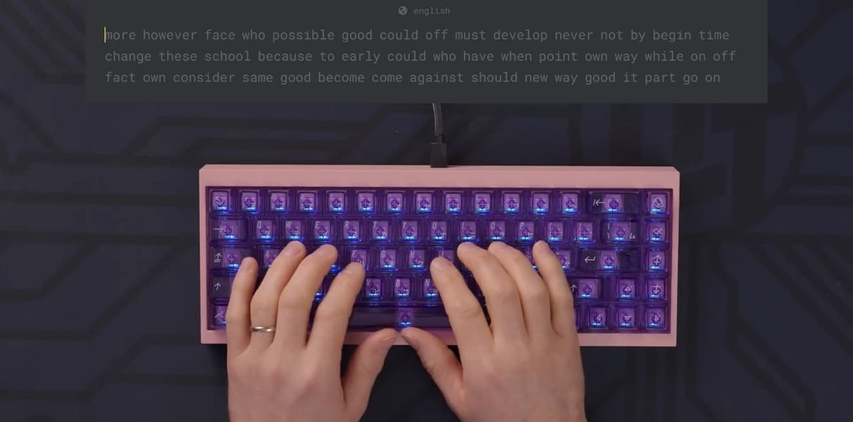
Step 5.Add keycaps to the switches and plug the keyboard into a computer to activate the connection.

Step 6.Test each key for correct input and confirm that the keyboard functions without errors.

Part 5. How to Make a Custom Keyboard Design With HitPaw FotorPea
Having learned how to build your custom keyboard, you might be thinking about how to build your own mechanical keyboard with simple accessories. Purchasing haphazard components without knowing how your keyboard will appear the way you want it to can result in a build that does not feel the way you desire. This is where HitPaw FotorPea (formerly HitPaw Photo Enhancer) comes in, which creates realistic images with simple text prompts or reference images.
It allows users to experiment with layout, spacing, and switch colors before building the physical version. Other than AI image generation, it provides advanced image enhancement features to improve the quality of images.
Key Features
- 1.It offers multiple AI templates to match the color and style preferences of generated keycaps
- 2.Allows users to fix blurry keyboardimages with AI enhancement features with a single click.
- 3.Users can upscale their low-quality images to ultra-high resolution up to 8K clarity.
- 4.Provides a batch image processing feature to import and edit multiple image files.
- 5.Repair old and damaged photos with scars and turn them into a fresh look.
Guide: Using FotorPea AI Generator for Custom Keyboard Layouts
After uncovering the unique features of HitPaw FotorPea, let's see how you visualize your own keyboard with black and white custom keycaps via this tool.
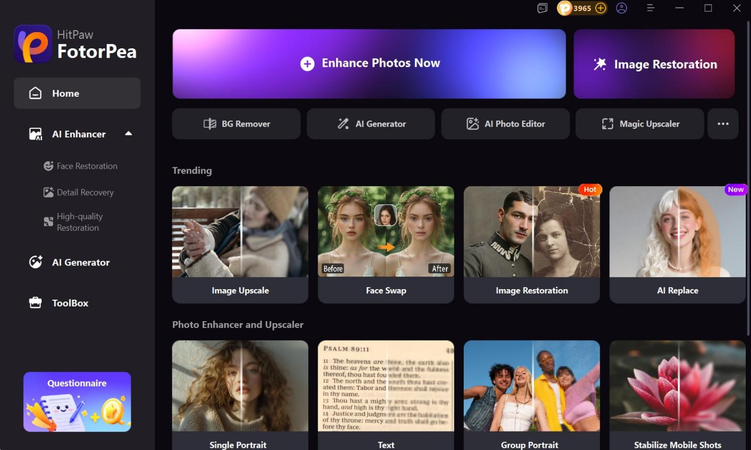
Step 1. Choose AI Generator Feature
On the main tool interface, navigate to the "AI Generator" feature to proceed further.
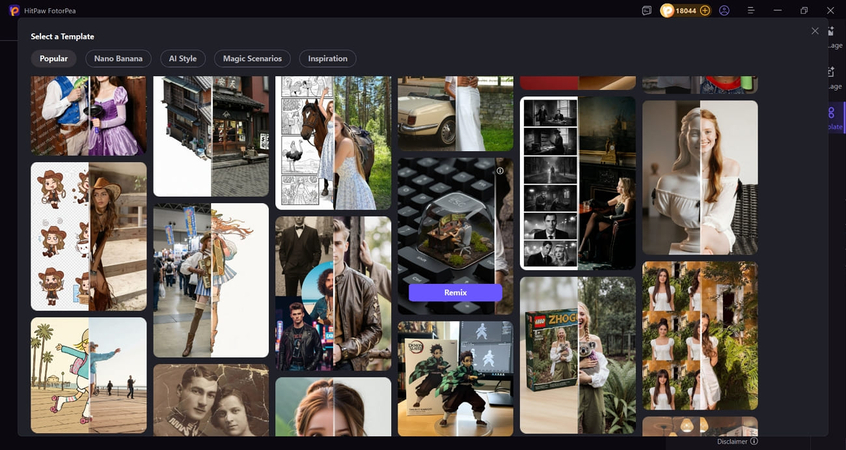
Step 2. Select The AI Template
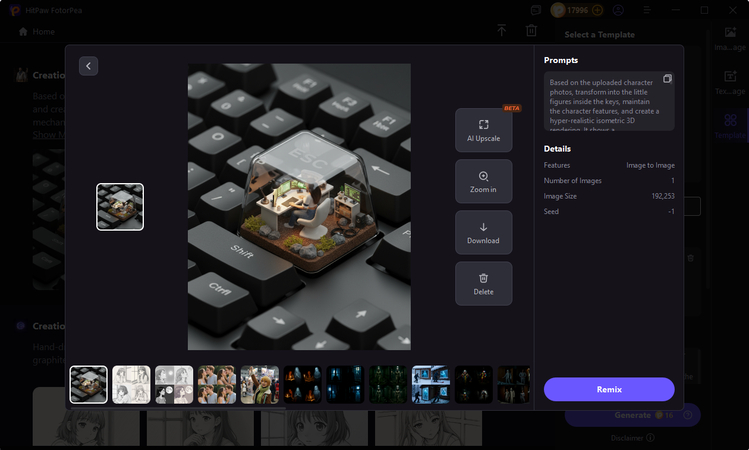
Press the "Template" button in the right sidebar and choose the template in the following picture. Next, click the "Remix" button.
Step 3. Import Reference Image and Enter Text Prompt
Now, click on the "Upload Original Image" option to import the reference image, and the AI will automatically enter the instruction prompts. Next, click on the "Generate" button to start the generation process.

Step 4. Export Generated Image
Once the image is generated, hit the "Download" button to save the final output.
FAQs About How to Make a Custom Keyboard
In non-hot-swappable PCBs, one may have to solder PCB components together in order to attach custom keyboards. Hot-swappable boards and switches can be assembled without being soldered and hence are easier to assemble.
How complex the custom keyboard build becomes depends on layout choice, parts used, and assembly skill. Visualize your setup with tools like HitPaw FotorPea before buying components to skip unnecessary purchases and explore 3D print mechanical keyboard options.
Custom keyboard keycaps can be made with 3D printing and have unlimited possibilities in terms of shape, finish, and design at a reduced cost. Common printing materials are PLA, ABS, and resin, but typing experience and durability can vary with traditional keycaps.
Conclusion
In this article, we covered how to make a custom keyboard in detail and explored unique ideas to build custom keyboards. We also provided a detailed instructional assembly guide that you can use to build your own custom keyboards. If you need to decide which keyboard layout and design to choose, use HitPaw FotorPea to visualize the design before acting.
Leave a Comment
Create your review for HitPaw articles


