A Detailed Guide on How to Sketch a Portrait from a Photo [2026]
Sketching portraits is trending in the social media world, where content creators are playing with aesthetics while creating personalized content. However, manual sketching appears to be time-consuming and needs polished skills, pushing people towards online sketch creators. Yet, they may seem easy to use, but not everyone is familiar with the tricks of the trade.
Therefore, this article will demonstrate how to sketch a portrait from a photo, both manually and by online tools. Besides, it will introduce you to HitPaw FotorPea, a smart and swift tool to save your time and energy, while producing matchless results.
Part 1. Preparing to Sketch a Portrait from a Photo
Before you start a photo to sketch, a little preparation about setting up and the materials is crucial, so the following points will help you to get started:
1. Choose a Bright Picture: Initiate the process with a well-lit photo so that you can analyze all the elements, including facial features and shadows.
2. Crop & Print for Reference: To achieve your desired size, crop and print your image; using this reference will help guide your drawing.
3. Get Your Equipment Ready: To draw, you will need good materials like HB-4B pencils, a good drawing paper, an eraser and a blending stump to enable you to draw smoothly.
4. Study Reference Image: Before you begin, make a note of the information on the reference image such as basic proportions, light source, shadows and facial features.
Part 2. Easy Simple Portrait Drawing from a Photo: Step-by-Step Guide
Once you are prepared to turn image into drawing, carry out the following steps for a simple portrait drawing from a reference photo:
Step 1. Lightly Block in Facial Proportions
With the help of light pencil strokes, initiate the process and sketch the basic shape of the head. While doing so, mark reference lines to position nose, eyes, ears, and lips for accuracy.
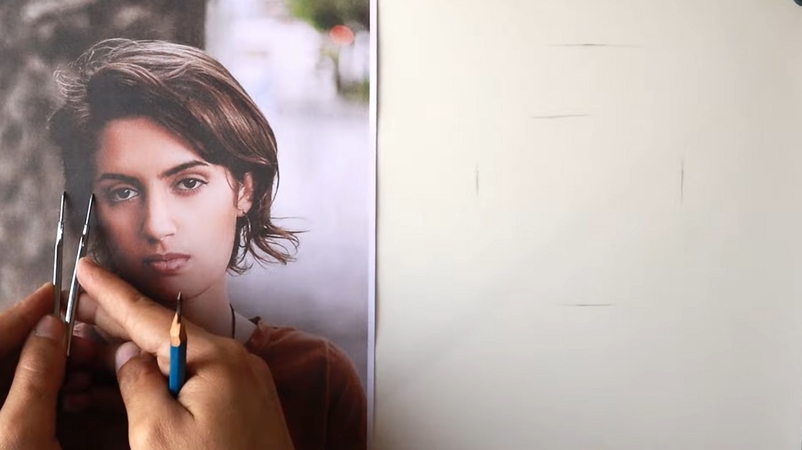
Step 2. Map Out Major Features
Here, you need to sketch outlines for eyes, nose, ears, and lips to get a basic shape of the facial features. Ensure that the proportion and placement of the features is correct before refining them.
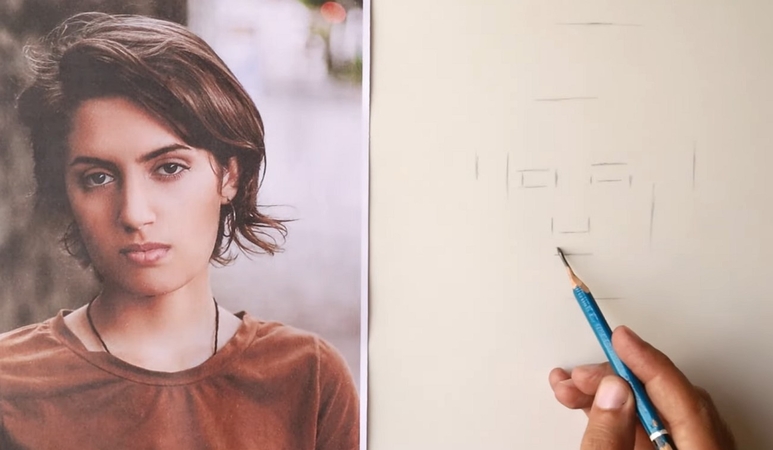
Step 3. Refine Contours and Facial Structure
Sharpen your sketch by correcting any uneven lines or shapes according to the reference image. Define the outline of the face, particularly the forehead, jawline, and cheeks.
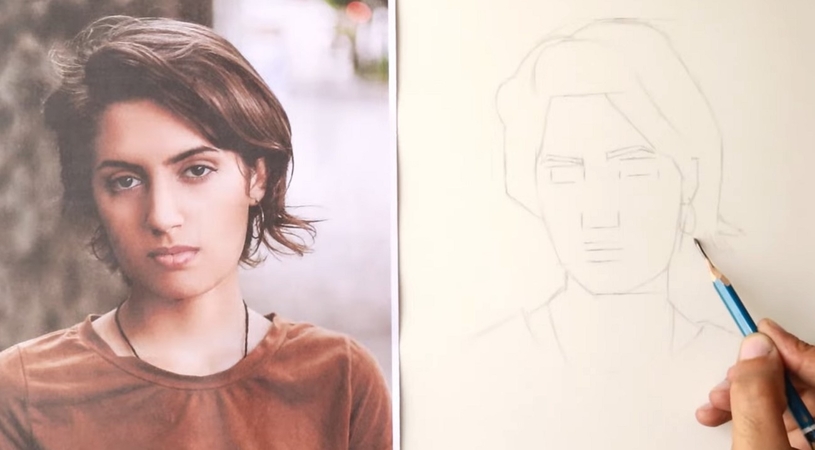
Step 4. Shade for Depth and Form
The face should have a 3D and more realistic look by using appropriate shading using soft pencil strokes. Here, the inclusion of shadows determines the areas where the light and dark is.
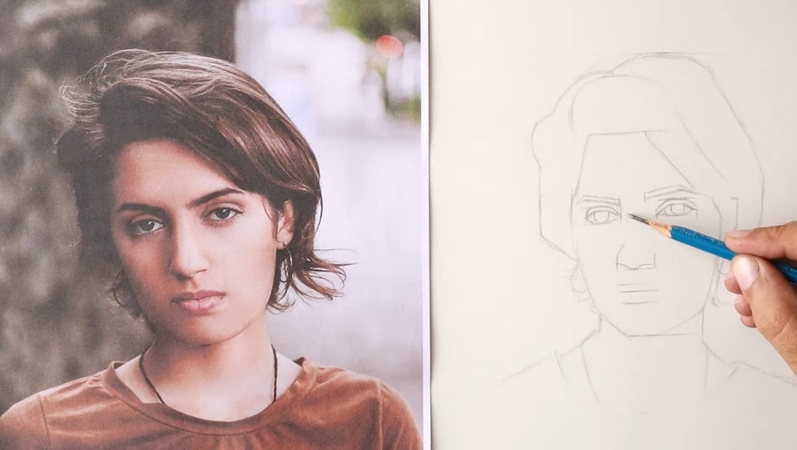
Step 5. Blend and Enhance Textures
Blend and smooth the shading carefully with a blending stump, and in case you do not have it, use tissue or cotton swab. To give a portrait a realistic look, add minor details such as the texture of skin, locks of hair, etc.
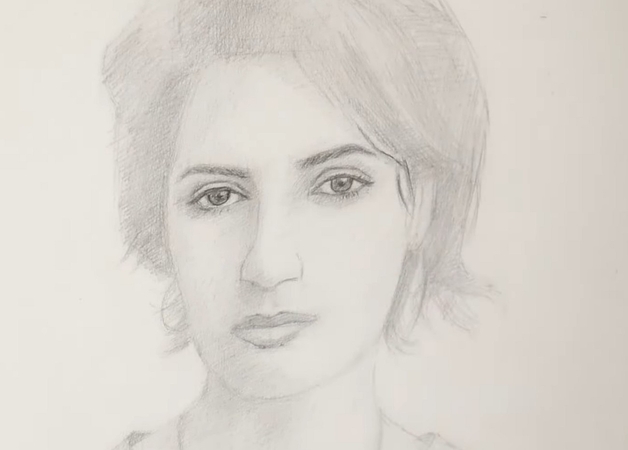
Step 6. Final Touches and Clean-up
Take one last look at your sketch, erase where necessary, and go over all the significant lines with a darker color to change photo to sketch perfectly. Put everything in balance and make the finishing touches.
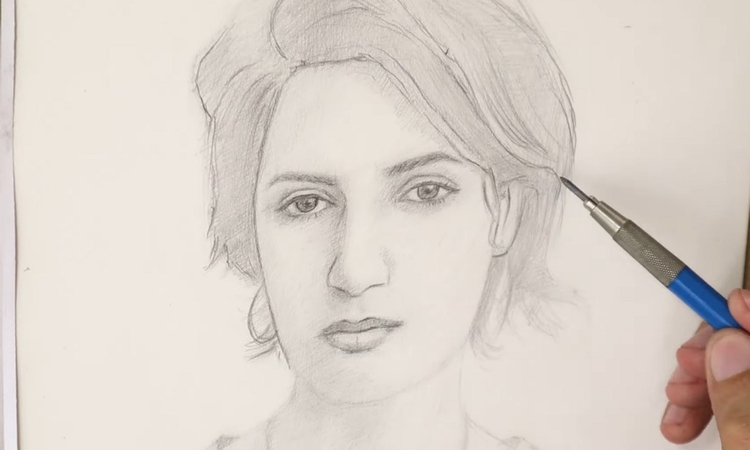
Part 3. HitPaw FotorPea: The Best Choice to Turn Photos into Line Drawings or Sketches
Creating refined line-drawn portraits of couples for invitation cards or flawless sketching becomes a daunting task when you have to do it manually. To address this, HitPaw FotorPea (formerly HitPaw Photo Enhancer) appears to be the ultimate solution, equipping you with an AI Image Generator designed to generate sketch images with Image-to-Image mode.
Key Features
1. Provides the Flux model to generate detailed, coherent images that capture every minor detail.
2. Offers you the ability to select the number of outputs you want to generate.
3. Features an old image restoration function that enables users to restore their old, distorted images.
4. Facilitates an Upscale Model that lets users enhance images of JPG and PNG format.
5. Easily colorizes old, black and white photos with its Colorize Model.
Detailed Stepwise Guide to Use HitPaw FotorPea AI Image Generator
To turn image into drawing efficiently, here is a detailed step-by-step guide to use HitPaw FotorPea AI Generator:
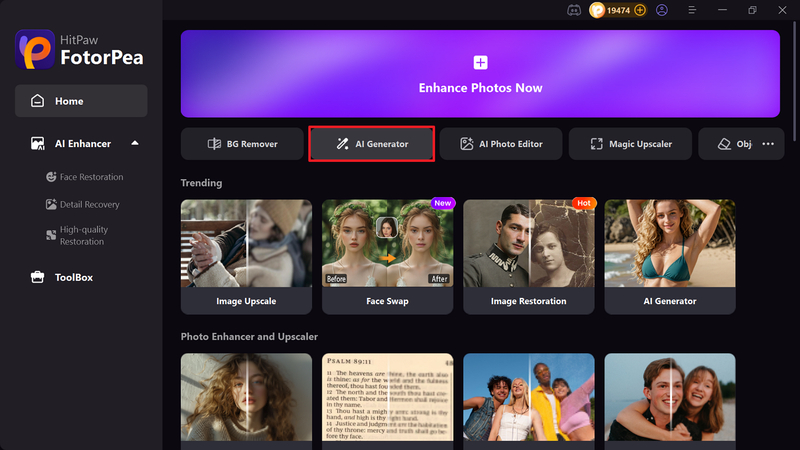
Step 1. Launch the Tool and Select the AI GeneratorAs you access HitPaw FotorPea, tap on “AI Generator” from the main interface to initiate the line art creation.
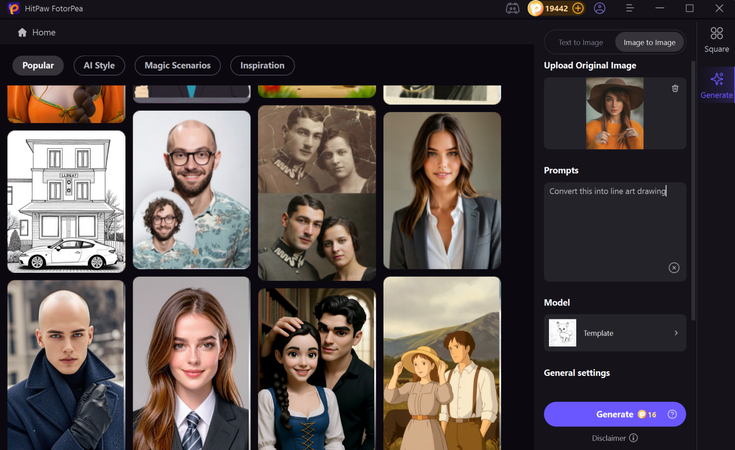
Step 2. Select the Image-to-Image Mode Generate Portrait
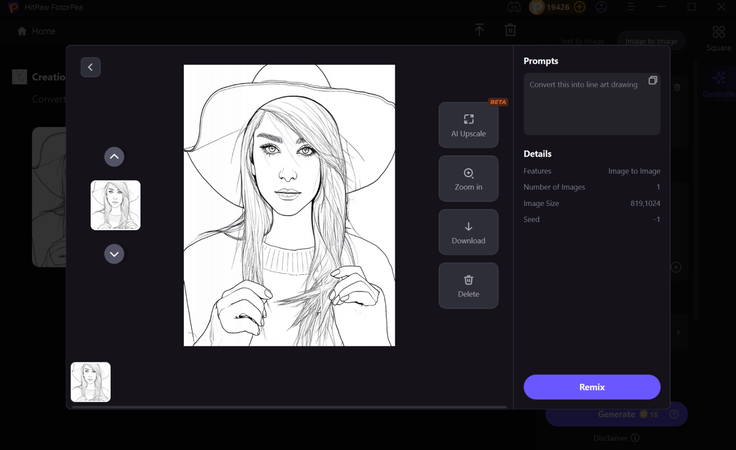
From the “Image-to-Image” mode, add your reference image, insert the detailed prompt, and pick the preferred model from the “Model” menu. Once you pick the preferred settings, tap the ‘Generate” button to initiate the image creation.
Step 3. Render the Generated Art Image to Device
Hover over the generated image, press the “Magnifier” icon to view image details, such as image size and seed. After reviewing, click the “Download” icon to save your generated line art.
Part 4. How to Change Image to Outline Sketch Converter Online: 5 Tools
Converting a photo into an outline sketch has become easier with a variety of online editing tools available, explore the following tools to get the job done:
1. Pencil Sketch Your Photo
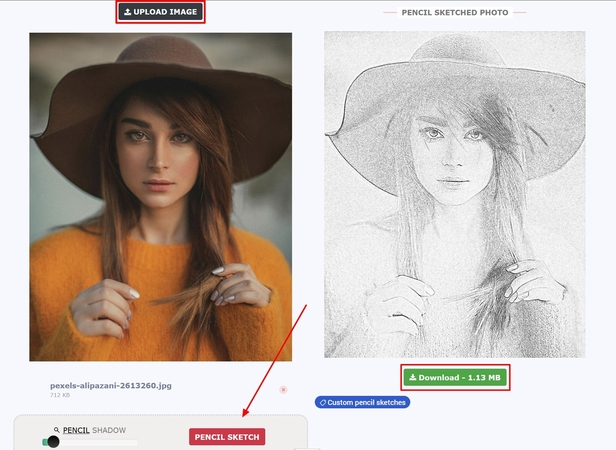
As a beginner, this free online tool lets you customize your image by setting the pencil shadow, which adjusts the thickness for lifelike pencil sketches.
Instructions. Access the tool, hit the “Upload Image” button to add your portrait. Click the “Pencil Sketch” button and tap the “Download” button to save the results.
2. Canva Photo-to-Sketch
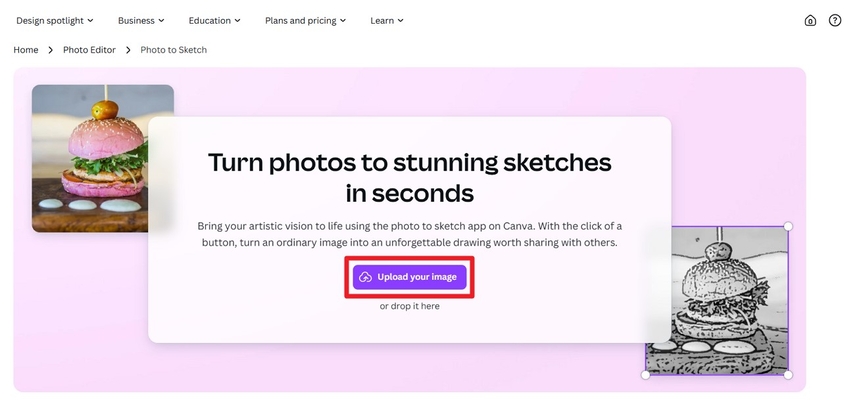
Canva’s native web apps enable digital artists to sketch a portrait from photo that can be edited and shared easily.
Step 1. Hit the “Upload Your Image” button to add an image for sketching.
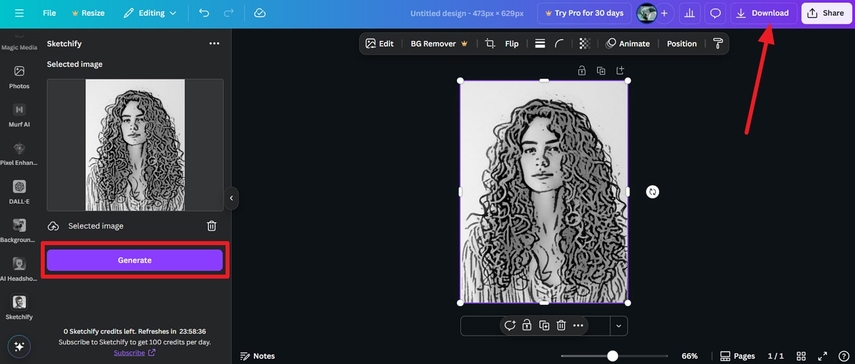
Step 2. Click the “Generate” button, use the “Add to Design” button before hitting “Download” to save your creativity.
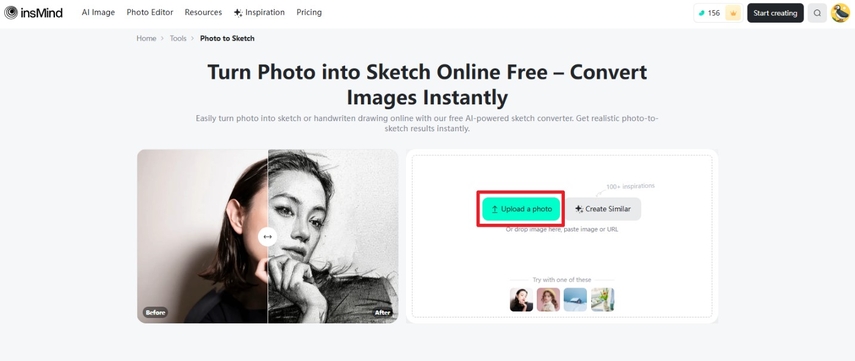
3. insMind Photo-to-Sketch
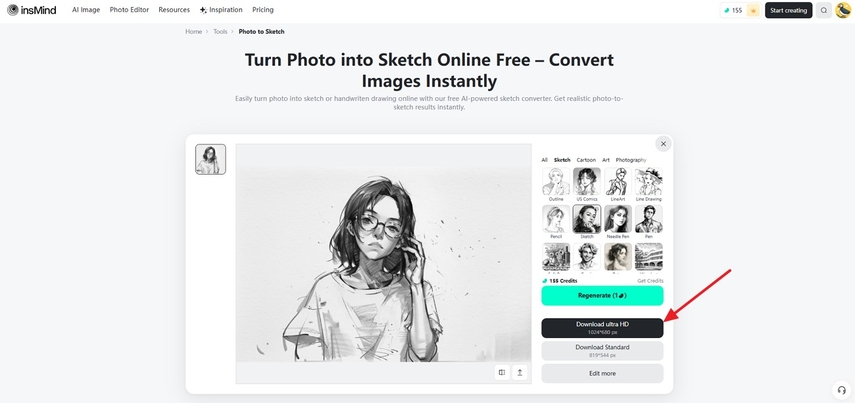
This online sketching tool allows you to regenerate your sketches, if needed, reupload the photo if selected wrongly, and hold to compare the original photo to the converted sketch.
Step 1. Load the website and upload the image using the “Upload a Photo” button.
Step 2. Choose “Sketch” from the given filter and click the “Generate” option to convert your image into sketch.
4. Befunky Photo-to-Sketch
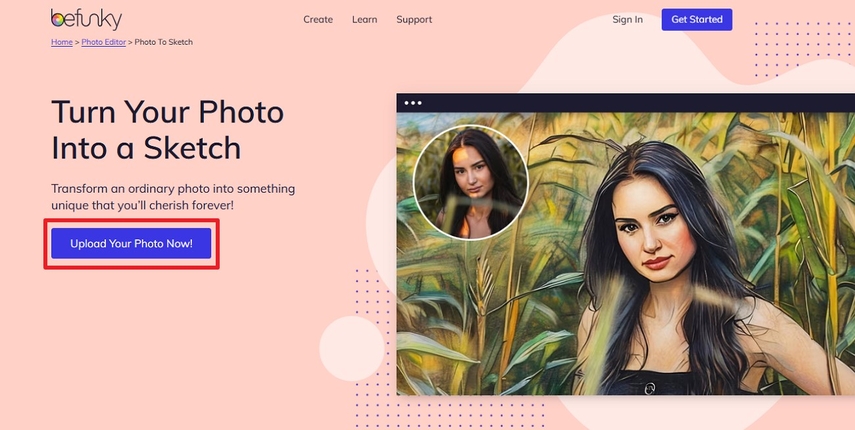
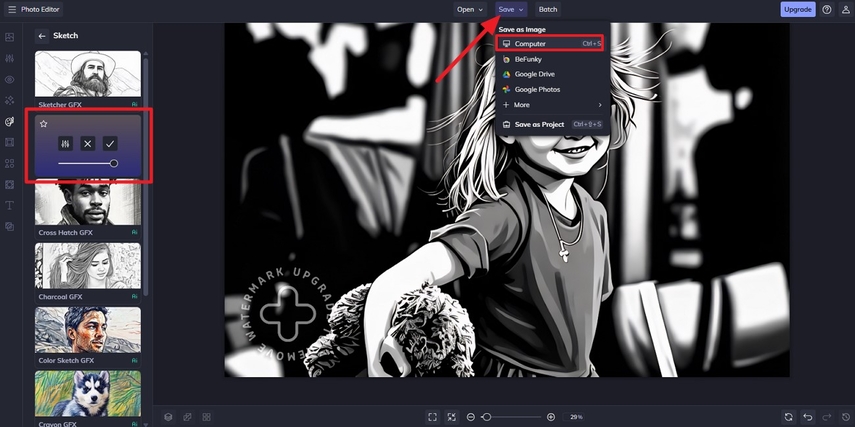
With only a few clicks, you can add sketch styles like Sketcher GFX and Comic Noir GFX across Befunky. Additionally, you can adjust the fidelity and variation to turn photos to sketch.
Step 1. Hit the “Upload Your Photo Now” button to insert your favorite image to continue.
Step 2. Click your favorite sketch style and hit the “Save” button when tool turns it into sketch.
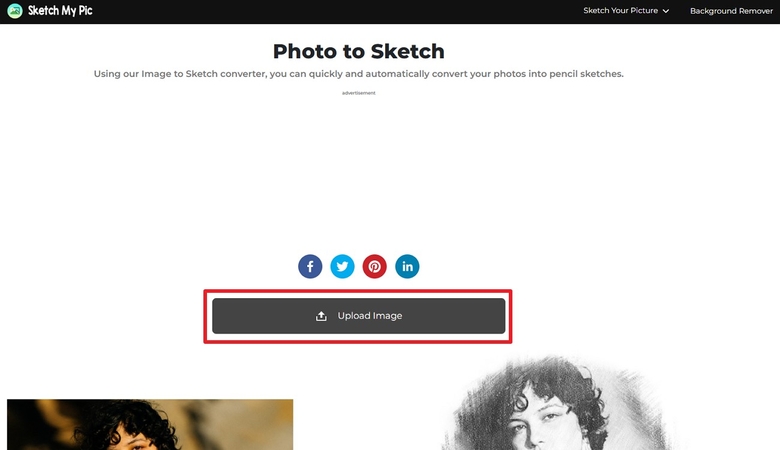
5. Sketch My Pic Photo-to-Sketch
With a swift Photo-to-Sketch feature you can quickly transform images to sketch and share with peers.
Step 1. Select the “Upload Image” button and add a photo from your device.
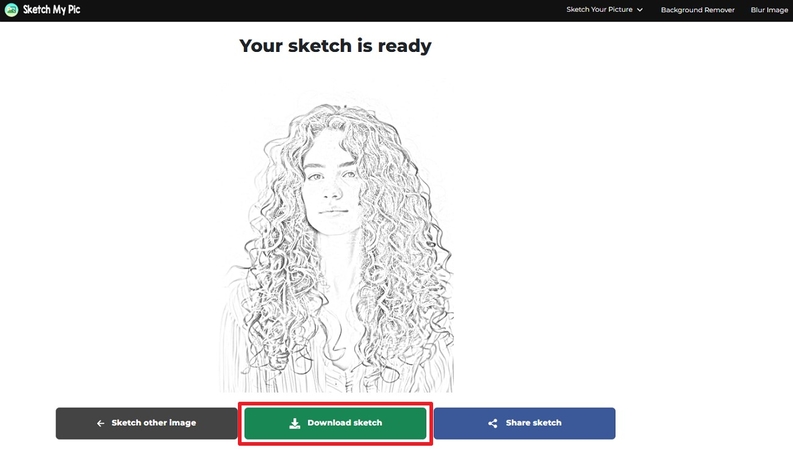
Step 2. The tool will automatically process your results; click the “Download Sketch” option to save your art.
Part 5. FAQs on How to Draw a Person Portrait from a Photo
Q1. Which pencil grades are best for portrait sketching?
A1. There are a variety of pencil grades for portrait sketching including HB and 2B-4B. While HB is used for basic structure and light outline, 2B-4B pencil grades are used for shading.
Q2. How to choose the best picture to drawing converter?
A2. While choosing the best picture to drawing converter, evaluate their output quality, AI accuracy, and the ease of use. Also, consider whether the tool supports different art styles and customization options to match your creative vision.
Q3. How long does a portrait sketch usually take?
A3. If you are doing it manually, it will take 3-5 hours to complete a sketch drawing. However, using an AI tool like HitPaw FotorPea will take only a few minutes, which could turn into seconds.
Q4. Do I need special software to trace a photo?
A4. No, you don't necessarily need special software to trace a photo as many online tools and apps can do it for free. However, using graphic design software like Adobe Illustrator or Procreate can offer more precision and creative control.
Q5. How do I preserve highlights in a pencil sketch?
A5. To preserve highlights, use a kneaded eraser, work from light to dark, and use highlighting tools carefully. Additionally, avoid over-blending in highlighted areas to maintain contrast and depth.
Conclusion
To sum up, this guide proves as a manual for digital artists who are passionate about portrait drawings from photos. From providing much needed information about multiple online tools to sketch images from real-life photos, it offers stepwise guides for each tool. However, when most of the mentioned tools fail to deliver what they promise, HitPaw FotorPea comes up as the most efficient and reliable AI generator.


 HitPaw VoicePea
  HitPaw VikPea (Video Enhancer)
 HitPaw Univd (Video Converter)

Share this article:
Select the product rating:
Daniel Walker
Editor-in-Chief
This post was written by Editor Daniel Walker whose passion lies in bridging the gap between cutting-edge technology and everyday creativity. The content he created inspires the audience to embrace digital tools confidently.
View all ArticlesLeave a Comment
Create your review for HitPaw articles