How to Fix Low Resolution Photos and Upscale Image Quality with AI Tools
A few months ago, I stumbled upon a dusty old shoebox while helping my mother clean out the attic. Inside it, buried between yellowing postcards and birthday cards from the '90s, was a photo of my grandfather. He was smiling, standing proudly beside his vintage bicycle. But the image was heartbreakingly blurred-his face a ghost of details, the background a smear of what once was a crisp summer day.
That single photo hit me hard.
I wanted to preserve it. Not just for me, but for my mother, who held that memory with tearful pride. But every time I tried to print or share it, the pixels fell apart. That's when I turned to AI.
Have you ever held a photo that meant the world to you-only to realize it's too low-res to print, frame, or even post? Maybe it was your child's first steps caught on an old phone, or a once-in-a-lifetime vacation shot snapped in a moment too fast to focus.
This isn't just a blog about pixels. It's about bringing memories back into focus.
And I'll walk you through how to do exactly that-with clarity, warmth, and the right tools.
Part 1. What Causes Low Resolution Photos?
Let me take you to another moment.
It was late at night, and I was curating photos for a friend's surprise anniversary slideshow. I found this beautiful selfie they took on their honeymoon-a sunrise behind them, cheeks flushed with happiness. But when I zoomed in?
Disaster. Blurred edges, digital noise, and compression artifacts that looked like someone smeared the image with digital fingerprints.
My friend texted, "That was taken with my old phone. Is it salvageable?"
It was. But here's what had gone wrong:
- Outdated Devices: Older smartphones and point-and-shoots just don't have the sensor strength or resolution modern devices do. That 5MP photo from 2011? Not meant for today's 4K world.
- Screenshots of Screenshots: Each screenshot removes detail. Share it again and again, and suddenly, your image is a ghost of what it was.
- Compressed Uploads: Social platforms auto-compress everything. Instagram, WhatsApp, Facebook-they sacrifice quality for speed.
- Aggressive Cropping: The tighter you crop, the more pixel data you lose. A cropped photo may frame the moment better, but it sacrifices clarity.
- Editing Exhaustion: Each time you filter, export, and re-save an image-especially in JPEG-you introduce loss. Details vanish, and edges fray.
Low resolution doesn't mean you failed. Often, it means a moment meant so much you shared it too often, edited it too eagerly, or stored it without knowing better.
But here's the good news: that doesn't mean it's lost.
Part 2. The Real Benefits of Fixing Low Resolution Photos
I want to pause here for a moment. Not long ago, a close friend of mine lost her grandmother. They were incredibly close. When she went searching through her phone for photos to use in a memory album, she found only one-the two of them in her kitchen, laughing over a burnt batch of cookies. But the image was taken in poor light, from an old phone, and had been cropped and screenshotted half a dozen times.
"It's the only one I have," she said, her voice tight with frustration. "I just wish it was clearer."
When I ran that photo through an AI tool and showed her the restored version, she covered her mouth, tears welling in her eyes. "Now I can print it," she whispered. "Now it feels real."
That's what this is about.
Fixing low resolution photos isn't about making your Instagram grid prettier. It's about reclaiming moments that matter. It's about:
- Preserving the Past: You're not just increasing pixels-you're restoring a feeling, a story, a presence. That baby picture of your niece or that candid wedding photo? They deserve to be seen clearly.
- Making First Impressions Count: Whether you're showing off your art, marketing a product, or building a personal brand, blurry visuals send the wrong message. Sharp images convey trust, intention, and care.
- Creating Shareable Beauty: Good images travel. A clear, clean photo is more likely to get liked, pinned, printed, and remembered.
- Liberating Your Creativity: Don't let low-res hold back your design. Upscaling gives you freedom to edit, crop, overlay, and reimagine.
- Printing Without Hesitation: You know that hesitation before hitting "order" on a canvas print or photobook? Upscaling erases it.
In a world obsessed with the next best moment, restoring a single old one can mean everything.
What you choose to fix today might be the very thing someone clings to tomorrow.
Part 3. How to Fix Low Resolution Photos Using AI Tools
Let's roll up our sleeves. Below, I'll show you how to transform your photos using five standout tools. Each one is designed for a different kind of user, and I'll break it down step-by-step.
1. HitPaw FotorPea - Your All-in-One AI Photo Fixer
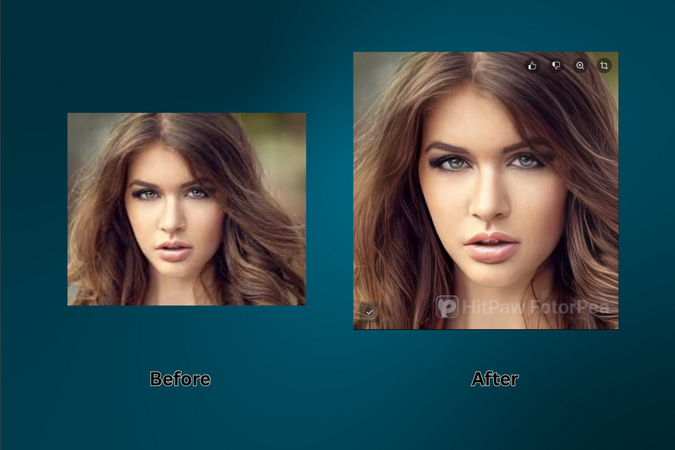
HitPaw FotorPea isn't just a tool-it's your digital darkroom. It was built with one goal: to help anyone bring photos back to life with stunning clarity.
Steps to use:
- 1.Visit: HitPaw FotorPea
- 2.Click on "Try it free" to download.
- 3.Install and launch the application.
- 4.Select "Enhance Photos Now."
- 5.Upload your low-res image.
- 6.Choose the upscale model:
- Aspect ratio: 1x, 2x, 4x, 8x
- Mode: High Quality, Fast, High Fidelity
- 7.Click Preview to see the transformation.
- 8.If you are satisfied, export the upscaled image.
Why it works:
- AI upscaling to 4K and 16K resolution.
- Dedicated Face Model for portraits-it smooths skin, removes blemishes, and brings out detail.
- Noise Reduction for high-ISO and low-light shots.
- Photo Restoration for vintage, faded, or damaged images.
- Batch enhancement to fix a folder of images in one go.
The catch? Free users get watermarked previews. Exporting requires a premium plan ($22.39/month, with a 7-day free trial).
When I used HitPaw on that photo of my grandfather, the difference was immediate. His features returned, his smile reformed-and just like that, he stepped out of the blur and back into our lives.
2. Canva - For Designers Who Need Speed and Style
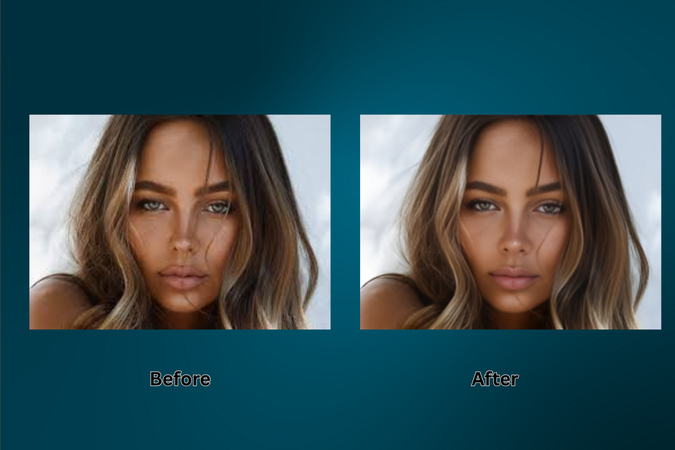
Canva isn't just a design tool-it's where creativity meets convenience.
Steps to use:
- 1.Visit: Canva Image Enhancer
- 2.Upload your low resolution image.
- 3.You'll land in Canva's workspace with the image upscaler open.
- 4.Choose the resolution: 2x, 4x, 8x, or 16x.
- 5.Click Upscale. If satisfied with the result, hit Replace to replace the old low resolution image with a new upscaled (high resolution) one.
- 6.Finally, download the enhanced image.
Canva's upscaler is part of their Pro plan, but you can start with a free 30-day trial.
What makes it stand out:
- Seamless workflow if you're already designing posters, social media graphics, or ads.
- Excellent for upscaling images that will be part of larger visual projects.
- Minimal effort. Maximum impact.
3. Fotor - One-Click Simplicity for Quick Fixes
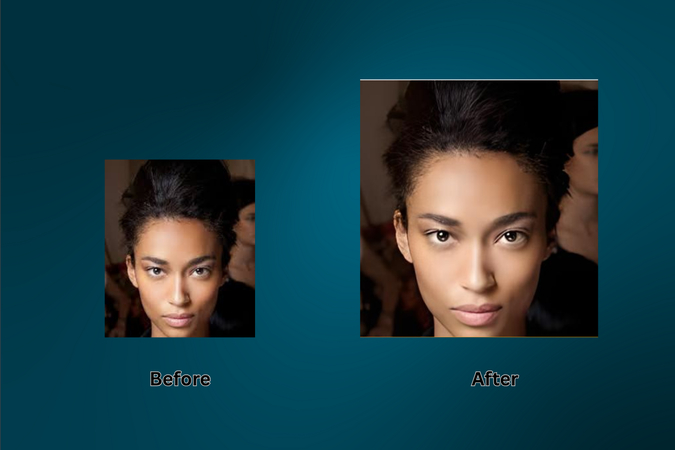
Need results fast? Fotor gets it done.
Steps to use:
- 1.Visit: Fotor Image Upscaler
- 2.Upload your low resolution photo by clicking " upscale image now".
- 3.The photo will open in the editor with AI upscaler panel on the left.
- 4.Choose 2x upscale.
- 5.Click Apply, then download.
Note: To download your upscaled photo, you would have to start the free trial offered with any of the paid plans.
Why it's helpful:
- No frills. No complications.
- Great for social media users who want quick improvement without needing design skills.
Imagine breathing new life into your vacation snapshots with two clicks. That's the beauty of Fotor.
4. Picsart - Manual Control Meets Creative Power
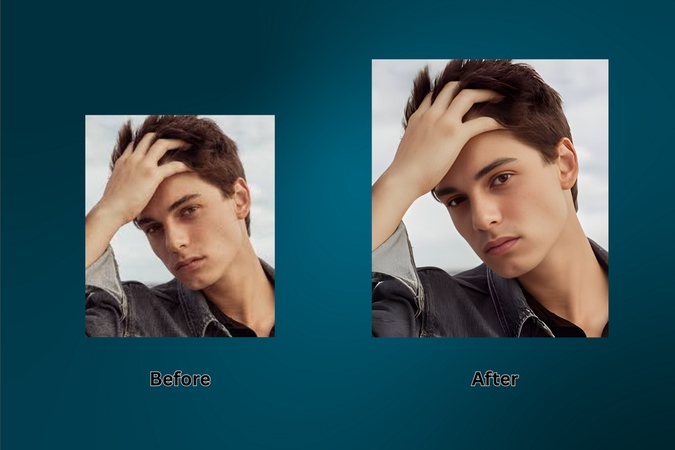
Picsart gives you the freedom to tweak every pixel your way.
Steps to use:
- 1.Visit: Picsart Upscaler
- 2.Upload your low resolution photo.
- 3.Let it auto-enhance, or choose Edit Image.
- 4.Your image will open in the editor, with the Quality Boost Panel on the left.
- 5.Select your photo type (portraits, product, etc.).
- 6.Enable Upscale Resolution.
- 7.Use the slider to increase scale (up to 4x).
- 8.Click Boost, then Apply, Export, and Download.
Picsart's beauty lies in flexibility:
- Automatic for beginners.
- Manual control for pros.
- Free low-res exports or HD downloads with Plus subscription.
5. LetsEnhance - Tailored AI Upscaling for Every Image Type
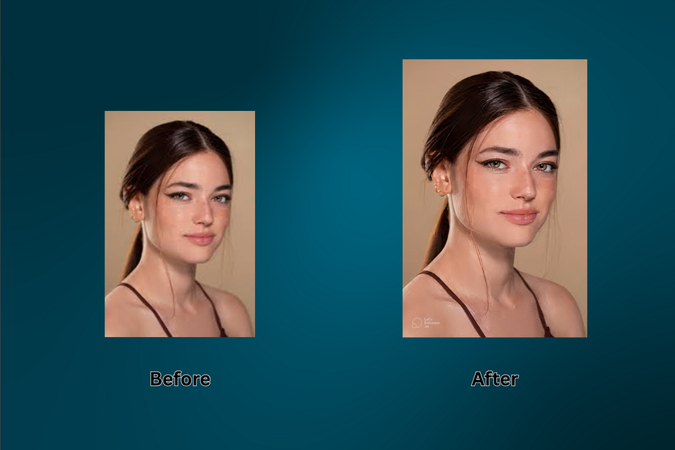
LetsEnhance feels like having a mini AI lab for your images.
Steps to use:
- 1.Visit: LetsEnhance AI image upscaler
- 2.Click "Enlarge 10 pics free."
- 3.Upload your low resolution image.
- 4.See if Upscale and Enhance tab is enabled.
- 5.Choose a model:
- Gentle, Balanced, Strong, Magic, Digital Art, Try All ( to test different models all at once).
- 6.Set size: Auto or Scale 1x,2x,4x (8x/16x for paid).
- 7.You can also set the width and height of the upscaled image, but that option is only available for paid customers.
- 8.Explore Advanced Options to adjust tone, color, format.
- 9.Click Enhance, wait for the process to complete, and download your high resolution image (free version downloads have watermark).
Who it's for: Artists, designers, and anyone who wants visual control with minimal effort.
Part 4. How to Maintain High Resolution Moving Forward
After I restored that old photo of my grandfather, I made a promise to myself: never lose a memory to poor quality again. It's not just about recovery-it's about prevention.
Here's what I wish I had known earlier:
- Capture in High Quality: Most smartphones let you adjust resolution in camera settings. Max it out. Give your future self the best raw material.
- Avoid Sending via Messaging Apps: Texts and DMs crush image quality. Use cloud storage links or email for important photos.
- Back Up Originals: Before editing or cropping, save a clean copy somewhere safe.
- Use Non-Destructive Editing Tools: Apps like Lightroom let you play around without harming the original file.
- Stick to Lossless Formats When Possible: PNG and TIFF maintain more detail than JPEG, especially for archiving.
Think of every photo as a piece of your story. Don't let it fade before its time.
Part 5. Can Upscaling Save Every Image?
Let's be honest-not every image can be salvaged. Sometimes, the original quality just isn't there.
A friend once asked me to restore a photo he found on an old CD. The file had been resized down to a thumbnail-literally 100 pixels wide-and he wanted to print it on canvas. I did what I could. The AI brought out shapes, smoothed some edges, and made it somewhat presentable. But the detail? Gone.
So no, AI isn't a magician. But it's a powerful helper.
Here's what it can do:
- Rescue lightly blurred or grainy images.
- Rebuild edges and enhance details.
- Restore contrast and tones in scanned photos.
But if the image is too far gone-say, completely out of focus or over-compressed beyond recognition-even AI can only go so far.
Use it with realistic expectations. When it works, though? It feels like breathing life into something that was nearly lost.
Part 6. Choosing the Right AI Image Upscaler for Your Needs
Every photo is different. So is every person editing it.
If you're restoring old family albums, go with HitPaw FotorPea. It's the closest thing to having a photo lab in your laptop.
If you're a content creator working in Canva, don't jump ship-use what's built in.
Need a quick fix for a blog post or resume headshot? Fotor has you covered.
Love experimenting? Picsart gives you control and flexibility. And if you're into testing different AI models and formats, LetsEnhance will feel like a digital playground.
Ask yourself: Do I want simplicity, control, speed, or precision? The answer will lead you to the right tool.
Part 7. When to Upscale vs Re-shoot or Re-edit
One afternoon, I tried upscaling an old vacation photo taken on a shaky bus ride through the Alps. The image was tilted, dark, and half-blurred. I loved the memory-but the picture? Not so much.
After fiddling with upscaling tools, I realized: some photos are better retaken than revived.
Here's a little guide:
- Upscale if the moment is irreplaceable (a lost relative, a historic location, a once-in-a-lifetime shot).
- Re-shoot if you can. Especially for product images, headshots, or anything commercial.
- Re-edit if the base photo is solid, but the tone or style feels off.
Sometimes, it's about preservation. Sometimes, it's about getting it right the second time.
Part 8. The Future of AI in Photo Enhancement
A few years ago, who would've thought we'd be using artificial intelligence to restore wedding photos or clean up scanned Polaroids?
Now, AI understands lighting, depth, skin texture, fabric weave-it's learning the language of images.
The future? It's not far off.
- Real-time enhancement while you shoot.
- AI that adjusts not just clarity, but mood and emotion.
- Instant scene recreation-turning low-res video frames into crisp photos.
We're not replacing human memory. We're preserving it better than ever.
Conclusion
That photo of my grandfather now lives in a wooden frame on my desk. He's smiling. The bicycle shines. The background glows with the soft yellow of that summer sun.
And every time I look at it, I'm reminded that some things are worth saving.
If you've got photos that matter to you-don't let them stay blurry and forgotten. Bring them back.
Start with HitPaw FotorPea. It's where I started, and I've never looked back.
Because memories deserve more than pixels. They deserve presence.
FAQs
Q1. Can I fix low resolution photos without losing quality?
A1. Yes. Tools like HitPaw FotorPea use AI to restore lost detail and enhance sharpness intelligently.
Q2. What's the best way to fix low resolution photos in Canva?
A2. Upload your photo, access the Pro upscaler, select your resolution, and download. It's smooth, fast, and integrated into your workflow.
Q3. What are the limitations of free AI image upscalers?
A3. Free tools often come with watermarks, resolution limits, and restricted export options. They're great for testing, but premium unlocks full potential.
Q4. How do I choose the right resolution when enhancing an image?
A4. Start with 2x or 4x. Go higher if you need large prints, but always preview before finalizing.
Q5. Why does my enhanced image have a watermark?
A5. That usually means you're using a free version. Upgrading to premium removes watermarks and gives you higher output quality.


 HitPaw Univd (Video Converter)
 HitPaw VoicePea
  HitPaw VikPea (Video Enhancer)


Share this article:
Select the product rating:
Daniel Walker
Editor-in-Chief
This post was written by Editor Daniel Walker whose passion lies in bridging the gap between cutting-edge technology and everyday creativity. The content he created inspires the audience to embrace digital tools confidently.
View all ArticlesLeave a Comment
Create your review for HitPaw articles