Capture Beautiful Moments with Candlelight Photography
There's something unique and special about candlelight; they are warm, feel intimate, and leave a memorable feeling. In these moments, capturing the perfect pictures lets you freeze that moment in time forever. These photos can be a bit tricky to shoot, which is why this article is here to provide you with all the necessary tricks about candlelight photography. Moreover, if these pictures turn out blurry or dull, try HitPaw to fix them.
Video Tutorial to Enhance an photo with FotorPea:
Part 1. What is Candlelight Photography?
It stands apart from both natural and artificial lighting due to its uniquely warm and soft glow, which creates strong contrast and deep shadows. Unlike illumination from daylight or the sharp clarity of LED, romantic candlelight photography casts a flickering that shapes the scene in a more intimate and cinematic way.
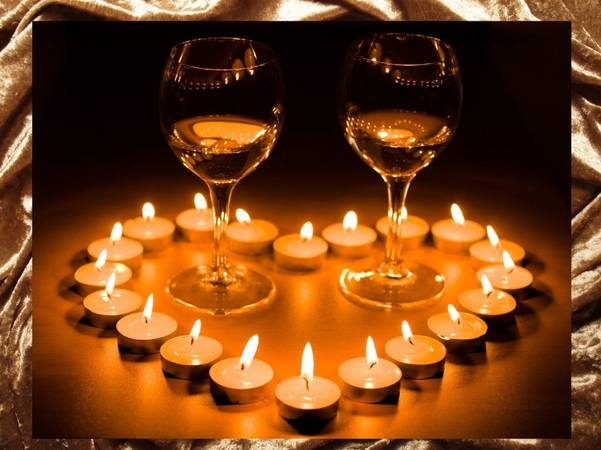
This kind of illumination brings in the organic vignette and gentle light, highlighting particular subjects. It establishes an emotional atmosphere and expresses warmth, romance, and nostalgia based on how it is applied.
Part 2. Technical Considerations to Keep in Mind About Candlelight Photography
To truly grasp the enchanting essence, it's essential to comprehend the subsequent technical elements that enhance low-light conditions:
1. Discuss ISO, Aperture, And Shutter Speed Settings Ideal for Low Light
For moody candlelight photography, use a wide aperture like f/1.8 or f/2.8 to let in more light. Moreover, pair it with an ISO such as 800 to 3200, depending on your camera, and properly expose it without blurring the candle flame by using a 1/30s shutter speed.
2. Recommend Suitable Gear (Lenses, Tripods, Cameras with Good Low-Light Performance)
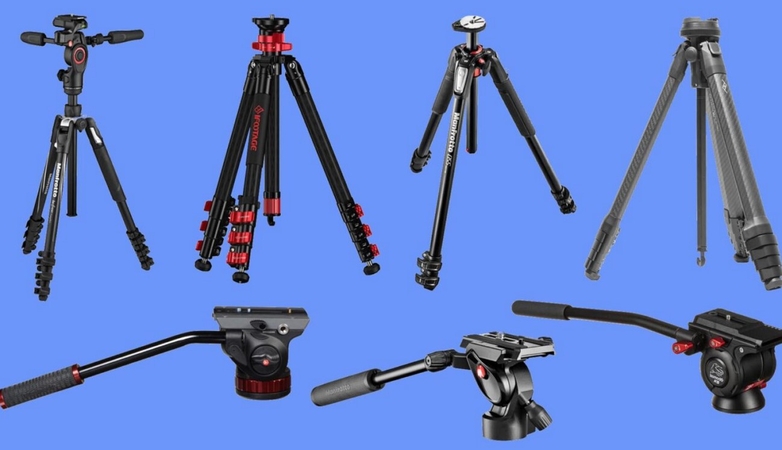
A prime camera with a wide lens is ideal for capturing crisp, low-light shots with beautiful depth of field. Use a DSLR that is known for good light performance, like the Sony A7 series or Canon R6, and a sturdy tripod to eliminate blur during slower shutter speeds.
3. Talk About White Balance Adjustments and Avoiding Color Cast Issues
Set your white balance manually or use a preset filter to reduce the yellow or orange cast from candlelight. Fine-tune in post-processing to retain warmth without distorting skin tones or losing the natural candlelight mood.
Part 3. Steps on How to Get the Perfect Candlelight Photographs
There’s something undeniably magical in the flickering glow of candlelight as it adds emotions to any photo. If you want to capture that soft, romantic ambiance, follow the provided stepwise guide for professional candlelight photography:
Step 1. Set the Scene and Position Your Candles Strategically
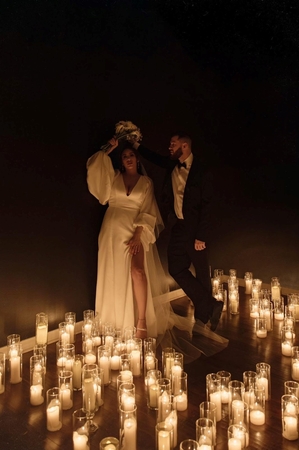
Initiate it by creating a calm and interruption-free setting that complements the overall mood. After this, use an odd number of candles for a more natural look and place them at varying heights to create depth. Plus, make sure your main subject is highlighted evenly by positioning candles around it, not just in front.
Step 2. Use Manual Focus or Live View for Sharper Shots
Now, switch to manual focus or use your camera’s live view mode to get sharp results without autofocus struggle. Also, zoom in digitally on your screen while adjusting the focus to keep minor details perfectly sharp.
Step 3. Adjust Camera Settings for Low-Light Success
Next, use a wide aperture and raise your ISO to brighten up the image as required. Plus, keep your shutter speed slower to absorb more light, and use a tripod to prevent any motion blur. Try to avoid the built-in flash because candlelight is all about natural warmth, not artificial bursts.
Step 4. Take Multiple Shots and Experiment
After this, take multiple shots to capture the perfect moment because each flame flicker can change your scene differently. Explore different angles, such as shoot-through candle holders, from above or behind the flame for stunning silhouettes.
Part 4. Improve Candlelight Pictures Quality with HitPaw FotorPea
As discussed, candlelight photography can be a bit tricky, as it can turn out low-light, blurry, and even grainy. Whether you’re using night mode, adjustable brightness, or editing magic, these pictures can get worse if not fixed. Therefore, you might need to rescue your precious pictures and beautiful moments, like birthday celebrations, dinner parties, and more. Use HitPaw FotorPea, an efficient and advanced photo enhancement tool.
Key Features of FotorPea
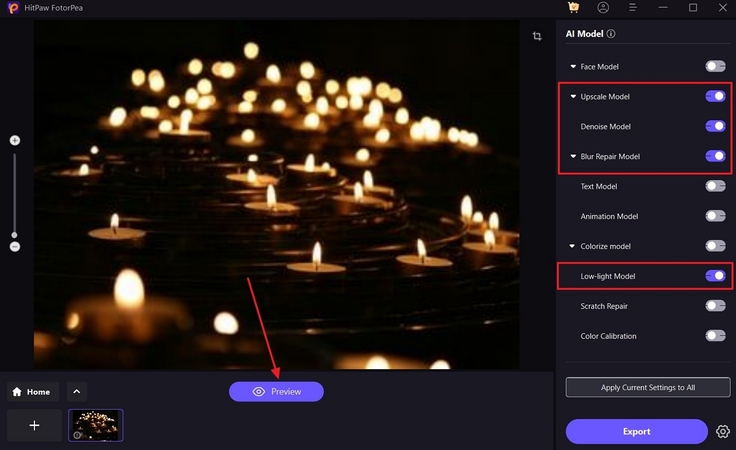
1. The Upscale Model sharpens and enlarges the candlelight image quality from 720p to 4K.
2. The Denoise Model helps improve the low-quality and flickering candlelight pictures to make every pixel clear.
3. With the Blur Repair Model, you can fix any motion, lens, or compression blur caused by low-light candlelight photography.
4. A dedicated Low-Light Model helps brighten low-light candlelight pictures with its advanced AI technology.
5. The Colorize Model within FotorPea helps enhance the fire-like vignette color in candlelight photography with AI enhancement.
Step on How to Enhance Candlelight Photography with FotorPea
The following is an easy step-by-step guide that will help you understand how to enhance the candlelight photos:
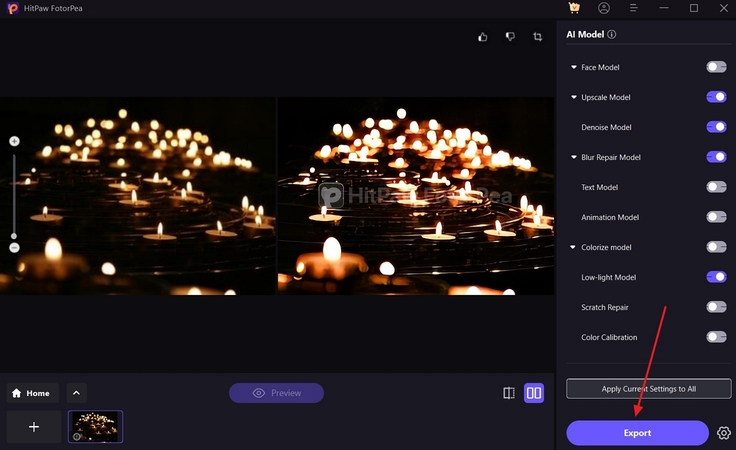
Step 1. Access HitPaw FotorPea Enhancer FeatureFrom the software’s main interface, press the “Enhance Photos Now” button in the “Home” tab.

Step 2. Choose Suitable AI Models and Start
Afterward, toggle the desired “AI Models” in the right panel, like “Upscale Model,” “Denoise Model,” and more. Next, hit the “Preview” button to start the enhancement process.
Step 3. Side-by-Side Candlelight Image Compare and Export
When the enhanced image appears, compare the two photos and click the “Export” button.
Part 5. FAQ on Candlelight Photography
Q1. What camera settings are needed for candlelight photography?
A1. To achieve that soft ambient glow of candles, you’ll need to optimize your settings for low-light conditions. First, you should have a wide aperture to let more light in and create a professional blur background. For romantic candlelight photography, your ISO must be between 800 and 1600 or high enough to brighten the shot without too much noise.
Q2. How do I set the correct white balance for candlelight photography?
A2. For perfection in the dim light pictures, set a warm tone, typically around 1800–2200K on the color temperature scale. To put this natural warmth, adjust your white balance manually or use a "Tungsten" or "Incandescent" preset on your camera.
Q3. What are some creative ideas for candlelight photography?
A3. There are various artistic possibilities, such as candlelight portrait photography with natural skin tones and dramatic shadows. Plus, you can create still-life compositions and silhouettes by placing candles behind your subject.
Q4. How to remove blur or grain from my candlelight photos?
A4. While blurry or grainy shots are common in low-light settings, they can still be fixed through a platform like HitPaw FotorPea. It facilitates users with nine AI models to improve overall quality by removing noise and repairing blurred parts.
Conclusion
To conclude, candlelight photography captures more than just a moment as it preserves the feeling when aiming for a romantic touch. The proper setup, camera settings, and a little bit of creative flair can transform an ordinary moment into an intimate masterpiece. Once the glow is captured, it can be further improved through HitPaw FotorPea, which removes blurriness and enhances your photographs for a clearer outcome.


 HitPaw Edimakor
 HitPaw VikPea (Video Enhancer)
 HitPaw Univd (Video Converter)


Share this article:
Select the product rating:
Daniel Walker
Editor-in-Chief
This post was written by Editor Daniel Walker whose passion lies in bridging the gap between cutting-edge technology and everyday creativity. The content he created inspires the audience to embrace digital tools confidently.
View all ArticlesLeave a Comment
Create your review for HitPaw articles