


Photographs in Sepia Tones: Not Just a Vintage Filter
There's just something about those warm, brownish photographs in sepia tones that appear timeless. You see them in old albums, antique shops, or even on Instagram when someone wants that throwback vibe. That color tone is called sepia, and it's been around since the early days of photography. This guide takes you through what sepia tone really is, how it's made, and how you can get that look straight out of your camera.
Part 1. What Is a Sepia Tone In Photographs?
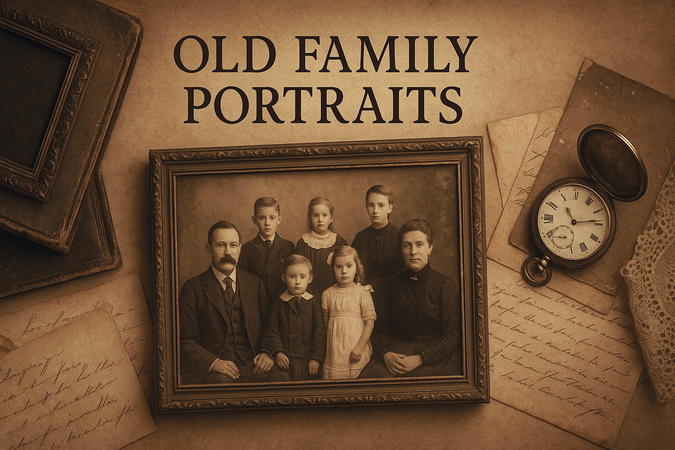
You've probably seen those brown-tinted photos that show up in old family albums or old-timey posters. That's what a sepia tone looks like. It gives the photo a warm, faded look that adds a quiet, vintage atmosphere. It's not just about looking old. It pulls you into a moment that appears preserved in time.

Sepia started way back when photographers were still using film and chemicals. The tone came from actual sepia ink, which was made using cuttlefish. That ink added a protective layer to photos, so they didn't wear out as quickly. As photography evolved, this brownish tone became more than just practical. People started noticing the character it gave to every shot.
What separates photographs in sepia tones from regular black and white is the warmth. Black and white comes across as plain and sharp, but sepia wraps everything in a golden softness. You still get the shadows and contrast, but there's more depth in the emotion. It's like the photo is telling a quieter story that holds its space and settles into the frame with calm energy.
These days, sepia tones aren't just stuck in the past. You'll see them used in wedding albums, memory books, and digital photo edits. Apps and filters bring it back with one tap, but the effect still carries that same atmosphere. People use it when they want to give a moment more weight or pull some old-school charm into a modern shot. So yes, it's not just a color. It remains a style choice rooted in photography's early years.
Part 2. How is Sepia Tone Created in Photographs?
Back in the early days of photography, sepia tones didn't come from a filter. They were the result of an actual chemical process done in a darkroom. Photographers used something called sepia toner, which was made using compounds like sodium sulfide. This was applied to black and white prints to change the silver content in the photo and turn it into a warm brown color. It also made the image more stable and less likely to fade over time.
That whole process needed patience. First, you had to bleach the black and white print, which would strip some of the original tones. Then came the toner, which reacted with the image and shifted everything to brown. That chemical change gave the photo more life in terms of longevity. The color gave it a softer mood, but the goal was mostly to keep it from breaking down.
Now, it's way simpler. Most digital cameras already have a sepia filter these days. When you select it, the camera adjusts the red and yellow channels while dropping some of the blues. This balance pushes the image into that familiar brown range.
Behind the scenes, all of this comes down to altering color values. Instead of neutral grays, sepia swaps in browns and reds. This changes the overall feel of the image by shifting how shadows and highlights show up. There's no single formula for it, but the color range usually leans toward reddish-brown with soft contrast.
There are photo editing apps, too, like Adobe Photoshop, which has a sepia effect. You can tweak it even more using tone curves or split toning if you want extra control. So basically, you're skipping hours of chemical steps that old-school photographers had to do by hand.
Part 3. Why Do People Have Photographs In Sepia Tones?
People still use sepia tones because they want their photos to carry a softer mood that doesn't come through with bright colors.
Emotional and Nostalgic Appeal
Sepia works well when someone wants a photo to feel older than it really is.
It's often used on images that were taken recently but are meant to represent a past memory. That's why you see sepia in memory books, heritage projects, or when someone wants to match the style of older black and white prints but with a warmer finish.
Artistic and Storytelling Reasons
Photographers sometimes pick sepia when they want less color to distract from the subject. It strips the frame down to its light, shadow, and shape. That shift helps the eye focus on texture, facial expressions, or background detail. It also helps create a quiet tone in portraits or documentary-style photos where mood matters more than bright color.
Sepia in Print vs. Digital Display
The Sepia tone looks more natural when printed. On textured or matte paper, the brown tones blend into the surface better than bold colors. That's why printed sepia shots are often used in galleries, home prints, or framed photos. On digital screens, the tone can appear sharper or uneven depending on the brightness, which can affect how soft the image looks.
Sepia isn't about copying the past. It's used today because it offers a different way to present a story or feeling. When color gets in the way, sepia gives photographers another way to direct attention where they want it.
Part 4. How to Capture Photographs In Sepia Tones Using Camera Settings
You don't always need editing software to get a sepia look. Some cameras already have it built in, and a few simple adjustments can also help get close to that warm tone.
Using Built-in Filters or Color Modes
A lot of DSLRs and mirrorless cameras include filter options or picture styles. You can scroll through the camera menu and choose one that says "sepia" or "warm monochrome".
Once that's selected, the camera processes every shot with that tone. It works well for basic scenes like portraits, still objects, or anything with strong lighting. You don't need extra editing after that.
Manual White Balance and Tone Adjustments
If your camera doesn't offer a sepia setting, you can get close by adjusting the white balance. Shift it slightly toward red or yellow tones. Some cameras let you fine-tune the color balance manually in the Kelvin settings. Adding a bit of warmth through these controls brings a faded brown look, especially when paired with lower contrast and muted color presets.
Best Lighting Conditions for Sepia Shots
Lighting can change how a sepia image turns out straight from the camera. If the goal is to capture a soft, warm tone without editing, natural light gives the best result.
Early morning and late afternoon lights create a calm balance in the shadows, which fits the look better than hard indoor lighting. Midday sunlight often blows out the details and flattens the color. Overcast skies work well, too, since they keep the light even. That's why outdoor portraits or still shots look more balanced in soft daylight. The light sets the mood before the sepia tone even comes in, and that gives your photo more control when the camera shutter opens.
Part 5. Colorize Your Photographs In Sepia Tones Using HitPaw FotorPea
If you have photographs in sepia tones or in black and white, you can convert them into color images using HitPaw FotorPea. This tool has a built-in colorized model that does the job for you. You don't need to adjust anything on your own. Just upload the photo, pick the model, and let it handle the rest. It adds natural color to the image and gives you a version that looks more recent.
Here's how to use HitPaw FotorPea to convert your black-and-white or sepia photos to color:


Step 1.Start by downloading and opening the HitPaw FotorPea software on your Windows or Mac computer. Once the tool launches, look at the top menu bar and click on the option that says "AI Photo Editor." That's where all the enhancement tools are grouped, including the colorize option.
Step 2.Now, click the plus icon showing in the middle of the screen to upload your photo in sepia tones or in black and white. Once your image is selected, it will appear inside the editor, ready for processing. You don't need to change any settings before this-just make sure your photo loads correctly.
Step 3.After the upload is complete, look through the editing features on the right pane and click on the option that says "Colorize B&W Photo." The tool will start working right away. It reads the shades in your image and adds natural colors automatically using its built-in model.
Step 4.Once the process finishes, you'll see a new version of your image in amazing color.
Step 5.To save the image, click the settings icon next to the Export button. This opens a small panel where you can adjust settings to save the image on your device, and configure the export quality, format, and other things. Then, click OK and click "Export" again, and the new image will be saved in the local HitPaw FotorPea folder on your PC so that you can access it anytime.
Conclusion on Photographs In Sepia Tones
In this guide, we've discussed photographs in sepia tones, how this tone is created using early photography methods, and whether it is still possible to capture photos in the same tones today. We also covered how editing tools can create the same effect. People still use sepia because it carries emotion, memory, and style, especially in print and digital formats.
If you ever want to reverse the tone and turn an old photo back into full color, HitPaw FotorPea does that easily with its built-in colorize model. You just upload your image and apply the AI model in seconds. It's simple, fast, and gives you a full color version instantly.

 HitPaw Univd (Video Converter)
 HitPaw VoicePea
  HitPaw VikPea (Video Enhancer)


Share this article:
Select the product rating:
Daniel Walker
Editor-in-Chief
This post was written by Editor Daniel Walker whose passion lies in bridging the gap between cutting-edge technology and everyday creativity. The content he created inspires the audience to embrace digital tools confidently.
View all ArticlesLeave a Comment
Create your review for HitPaw articles