


Best VR Video Converters to Convert VR Video to Normal Video
Summary
- Show how to convert VR videos into normal 2D videos for easy playback on regular screens and media players like VLC.
- Highlight key differences between VR and normal videos, explaining why VR-to-video conversion is often necessary.
- Cover extra tips for expanding video use, including converting normal videos to 3D for a better viewing experience.
VR videos are designed for headsets, but many users want to watch them on normal screens such as PCs, TVs, or media players like VLC. To do this, you need to convert the VR video to a normal 2D video format. This process flattens the 360° view into a standard frame so the video can play normally without a headset. In this guide, we’ll show how to convert VR video to normal video using practical tools and simple steps. These VR to normal video converters allow you to watch VR videos on regular devices and share them easily.

Part 1: How to Convert VR Videos to Normal Videos?
To convert a VR video to a normal video, you typically need a tool that supports 360° or VR video editing. These tools flatten the VR projection and export it as a standard 2D video format such as MP4. Below are two practical VR to normal video converters that can help you turn VR videos into normal videos for easier playback.
Method 1: Convert VR Video to Normal Video Using Pinnacle Studio
Pinnacle Studio is a rather powerful video editing tool that is also characterised by a friendly interface and a great number of options available for editing. It also supports 360-degree video editing and provides users with an easy way of converting VR videos to regular format. Additional feature sets of Pinnacle Studio are colour correction, video stabilisation, and managing audio tracks.
Its timeline-based editing keeps the clips in order, and the effects also can be added easily. It also supports various output formats so that it can be easily compatible with many of the devices. Learn how to convert VR video to 2d.
Guide on How to Convert VR to Normal Videos using Pinnacle Studio
1. Import Your 360-Degree Video
Start by importing your 360-degree video into the software library. This step organises your VR footage. After importing, select the video file and drag it to your editing timeline for conversion.
2. Choose the Conversion Format
Select your conversion option based on the format of your VR video. You can convert from Equirectangular to standard, single fisheye to standard, or double fisheye to standard. Use the dual-panel preview to see both the original 360 video and the selected output format.
3. Adjust the View Tracker
Use the 360 source pane to adjust the view tracker settings. This allows you to change the camera angle in your VR footage. Watch the real-time updates in the preview pane as you make changes. Click play to view playback and move the view adjuster to find the right angle.
4. Make Additional Edits
Enhance your video project by trimming sections or adding audio tracks. Use the editing tools in the software to improve the final product. Ensure that your edits work well for the transition from VR to standard video format.
5. Export Your Final Video
After completing your edits, save your project to keep your work. Then, export the video by choosing your output settings, such as resolution and format. Click the export button to start the rendering process. This will convert your edited VR video into a standard format, ready for playback.
![]() Pros
Pros
- Easy-to-use interface for simple navigation
- Supports different video formats for output
- Advanced editing tools for high-quality results
- Allows detailed control over video and audio
![]() Cons
Cons
- It can be resource-heavy, needing a powerful computer
- Some features may take time to learn for beginners
- The full version requires payment, which may not be affordable for all
Method 2: Convert VR Video to Normal Video Using VideoStudio
VideoStudio is another tool that could be useful to help convert video to virtual reality. One of the most useful features is that it has very many editing tools specifically for 360-degree videos.
Overall, VideoStudio has been developed with an interface, which is very easy to navigate and can be used ranging from a novice to an experienced computer user. You can use the software to write text and transitions on your videos and add effects to them as well. It is also possible to export the projects in a number of resolutions and formats to ensure sharing across devices.
Steps to Convert 360 Video to Standard Video using VideoStudio
Step 1. Download and Install VideoStudio
To begin with, one has to download this VideoStudio from the official site. Simply double-click the installation file and click on the next button until the installation process is complete. Ensure that your computer server is well endowed with the right system specifications for the software.
Step 2. Import Your 360 Video
Click on Open VideoStudio and open a new project. To import 360 videos, go to the "Import Media" tab. Locate your video file and choose it by clicking it. This will pre-condition your video for editing purposes.
Step 3. Return to the 360 to Standard Conversion Tool
To do this, just click and drag your imported 360 video into the Timeline. Pause the video and right click on the video clip and then choose 360 Video > 360 to Standard. This will bring up a window with two preview windows-one for the 360 video and one for the standard video.
Step 4. Use The View Tracker to Fine-tune Your View
On the left side pane, locate the View Tracker icon. This icon can be dragged to change the viewpoint that you wish to display in the standard one-view video. This helps you to concentrate on the portions of your 360 video which are most important.
Step 5. Preview and Change the Video View
To view your 360 video, just click on the Play button next to it. As it does so, use the View Tracker to fine-tune the position observed in the standard video pane. Whenever you manually change the position, the new keyframes will be automatically set.
Step 6. Edit Keyframes for Adjustments
To review changes, press on keyframes within the Timeline panel. To delete a keyframe, simply highlight it and then press Delete. Suppose you want to change when a view is visible, drag a keyframe on the Timeline. It is also possible to choose a keyframe and then tweak the Pan, Tilt, and Field of View settings as you desire.
Step 7. Finish and Save Your Standard Video
After you finish truing the file, press OK to save changes and get back to the main window with the Timeline. To export your project, navigate to the Share tab and then select a format for the exported video, such as MP4 or AVI. Define the quality of the output and press Export to download your converted video.
![]() Pros
Pros
- User-friendly interface suitable for beginners
- Many editing tools for better video quality
- Supports various output formats for easy sharing
- Provides tutorials to help users improve their skills
![]() Cons
Cons
- Fewer advanced features compared to professional software
- Some users may find editing options limited
- The software requires payment for the full version
Part 2: VR Videos vs Normal Videos Key Differences and Why Conversion Matters
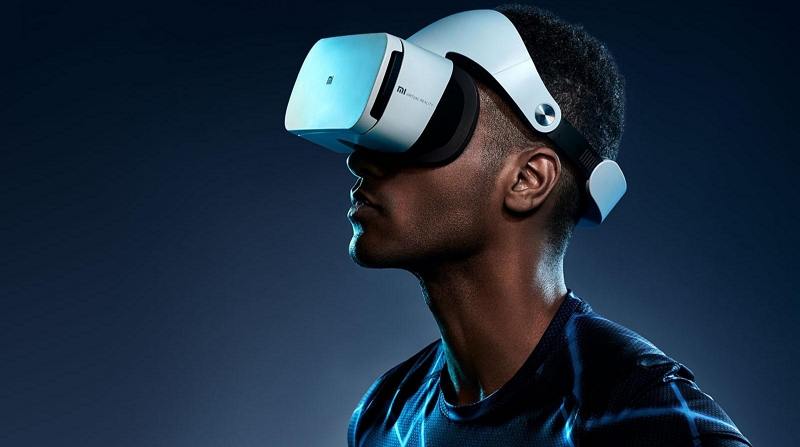
Virtual Reality (VR) videos are one of the new generations of digital media that aims to create an environment for the viewers. These videos give the users a realistic feel of the scene like they are watching it from inside a box. The VR videos can be watched with specific headsets or by using devices that detect the head movements. This means that this technology has the potential to provide people with video content in a method that is dissimilar to any other technology.
VR videos usually come in two formats: 360-degree videos and fully interactive VR experiences. A 360-degree video is a video with 360-degree coverage where a viewer is able to look around with their head or by swiping their device. Achieving a fully interactive experience allows the user to intervene in the environment. Such a level of participation can contribute to the development of narratives and improve learning. Virtual reality videos are consistently growing to be much more real and are becoming more and more available to the public.
What are the differences between VR videos and normal videos?
Feature
Normal Videos
VR Videos
Photography
Captured from a single angle
Captured from various angles, providing a 360-degree view
Mobility
Users remain in one spot and can only look around within the frame
Users can move their heads freely to explore the scene
Video Timeline
Follows a straight, linear progression
Offers a non-linear format that allows for different viewing paths
Platforms
It can be watched on any device
Requires a virtual reality headset for viewing
Experience
Filmed from a stationary perspective, limiting the view to the camera's frame
Creates a more immersive and realistic environment, making users feel present in the video
Why Need to Convert VR Video to Normal?
It is important to convert VR videos to normal format for the following reasons. VR videos can be used to create an exciting experience, and despite this, they have known demerits. First, VR videos can only be viewed with accessories, for example, a headset, which most people do not have access to.
This restricts the number of viewers who will be able to see the content. Second, VR videos may take longer time in post-production, including editing and sharing. They normally require a special program, which makes them quite challenging to work with, especially for a normal user. Third, a portion of viewers may experience discomfort or even motion sickness when using VR, thus resulting in undesirable experiences.
Converting the VR videos back to normal formats means that more individuals are capable of viewing the content. Normal videos can be broadcast on any ordinary media device, including tablets, smartphones, and computers. The expanded reach has the advantage of extending the target market. Furthermore, normal videos are easier to edit and can be shared readily. It does not require specific software that makes the process easier for creators with restricted know-how. Take a look at how to convert VR videos to normal videos below.
- VR videos can be changed to standard formats for better device support.
- Conversion allows for changes in resolution for better playback on different screens.
- Converting VR videos can change the field of view for normal viewing.
- VR audio can be changed to stereo for regular video playback.
- Converting VR videos usually removes interactive parts for a straight viewing experience.
- Changing VR videos to normal formats can lower file size for easier storage.
Bonus: Convert Normal Videos to 3D for VR Viewing
While converting VR videos to normal formats improves accessibility, some users may also want a more immersive visual experience when watching standard videos. In this case, converting 2D videos to 3D can help add a sense of depth and make videos feel more engaging.
HitPaw Univd (HitPaw Video Converter) offers a practical solution for converting standard 2D videos into 3D video formats. Instead of creating full VR content, this feature focuses on enhancing visual depth to improve immersion during playback. With a simple and user-friendly interface, users can complete 2D to 3D video conversion efficiently without complex settings, making it suitable for everyday viewing needs.
Why Choose HitPaw 3D Video Converter?

HitPaw Univd - All-in-one Video Solutions for Win & Mac
Secure Verified. 254,145 people have downloaded it.
- HitPaw allows you to change 2D videos into amazing 3D videos easily.
- The software offers fast conversion speed, finishing tasks quickly.
- It keeps high-quality output, making sure the immersive experience stays the same after conversion.
- Users can convert many videos at once, saving time and increasing productivity.
- HitPaw's simple interface makes it easy for anyone to use the software.
- This tool supports many video formats, making it useful for all your video conversion needs.
Secure Verified. 254,145 people have downloaded it.
Guide on How to Convert 2D Normal Video to 3D with HitPaw Univd
Step 1: Open HitPaw and Select the 2D to 3D Feature
Start HitPaw Univd and scroll down on the Home interface to find the Video tab. Choose the 2D Video to 3D feature to begin.
Step 2: Choose and Set Up Your 3D Effect
After selecting the 2D to 3D feature, you can choose your 3D effect. HitPaw offers several split modes, such as Anaglyph Side By Side, Anaglyph Red/Cyan Gray, and Anaglyph Green/Magenta Gray. Select the effect that works best for your video.
Step 3: Choose the Output Format for Your 3D Video
After setting the 3D effect and confirming the parallax value, choose your output format for the 3D video. Common options include MP4, MOV, MKV, AVI, WMV, and WEBM. Pick the format that fits your needs.
Step 4: Preview, Adjust, and Export Your 3D Video
Use the preview feature in HitPaw Univd to check the 3D effects. Wear your VR devices to see how the video looks. Make any needed changes to get the best output. When you are happy with the result, click the Export button to save your 3D video.
FAQs about VR to Video
Q1. What is the best way to watch VR videos without a headset?
A1. The easiest way is to convert the VR video to a normal 2D video format. VR videos use a 360° projection designed for headsets, so they may appear distorted on regular screens. Converting VR video to normal video allows it to play properly on computers, phones, TVs, and media players like VLC.
Q2. Can you convert a VR video to a normal video?
A2. Yes. You can convert a VR video to a normal video by flattening the 360° VR projection into a standard 2D frame. Using a VR to normal video converter, you can export the video in formats like MP4 so it can be played on regular screens without a VR headset.
Q3. How do you turn a VR video into a normal video?
A3. To turn a VR video into a normal video, import the VR file into a video editor that supports 360° footage. Select a viewing angle, flatten the VR projection, and export it as a standard 2D video. This process converts VR content into a normal video that can be watched on standard devices.
Q4. Can VLC play VR videos normally?
A4. VLC can open VR or 360° video files, but they may appear panoramic or distorted because VLC does not fully support VR projection. To watch VR videos normally in VLC, many users convert the VR video to a standard 2D format before playback on a computer or other devices.
Q5. Why do VR videos look split on normal screens?
A5. VR videos often look split or stretched on normal screens because they use a 360° equirectangular projection designed for VR headsets. Without a headset, the video appears distorted. Converting the VR video to a normal 2D format fixes this problem and allows proper playback.
Conclusion
VR videos are very professional. To get the most out of VR videos, you need to use a VR headset to watch it. A VR headset is able to bring you into the world of the video and create a completely immersive experience. But not everyone has access to a VR headset. If you want to get the most out of your videos and reach a wider audience, converting VR into normal videos is necessary.
In addition, if you already have a VR headset and want to create a fully immersive experience, you can try using HitPaw Univd to convert normal 2D videos to 3D videos.


 HitPaw Univd (Video Converter)
 HitPaw VoicePea
  HitPaw FotorPea
![How to Create VR 360 Degree Videos [Solved!]](https://images.hitpaw.com/videoconverter/topics/covers/make-vr-video-cover.jpg)

Share this article:
Select the product rating:
Daniel Walker
Editor-in-Chief
This post was written by Editor Daniel Walker whose passion lies in bridging the gap between cutting-edge technology and everyday creativity. The content he created inspires the audience to embrace digital tools confidently.
View all ArticlesLeave a Comment
Create your review for HitPaw articles