How to De-Flicker with Premiere Pro: 4 Proven Solutions
Have you ever filmed a perfect scene, only to find flickering stripes ruining your footage in post-production? Video flicker typically stems from mismatched frame rates, unstable shutter speeds, or fluorescent lighting interference. These inconsistencies create distracting brightness fluctuations that make your content look unprofessional. In this guide, you’ll learn proven methods to deflicker videos in Premiere Pro and alternative tools for seamless results.
Part 1. Why Video Flicker Happens & How It Affects Your Footage?
Why Video Flicker Happens
1. Light Frequency Mismatch– Shooting under fluorescent or LED lights at incompatible shutter speeds.
2. nconsistent Color/Exposure– Varying LUTs or manual adjustments between clips.
3. Frame‑Rate Conversions– Interpolating or retiming footage without smoothing settings.
How Flicker Affects Your Footage
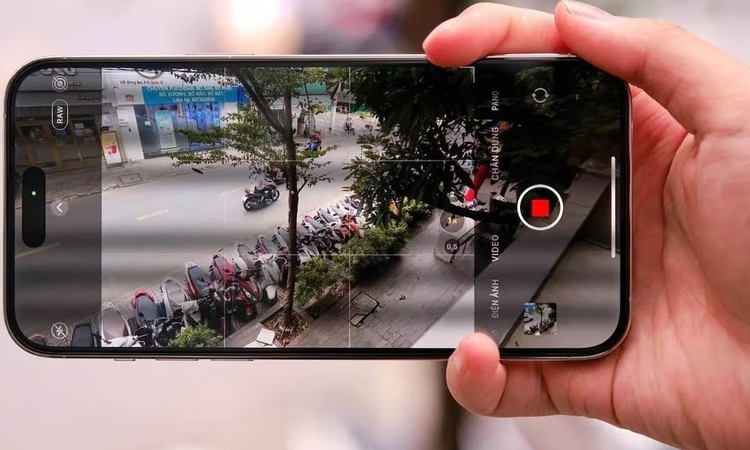
1. Visual Distraction: Causes uneven brightness shifts, color banding, and strobing motion, making footage unwatchable.
2. Reduced Professionalism: Makes content appear unpolished, harming credibility for creators/videographers.
3. ealth Risks: Triggers eye strain, headaches, or even photosensitive epilepsy in viewers.
4. Playback Inconsistencies: Flicker may worsen on certain displays (e.g., TVs/monitors with poor refresh rates)
Part 2. How to Remove Flicker From Video in Premiere Pro?
Adobe Deflicker Premiere Pro is one of the most popular software programs that improves the quality of your videos, tackling flickering and artifacts with different methods given below:
Method 1. Using The Anti-Flicker Premiere Pro Filter
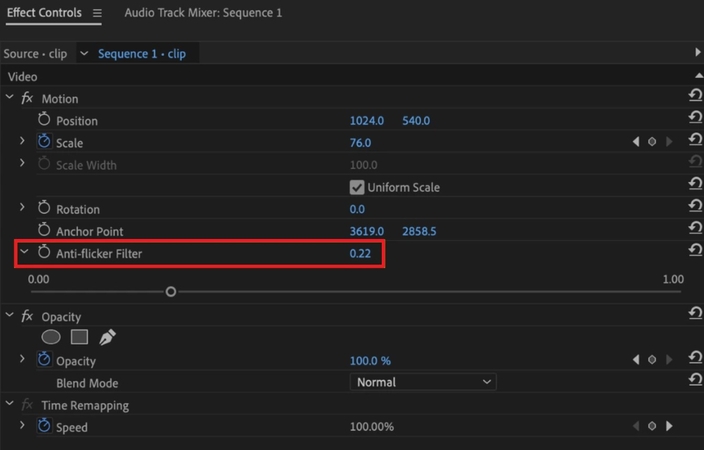
This method lets the user sharpen the damaged parts of the image by applying the Anti-flicker Premiere Pro Filter, which ultimately removes the flickering. The instructions for using this method to enhance the video are mentioned in this section:
Instructions. Import the video clip that you want to deflicker in Adobe Premiere Pro and locate the “Effects Panel” on top of the screen. From the drop-down menu under “Video,” navigate to “Anti-flicker Filter.” Manually adjust the slider of the filter from below until the flickering has vanished from the video.
Method 2. Using The Lumetri Color Panel To Remove Flicker In Premiere Pro
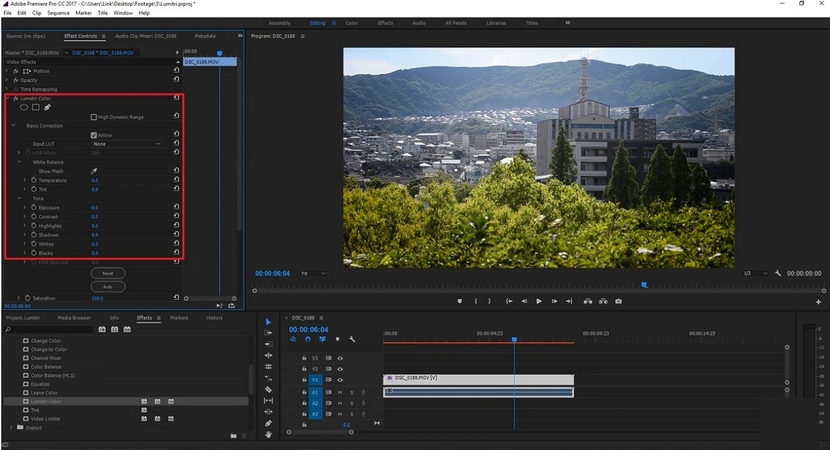
Another powerful method to remove flickering from your videos is to adjust highlights and brightness from the Lumetri Color Panel. A set of instructions is mentioned below to help you remove flicker in Premiere Pro.
Instructions. To perform the deflickering task, open the video clip first. Go to the “Effects Controls” panel and simply adjust “Highlights” and “Shadows” to alter the brightness of the clip until flickering reduces.
Method 3. Anti Flicker with Premiere Pro Plugin & Third-Party Plugin For Professional Results
Adobe Premiere Pro allows you to use different third-party plugins that can help you remove flickering from videos. Although there are multiple plugins available online that this tool supports, 2 of the most popular and effective are discussed in the following:
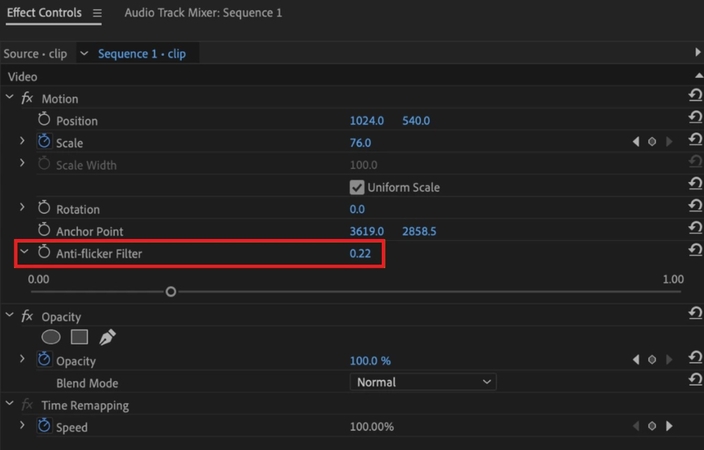
Anti-Flicker Plugin for Premiere Pro
Instructions. First and foremost, download the Anti-flicker plugin and navigate to the "Effects Panel." Click on "Video" to access its drop-down menu, where you'll locate the "Anti-flicker" option. Under, there is an adjustable slider of the filter, which you can move until the flickering has vanished from your video.
Digital Anarchy Flicker Free Plugin
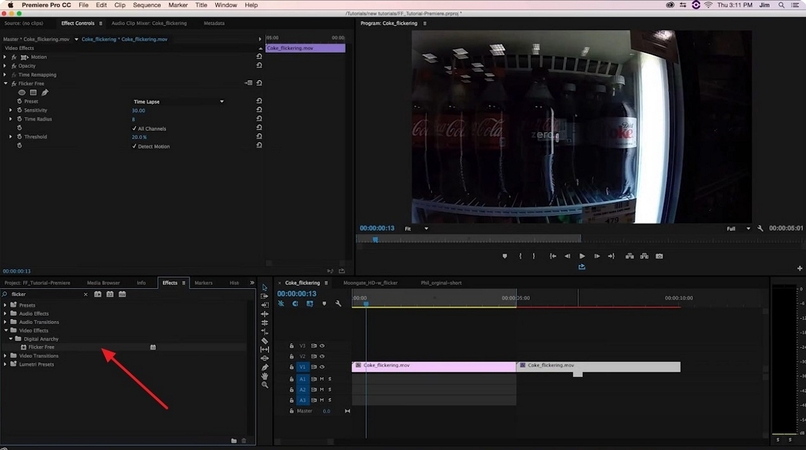
Step 1. Install the "Flicker Free" plugin from the Digital Anarchy website, and it will be added to Premiere Pro in the "Effects" panel. Drop your damaged clip on the "Flicker Filter" to reduce flickering.
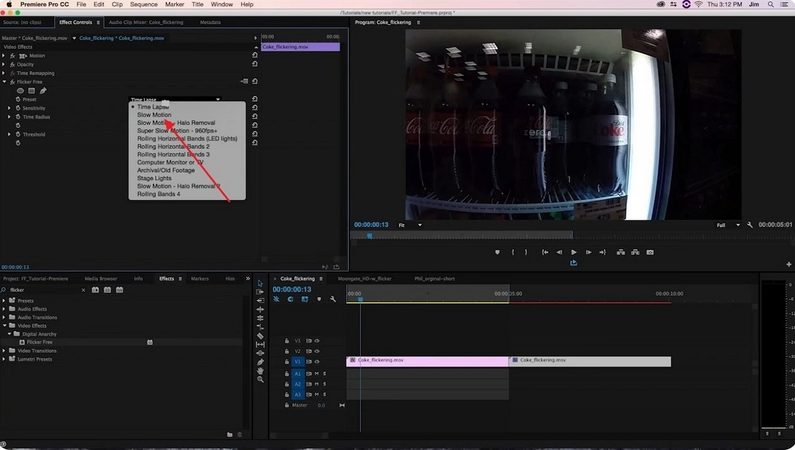
Step 2. Tap "Slow Motion" from the expanded menu of "Time Lapse," and the flickering will automatically fade away.
Part 3. Anti Flicker in Premiere Pro With HitPaw VikPea For Better Results
Removing flicker in Premiere Pro can be unfriendly to beginners, as it requires technical expertise that may lead to unsatisfactory results. Thankfully, this is where use HitPaw VikPea (formerly HitPaw Video Enhancer) stands out. Leveraging AI-powered intelligence, it eliminates flicker seamlessly, delivering smoother and clearer visuals. Beyond deflickering, it offers a range of video repair functions, such as fixing lag and unplayable videos. With no complex technical skills required, users can achieve professional results with just a few clicks, making it the ideal choice for hassle-free video enhancement.
Key Features
- AI Eliminate Flickering: Automatically detects and removes flicker induced by mixed lighting setups, restoring smooth, clear, and consistent video playback.
- Fix Video Screen Loss: Recovers missing or corrupted video frames to eliminate blackouts and glitches, ensuring seamless playback without manual intervention.
- Restore Video Sound: Restores lost or distorted audio tracks, synchronizes sound with visuals, and enhances clarity to deliver rich, immersive audio.
- AI Video Enhancer: Reduces noise, deblurs footage, recovers fine details, and applies color correction to produce crisp, vibrant, professional‑looking videos.
A Guide To Eliminate Flickering Using HitPaw VikPea
If you want to deflicker video using a top-notch AI-driven tool, follow the steps discussed below:
Step 1. Start The Tool And Choose Video RepairOpen HitPaw VikPea and click the “Video Repair” button on the left sidebar of the screen.

Step 2. Choose A Suitable Feature And Upload Your Video
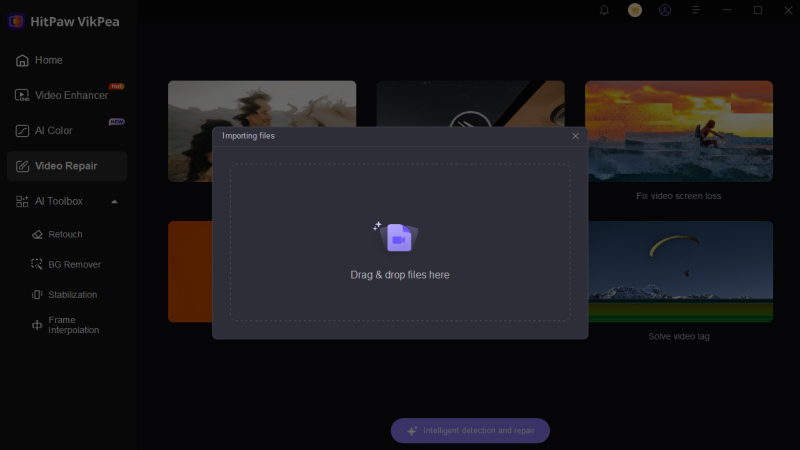
Select the “Eliminate Flickering” features and import your video by pressing the “Drag and Drop File Here” button.
Step 3. Repair And Preview Your Video
As the video is there, tap the “Repair Now” button and preview to compare before and after results.

Step 4. Download The Repaired Video
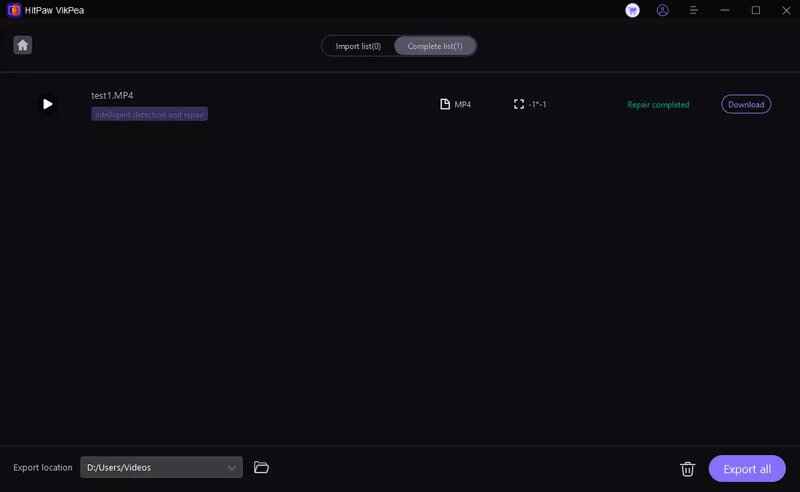
Once all the flickering has vanished from your videos, press the “Export” button below to download your enhanced video.
Part 4. Best Practices to Anti Flicker with Premiere Pro
Prevention is the best medicine, so instead of wondering “how to reduce flicker in Premiere Pro,” avoiding it is a better move. A few tips and tricks are given below that you can use to evade these issues when shooting your videos:
1. Avoid Cheap Lights: Instead of using cheap and dim lights, you can use flicker-free lighting specially designed for video shooting.
2. Test Shoot: Always test the frames before shooting your actual video.
3. Higher Frame Rate: Record at a higher Frame Rate in artificial lights as it reduces the risk of flickering.
4. Alter Exposure Settings: It is better when you set the exposure settings manually instead of depending on automatic settings.
5. Sync Shutter Speed: You should adjust the shutter speed to the light source frequency to sync with the flickering cycle.
6. Opt for ND Filters: High shutter speeds can introduce flickers; thus, use ND filters to control brightness without impacting shutter speed.
Part 5. FAQs of Flicker Removal Premiere Pro
Q1. How to remove flicker in Premiere Pro?
A1. The simplest technique is the Anti-Flicker Filter, which smoothes out light by adjusting the slider. Also, its Lumetri Colour Panel can help balance varying light levels across frames by offering manual control over exposure, contrast, highlights, etc.
Q2. What are the best online tools for fixing Flicker?
A2. Remove flickers in Premiere Pro is a difficult task for beginners. Therefore, HitPaw VikPea is a perfect alternative because it is easy to use and has multiple enhancing features.
Q3. How does frame rate affect the likelihood of flicker in video footage?
A3. Frame rate must align with the local power frequency (50Hz/60Hz) to prevent flicker. Shooting at 30fps under 50Hz lighting creates a 20Hz mismatch, causing visible dark bands. Use frame rates that divide evenly into the power frequency – like 25fps in 50Hz regions with a 1/50s shutter speed – to synchronize light cycles and eliminate flicker.
Q4. Will flicker removal reduce the sharpness or quality of my video?
A4. Sometimes, flicker removal can reduce the video quality, but it depends on the method and tool that you use. Some of the features in Premiere Pro can reduce video quality, but AI-powered HitPaw VikPea can not only remove flickering but also enhance the video quality.
Conclusion
In short, it is obvious for videos to become distracting because of flickering, but deflicker Premiere Pro tools and plugins could help you fix it. In this regard, built-in features like the anti-flicker filter in the app or third-party plugins can eliminate flickering. However, when the process compromises quality, tools like HitPaw VikPea are suggested since they can enhance video quality with precision and help you achieve smooth, flicker-free footage.


 HitPaw Edimakor
 HitPaw FotorPea
 HitPaw Univd (Video Converter)


Share this article:
Select the product rating:
Daniel Walker
Editor-in-Chief
This post was written by Editor Daniel Walker whose passion lies in bridging the gap between cutting-edge technology and everyday creativity. The content he created inspires the audience to embrace digital tools confidently.
View all ArticlesLeave a Comment
Create your review for HitPaw articles