Master Liquid Photography: Tools, Techniques, and Tips to Capture Stunning Splashes
Photography is truly an art, and there are various methods to do it. One fascinating way is liquid photography, where an artist turns ordinary liquid into extraordinary works of art. Whether it’s milk splashing in a glass, colorful inks blending in water, or a water droplet frozen in air, liquid photography is exciting, unpredictable, and full of creative possibilities. With this style of photography, you can play with motion, texture, and light and make your shot look magical. Wondering how? In this article, we will talk about precisely what liquid photography is and what creative techniques you can use to make your shot stand out. In addition, we will discuss what equipment you must have and what essential tips to make your liquid photography magical.
Sounds exciting? It surely is! So let’s get started.
Part 1: What Is Liquid Photography?
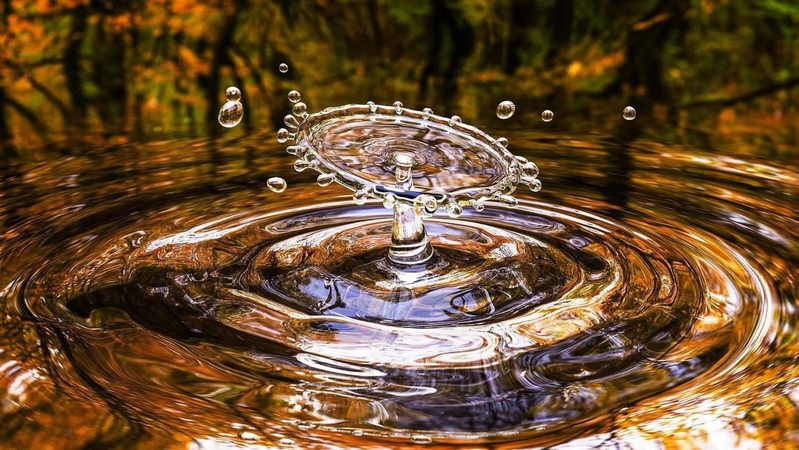
In simple words, liquid photography is about capturing liquids in creative ways. As you know, liquids behave differently from solid objects; capturing them makes them quite fascinating. In liquid photography, the photographer attempts to capture the movement of a liquid at just the right moment, when the splash, drop, or ripple appears beautiful and dramatic.
Types of Liquids Commonly Used:
- Water—the most common, perfect for splashes and droplets.
- Milk—thicker, creating dramatic crowns and textured splashes.
- Oil—great for abstract shots with unique reflections.
- Paint and colored dyes—for bold, artistic effects.
- Cocktails or drinks—perfect for creative product photography.
Liquid photography is often used in product photography, advertisements, and creative art projects. The fun part of this photography is that the two shots are never the same. As each drop or splash creates a unique pattern, it provides endless room for creativity.
Part 2: Popular Techniques in Liquid Photography
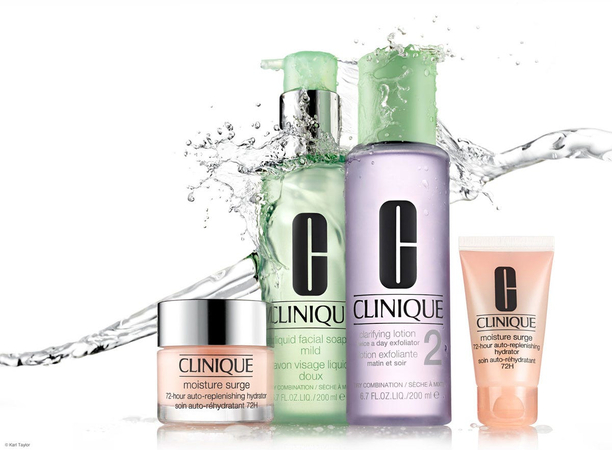
As liquids are alive, this means they can move, mix, reflect light, and react to their environment.
Photographers love liquid photography because it is visually striking and full of colors. When light hits a splash or droplet just right, it creates reflections and shapes that look almost magical. Here are some popular techniques that photographers use to bring out a new side of beauty every time.
1. Splash Photography
First on the list is splash photography. As the name suggests, this technique captures the moment a liquid hits a surface or another object. For example, a strawberry dropping into the milk. This splash, frozen in time, would be amazing and elegant.
2. Droplet Photography
Droplet shots, on the other hand, focus on single drops of water or other liquids. In this photography, you can photograph crowns, ripples, or even collisions where two droplets meet. However, this technique requires precision and patience, but if you manage to capture it, the results will be stunning.
3. High-Speed Liquid Photography
High-speed liquid photography is extremely popular, where photographers freeze even the quickest liquid motion using a fast shutter speed. It can be anything from a bursting water balloon to a falling droplet. Still, a right click reveals some amazing details that the human eye cannot see.
4. Abstract Liquid Photography
In abstract liquid photography, the photographer mixes oil, ink, or colored paint with water, which produces a dreamy and abstract effect. The swirling colors and unpredictable shapes resemble paintings captured within a photograph.
5. Underwater Photography with Liquids
Underwater photography with liquids is where things get even more magical. This style of liquid photography requires patience, but the results are absolutely breathtaking. For example, you can drop paint, ink, or colored water into a transparent tank and then try to capture it as it swirls and dances in slow motion.
Part 3: Essential Equipment for Liquid Photography
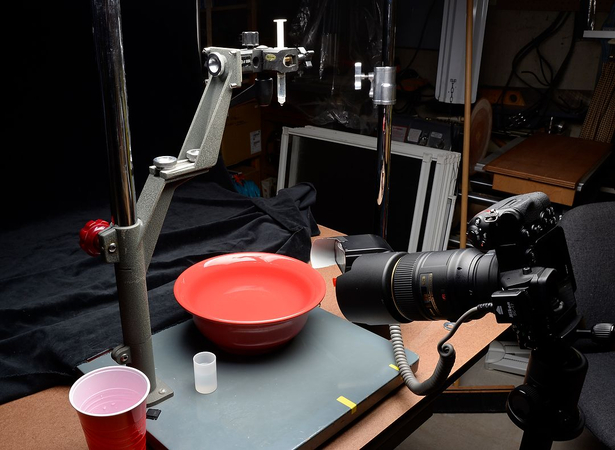
Knowledge about the best liquid photography techniques is essential, but having the right tools can also make a big difference. Although you don’t need the most expensive camera to start, what matters most are the essential tools, along with a creative approach.
- Camera and Lenses: You can start with a DSLR or mirrorless camera, as they generally work best. If you are aiming for a close-up shot of a droplet, macro lenses are ideal; telephoto lenses, on the other hand, will help you capture splashes from a distance.
- Tripod: A tripod is necessary to keep the camera steady so you can focus on timing.
- High-Speed Flash or Continuous Lighting: It is essential for freezing motion and highlighting liquid textures.
- Containers and Droppers: You can use tools like bowls, pipettes, or droppers, as they will help you control the flow of liquids.
- Backdrops: It is always recommended to use a simple black or white background to keep the focus on the liquid. However, if you want a dramatic contrast, you can use a colorful backdrop.
- With this setup, you’re ready to start experimenting and catching those magical liquid moments.
Part 4: Camera Settings and Lighting Tips
As the liquid moves quickly and unpredictably, having the correct camera settings is crucial to freeze the motion sharply while keeping everything in focus and highlighting every detail. Here are some of the basic camera settings that will make your liquid photography stand out.
Shutter Speed:
In liquid photography, speed is everything, and shutter speed will help you with the motion. Generally, a shutter speed of 1/1000 s or faster would work beautifully. Still, if you’re capturing high-speed splashes or collisions, you can go even quicker, like 1/2000 s or 1/4000 s, to freeze motion.
Aperture:
Aperture (the “f-number”) decides how much light enters your camera and how much of the image stays in focus. Since you’re working with tiny droplets, set your aperture between f/8 and f/16, and it will keep the whole splash in focus.
ISO:
ISO affects your image brightness and grain. Usually, a higher ISO setting makes photos brighter, but it can also introduce unwanted noise in the image. That’s why you should always keep the ISO between 100 and 400 to get the best results and preserve details.
Along with the camera settings, lighting also plays an important role. In fact, lighting is so crucial that it completely changes how your liquid photo looks. Therefore:
- Use an intense flash or bright LED light from the side or behind your subject to make the splash glow.
- If you’re working in natural light, shoot near a window with diffused sunlight.
- Experiment with colored gels or backgrounds to add extra mood and creativity.
When you combine the correct settings with bright lighting, every droplet becomes a piece of art.
Part 5: Editing Liquid Photography—Enhance Photos with HitPaw FotorPea
Editing is the final and most crucial step in any photography process. No matter how brilliantly you have captured the photos, without photos, the editing will look dull. This is where HitPaw FotorPea comes in.
Powered by an advanced AI algorithm, this fantastic tool helps bring your liquid photography to life with just a few clicks. It automatically adjusts color, contrast, sharpness, and lighting so that every splash, swirl, and droplet stands out in stunning detail. What makes it even better is its beginner-friendliness. Unlike the other photo editing tools, you don’t need to spend hours mastering it. Even a complete beginner can enhance the photo in just a few seconds.
Some of the main features of HitPaw FotorPea include:
- AI algorithm
- User-friendly interface
- Multiple AI enhancement models
- Batch processing
- Automatic color adjustment
- High-quality output
Step-by-Step Guide to Editing Liquid Photography with HitPaw FotorPea
Step 1: Go to the official HitPaw website and download HitPaw FotorPea on your computer. Once the download is complete, open the setup file and follow the on-screen steps to install it quickly.
Step 2: After installation, launch the software. On the main screen, choose “Enhance Photos Now.” This option will allows you to improve your liquid photography clicks.

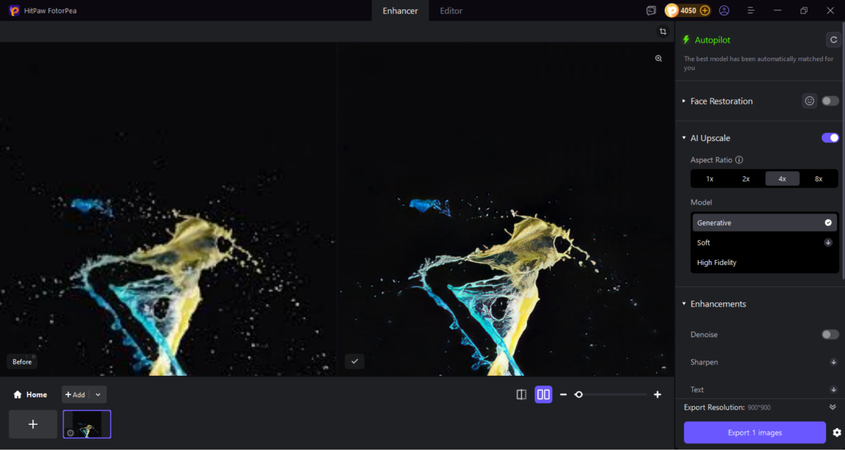
Step 3: Click on Upload and select the photo you want to enhance. To improve your liquid photography, turn on the “AI upscale” feature. This will prepare your photo for a cleaner, more detailed look.
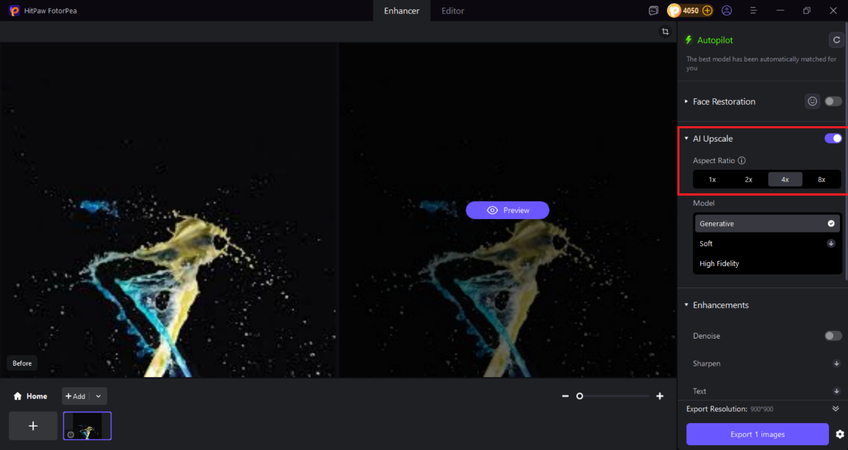
Step 4: Press Preview to start processing. The AI tool will automatically analyze your image and remove unwanted noise or distortion. Within seconds, your photo will look sharper and clearer.
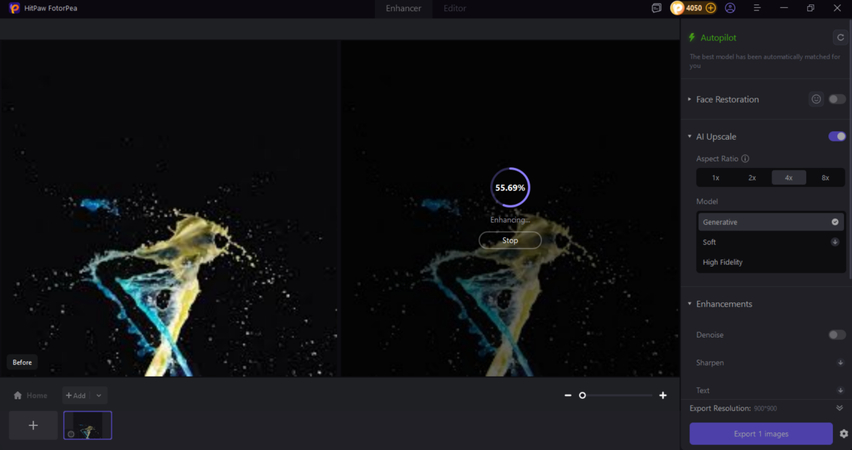
Step 5: Once processing is complete, check the before-and-after results. You’ll notice how effectively HitPaw FotorPea enhances the liquid textures and clarity. And if you are satisfied with the outcome, click on Export and download the photo.
Conclusion
Liquid photography is one of the most exciting and creative types of photography. Although the results look stunning, capturing those challenges requires your timing, sparks, and imagination. However, with the right equipment, proper camera settings, bright lighting, and the correct technique, you can capture liquid in a way that amazes the world. However, remember that raw photos often appear dull without touch-ups.
Therefore, after capturing those stunning shots, don’t forget to enhance them using HitPaw FotorPea. This comprehensive editing tool automatically adjusts lighting, color correction, sharpness, and more, transforming your liquid photography into a masterpiece.
Leave a Comment
Create your review for HitPaw articles


