


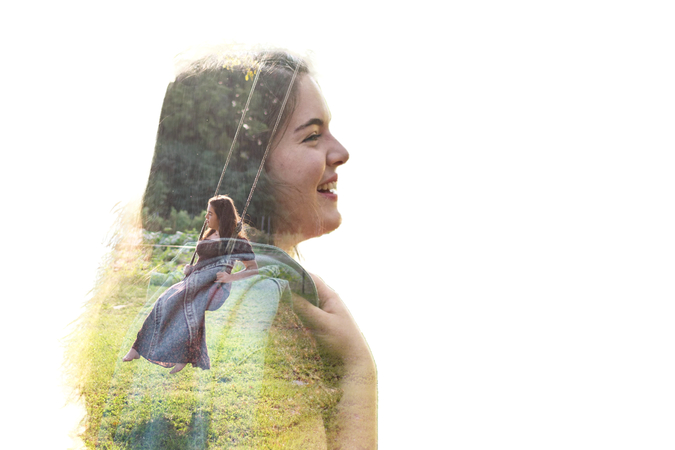
Creative Self-Portrait Photography: Pro-Tips
A quick selfie is something most of us do without thinking; it's fast and casual. Conversely, creating an appealing self-portrait is much more thoughtful and artistic. A selfie might show what you look like at the moment, but a well-composed self-portrait portrays a venture. For those who are new and want to know how to go beyond basic selfies, creative self-portrait photography can be an exciting journey.
To join this venture, read the following article, which is a complete guide on how to capture stunning self-portraits. You’ll start to understand how each camera setting works and affects the overall feel of an image. In the end, we’ll unveil the ultimate photo enhancer to add more purpose to your captured portrait.
Part 1. The Essential Camera Settings for Self-Portrait Photoshoot
Camera settings form the foundation of any striking self-portrait photography session, where the image quality and mood come together. Therefore, we’ve rounded up all the essential camera settings that will help you unlock the full potential of your camera:

A. Aperture – Controlling Depth and Focus
Aperture is a key aspect of a setting because it directly affects how much of your subject is in focus. The suggested range lies between f/1.8 – f/2.8, beautifully blurring the background while keeping the subject in sharp focus. To include more background detail in your shot, you can opt for the f/4 to f/8 range that keeps scene in focus.
B. ISO – Managing Light Sensitivity and Image Quality
It manages your camera’s sensitivity to light and plays a major role in how clean or grainy your self-portraits might look. For shoots in bright natural light, keep ISO low for up to 100–400 and 800–1600 when shooting indoors. Be careful because higher ISO can introduce digital noise or grain in self-portrait pictures.
C. Shutter Speed – Capturing Emotion and Movement
In simple words, shutter speed controls how long your camera’s sensor is exposed to light. The standard range between 1/125 – 1/250 sec is usually ideal for a classic and sharp portrait. If you want to add a sense of movement or emotion, a slow shutter speed of 1/60 seconds is recommended.
D. Focus Mode – Keeping Yourself Sharp
To maintain the focus on your face, you can use the Face or Eye Detection Autofocus feature in your camera. An alternative to this feature is placing an object, like a stool, where you’ll sit and replace it with yourself once the camera is set. This avoids blurry results and keeps the subject looking sharper and professional in every shot.
Bonus: Quick Reference Chart for Popular Self-Portrait StylesTo help you apply what you’ve learned, below is a comparison table that pairs camera settings with styles of artistic self-portrait photography:
| Style | Aperture | ISO | Shutter Speed | Creative Tip |
|---|---|---|---|---|
| Dreamy & Soft | f/1.8 | 100–400 | 1/125 sec | For such looks, use soft, diffused light from window or golden hour light. |
| Cinematic Drama | f/2.8–f/4 | 400–800 | 1/200 sec | Use side lighting or shadows to add mood. |
| Motion Blur Art | f/5.6 | 100–800 | 1/30 sec or slower | Utilize a tripod and move slowly like twirling. |
| Sharp & Detailed | f/8 | 100–200 | 1/250 sec | Shoot in a well-lit space to capture textures. |
Part 2. Creative Self-Portrait Photography: Composition and Framing Strategies
After setting up your camera, read the following points and learn how to compose a shot to capture a self-portrait picture like a professional:
1. Rule of Thirds & Negative Space
Rule of Thirds: Divide the frame into a 3x3 grid. Place your face near the top-left or bottom-right intersection (golden points) instead of center. Align horizons/architectural lines with the top/bottom third for balanced scenes, like positioning the sea on the lower third with yourself on the right intersection at the beach.
Negative Space: Leave “breathing room” around your subject—empty sky, walls, or backgrounds—so the face pops and the overall feel is minimalist yet impactful
2. Background Depth & Layers
Foreground Elements: Use natural (tree branches) or man-made (window frames) borders on the edge of the frame (1/4-1/3 area) for a framed effect, like a vine arch in a garden.
Props: Hold objects 10-20cm from the lens (flowers/books), blur them with portrait mode to add depth—sunflower petals create warm contrast with skin tones.
Background Storytelling: Separate foreground (blurred coffee), subject, and background (clear café details) with distance (1.5m+ for phones) to tell stories. Use 1/60s shutter in crowds to blur moving people, highlighting your stillness for focus contrast.
When you add objects in the foreground or background, the depth and richness of your photo are entirely changed. They help set the scene and tell a story while turning a plain self-portrait photoshoot into something compelling. Frame between elements like doorways or window frames to draw attention to your face.
3. Innovative Angles & Perspectives
High Angle: Hold the camera slightly above eye level and tilt your chin down to slim the jawline and emphasize your eyes.
Low Angle: Shooting from below can project confidence and drama—great for power poses or emphasizing architecture behind you.
Mirror & Reflective Surfaces: Use mirrors, water puddles, or glass to capture both your reflection and the surrounding environment, adding layers and intrigue.
Part 3. Craft A Perfect Self-Portrait Picture With FotorPea
The shutter clicks, a moment is captured with a confident pose, flattering light and strong emotions all in one frame. On closer look, you feel something is missing, whether it's the color or the background that feels too sharp. All of this can be sorted with an ultimate photo-enhancing tool, HitPaw FotorPea, which elevates personal portrait photography with rich tones. The best part is that it offers AI models, each providing unique functionality.
Key Features
- Upscale Model: boosts selfie quality to 16K resolution, delivering professional-grade detail and sharpness effortlessly.
- Denoise Model & Sharpen Model: eliminates grain and blurs, restoring clear, natural skin textures while preserving facial details.
- Face Model: sharpens eyes, hair, and skin in selfies, fixing focus errors or motion blur to reveal lifelike, vibrant facial expressions.
- Color Calibration: revives dull/underexposed selfies with intelligent color matching, balancing skin tones and lighting for natural, film-worthy hues.
- Low-Light Model: brightens dark scenes using advanced algorithms, enhancing overall clarity and contrast without overexposure or noise—ideal for night selfies.
Steps to Enhance Your Self-Portrait with FotorPea
A well-shot face portrait photography sets the foundation, let's walk through the tutorial to shape the final mood with HitPaw FotorPea:
Step 1. Access FotorPea and Import Your Photo for EnhancementTo start enhancing, launch the platform on your device and press the “Enhance Photos Now” button from main interface. After this, press the “Drag & Drop Files Here” button to import your photo into the tool.


Step 2. Select the AI Models and Analyze the Results
Once done importing, choose the “Upscale Model” and “Face Model” from the right-hand panel. Now, navigate to the “Preview” button to analyze what difference the models made.
Step 3. Secure Your Enhanced Portrait to Device
If you’re convinced of your outcome, proceed to the “Export” button and secure your enhanced image to the device.
Part 4. FAQs on Creative Self-Portrait Photography
Q1. What are some famous photographers' self-portraits?
A1. Among many well-known photographers, Vivian Maier is known for her mysterious and candid self-portraits using mirrors. Man. Ray's surrealist self-portrait picture delivers a perfect blend of art and experimental photography.
Q2. What are the different self-portrait picture styles one can explore?
A2. There are various creative styles you can try for self-portraits including, silhouettes and shadows to highlight outlines for dramatic. Besides this, mirror selfies and lifestyle portraits allows showing yourself in everyday action.
Q3. Which techniques are commonly used in face portrait photography?
A3. Among famous techniques, framing and composition is commonly used because close-up framing can draw attention to expression. Plus, you can use a tripod and timer that ensure stability and helps with precise composition of portraits.
Q4. Why choose black and white for self-portraits, and how can you compose them effectively?
A4. A black and white self portrait can emphasize on emotion and expression by removing the undesired color distractions. To compose them, play with light and shadows or keep background simple to avoid clutter, helping subject stand out.
Q5. How can you create a funny self-portrait that really stands out?
A5. If you want to make a humorous self-portrait, use props such as goofball faces or costumes. Apart from this, you can add comic-style captions or playful edits to involve humor in editing.
Conclusion
A single click to create a creative self-portrait photography can turn a simple moment into something meaningful. To master this skill, we’ve rounded up everything from best camera settings to composition and framing techniques. Still, if you think your portrait misses that spark, download HitPaw FotorPea for its AI capabilities in enhancing.

 HitPaw Edimakor
 HitPaw VikPea (Video Enhancer)
 HitPaw Univd (Video Converter)


Share this article:
Select the product rating:
Daniel Walker
Editor-in-Chief
This post was written by Editor Daniel Walker whose passion lies in bridging the gap between cutting-edge technology and everyday creativity. The content he created inspires the audience to embrace digital tools confidently.
View all ArticlesLeave a Comment
Create your review for HitPaw articles