Does Premiere Pro Support to Import/Export AV1 Video Codec
With the rise of 4K and 8K video content, the AV1 codec is gaining popularity among streaming services for its superior compression and quality. However, users get an error code when importing AV1 encoded files to Premiere Pro. So, are you also wondering why this failure is happening? No worries. In this article, you will learn everything about Adobe Premiere Pro AV1 support for importing or exporting and how to convert AV1 videos with HitPaw Univd for seamless editing!
Part 1: Does Premiere Pro Support AV1?
Adobe Premiere Pro is an industry-leading video editor that supports an extensive range of audio/video formats, such as Apple ProRes, AVI, H264, M2TS, ASF, etc., and native media formats from DSLR cameras. However, the latest update of Premiere Pro still doesn't support the AV1 codec. So, you can't import or export MP4, MKV, and WebM files that use AV1 encoding. It also doesn't allow opening AVIF images that use AV1 compression algorithms.
When you try importing an AV1 video, an error message states, "File format not supported." This presents a challenge for creators working with AV1 content, especially from sources like YouTube, Netflix, or high-efficiency camera footage. Fortunately, some plugins and third-party tools can help you process the AV1 codec in Premiere Pro.
Part 2: How to Import AV1 to Premiere Pro with Autokroma Influx
To extend Adobe Premiere AV1 support, it allows installing various efficient plugins. Autokroma Influx is one of the most reliable options for importing AV1 videos. This plugin supports different video codecs and formats, making it easy to import or edit these files in Premiere Pro, After Effects, Audition, and Media Encoder. Although it offers a free trial with limitations, you need to purchase its license for advanced functionalities. Here are the steps for using Autokroma Influx to import AV1 into Premiere Pro:
Step 1. First, download the Influx zip file from the official page to your computer. Then, extract and run the installer, which includes its free trial version.
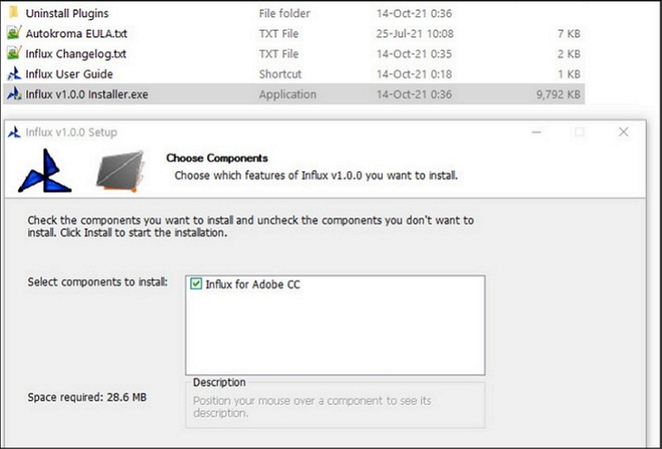
Step 2. You need to manually edit the "Config.toml" file and change the desired settings between true and false. On Windows, this file is on “C:\Users\[Username]\AppDate\Romaing\Autokroma\Influx\”
You can disable any setting by writing false.
- debugLogs = true (To send files for inspection and bug fixing)
- disable = false (enable completely importing files with Influx)
- overrideAdobe = true (force Adobe to use Influx even for natively supported files)
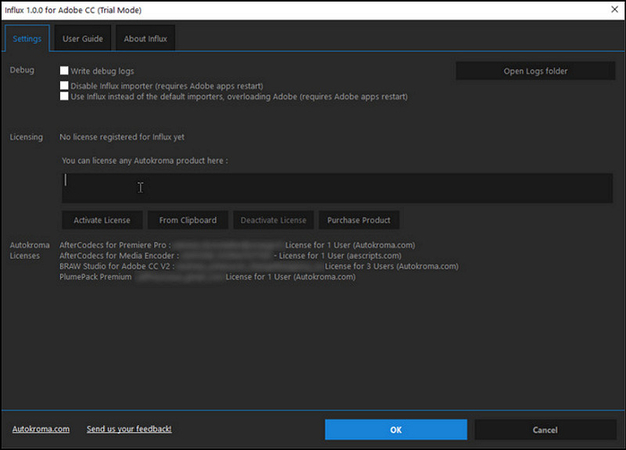
Step 3. Now, you can purchase the license and copy the code sent via email. Launch Premiere Pro and click on a project. Tap "Source Settings…"
Step 4. From the "Settings" tab, paste the copied license key. Press the "Activate" button and then "OK."
Step 5. Launch Adobe and go to "Preferences"> "Media Cache"> "Delete"> "Delete all media cache files from the system."
Step 6. Restart Premiere Pro to fully decode your files. Then, drag and drop the AV1-encoded videos and start editing. That's all!
Part 3: How to Export AVI Codec Video in Premiere Pro
While importing is one thing, exporting videos in AV1 to reduce file size and save storage space is another challenge, as Premiere Pro does not natively allow exporting AV1. However, using Voukoder, a free video and audio encoding service, you can encode their final video to AV1. However, it is only compatible with Premiere Pro 13.0 or higher on Mac, Windows 32-bit and 64-bit. Let's learn how to use Voukoder to encode video for Premiere Pro AV1 export:
Step 1. Install the free Voukoder plugin from Adobe Exchange on your Windows PC. Now, launch Premiere Pro and edit videos as usual.
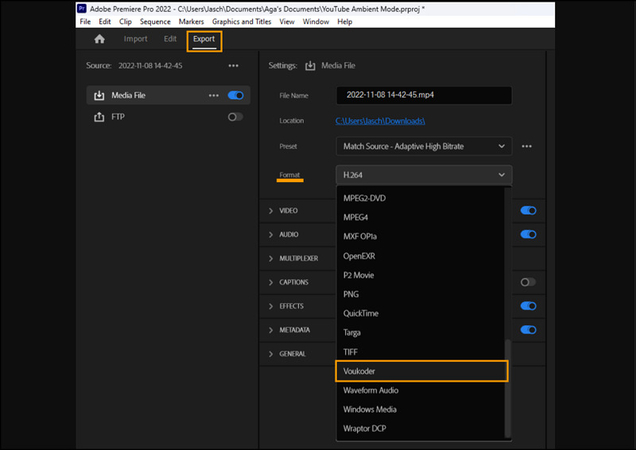
Step 2. Next, go to "File"> "Export"> "Media File" to launch export settings. Then, expand the "Format" drop-down menu and choose "Voukoder."
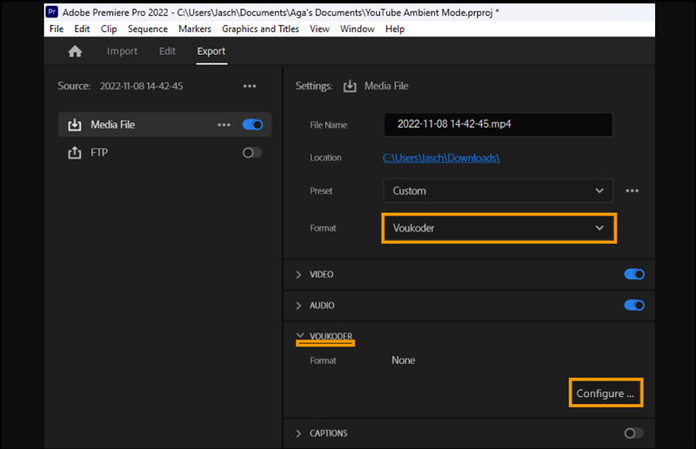
Step 3. This plugin offers a "VOUKODER" tab in addition to "Video" and "Audio." Tap "Configure."
Step 4. Go to "Video"> "Encoder" and pick the "AV1 (VST)" option. Then, move to "Options" to set the video bitrate.
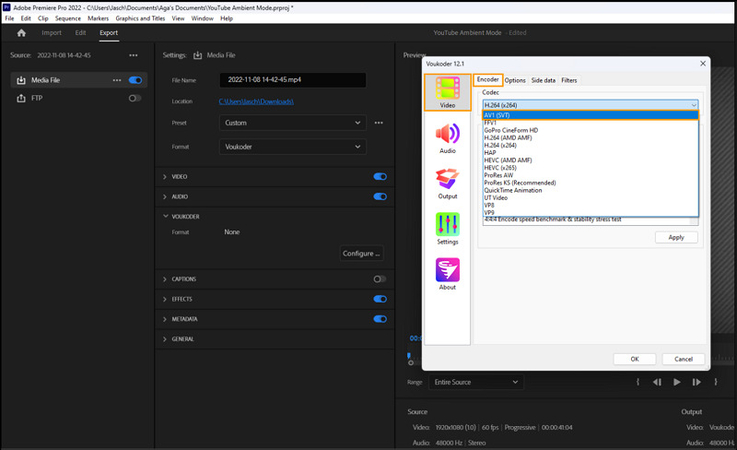
Step 5. Lastly, save the settings as a preset in Premiere Pro and hit the "Export" tab to start rendering the video. You're all done!
Part 4: Bonus tip: Best Way to Convert AVI to Premiere Pro Supported Formats
For those who don't want to use plugins and need a smoother, easier-to-follow path, HitPaw Univd (HitPaw Video Converter) is the ultimate choice.
This powerful AI-powered video converter is a comprehensive software that simplifies video conversion, editing, and compression. With a beginner-friendly interface, it supports a wide range of codecs and formats, including AV1. So, you can easily convert AV1 codec files to a Premiere Pro-supported format like Apple ProRes, AVI, WMV, and MP4 or MOV with an H.264 encoder. It also allows changing the video encoder, frame rate, or other parameters. You can even preview the converted video files with its built-in media player.
Main Features:
- Provide an intuitive interface for beginners and professionals
- Convert video files at 120X faster speed without losing quality
- Offer social sites and device-based presets for video conversion
- Support converting multiple video files simultaneously in record time
- An editing toolbox to enhance your video files by cutting, cropping, etc.
How to Convert AV1 Videos to Premiere Pro Supported Format using HitPaw Univd:
Step 1. Import AV1 VideoThe first step is to launch this software and open its "Convert" section. Now, click "Add Files"> "Add Video" to upload the AV1 encoded video file.

Step 2. Choose an Output Format
Next, expand the "Convert all to" drop-down menu and choose the desired output Premiere supported format.
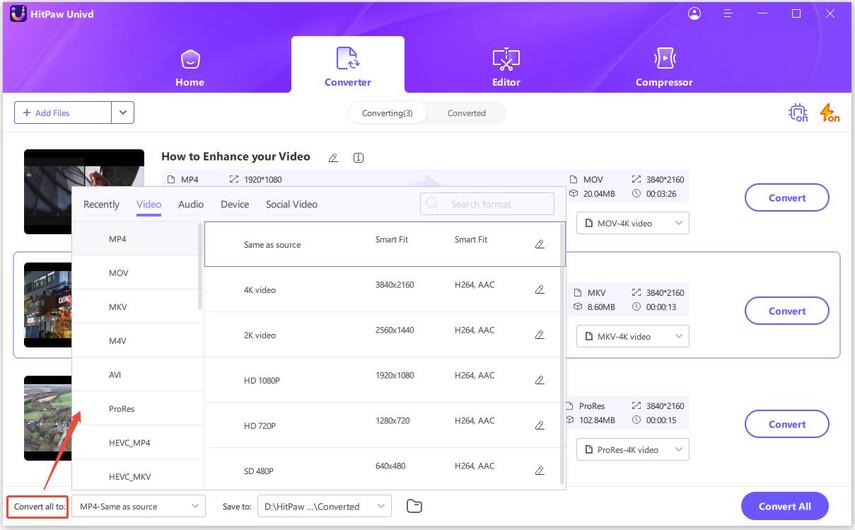
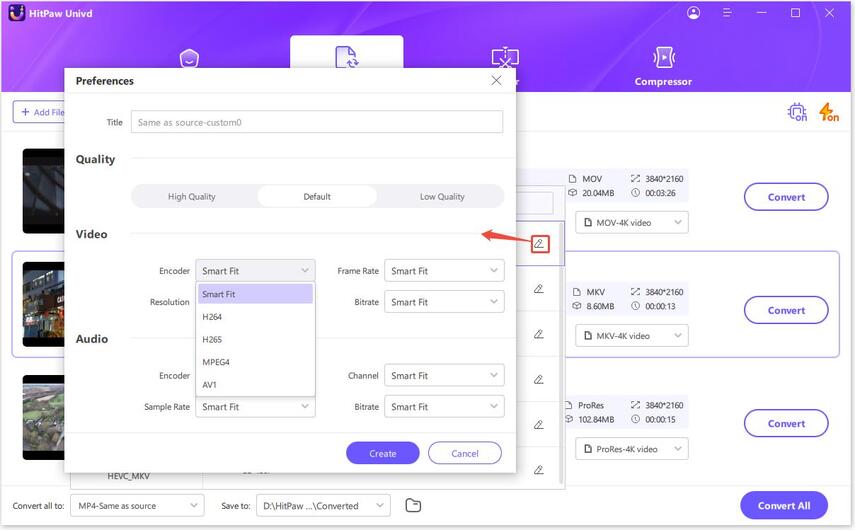
You can click the small pen icon to change the preferences, such as encoder, bitrate, resolution, etc.
Step 3. Convert Videos
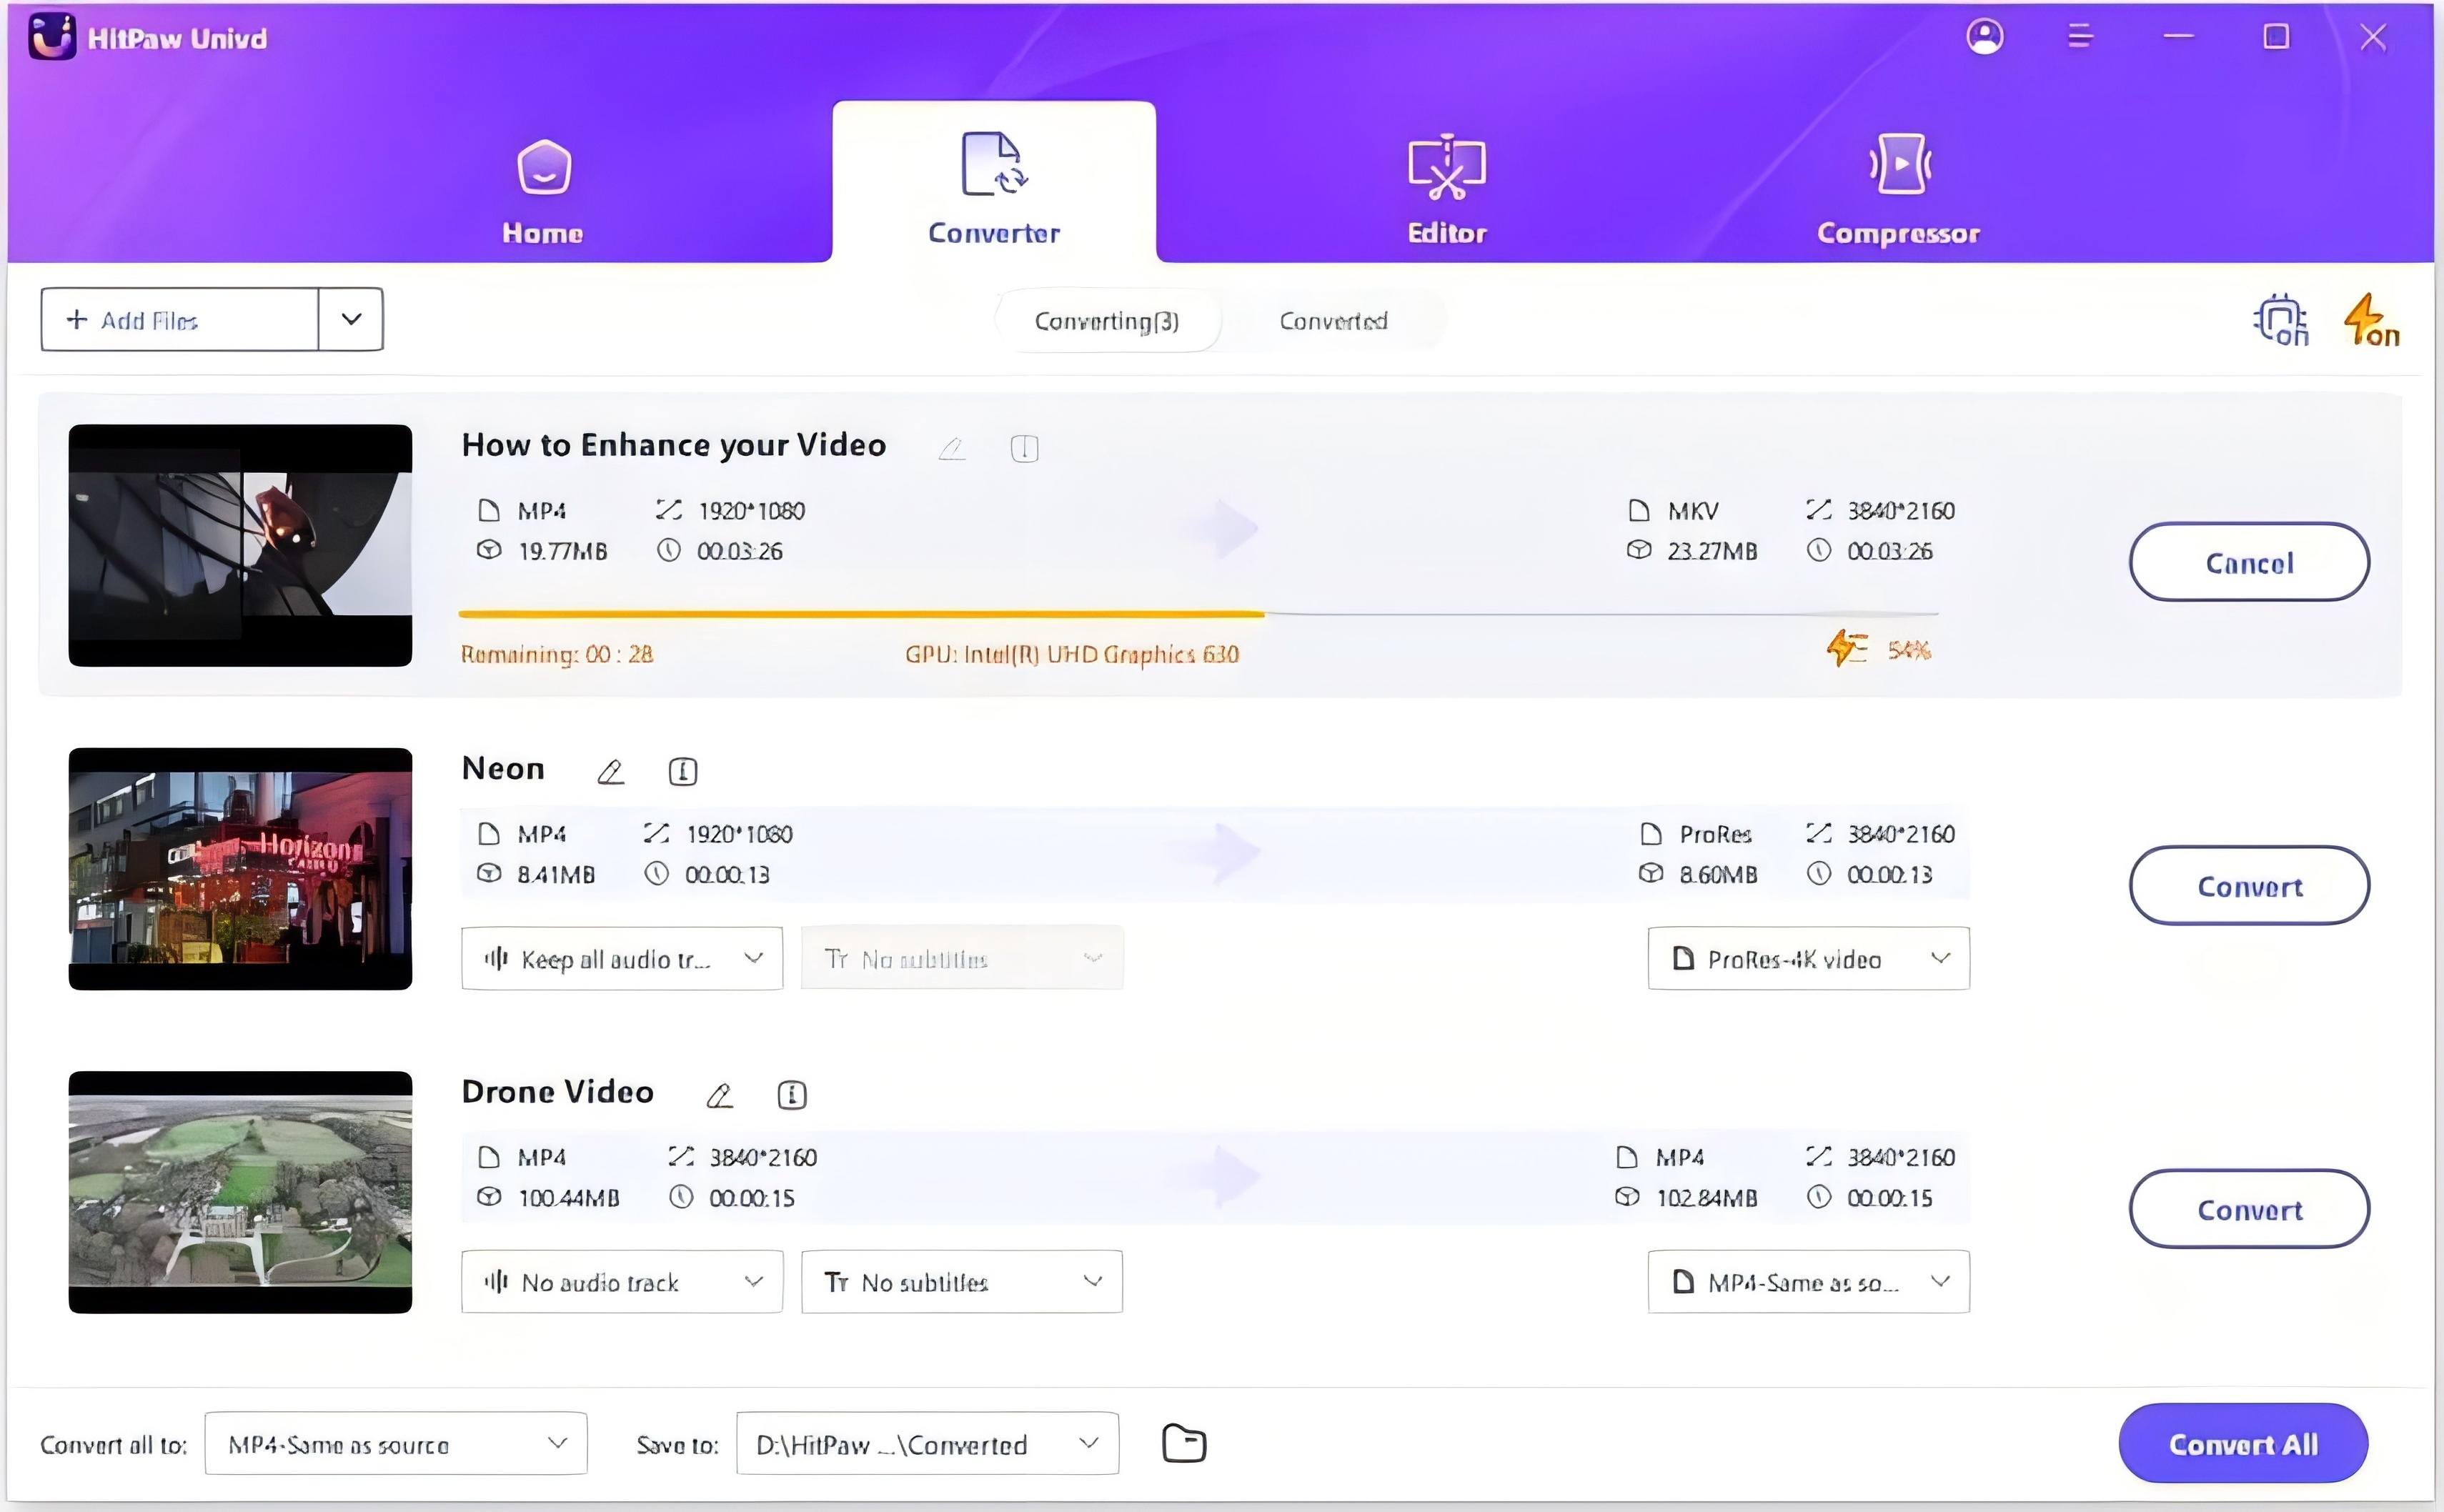
Lastly, enable the ultrafast conversion mode and press the "Convert" or "Convert All" tab to start conversion. You can access the output files from the "Converted" section. That's it!
Conclusion
While Premiere Pro AV1 support is still unavailable, you're not stuck. With the help of Autokroma Influx and Voukoder, you can both import and export AV1 in Premiere Pro projects efficiently. However, if you prefer a faster, easier method, HitPaw Univd should be your go-to solution for converting AV1 videos into Premiere pre-supported formats. Try this software today to experience seamless conversion with zero hassle and make your Premiere Pro workflow AV1-friendly!


 HitPaw Edimakor
 HitPaw VikPea (Video Enhancer)
 HitPaw FotorPea


Share this article:
Select the product rating:
Daniel Walker
Editor-in-Chief
This post was written by Editor Daniel Walker whose passion lies in bridging the gap between cutting-edge technology and everyday creativity. The content he created inspires the audience to embrace digital tools confidently.
View all ArticlesLeave a Comment
Create your review for HitPaw articles