


The Ultimate Guide to Headphones Photography: Techniques, Tips & Creative Ideas
In the marketing industry, the demand for high-quality product photography has become an essential part of marketing. Whether you want to capture the images of a headphone for your online store, promotional campaign, or social media store, photography matters. Professional photographers look for ways to showcase the sleek design of headphones and their intricate details in a way that highlights their function and design.
Therefore, if you are an eCommerce seller or creator who wants to take stunning headphone photography, read this article. We will provide you with all the essential tips, ideas, common mistakes to avoid, and more. Moreover, we’ll also explore one of the best headphone photoshoot editing tools that will help you elevate your photography.

Part 1. Helpful Tips on Setting Up a Headphone Photoshoot
To reach the level of studio headphone photography, you need to understand some of the tips that the professionals use. Provided below are the most common tips in headphone photography that should be kept in mind:
1. Right Lighting: Lighting helps capture every detail, texture, and feature of a product; thus, using natural, diffused, and neon lighting can make your headphones pop.
2. Focal Points: Users need to ensure to keep the main features of headphones as their focal point to grab the audience’s attention.
3. Suitable Environment: Photographers can use natural backgrounds to shoot real-life freestyle shots and utilize the studio space to get more dynamic shots.
4. Proper Equipment: To capture high-quality professional headphone photos, use proper equipment, like a Canon DSLR, Benro Mach3 tripod, Canon ER macro lenses, and more.
Part 2. Top Creative Ideas to Shoot Headphones Photography
This part will provide you with creative headphone photography ideas that you can use in shooting your product line:
1. Lifestyle Shots: Shooting real-world scenarios can bring your headphones to life, increasing their marketing potential. You can shoot people wearing headphones doing exercise, traveling, and working to capture the essence of a relatable moment.
2. Macro Photography: With macro photography, capture the fine details of the headphones, like the texture, branding, and more. Additionally, various cameras come with lenses that maintain sharpness and ring out the details of the headphones.
3. Mood Light Shooting: One of the best marketing strategies is using dynamic lights to capture creative headphone photography. Users can play with shadows, neon lights, and cool, futuristic colors to showcase the headphones in a more aesthetic way.
4. Conceptual Storytelling: You can create a storyline surrounding your headphone product with a catchy tagline. This makes your photoshoot more visually creative and impressive to viewers, thus increasing sales.
Part 3. Elevate Headphone Shots with the Ultimate AI Photo Enhancer
When it comes to headphone photoshoots, everyone knows that it all comes down to the final edits that will make the headphones pop. That is why we introduce you to HitPaw FotorPea, which is equipped with AI-powered image-enhancing features. Users can enhance their headphone pictures with this 16K enhancer using a single click. Moreover, this software can easily remove any blurriness and upscale them to 4K and 8K.
HitPaw FotorPea provides 9 AI models that can help you enhance your picture to another level without compromising quality. Its photo editing feature is filled with multiple AI tools, where you can execute color correction, reconstruct images, and retouch. Similarly, the adjustments options let you crop images and do basic and color adjustments to highlight your image.
Key Features
1. Batch Enhancer: With the batch feature, you can enhance and upscale multiple images at once to improve efficiency and productivity.
2. Filters & Backgrounds: There are various filters ranging from cool white and shadows to cyber style and artistic, which you can pair with different simple, podium, and other backgrounds.
3. Photo Restoration: HitPaw FotorPea can help you restore old, grainy, and scratched photos and bring life to them with colorized and high-quality results.
4. Image Recovery: Photographers can use the denoise feature, which automatically reduces the noise and recovers image details and their beauty.
Comprehensive Guide on How to Enhance Headphone Photos
Let's go through the following step-by-step guide and learn how to utilize all the creative headphone photography ideas with this tool:
Step 1. Launch HitPaw FotorPea and Access Photo Enhancer
Install and launch the photo editing software on your computer and click the “Enhance Photos Now” button from the main interface “Home” tab.
Step 2. Upscale Image and Preview
Next, import the desired headphone photo on this tool from the File Explorer and toggle the “Upscale Model” option in the right “AI Model” section. After that, press the “Preview” button and “Export” the final result to proceed with other editing options.
Step 3. Open AI Photo Editor and Import Enhanced Image
Head to the main window, access the "Toolbox" tab and choose the "AI Photo Editor" option. On the next screen, import the enhanced image and start making other photo edits.
Step 4. Adjust the Basic Settings of the Image
After adding the enhanced headphone picture, click the “Adjust” tab from the right-side panel to reveal different options. Extend the “Basic Adjust” section and name suitable changes by dragging the scales of contrast, brightness, and others from left to right.
Step 5. Head to Image Retouching
Moving forward, open the “AI Tools” tab from the right panel and click the “Retouch” option from the available AI tools.
Step 6. Make Suitable Retouches and Export
Choose the remover pen, drag it over the unnecessary area, and hit “Remove” to retouch the image. Once satisfied with all the changes, press the “Export” button at the top right and save it on your device.
Part 4. Common Headphone Photography Mistakes and How to Avoid Them
After going through all the best ideas and tips for capturing high-quality headphone photoshoots, let’s look at some of the common mistakes that you can make.
1. Harsh Reflections: When shooting headphones, the different textures and surfaces of the product can create hard reflections. To avoid this mistake, try using diffused light, different angles, and polarized filters to improve overall image clarity.
2. Missing Product Details: If you fail to capture the important features of the product, like branding, functional buttons, and more, it is bound to be a failure. Therefore, use close-up shots, manual focusing, and follow a short checklist to ensure all essential features are captured.
3. Inconsistent Angles: Another mistake photographers make in wireless headphone photography is inconsistent angles that can confuse the customers. In this case, use a steady tripod, stick to a standard background, and cover every base of the product to capture professional shots.
4. Over-Edited Photos: The use of excessive editing tools on your headphone photographs can ruin them, leading to dissatisfied customers. You can avoid this by keeping the adjustments to a minimum, avoiding over-saturation, and always comparing before and after when finished.
Part 5. Optimizing Headphone Photography for Commercial Use
Users can try these refined best practices to achieve that studio setup for professional headphone photography.
1. Content on Various Platforms: Marketing companies can follow various social media image guidelines, aspect ratios, and formats to advertise their headphones.
2. Consistent Branding: It is important to maintain a consistent visual representation of your headphone brand, like color scheme, logo, and typography.
3. Highlight Key Features: As discussed before, capturing highlighted features of headphone photography and showcasing its accessories can ensure a high buyer rate.
4. Optimize SEO Image: Whenever someone searches for headphones, your product can be at the top if you add relevant descriptive file names, alt text, and more.
Conclusion
We learned about the importance of headphone photoshoots in the marketing industry and how you can achieve perfection. This article provided you with different useful tips and creative ideas on how to take the perfect shot in various settings. Moreover, we learned common mistakes that can ruin the shot and how to prevent them.
All in all, one of the most important things in studio headphone photography is editing. So, utilize the HitPaw FotorPea to upscale your images to 8K, remove noise and blurriness, and make suitable adjustments.

 HitPaw Edimakor
 HitPaw VikPea (Video Enhancer)
 HitPaw Univd (Video Converter)
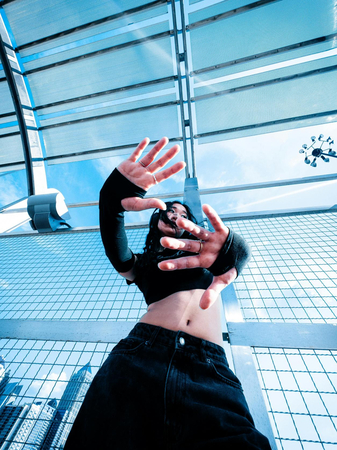

Share this article:
Select the product rating:
Daniel Walker
Editor-in-Chief
This post was written by Editor Daniel Walker whose passion lies in bridging the gap between cutting-edge technology and everyday creativity. The content he created inspires the audience to embrace digital tools confidently.
View all ArticlesLeave a Comment
Create your review for HitPaw articles