How to Remove Shine from Face Using Photoshop (and AI Alternatives)
Even a good portrait would lose its beauty if a shiny forehead or nose takes the center stage. Remove Oily skin photoshop, strong lights, or camera flash can cause facial shine, which can cause undesired glare in photos as they appear uneven and overexposed.
Fortunately, there is now an easy way to do it with the help of such tools as Photoshop and some AI-based editors like FotorPea by HitPaw, where the remove shine from face photoshop can be done without the lines and color being lost, not to mention the ability to even out the skin tone and to make it radiant as well.
Part 1. Why Faces Look Shiny in Photos
It is well to know how to cause shine in Photoshop before knowing how to take the shine away.
Oily skin: The skin is oily, and it is natural; therefore, it reflects light, particularly in the humid seasons or when it is light.
When photographed, things such as the forehead, nose, and cheeks may be over-reflected.
Overly bright light: The overhead sun or harsh studio lights may reflect off the skin and highlight the differences and uneven textures.
Flash photography: The flash of the camera is of use in dark places, but it leaves spots of reflectance in hot places, such as excessively greasy or sweaty ones.
It is not only a matter of vanity to make corrections to these highlights; it is a necessity to have a balanced and professional portrait. Regardless of a company portrait, a fashion picture, or an Instagram story, the ways to minimize shine will make features, expressions, and real skin color shine through.
Part 2. Photoshop procedure to remove shine on the face.
Removal of shine created by face Photoshop editing provides the greatest level of control when it comes to having accurate, high-quality editing. This is a basic procedure that will be done step by step:
The first thing you do is to open your photo using Photoshop.
Open Adobe Photoshop and select the picture that you would like to work with. You should always begin with collecting background, which is done by copying the background on a different appearance (Ctrl + J- needs to be done in a non-destructive way), you will leave the original image unchanged.
How to Remove Shine from Face in Photoshop
When confronted with the exact, professional editing done, nothing leaves you in more control than the shine off face Photoshop techniques put you in. Following is the step-by-step process.
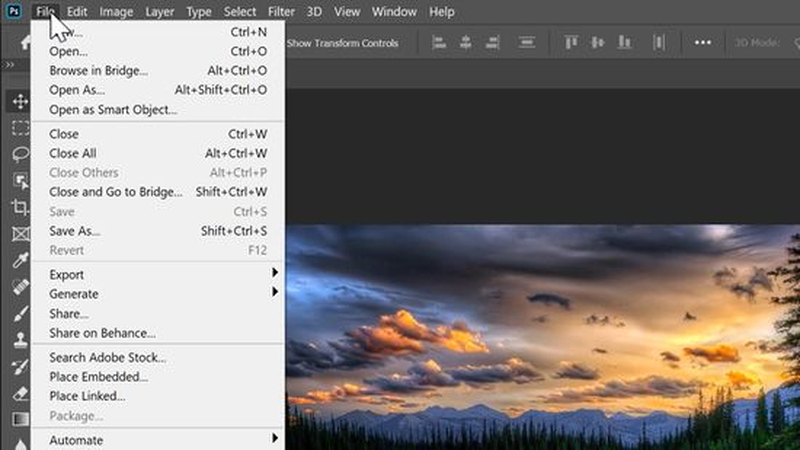
Step 1: The first thing you have to do is open your photo with Photoshop.
Upload the image to your Photoshop. Press Ctrl + J to duplicate a layer so that the original image can also stay available.
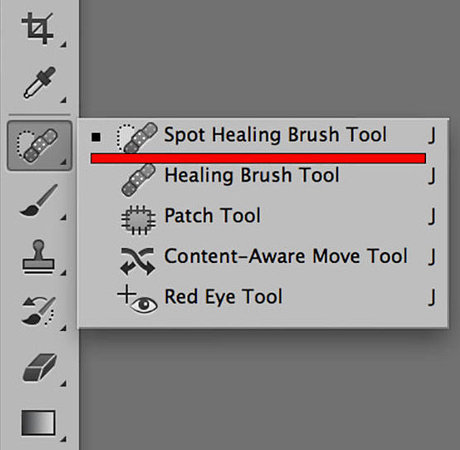
Step 2: It involves the use of the Spot Healing Brush Tool.
Choose the tool of the Spot Healing Brush. Now paint lightly on any area of shine. Photoshop will automatically merge these regions with tones around which will tone them to a lesser level of glare. This is best applied on small areas of the nose, cheeks, or chin.
The purpose of this is to select the Clone Stamp Tool to use when working with bigger spots.
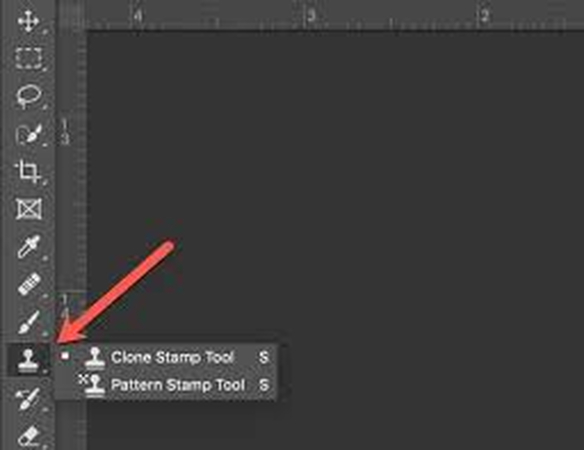
Step 3: Try the Clone Stamp Tool for Bigger Spots.
Keep the brush opacity around 20-30% for gradual, realistic blending.
To be more precise, any switch to the Clone Stamp Tool. Sample a matte patch on the skin, hold the proposition until it is light on shiny areas on Mac (hold Alt). Your brush should maintain an approximation of 20-30%; this is to ensure that there is a smooth, natural shading.
Step 4: stresses and graduates with the Dodge and Burn.
This is done with the Dodge Beam and the Burn Beam to lighten the shadows and make the highlights a tiny bit darker. This is an ideal method of balancing out and maintaining depth in the skin. Grade the movement to 5-10% so that there are no severe transitions.
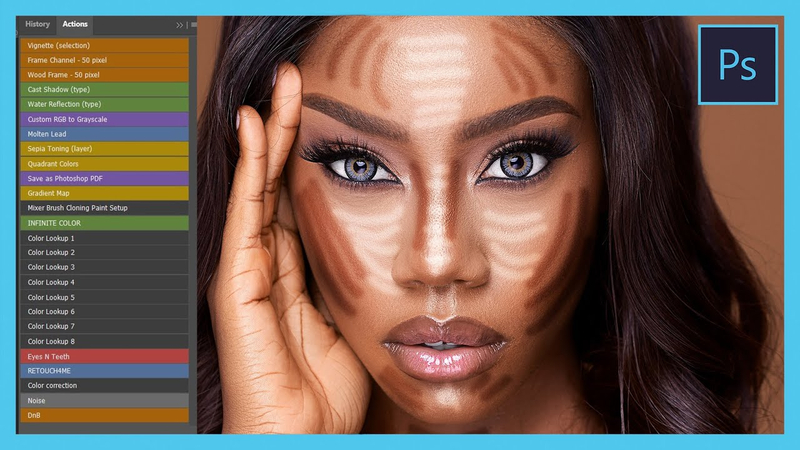
Step 5: Using Frequency Separation (The Advanced Way).
If you're serious about getting a great Photoshop skin retouch, then frequency separation is worth exploring. This technique involves splitting your image into two layers: one for texture (think pores, fine wrinkles) and the other for colour and tone.
- First, blur the "low frequency" layer to take the shine off your skin tones, and then leave the high frequency layer intact so you've still got all that lovely texture.
- Next, use the Clone Stamp Tool to work on the low-frequency layer - just hit those shiny spots with a gentle hand, okay.
- The beauty of this method is that it leaves your skin looking like skin, and not some weirdly smooth, airbrushed mess.
Step 6: Tuning It Up with Curves or Hue/Saturation.
Finally, fire up Curves or Hue/Saturation adjustments and take a look at your skin tone. Slightly dial back those highlights and saturation, and you'll be left with something that looks nice and even.
By following these steps, you can easily knock the shine off your subject in Photoshop and leave them looking smooth, but still remarkably like themselves.
Part 3. Alternative: Using HitPaw FotorPea (The Easy Road)
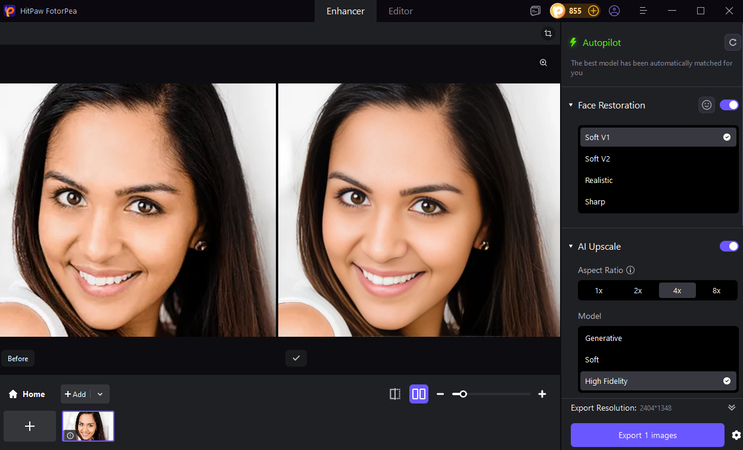
If all this sounds a bit too much like hard work, then you're in luck - there are some pretty cool AI tools out there that can do all the heavy lifting for you, like HitPaw FotorPea. It's perfect for anyone who wants a pro-standard result without having to do any real editing.
Here's how to get rid of shine in a face photo using this AI trick:
-
First, get yourself over to HitPaw FotorPea. You can either open the online version or grab the desktop app.
-
Next, upload the photo that needs a bit of TLC - you know, the one where your subject looks a bit too shiny or over-exposed.

-
Now, navigate over to the Skin Enhancement tool - FotorPea can spot those pesky shiny spots and dark areas all on its own.

-
Just let the AI get on with it - it'll have your photo looking great in a matter of seconds.
-
Fine-tune things with the 'Adjust Skin Tone' slider - a bit more tweaking to get the complexion just right, and you're done.

-
Lastly, export your masterpiece in hi-def, and you're ready to go.
Part 4. Pro Tips for a Natural Finish
Whether you’re using Photoshop or one of these AI tools, the goal is to go for a finish that looks, not one of those freakishly perfect fantasy portraits that look like a doll. Here are a few pro tips to help you get the most out of your shots:
- Don’t over-smooth - real skin still has some texture to it, so you don’t want to smooth it out too much and lose that natural look.
- Preserve the highlights - a bit of shine can be a real winner - it adds depth and makes the pics feel more real.
- When you’re making these subtle corrections, try starting off with a pretty low brush opacity - in Photoshop, anything between 20 to 40% is a good rule of thumb. Just remember, you want to make these tweaks in a way that they blend in with the rest of the shot.
- Then just put a soft finish on it - a low-key matte look can really make your portraits pop, but just be careful not to take it too far or your pics can end up looking too washed out.
Part 5. Mistakes Newbies Make When Removing Shine in Photoshop
When you’re first trying to get to grips with removing shine in Photoshop, there are a few common mistakes that can totally ruin your edit:
- 1. Overblurring: If you use too much Gaussian Blur or AI smoothing, you’ll end up stripping the skin of its texture and leaving it looking all waxy and unnatural.
- 2. Erasing all texture: The thing is, pores and fine lines are a big part of what makes skin look real, so don’t overdo it and smooth them out completely.
- 3. Not checking tone balance: Make sure you’re regularly comparing the face and neck tones to make sure they match - it’s an easy thing to overlook, but it can make a big difference.
- 4. Not duplicating your layers: Always edit on a duplicate layer - it’s just good practice to protect your original image and make it easy to go back if you need to.
- 5. Being too aggressive: Remove shine should be about making a subtle tweak - if it looks like it’s been heavily edited, you’ve probably gone too far.
Conclusion
You don't have to put up with shiny skin ruining your favourite photos - whether you're a total beginner or a seasoned pro, Photoshop and HitPaw FotorPea both offer reliable ways to remove shine from face, Photoshop style or through automation. With a bit of know-how and the right tool, you can smooth out oily skin, balance out light, and get your portraits looking natural and radiant.
So the next time you spot a shiny forehead or cheek in your photo, don't get too stressed - just fire up Photoshop or HitPaw FotorPea and get back to work on getting that perfect glow.
Leave a Comment
Create your review for HitPaw articles


