The Best 6 Audio Normalizers to Normalize Sound Easily
High-quality audio is crucial for a superior viewing and listening experience. Whether you're watching movies, listening to music, tuning in to podcasts, or reviewing presentations, audio quality can play a significant role in your experience. Audio normalization adjusts the volume to a target level, ensuring that the peak volume does not exceed a specific decibel level. This way, the audio level remains the same when you switch from one track to another, and you are not bombarded with sudden loudness that may ruin your experience or hurt your ears. In this guide, we'll give you step-by-step instructions on how to normalize audio in Audacity and some faster alternatives.
Part 1: What is "Normalize" and Audio Normalization?
Normalize in audio refers to a process that adjusts the amplitude (volume level) of an audio signal to bring it to a target level without distorting or altering the content itself.
The Definition of Audio Normalisation
Audio normalization is the process of uniformly increasing or decreasing the loudness of an audio file to a standard or target level. It ensures that the loudest part of the audio reaches a desired peak or average loudness. There are two main types of normalization:
1. Peak Normalization
- What it does: Adjusts the audio so that the loudest peak (highest point in the waveform) reaches a set level (usually 0 dB or slightly below).
- Use case: Prevents clipping; often used for music tracks or individual files where relative dynamics are preserved.
- Limitation: Doesn't account for perceived loudness-quiet parts may still seem too soft.
Example: If your loudest sound is -6 dB, peak normalization will raise the entire waveform so that the peak hits 0 dB, raising all other parts proportionally.
2. Loudness (or RMS/Integrated LUFS) Normalization
- What it does: Balances audio based on how loud it sounds to the human ear, not just based on peaks.
- Uses: Podcasts, broadcasting, streaming platforms (e.g., YouTube, Spotify), where consistent listening volume is important.
- Standards: Measured in LUFS (Loudness Units Full Scale); common targets include:
-14 LUFS (Spotify, YouTube)
-16 LUFS (Podcasts)
-23 LUFS (Broadcast TV, Europe)
| Type | Based On | Use Case | Pros | Cons |
|---|---|---|---|---|
| Peak | Loudest Peak | Music, simple gain adjustments | Easy, prevents clipping | Doesn't reflect perceived loudness |
| Loudness/LUFS | Perceived volume | Streaming, podcasts, broadcast | Consistent listening experience | More complex, needs metering tools |
Why Need to Normalize Sound/Audio?
- To avoid jarring volume changes between tracks or clips.
- To prepare audio for streaming or broadcasting where standard loudness levels are enforced.
- To maximize volume without clipping, especially for music production.
- To ensure consistency in audio projects like YouTube videos, interviews, or voiceovers.
If you're working with audio for content creation, podcasting, or streaming, normalizing to LUFS is essential to meet platform requirements and ensure a professional sound.
Part 2: Top 6 Audio Normalizers for Windows and Mac
1. Audacity to Normalize Audio
Audacity has cemented its position as the top choice of amateurs as well as professionals who work with sounds. The free and open-source tool offers a rich variety of powerful features that make audio editing seamless and efficient. It supports a vast variety of audio formats, which makes it easy to edit any audio. Moreover, it has a thriving ecosystem of plugins that enhance its capabilities in many ways. Most importantly, Audacity normalizes audio without compromising its quality.
Step-by-step Guide to Normalizing Audio with Audacity
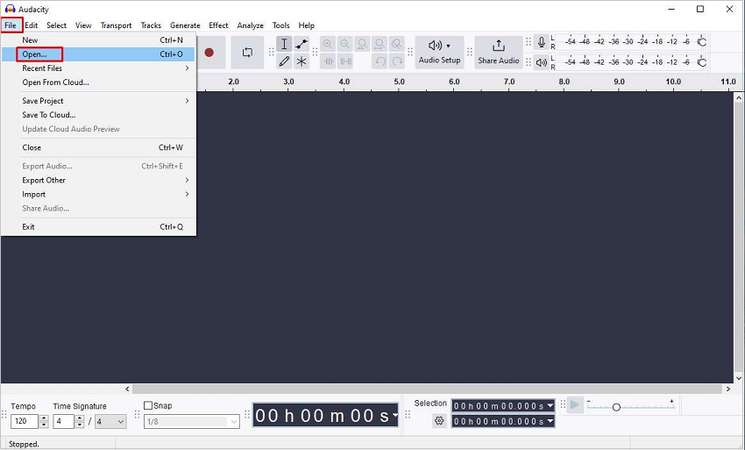
Step 1:Click 'File' > Choose 'Open'> Find, select, and import audio into Audacity.

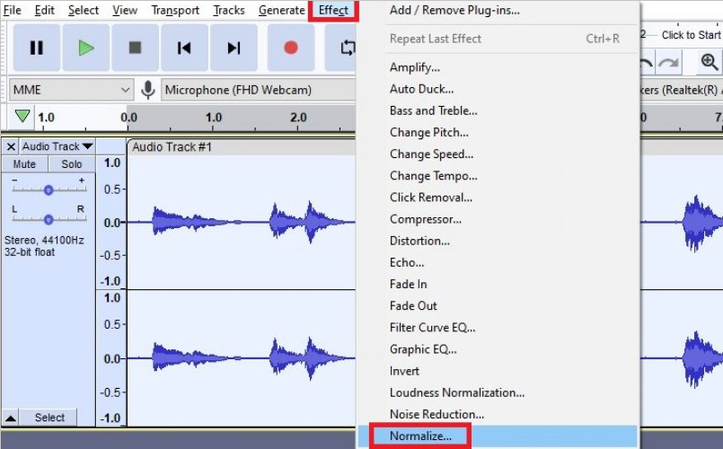
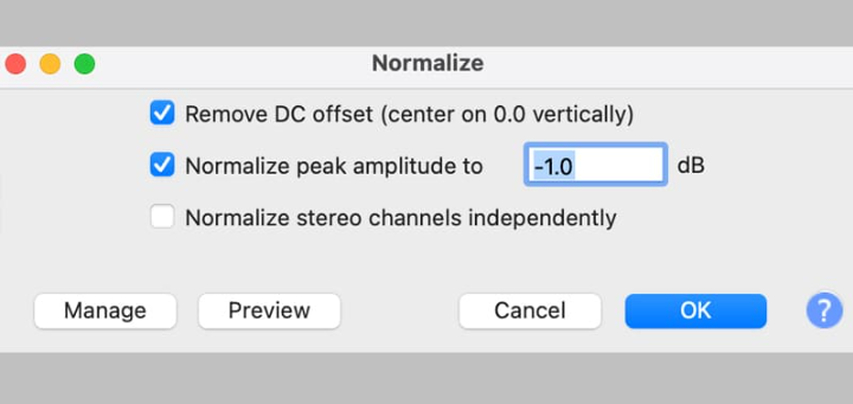
Step 2:Go to 'Effect',choose 'Normalize' from the menu.

Step 3:Check the 'Normalize peak amplitude to' checkbox,Edit the value in the box next to it to -1.0 db. Hit 'Preview', experiment with different decibel levels and click 'OK' when satisfied.

Pros
- Free and open-source
- Simple audio normalization process
- Limited batch processing support
- Works on Windows, Linux, and macOS
Cons
- No LUFS/Loudness Normalization
- Dated UI
- Lacks advanced features
2. MP3Gain
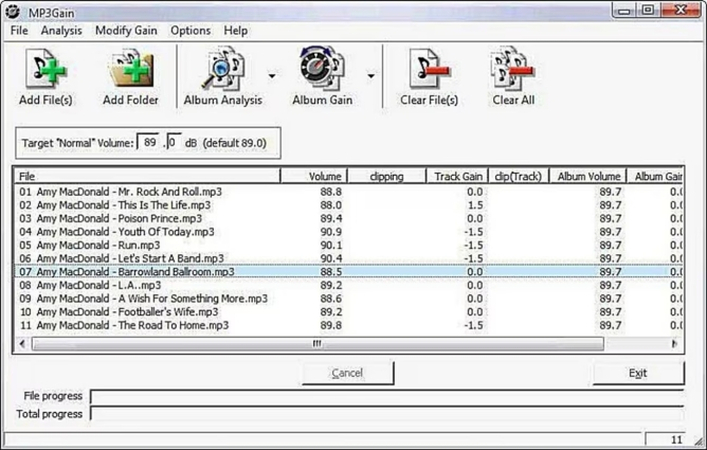
MP3Gain is one of the most popular tools for losslessly normalizing audio. Its batch-processing capabilities make it possible for users to standardize audio across multiple MP3 files without quality loss. If you made an edit that you don't like, MP3Gain lets you reverse the changes without making permanent edits to the MP3 file. MP3Gain is capable of automatically analyzing the imported audio file and determining whether it needs normalization.
Pros
- Free and open-source
- Multiple audio format support, including MP3, AAC, M4A, etc.
- Command line support available for power users
- Increases the dynamic range of all audio files to boost overall audio quality
- Batch processing support
- Presets
Cons
- Old and outdated interface
- Lacks advanced normalization features
3. Adobe Premiere Pro
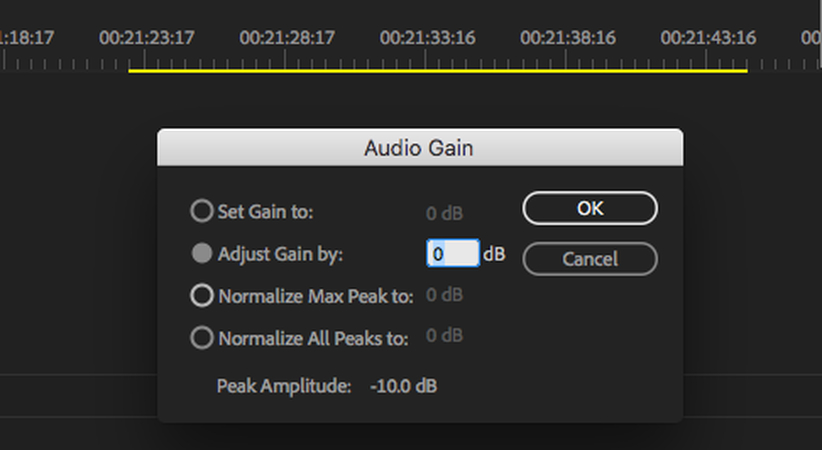
If you need a professional tool, you can use Premiere Pro to normalize audio. Premiere Pro remains the industry standard for sound engineers and audio professionals in the entertainment industry. Its comprehensive suite of features makes it the top choice for editing video and audio content. Premiere Pro provides users with granular control over audio normalization, including loudness normalization. Users can cap the peak decibel level of the audio to ensure that the loudness never exceeds the prescribed limit.
Pros
- Offers keyframe-level editing
- Vast audio format support
Cons
- Highly resource-intensive. Requires high-end computer
- Complex tool. Not suited for beginners
4. VLC Video Player
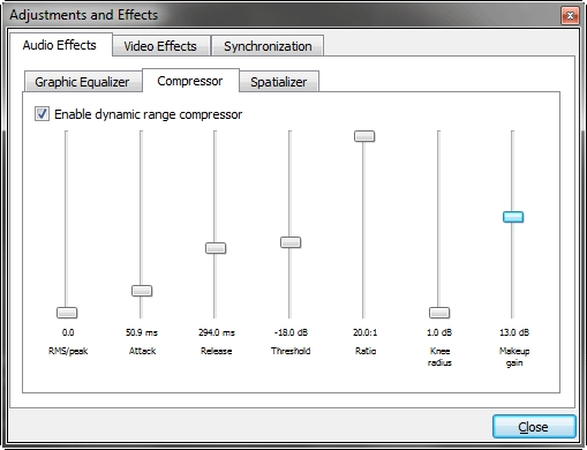
VLC Video Player offers a simple audio normalization function that's quite intuitive and easy to use. However, the outdated interface and multiple steps involved in the process may discourage some users. If you can overlook them, VLC Video Player is one of the best audio normalization tools. It provides users with broad customization options for normalizing audio levels across entire playlists.
Pros
- Can detect loudness of an audio and automatically adjust it to preconfigured levels
- Can normalize video across multiple playlists
- Built-in visualizer helps you visualize audio loudness
Cons
- Lacks advanced normalizing features
5. Handbrake
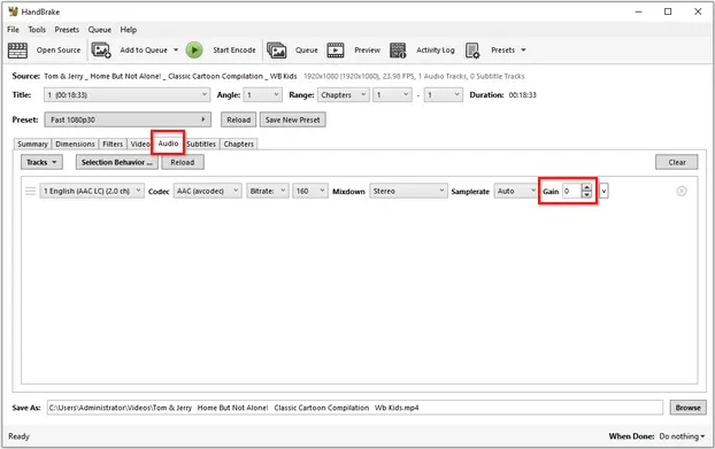
Handbrake is a powerful video transcoding tool with audio normalization features. This free and open-source tool comes with a surprising array of normalization features. For instance, users can enhance the volume of low sounds without affecting the volume of loud sounds. The Dynamic Range Compression of the Handbrake works brilliantly and is second to none. It can reduce the range between the loudest and softest sounds and balance them to produce a high-quality listening experience.
Pros
- Free and open-source
- Batch processing
- Supports a variety of audio formats
- Lots of presets for a variety of functions
Cons
- Audio normalization can get too aggressive, leading to distortions
6. AIMP
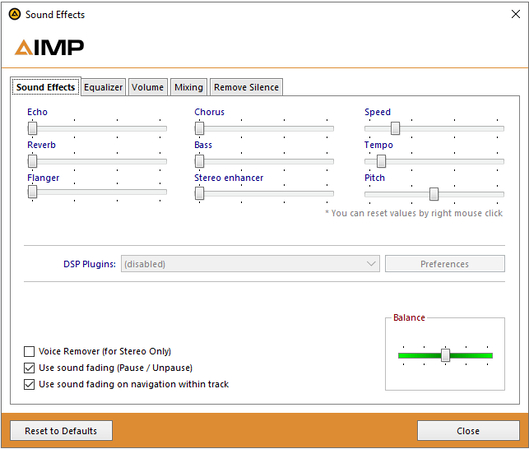
AIMP is a free audio player with basic audio normalization capabilities. It emphasizes user-friendliness over everything. That means AIMP will get the job done, but don't expect it to do it losslessly. AIMP automatically detects the perceived loudness of an audio and normalizes it to predetermined levels.
Pros
- Free
- Can auto-detect and remove silent parts of an audio
- Offers volume control with logarithmic scales
- Lots of effects like reverbs and echoes
Cons
- Cluttered UI
- Only basic features
Bonus: Remove Background Noise from Audio with HitPaw Univd
Ambient sounds and background noises can interfere with audio normalization in several ways, negatively affecting sound quality. They can reduce the average loudness, amplify noise while reducing speech or vocal volume, or confuse the audio editing into believing that the average loudness is already high. Use HitPaw Univd to remove background noise from your audio for great audio normalization results.
HitPaw Univd - All-in-one Video Solutions for Win & Mac
Secure Verified. 254,145 people have downloaded it.
- Remove background noise from over 1000 different audio and video formats.
- No audio editing skills or knowledge is needed. Univd's AI removes noises with a button click.
- Removes everything from a persistent noise like wind or intermittent sounds like coughs.
- With built-in hardware acceleration, Univd denoises audio in seconds.
- Compare input and output audio with previews before saving the denoised audio.
Secure Verified. 254,145 people have downloaded it.
FAQs on Normalize Sound
Q1. Can normalization ruin my audio?
A1. Normalization is vital for delivering a superior audience experience to listeners. However, if your audio has background noise, normalization can boost its volume, too. So, make sure you clean up the audio before using normalization. Tools like HitPaw Univd can help.
Q2. Can normalization fix quiet audio?
A2. Normalization can enhance the default volume of your audio to boost its loudness, but only up to a certain level. When the original volume is too low, it often leads to the amplification of background noises as well. So, you may have to clean up the audio before audio normalization.
Conclusion
Audio normalization is an essential step in ensuring a consistent and pleasant listening experience, especially when working with mixed media. Tools like Audacity let you fix your audio for free and quickly. However, audio normalization is fraught with issues. It can make background noises loud or even distort the actual audio contents. Use HitPaw Univd to get rid of all unwanted noises before you apply audio normalization on your sound file. Try Univd today.




 HitPaw VoicePea
  HitPaw VikPea (Video Enhancer)
 HitPaw FotorPea
![Ultimate Guide to Taylor Swift Masters Controversy [2026]](https://images.hitpaw.com/topics/video-resources/taylor-swift-masters-cover.jpg)


Share this article:
Select the product rating:
Daniel Walker
Editor-in-Chief
This post was written by Editor Daniel Walker whose passion lies in bridging the gap between cutting-edge technology and everyday creativity. The content he created inspires the audience to embrace digital tools confidently.
View all ArticlesLeave a Comment
Create your review for HitPaw articles