Master Video Deinterlacing with Topaz Deinterlace
Video deinterlacing is a must in video especially for old footage or old formats. This challenge has a robust solution, Topaz Deinterlace, which turns interlaced videos into smooth, high-quality, progressive footage. This guide will take you through how topaz video enhance ai deinterlace, and a potent substitute can teach you to master video deinterlacing to make sure your videos look sharp, clean, and professional, no matter the source or format.
Part 1. Understanding Topaz Deinterlace: Key Features and Benefits
Topaz Video Enhance AI Deinterlace is a potent AI tool to help video quality by using cutting edge AI technology on interlaced videos. While interlaced video formats traditionally suffer from flickering and artifacts on high-definition displays, there have been no effective ways to mitigate those effects until now.
Topaz Deinterlace proves to be the solution to this problem by 'intelligently analyzing' the course of each frame of video and 'separating' the interlaced fields. It then uses the software to reconstruct these frames, getting smoother and more detailed results.
Topaz Deinterlace is one of the best features, as its AI processing uses deep learning to improve the quality of videos while preserving fine details. It’s a convenient tool for restoring older videos, converting DVDs or VHS tapes, and generally improving videos that were recorded using interlaced formats to begin with.
In contrast to conventional deinterlacing techniques, Topaz Deinterlace delivers little loss of motion fluidity and image clarity for crisp, high-quality video.
It also features an easy-to-use UI that both beginners and professionals may utilize with ease. Its easy-to-use settings allow you to get professional effects with only a few clicks effortlessly. Whether you're working on a personal project or want to enhance footage for commercial use, Topaz Deinterlace makes the process of video deinterlacing easier.
Part 2. Step-by-step Guide to Use Topaz Deinterlace
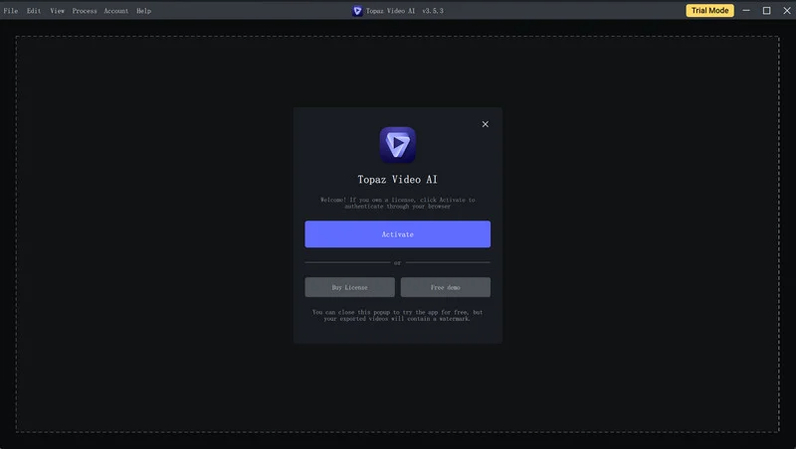
Step 1. Depending on the operating system on your computer, download the installation package. After Topaz has been installed via the Setup Wizard, open the software to the welcome screen, where you may either trial it for free or activate it for full version access.
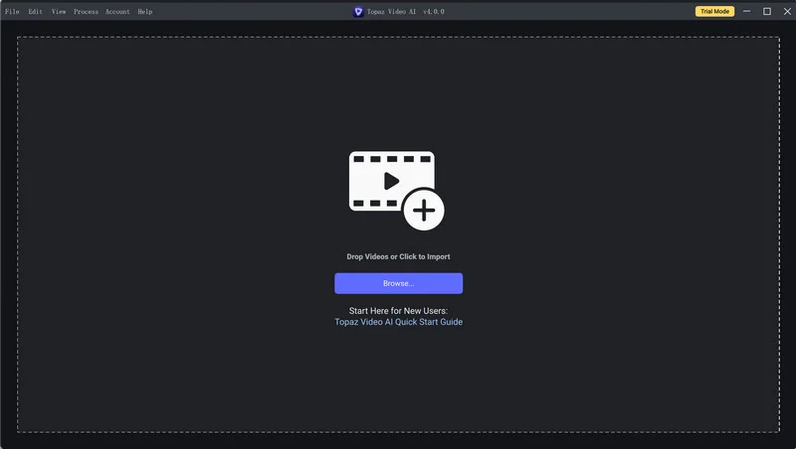
Step 2. Topaz can import videos in two different ways: Choose to "Browse" or drag & drop files into the application.
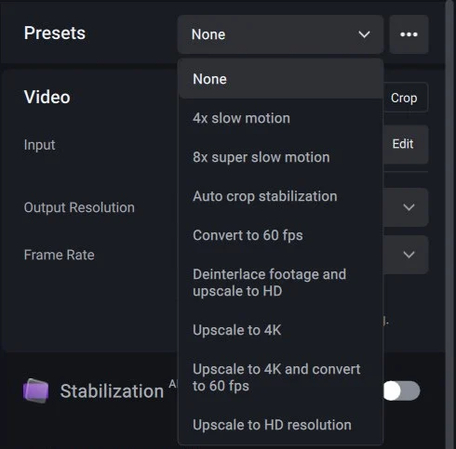
Step 3. Before rendering, the AI filters can be chosen in two different ways:
1. Choose A Preset: Program setup is made simpler with the PRESET, making testing more straightforward. Using the Presets panel, select a preset (such as "Upscale to 4K") that will automatically activate the output resolution, output format, and enhancement filters. Click the "Preview" or "Export" buttons to start the video export process or observe the differences between the before and after.
Tip: Additionally, you may create a new Preset on your own, giving you the freedom to personalize your experience.
2. Manual Configuration: By manually choosing AI filters, AI models, and video type, as well as by modifying output parameters like resolution, bitrate, quality level, and format, users may transform the program's output. Multiple filters, including Frame Interpolation and Enhancement, may be selected simultaneously thanks to their adjustable and fine-tuning features.
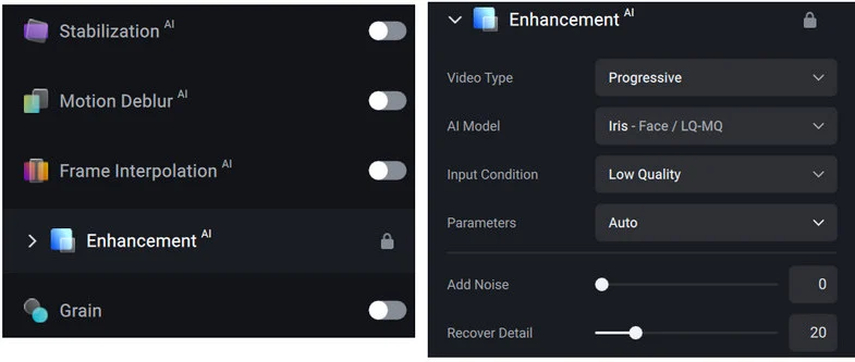
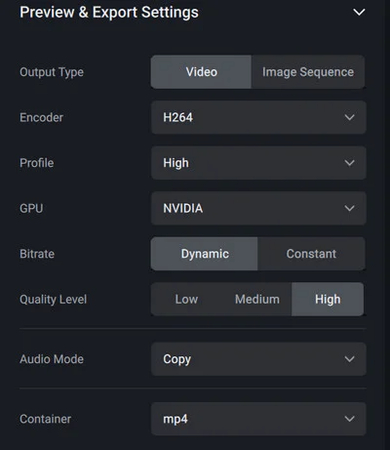
Step 4. AI Filters and AI Models can be configured manually or by selecting a preset. Customize elements such as Encoder, Profile, GPU, Bitrate, Quality Level, Audio Mode, and Container by opening the output options box.
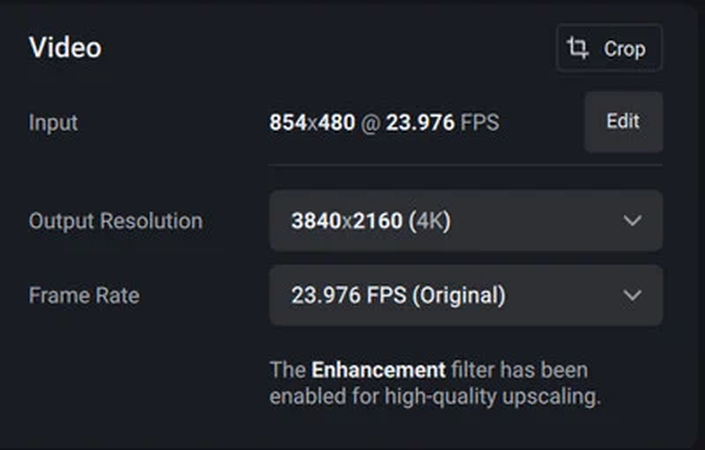
To guarantee the intended project outcomes, choose your desired output resolution and frame rate when selecting AI Filters and AI Models by hand.
Tip: Users of Macs should use MOV as the container and H.264 or ProRes as the encoder for optimal compatibility with media players, while users of Windows should use MP4 as the container and H.264 as the encoder.
Step 5. Start the enhancing effect preview when the configuration is complete to guarantee the desired result, usually 30 frames. Choose "Preview 2s" by default to begin the preview.
Note: The loading time to complete the request will rise if you select a longer preview duration. This is something you should consider before choosing.
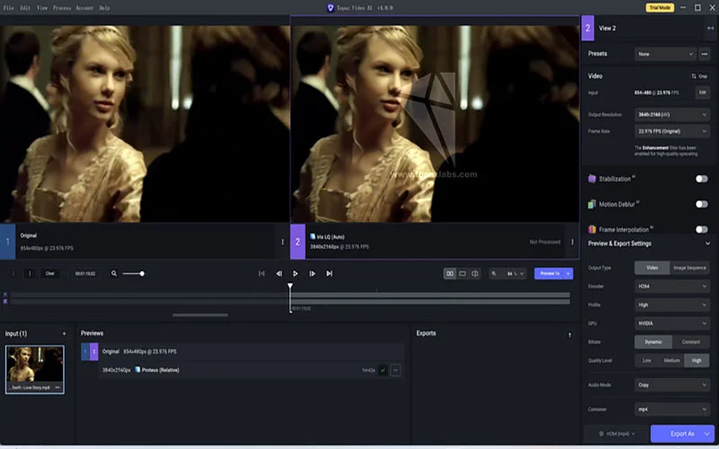
Step 6. Click the "Export As" button to begin processing the video if the result meets your expectations.

Part 3. Limitations of Topaz Deinterlace
Topaz Deinterlace is an excellent video enhancement tool. You need to be mindful of a few things, though. When the trial period expires, you have to buy a license, which is the main drawback of the software. There is also the problem of long processing times, particularly for large or even high resolution files, not that useful if one needs quick results.
Topaz also requires high-performance hardware, and users with older or less powerful computers may find that Topaz performs slowly. The software also can’t be used for real-time processing, so it isn’t ideal for live video editing.
Additionally, although it excels at deinterlacing, it needs some of the more advanced editing functions, such as trimming and color fixing, so users must depend on other software. Some minor artifacts may appear in some complex video scenes and this may degrade overall video quality.
Part 4. The Best Alternative to Topaz Deinterlace
HitPaw VikPea (formerly HitPaw Video Enhancer) is an ideal alternative to Topaz Deinterlace if you’re looking for an all-in-one. With advanced AI-based video repair and enhancement software, this is one of the best video repair and enhancement software ever. It utilizes cutting-edge algorithms to improve video quality and works best for users who need more than just deinterlacing in a very short time.
With the newest version of HitPaw VikPea, users can have try of various models, including the Frame Interpolation Model and Stabilize Model, to help users improve video clarity and stabilize shaky footage. If you’re dealing with low-resolution videos or trying to reconstruct damaged files, HitPaw VikPea is a highly professional tool that always gets the job done quickly and efficiently.
Key Features of Hitpaw VikPea
- An AI-powered enhancement that enhances the video clarity and detail.
- High-quality upscale videos to 8K resolution for stunning visuals.
- Advanced AI technology will repair your damaged video files.
- Mature AI technology guarantees precise and high-quality results.
- Easy to use and with a clean interface suitable for everyone.
- View without watermarks so you can see your edits before exporting.
Detailed Steps for Using Hitpaw VikPea
Step 1. First of all, download and install Hitpaw VikPea from the official website.
Step 2. Once the installation of this robust tool is done, insert the desired video to start the AI upgrade process. Select the "File" option. HitPaw VikPea offers more than 30 input modalities to work with.

Step 3. A variety of AI models, such as General Denoise, Animation, Face, Colorize, Color Enhancement, Frame Interpolation, and Stabilize Models, are available on Hitpaw VikPea to provide customized results.
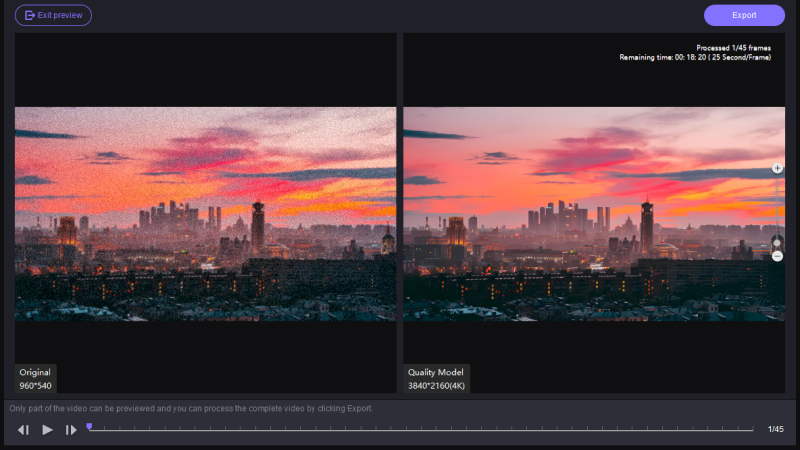
Step 4. After being satisfied with the video's quality, upload the modified version, select Preview, wait a little, and then click the Export option.

Learn More about HitPaw VikPea Video Enhancer
Bottom Line
Topaz Deinterlace is a suitable deinterlacing tool; however, HitPaw VikPea is a more result-oriented and robust tool that features advanced AI-powered enhancements, upscaling, and repair of videos. Frame Interpolation and Stabilize its latest models add extra value for those who are looking for professional quality. If you want to take the video editing experience to the next level, HitPaw VikPea is what you’re looking for.


 HitPaw Edimakor
 HitPaw FotorPea
 HitPaw Univd (Video Converter)


Share this article:
Select the product rating:
Daniel Walker
Editor-in-Chief
This post was written by Editor Daniel Walker whose passion lies in bridging the gap between cutting-edge technology and everyday creativity. The content he created inspires the audience to embrace digital tools confidently.
View all ArticlesLeave a Comment
Create your review for HitPaw articles