How to Perform a Vivo Y Photo Quality Fix: Step-by-Step Guide
If you are a Vivo Y phone user, you may have noticed that your photos get blurry or dull. You are not alone; many users experience this issue occasionally due to software glitches, outdated software, or incorrect camera settings.
To cater to this issue, this article covers the Vivo Y photo quality fix by listing all issues and tips to get better photos. Additionally, you will get an image upscaling tool to enhance your pictures, so keep reading this article to resolve image quality conflicts quickly.
Part 1. How to Identify Vivo Y Camera Quality Issues Affecting Your Photos?
Before fixing any camera-related issue, it is essential to recognize what is actually wrong. Here are some common problems that are affecting your photo quality:
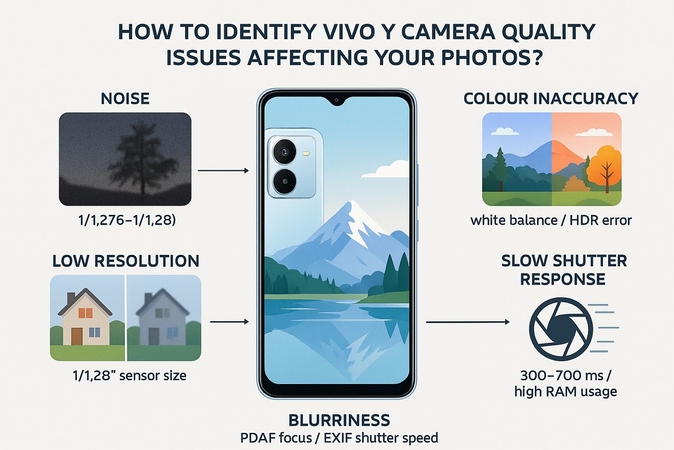
1. Vivo devices commonly use small image sensors (1/1.276-1/1.28), which are less capable of dim light, resulting in grainy textures.
2. It occurs due to an issue in white balance or image post-processing, like RGB histograms or HDR processing artifacts, which can affect its tones.
3. Despite having high pixels, the Vivo Y camera's low-light performance gets affected due to high compression and the limited sensor size of 1/1.28”.
4. This phone uses PDAF for quicker focusing, but the picture can get blurry due to low contrast and longer shutter speed in EXIF.
5. The device may face a delay of 300-700 ms in tapping the shutter speed due to high RAM usage, which can lead to motion blur in pictures.
Part 2. What Causes Photo Quality Issues on Vivo Y Devices?
Before you know Vivo Y camera troubleshooting, remember that several other factors can also ruin the quality of your photo, some of which are mentioned below:
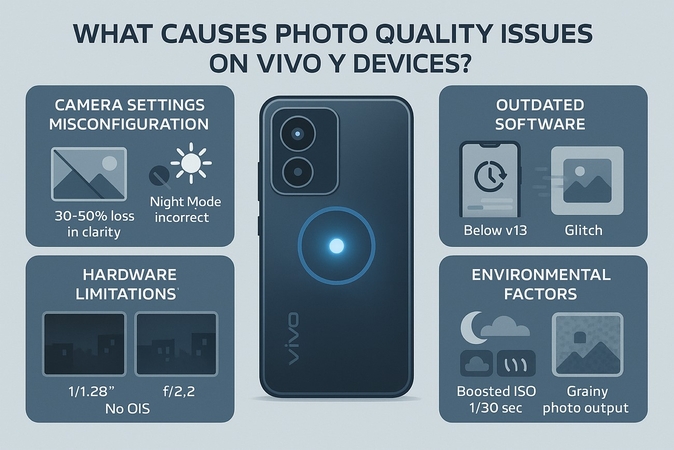
1. Camera Settings Misconfiguration: Using digital zoom beyond 2x can ruin image clarity by 30%-50%, while using incorrect modes like night mode in the daytime can ruin the photo.
2. Outdated Software: Running an outdated OS below v13 can lack many image processing improvements, such as Image rendering.
3. Hardware Limitations: Vivo Y often uses 1/1.28 sensors with f/2.2 aperture, which don't give accurate results in low light and lack OIS, leading to blurred pictures.
4. Environmental Factors: The External environment plays a vital role, as improper lightning boosts ISO and slow shutter speed (1/30), which leads to noisy or pixelated images.
Part 3. How to Improve Vivo Y Camera Quality With General Fixes
When you want a clear camera quality on your Vivo Y, try out fixing the main issues it can face. The following are some of the Vivo Y photo quality fixes that you can try with step-by-step guides:
Fix 1. Adjust Vivo Y Camera Settings for Optimal Results
You can try improving your photo quality by exploring and customizing the built-in camera settings. These tweaks help you achieve sharper, more balanced shots without needing third-party apps. Now, let’s look at the following instructions for this vivo Y photo quality fix:
Instructions. Open the phone's camera, head to "Settings," and adjust brightness, photo resolution, HDR mode, and more according to your preference.

Fix 2. Update Vivo Y Camera Software to Enhance Performance
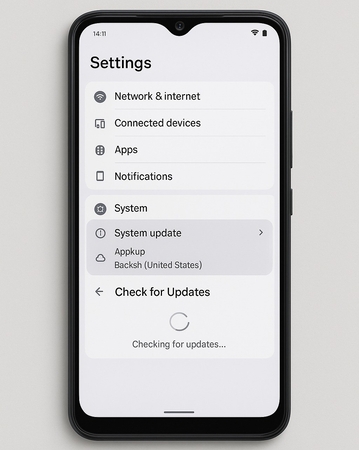
If you regularly check software updates, it can significantly improve your camera performance, including better image processing and more. It also ensures your camera software stays optimized and secure. The following instructions can help you upgrade Vivo’s camera settings:
Instructions. Go to "Settings," press "System Update," and tap on "Check for Updates" to see if a new version is available on your Vivo Y.
Fix 3. Utilize the Night Mode
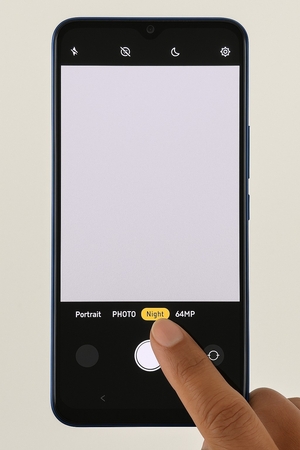
The Night Mode is especially useful for capturing clearer, brighter photos in low-light environments. When you activate it, it uses longer exposure times and image stacking to reduce noise and bring out more detail. Follow the easy instructions and have Vivo Y camera image stabilization:
Instructions. First, tap on the “Camera" icon to launch the app, swipe through the camera modes, and turn on the "Night or Night Mode."
Part 4. How to Use Dedicated Apps to Enhance Vivo Y Photo Quality
You can go through the following image enhancer apps that take image quality to another level and offer other special image enhancer features:
1. Snapseed (Android & iOS)
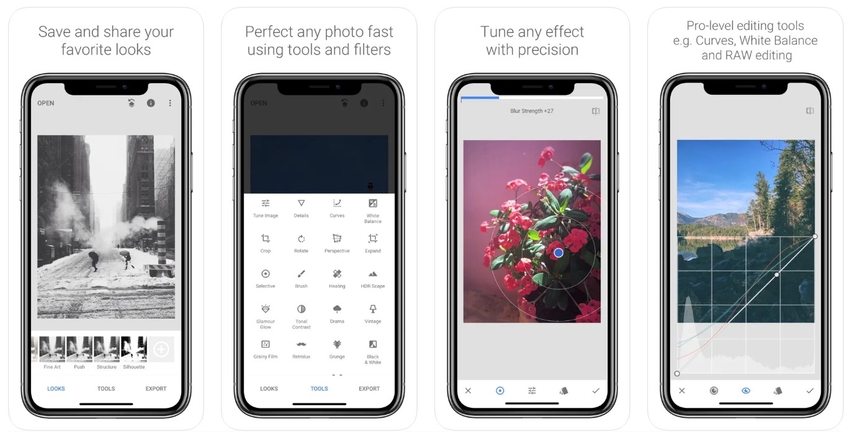
Snapseed is a powerful, free photo-editing app that significantly enhances the Vivo Y camera's low-light performance. With professional-grade tools, it allows users to fine-tune their images by adjusting exposure, enhancing details, and more.
Key Features
1. HDR scape boosts dynamic range to revive underexposed shots.
2. Image tuners help adjust brightness, contrast, and ambiance.
3. Use white balance to fix incorrect color temperatures of photos.
Limitations- Has limited creative presets compared to other apps.
- The tool requires practice for natural-looking edits.
2. Adobe Lightroom Mobile (Android & iOS)
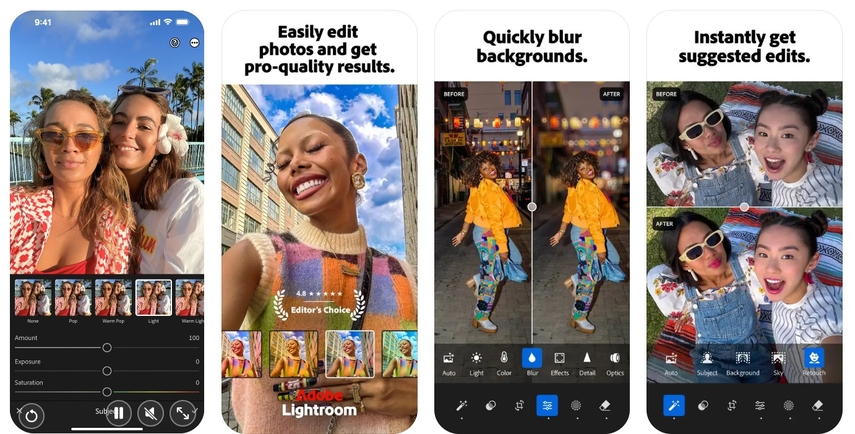
This professional app transforms ordinary pictures into stunning visuals in a few steps. It's especially helpful for social media users or casual photographers who want high-quality results.
Key Features
1. Background blur adds depth and turns images into focused, natural photos.
2. AI helps adjust lighting, remove distractions, and apply style.
3. Offers batch editing to enhance the quality of images.
Limitations- The app consumes more storage on your phone.
- To access some advanced features, you need a subscription fee.
3. Remini (Android & iOS)
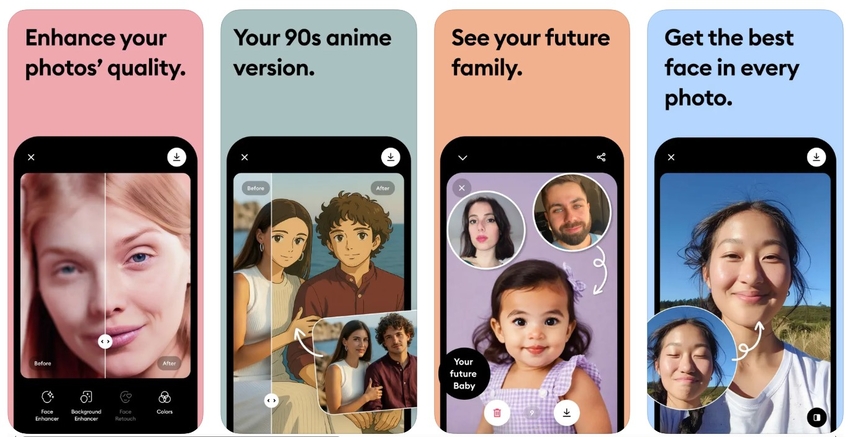
Remini is a specialized AI-powered app used to enhance image quality, making it an ideal tool for Vivo Y camera image stabilization. It excels at facial enhancement, bringing out sharp eyes, smooth skin, and defined features while also repairing noise and distortion.
Key Features
1. You can instantly convert low-resolution photos into HD-quality enhanced images.
2. Try facial detail recovery to fix portraits and facial details.
3. Preview the before and after images before downloading.
Limitations- Limited customization and fine adjustment options.
- AI may produce unnatural results, thus damaging the image further.
4. VSCO (Android & iOS)
This photo editing app and community platform excel in enhancing image quality while also encouraging artistic expression. Its strength lies in subtle, film-inspired looks that improve image clarity and mood without feeling over-processed.
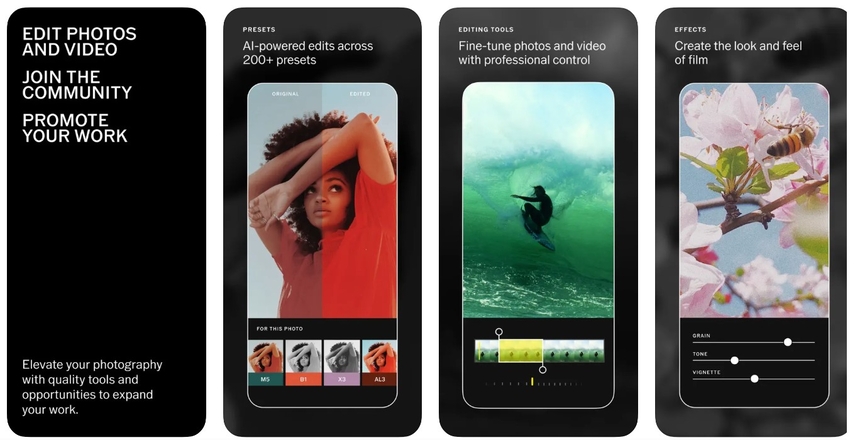
Key Features
1. Apply free and high-quality filters to enhance the image’s tone, color, and texture.
2. Improve image details with professional-grade RAW file support.
3. The pro-HSL can control the hue, saturation, and light of the photo.
Limitations- Doesn’t support healing and offers limited restoration options.
- Lacks AI auto-enhancer compared to the other apps.
Part 5. How to Perform a Comprehensive Vivo Y Photo Quality Fix: HitPaw FotorPea
Other than the apps mentioned above, if you want an advanced tool for Vivo Y camera image stabilization, then HitPaw FotorPea is the best option. This tool allows you to enhance image quality up to 16k with its “Upscale” model. Using its “Colorization' model, you can restore your old black-and-white photo without losing its originality. Furthermore, you can use its batch processing to edit all the images in one go.
Its "Face" model offers you 3 modes: soft, soft v2, and sharp, for a detailed finish, depending on your desired portrait style. Within the settings, select the desired export quality from Low, High, and Medium. Moreover, there is a “High-Res Acceleration” mode to enhance the image processing speed while preserving maximum details. Unlike other tools, FotorPea allows you to preview the generated output before saving it to your device.
Key Features
1. Denoise Model: This model offers you 2 modes, such as “Creative and Realistic,” through which you can remove any noise, compression, and artifact blurs.
2. Low-light Model: Users can brighten the pictures taken in a low-light environment without ruining their actuality.
3. Sharpen Model: Using this model, one can fix blur, motion blur, and any kind of artifacts.
How to Denoise Photos Using HitPaw FotorPea: Step-by-Step Guide
After understanding Vivo Y camera HDR settings, let's learn how to upscale your denoised images with HitPaw FotorPea with the following steps:
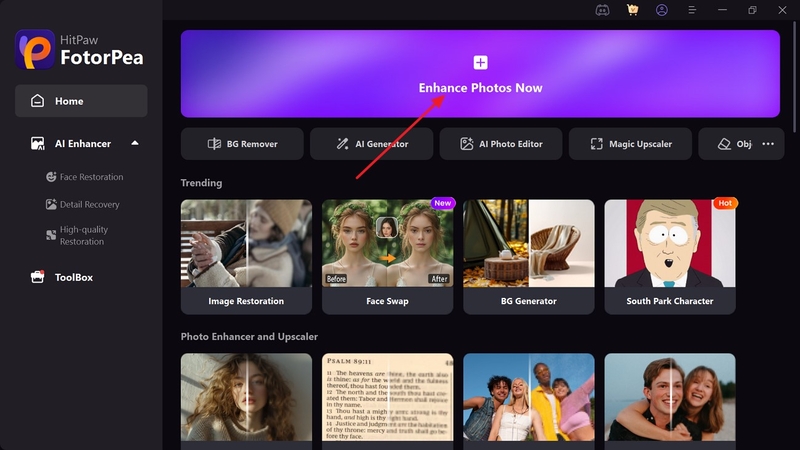
Step 1. Launch the Tool to Select “Enhance Photos Now”After accessing the tool, tap on the "Enhance Photo Now” to get the photos imported from the file explorer.
Step 2. Enable the Denoise Model and Pick the Creative Model
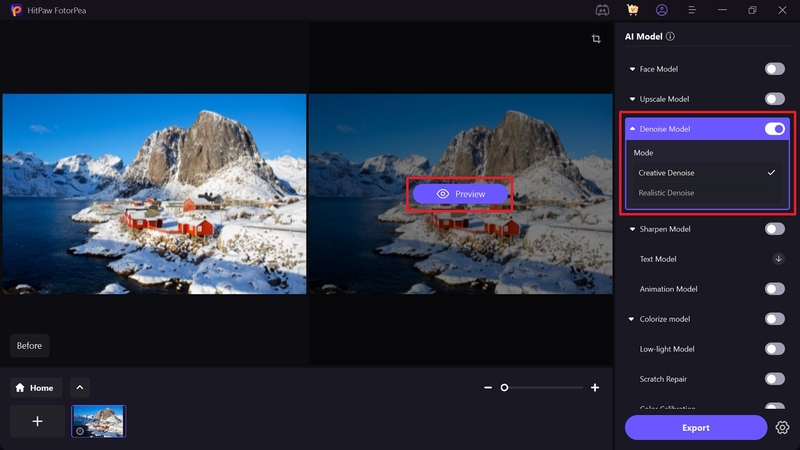
As the photo is imported, go to the AI Models section to toggle the "Denoise Model," choose its "Creative Mode," and hit the "Preview” button to start generating.
Step 3. Render the Outcome to the Device
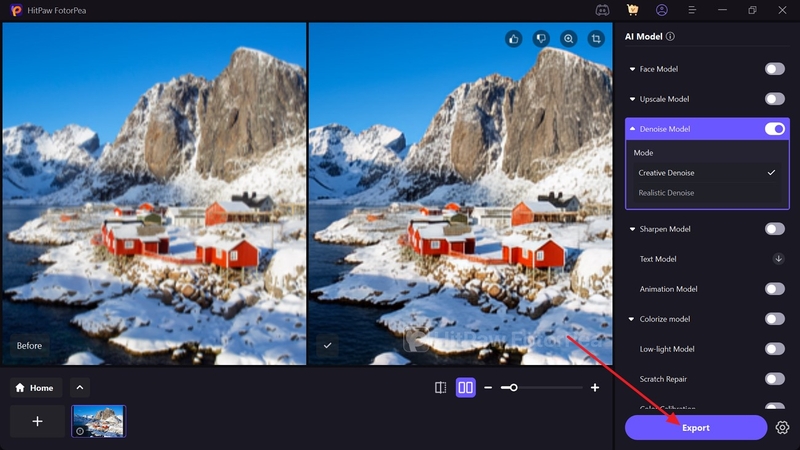
After the photo is generated, you can preview your photo beforehand and hit the “Export” button to get the image saved.
Conclusion
Summing up, Vivo Y camera quality improvement isn't difficult now, as this article covered identifying issues, along with the fixes, and using third-party apps. We have introduced you to the powerful photo enhancement tool FotorPea, which allows you to upscale your photo without ruining the quality.


 HitPaw Edimakor
 HitPaw VikPea (Video Enhancer)
 HitPaw Univd (Video Converter)



Share this article:
Select the product rating:
Daniel Walker
Editor-in-Chief
This post was written by Editor Daniel Walker whose passion lies in bridging the gap between cutting-edge technology and everyday creativity. The content he created inspires the audience to embrace digital tools confidently.
View all ArticlesLeave a Comment
Create your review for HitPaw articles