The Best Approach to Fix Lumix G95 Noise in RAW Photos
When you have one of the best mirrorless cameras with hybrid photo-video performance, you can still notice Lumix G95 noise in RAW photos. These RAW files retain all the sensory data, giving photographers maximum control, but there's still the issue with the noise. Therefore, to address this problem, users have to turn to effective methods of optimizing the Panasonic Lumix G95 settings. This article will provide different fixes, reasons, and signs of image noise.
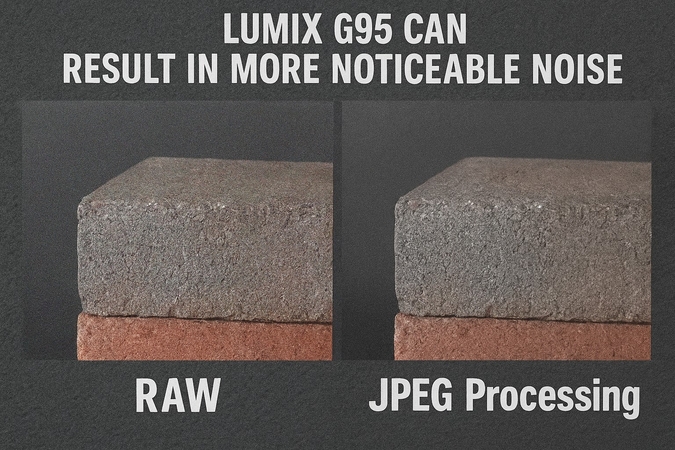
Part 1. Why Shooting RAW with the Lumix G95 Can Result in More Noticeable Noise
If you are taking RAW shots with the Lumix G95, the noise is highly noticeable, and its in-camera noise reduction doesn’t help reduce it. The following are the reasons why taking pictures with this camera results in more noise:
1. RAW vs. JPEG Processing: RAW files contain unprocessed sensor data, unlike JPEGs, which are processed in-camera and often include automatic noise reduction, sharpening, and color correction.
2. Impact of Light Condition: If you are shooting at high ISO, it amplifies the digital noise, whereas low-light conditions often result in grainy images.
3. Sensory Characteristics: The Micro Four Thirds sensor of the Lumix G95 has smaller pixels, which are more prone to noise.
Part 2. What Are the Telltale Signs of Noise in Lumix G95 RAW Photos
Due to these reasons, you need to learn how to fix grainy RAW images from G95. Before that, get to know the following signs of noise in these RAW photos:
1. Color Speckles: If random red, green, and blue dots start to disrupt the image's color accuracy and appear unnatural, then it's a sign.

2. Muddy Shadows: Another sign is the shadow regions becoming blocky with visible degradation in tone gradation.
3. Loss of Details: With the textures, like skin, hair, and more, looking blotchy and smudged, it’s due to high noise levels.
4. Graininess: When the images have a sandpaper-like texture, their flat-toned areas are a telltale sign of noise in Lumix G95 RAW photos.

The noise is manifested at varying ISO settings. At lower ISO (200-800) values, noise is usually minimal, and at mid-range ISO (1600-3200) values, it becomes grainier. At its highest value (6400 and above), noise becomes more visible throughout the image, often with severe color distortion.
Part 3. How to Optimize Panasonic Lumix G95 Settings to Minimize Noise in RAW Photos
After learning the basic reasons and signs of noise, let’s learn the following 4 best methods to remove noise from Lumix G95 RAW files:
Method 1. Adjust ISO Settings
If you set the ISO to the lowest value, it allows proper exposure, as it reduces the sensor’s sensitivity to light, thus minimizing noise. Defining a proper limit to the ISO value can prevent the camera from selecting excessively high ISO values. Now, let’s learn how to adjust the ISO settings and reduce grain in Panasonic G95 night photography:
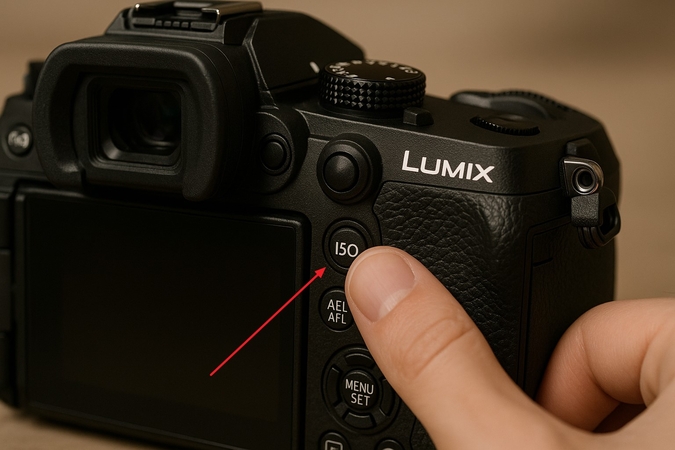
Step 1. Find the “ISO” button on the Lumix V95 camera and press it to reveal the various values of the settings.
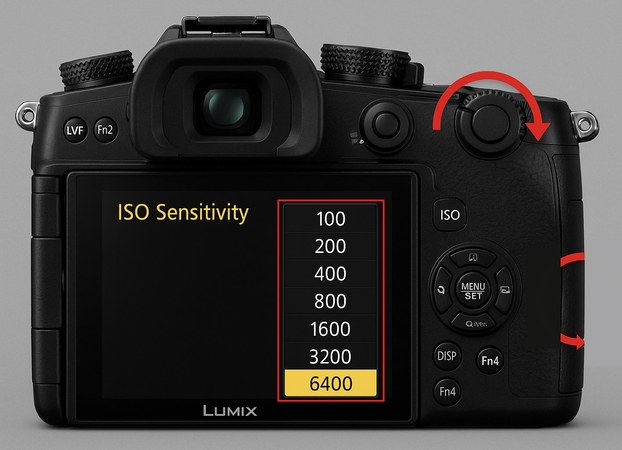
Step 2. Now, press the up and down buttons to choose the desired ISO settings from 100 to 6400.
Method 2. Use Long Exposure Noise Reduction
Long exposure shots enable the Lumix G95’s Shutter Noise Reduction, which seamlessly reduces exposure happening after image capture. With this setting enabled, it’ll double the time it takes to process the long exposure shots. To subtract noise, follow the given steps on how to fix grainy RAW images from G95:
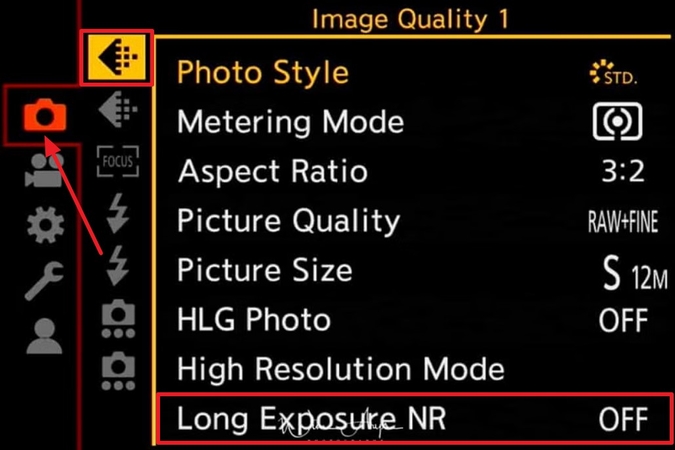
Instructions. On the camera screen, press the “Camera” icon, and choose the first “Image Quality” arrow to reveal options. From here, turn on the “Long Exposure NR” option.
Method 3. Employ Proper Exposure Techniques
When it comes to noise reduction techniques for Lumix G95 photos, another method that can work is employing exposure settings. If you have taken an underexposed image, brightening it in post-processing reveals amplified noise. Therefore, to minimize the need for adjustments, ensure the images are properly exposed in-camera. You can also utilize the exposure compensation feature to increase brightness.
Method 4. Selecting Appropriate Picture Profiles
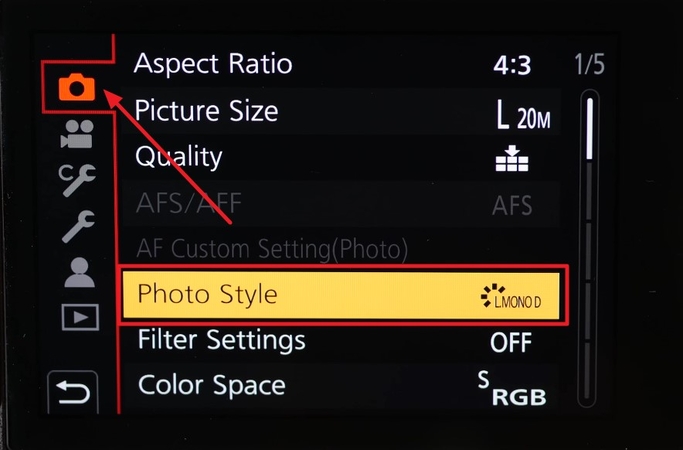
On the Lumix G95, selecting a picture profile affects the JPEG images, thus influencing the preview. Furthermore, you should choose a profile picture with low contrast and saturation to help the camera access exposure. The following steps will illustrate how to eliminate Lumix G95 noise in RAW photos:
Step 1. Head to the “Camera” icon and choose the “Photo Style” option to proceed.
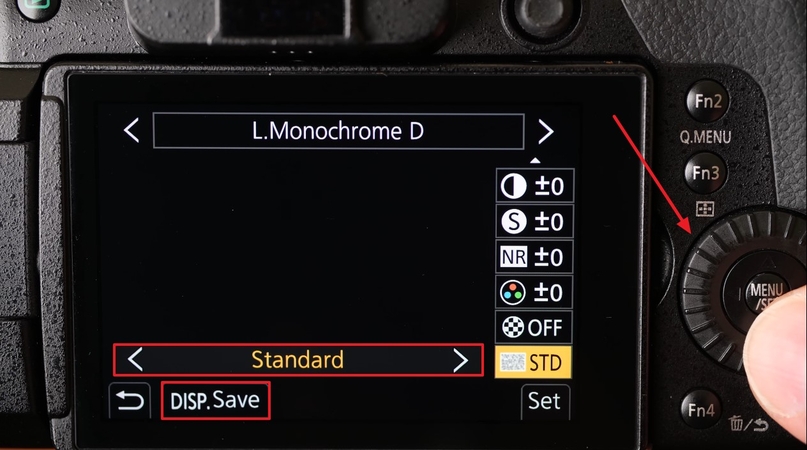
Step 2. Adjust the various right-panel options, like the “Noise Reduction” option, by pressing the “Right” and “Left” arrow icons.

Step 3. After that, go to the last "Grain Effect" option and set it to "Standard" by rotating the "Menu" button.
Part 4. How to Fix Lumix G95 Noise in RAW Photos Using HitPaw FotorPea
Say you do learn about the basic optimizer settings to minimize the Lumix G95 noise in RAW photos, but it's still not enough. As a photographer, you still experience grainy skies, blurred details, and more, ruining your beautiful shots. To cater to this issue, you can turn to HitPaw FotorPea, which edits noisy Lumix G95 RAW files without detail loss. With its advanced denoising technology, you can restore the image’s clarity with ease.
Key Features
1. Denoise Model: It is used to remove noise and grain from low-light or high-ISO raw images and to preserve the essential details.
2. Upscale Model: This AI enhanced model enlarges raw images up to 4K or 8K to get crisp and clear pictures.
3. Low-light Model: With the Low-light Model, brighten and enhance the raw images taken from a low-light environment or night shots.
4. Color Calibration Model: This can enhance the colors of the raw images that are underexposed or have low saturation.
Comprehensive Step-by-Step Guide on How to Perform Denoise With FotorPea
This section will help you understand how you can perform the denoiser model on the granny images taken from the camera and enhance them:
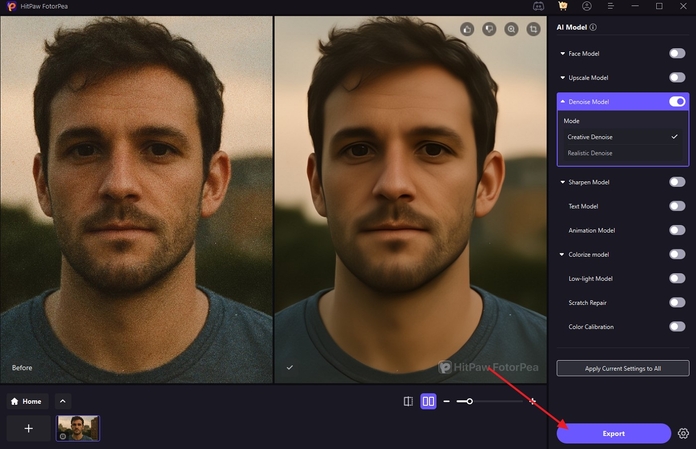
Step 1. Open HitPaw and Import the ImageOn the main interface of the software, click the "Enhance Photo Now" button and import or drag the grainy photo to proceed.

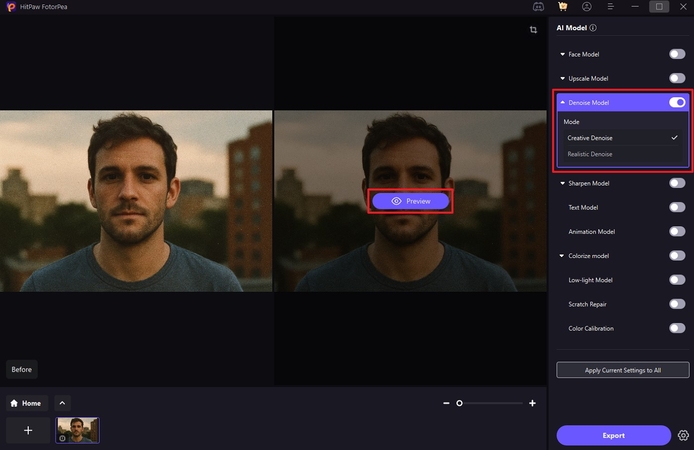
Step 2. Toggle Denoiser Model and Start Process
Next, toggle on the "Denoise Model" to pick the “Creative Denoise” mode from the right "AI Model" panel and hit "Preview" to initiate the process.
Step 3. Preview the Results and Export
Afterward, review the final enhanced image and press the "Export" button to save it on your device.
Part 5. What Measures Can Be Adopted to Minimize Noise in Captured RAW Photos with the Lumix G95
Apart from the settings and equipment, there are some adjustments you can make to improve Lumix G95 image quality in low light:
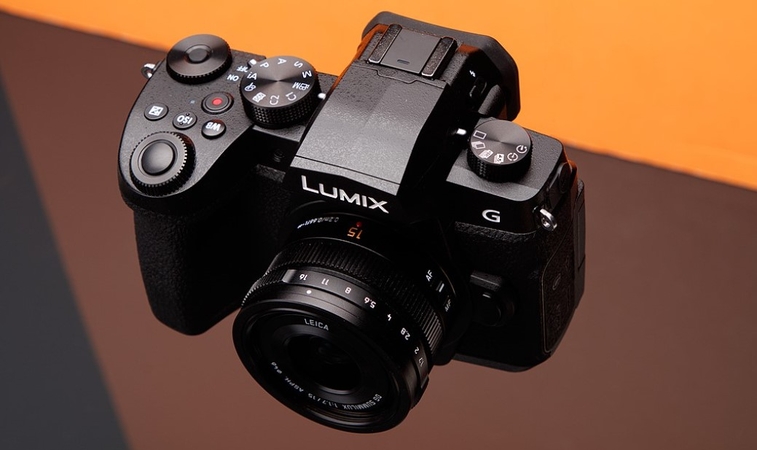
1. Use of Fast Lens: Utilizing a fast lens with a wide maximum aperture lets more light hit the sensor, yielding less noise.
2. Photograph in Good Lighting: Under good lighting, you can limit the camera from increasing ISO, making it easier to keep images clean.
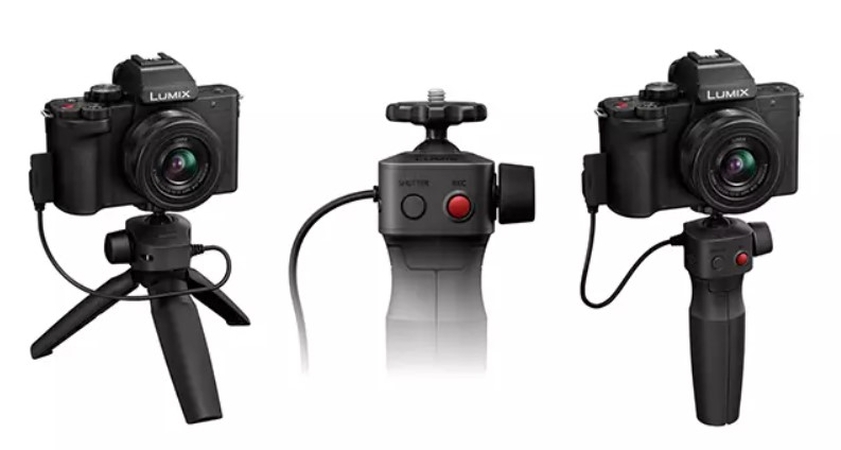
3. Use a Tripod: Photographers should use a tripod since it stabilizes the camera and enables longer exposure times without the occurrence of blur.
4. Expose to the Right (ETTR): The ETTR method allows for more light to enter through slightly overexposing the images, thereby avoiding noise.
5. Keep ISO at Low Settings: You should avoid using high ISO unless necessary, and the G95 performs best in ISO ranges below 1600 for minimal noise.
Conclusion
In the end, this article dealt with the Lumix G95 noise in RAW photos and explained the various reasons and signs of noise in images. You learned the best 4 methods on how to optimize the Lumix G95 settings to minimize the noise reduction. Other than that, to achieve the best noise-free photos, the most recommended software is HitPaw FotorPea with its advanced Denoising Model technology.


 HitPaw Edimakor
 HitPaw VikPea (Video Enhancer)
 HitPaw Univd (Video Converter)
![[Step-by-Step] How to Use Object Eraser on iPhone Photos](https://images.hitpaw.com/topics/fotorpea/guide-to-use-iphone-object-eraser.jpg)


Share this article:
Select the product rating:
Daniel Walker
Editor-in-Chief
This post was written by Editor Daniel Walker whose passion lies in bridging the gap between cutting-edge technology and everyday creativity. The content he created inspires the audience to embrace digital tools confidently.
View all ArticlesLeave a Comment
Create your review for HitPaw articles