Best Ways to Improve Lumix Photo Clarity: Full Guide
Many photographers struggle with soft focus and a lack of detail in their shots taken from Lumix cameras. Although this can be disappointing, the voids in the image can be fixed by using the accurate camera settings and post-processing. From photography tips to editing techniques, there are many ways to get better outcomes. Hence, this article focuses to improve Lumix photo clarity using various methods and tips.

Part 1. How Good Is the Panasonic Lumix Series for Capturing Sharp and Clear Images
Panasonic Lumix is also categorized into series, like many photography equipment series. Perfect for vloggers, the G Series is known for its fast performance and compact size. In contrast, the S Series offers superior depth of field control and low-light clarity, favored by professionals and serious enthusiasts. To learn about the features of this camera that contribute to image clarity. Explore the following list:
1. High-Resolution Sensors: Lumix cameras feature a 25.2MP sensor in the GH6 and a 24.2MP full-frame sensor in the S5 2. These sensors capture detailed and sharp images even when cropped or enlarged.
2. Advanced Autofocus Systems: Panasonic has improved autofocus with technologies like Phase Hybrid AF in the S5 2. These systems provide faster and more accurate subject tracking in dynamic scenes or low light and improve sharpness in Lumix images without quality loss.
3. In-Body Image Stabilization: Many Lumix models have 5-axis in-body image stabilization that reduces camera shake during handheld photography. This feature is essential for achieving sharp images at slower shutter speeds.
4. Models Known for Exceptional Clarity: The Lumix S5 2 stands out for its full-frame sensor and 6.5-stop IBIS, making it a favorite for hybrid shooters. Whereas the GH6 variant delivers outstanding detail and sharpness with its new Venus Engine and high bit-rate recording.
Part 2. How to Adjust Panasonic Lumix Camera Settings to Enhance Photo Clarity
To help you get good photography outcomes, follow the methods below and learn how to make Lumix photos sharper and clearer:
Method 1. Utilize the Photo Style Settings
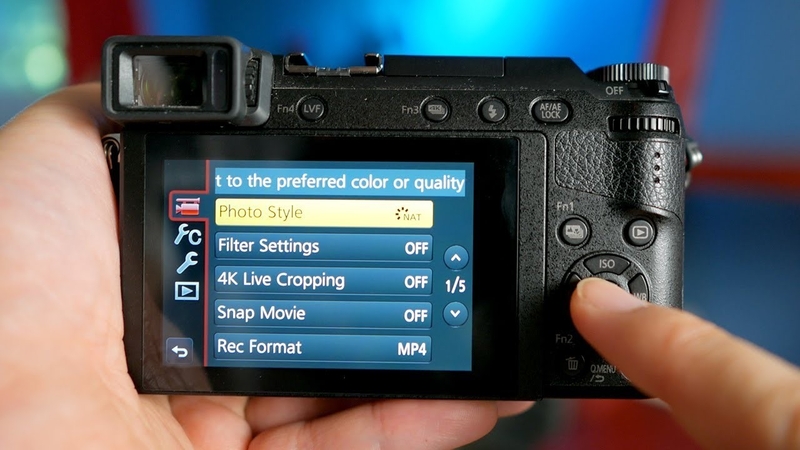
Lumix cameras offer customizable Photo Styles that influence color settings and noise reduction. Choose the Custom style and increase the Sharpness sliders slightly to emphasize textures and edges without overprocessing the image.
Method 2. Optimize ISO Settings
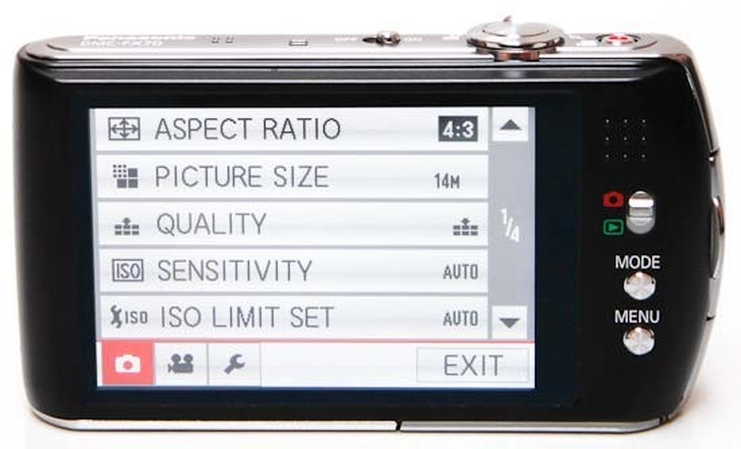
Despite controlling the camera’s sensitivity to light, higher ISO values can add noise that reduces image clarity. An ISO setting as low as 100–400 helps you generate high-quality results for pictures captured through Lumix. Also, use a tripod or image stabilization to avoid raising ISO unnecessarily in low light.
Method 3. Adjust Aperture Settings
You can control depth of field and sharpness by selecting the aperture in Aperture Priority Mode. Keeping the lens sharpness between f/4 and f/8 gives you precise detail without softening the image from diffraction.

Part 3. How to Enhance Lumix Photo Clarity Using AI-Powered Tools and Software
If you forgot to capture the image with the above specifications, you can fix the faults in the post-processing. After we have learned ways to enhance photo clarity on Panasonic Lumix cameras, let's look into the AI-powered tools that help you fix the quality:
Tool 1. HitPaw FotorPea
Whether you are a professional photographer or a hobbyist, poor-quality images can waste hours of hard work. Besides being a disappointment, this can cost you the money needed to reshoot the entire thing. Making up for the poor quality, HitPaw FotorPea removes the defects in your pictures to prevent you from wasting time. With its numerous AI models, it detects the voids in your images and fixes them by offering a relevant model.
If you are not sure which model would cater to your issue, the Auto Select Model feature automatically enables a relevant model. After you have improved sharpness in Lumix images without quality loss, the picture quality, export the results in your preferred settings, like quality and format.
Key Features of HitPaw FotorPea
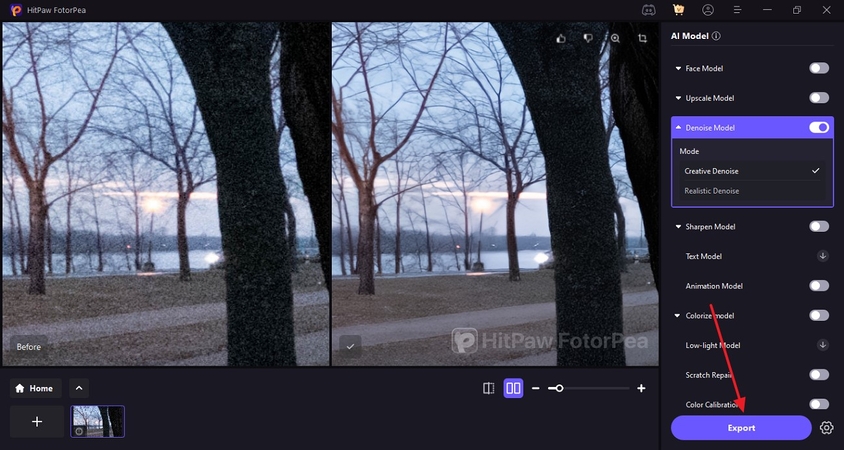
1. The diverse Denoise Model detects the grains in your image and removes them using AI.
2. Its Creative Denoise model is ideal for blurry and noisy images while regenerating the textures.
3. HitPaw FotorPea’s Realistic Denoise model is designed for preserving the details of photos with intense noise.
4. Using the Face Model, users can enhance the facial features in pictures while retaining the original textures of the skin.
A Complete Demonstration on Denoising Lumix Images With FotorPea
To increase the clarity of Lumix photos during post-processing using FotorPea, follow the instructions below:
Step 1. Launch the Tool to Access the Image EnhancerTo start the process, launch the main interface of HitPaw FotorPea and select the “Enhance Photos Now” button to proceed.

Step 2. Import the Image with Noise to Enhance
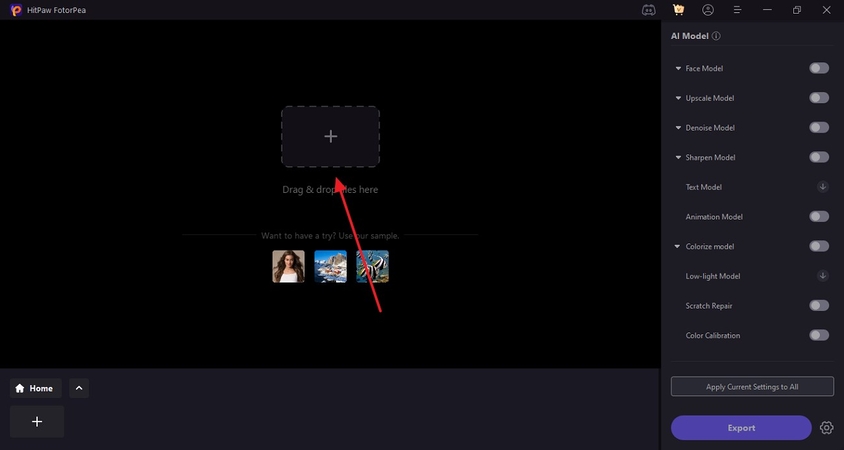
Using the “+” icon on the next screen, import the Lumix-shot picture that has visible noise.
Step 3. Fix the Blur and the Noise Using the Creative Denoise Model
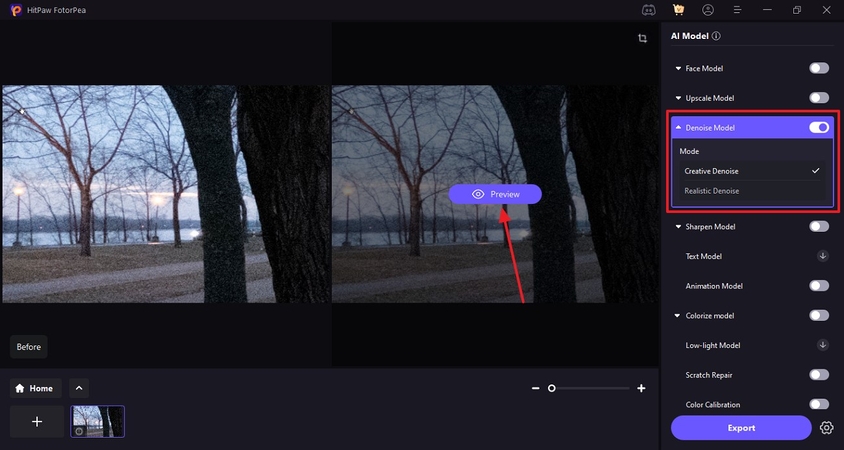
As the picture appears, enable the “Denoise Model” and select “Creative Denoise” to fix the blur and the noise. Afterward, select the “Preview” button to unveil the improved image in a few moments.
Step 4. Export the Enhanced Lumix Photo
Once your Lumix photo has been enhanced, select the “Export” button to save it to the device.
Tool 2. Luminar Neo
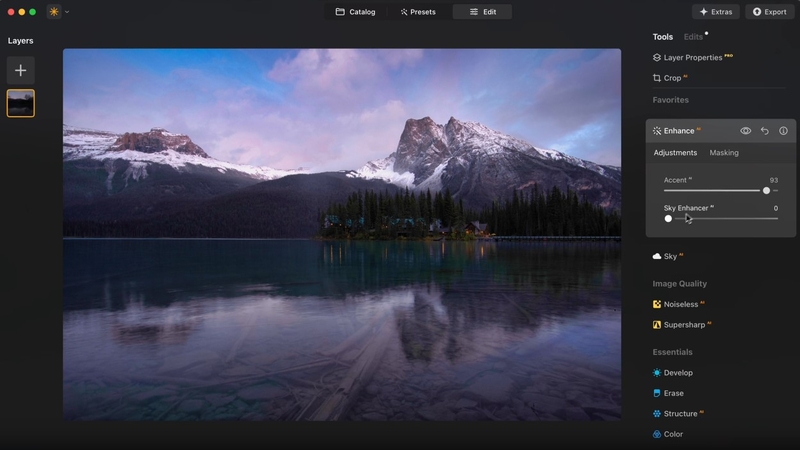
If you are looking to fix blurry Lumix images using AI-based enhancers, Luminar Neo will serve as a viable option. With its batch-processing feature, it allows you to fix multiple pictures in a single go.
Features
1. If you have a sky image, use the dedicated Sky Balance feature to enhance its quality.
2. Using the Supersharp utility, users can enhance the clarity in their photos to a high extent.
3. Besides improving clarity, you can correct the colors in photos using the dedicated option.
Limitations- Being an advanced image upscaler, Luminar Neo works more slowly on older PCs.
- The AI Enhancer of this platform sometimes overprocesses images and creates unnatural skin tones in low-light conditions.
Tool 3. Adobe Express
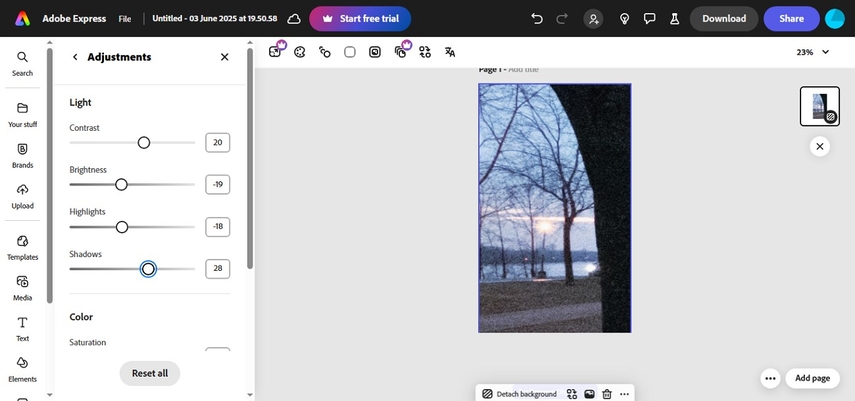
From fixing color and contrast to improving image details, Adobe Express has every tool to offer. Using this web-based enhancer, you can take complete control over the enhancement by manually adjusting the light and color of the Lumix photos.
Features
1. Using the Shadows and Brightness sliders, users can optimize Lumix image quality in low-light conditions.
2. The enhanced images can be accessed and managed in the My Stuff folder.
3. If your picture is blurry, you can adjust its sharpness manually for precise outcomes.
Limitations- Unlike most tools, this one allows manual enhancement and does not offer any dedicated AI image denoiser.
- This web-based version of Adobe does not have many editing features to enhance photos.
Tool 4. Canva
When looking for a versatile image editor that uses unconventional ways of upgrading picture quality, use Canva. To help you and your team work together on a single project, this tool offers a unique collaborative feature.
Features
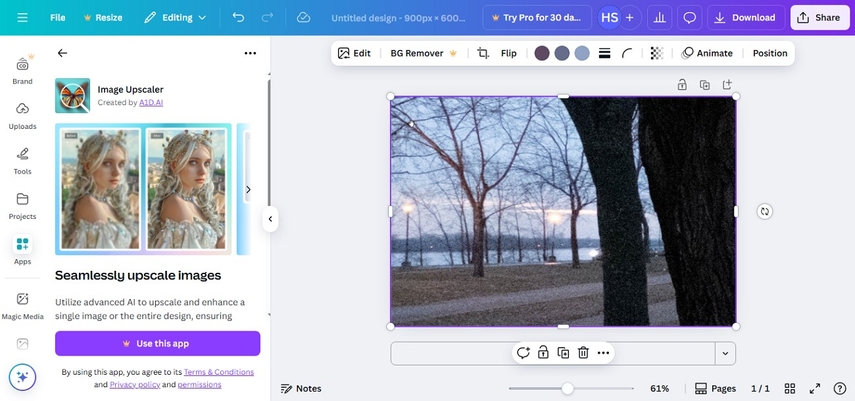
1. For enhanced clarity of photos, Canva allows upscaling pictures 8 to 16 times.
2. To improve sharpness in Lumix images without quality loss, you can upload an image up to 50MB in size.
3. Once you have denoised the picture, it can be exported as PNG, PDF, and more file types.
Limitations- Canva does not offer a batch enhancement feature to polish multiple images at once.
- You cannot use the AI Enhancement feature without subscribing to the paid version of Canva.
Tool 5. Fotor
With Fotor AI Photo Enhancer, users can upgrade their image quality 2 to 4 times the original fidelity without losing the details. The AI enhancement model clears out the blur, reduces noise, and enhances details to correct soft focus in Lumix pictures for crisp results.

Features
1. To test the tool’s performance, you can use one of the sample images offered by Fotor.
2. Despite using the one-click enhancer, Fotor allows you to make manual adjustments for precise results.
3. If you have uneven light in the photos, the enhancement model detects and fixes it too.
Limitations- Despite useful features, Fotor does not allow you to batch enhance the Lumix pictures.
- The enhancement model overly smooths out the picture, giving a fake look.
Conclusion
In essence, Lumix users need to take certain measures to ensure Lumix photo clarity. From camera settings to post-process editing, this article mentions every way to address this issue. If the mentioned tips do not work, use HitPaw FotorPea to upgrade your image quality by removing the visible grains.


 HitPaw Edimakor
 HitPaw VikPea (Video Enhancer)
 HitPaw Univd (Video Converter)
![[Step-by-Step] How to Use Object Eraser on iPhone Photos](https://images.hitpaw.com/topics/fotorpea/guide-to-use-iphone-object-eraser.jpg)


Share this article:
Select the product rating:
Daniel Walker
Editor-in-Chief
This post was written by Editor Daniel Walker whose passion lies in bridging the gap between cutting-edge technology and everyday creativity. The content he created inspires the audience to embrace digital tools confidently.
View all ArticlesLeave a Comment
Create your review for HitPaw articles