How to Improve Indoor Camera Photos: Techniques and Tools for Stunning Results
Everyone likes to get professional photography outcomes, but it requires some professional skills. Most beginner photographers start with indoor shoots despite the lack of resources. Due to dim lights and non-professional equipment, the resultant images can have digital noise. Lucky for you, there are many ways you can make up for the defects in your photography. This article helps you generate studio-quality outcomes by suggesting ways to improve indoor camera photos.
Part 1. The Need to Improve Indoor Camera Photos
Before diving into any extensive enhancement processes, you must understand the reasons why you must do it. The following list features the top reasons why a beginner should improve their photos:
Common Issues Faced During Indoor Photography
1. Indoor Light Conditions
The use of artificial light can add shadows and unwanted yellowish tones in indoor images. Cameras get triggered in low-light and increase ISO and result in grainy or noisy photos. The overall quality of indoor photos can suffer significantly without proper lighting control and balance.
2. Motion Blur
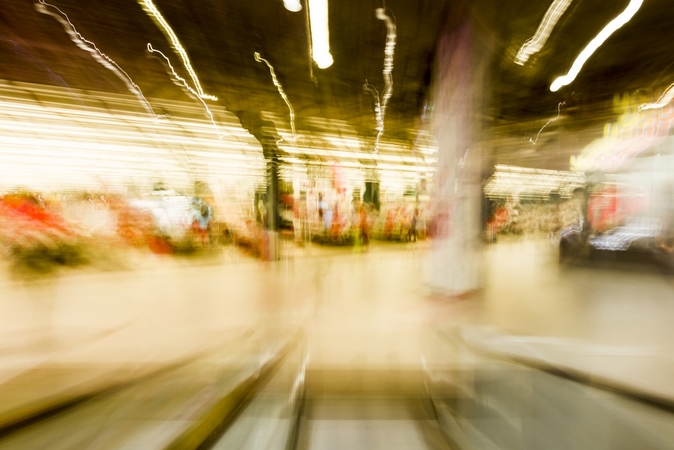
Slower shutter speeds are often used to compensate for low light. As this causes motion blur, it can deteriorate the image quality by making the subjects appear unfocused.
3. White Balance and Color Issues
Using mixed light sources and lighting techniques for indoor photography can confuse a camera’s white balance settings. This confusion in light often results in strange color casts or green tints in images. You may notice unnatural colors and off skin tones in portraits.
4. Lack of Depth and Contrast
Indoor stills can appear flat due to limited dynamic range and poor lighting angles in photos. Highlights and shadows are not as pronounced in such pictures and the subject blends into the background. Even with a good camera, this can make photos look lifeless or low-quality.
Why High-Quality Indoor Photos Matter
The need for high-quality indoor photos transcends aesthetics and caters to personal memories and professional purposes. Image quality impacts how your work is perceived, no matter why you are executing it. Poor-quality photos can ruin a memory or make professional content look low-fidelity. Improving indoor camera photos ensures your images deliver what is required and are engaging.
Part 2. 8 Effective Tips and Techniques to Enhance Indoor Camera Photos
Before you get into image enhancement, you must know some tips that can help you avoid poor quality. The tips below are the preemptive measures that will prevent quality issues indoors:
1. Utilize Natural Light Strategically
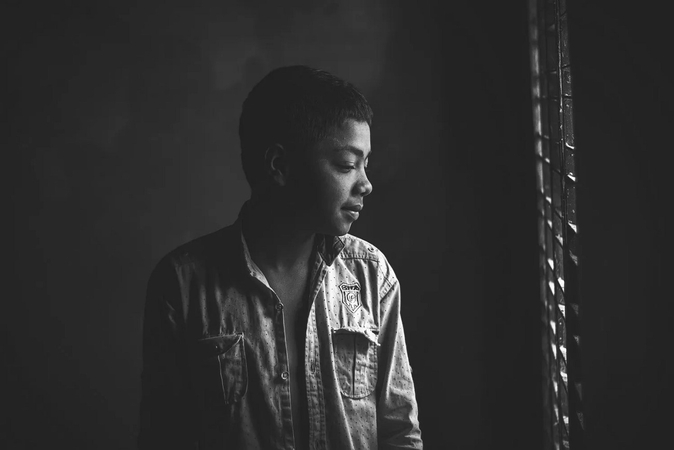
Natural light is often the best source for indoor photography, especially when coming through windows. It is better to position your subject near the window and benefit from natural light instead of depending on artificial sources. Early morning or late afternoon light offers the most impressive results in the case of indoor photo shoots.
2. Employ Reflectors and Light-Colored Backdrops
Reflectors reduce shadows and balance lighting by bouncing light onto your photography muse. You can also use light-colored backdrops and white foam boards or aluminum foil for this purpose. This technique enhances subject focus by reflecting light and brightening the scene.
3. Adjust White Balance Manually
Automatic white balance does not always handle mixed indoor lighting accurately, so adjusting it manually is a better option. This lighting technique for indoor photography allows you to correct unwanted color casts like yellow or blue tones.
4. Stabilize Your Camera
Shaky hands can lead to motion blur in low-light indoor settings, generating poor-quality results. It is better to use a tripod or place your camera on a stable surface to prevent unintentional movement. You can also consider using a remote shutter or timer to eliminate vibration during the shot.
5. Opt for Fast Lenses
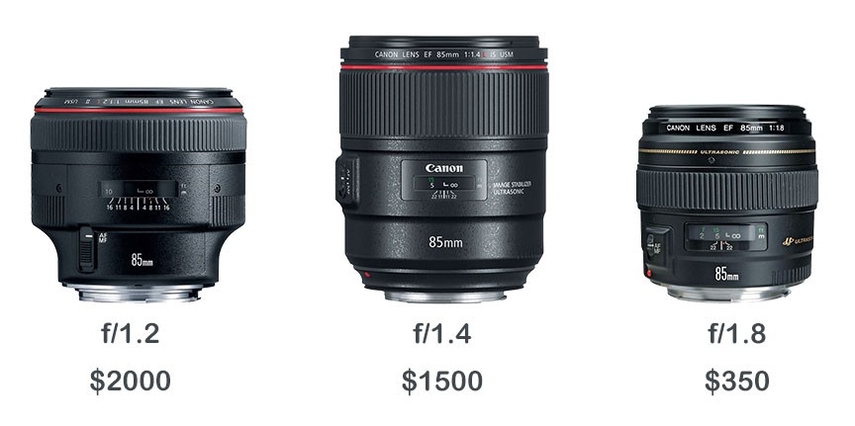
Using fast lenses in shoots can help you achieve brighter images and better background blur for portraits and detail shots. Lenses with wide apertures of f/1.8 or f/2.0 allow more light into the camera to help in low-light conditions without raising ISO.
6. Control Ambient Light Sources
Indoor lighting often includes multiple sources with different color temperatures, which can confuse your camera. This way to fix grainy indoor photos is ideal to turn off unnecessary lights or use consistent lighting to avoid color inconsistencies. You can also use lamps with daylight bulbs for a more neutral effect and to make exposure and color correction much easier.
7. Shoot in RAW Format
For greater flexibility in editing, shooting in RAW format captures more image data than JPEG. It allows you to adjust exposure and detail without losing the original image quality. This is especially helpful for fixing indoor photos affected by poor lighting.
8. Practice Composition Techniques
Framing your subject intentionally is key to a compelling photo to address cluttered indoor spaces. You can add framing to your subject and depth to the image by using doorways and the objects in your house.
Part 3. Top Tools to Enhance Indoor Camera Photos
Although the above-mentioned techniques for improving the clarity of indoor pictures are effective, you can use the following enhancement tools to make up for the poor quality:
1. HitPaw FotorPea
Imagine being a beginner photographer for an intimate indoor wedding who has built a hype about his work. As you start taking photos, you notice grains in the image because of poor lighting. Instead of arranging an alternative light, you continue to take pictures in the available light. As you go back home, you open HitPaw FotorPea to use its Denoise model to fix the grainy parts of the photos.
Using this indoor photo enhancement software, you can utilize 10 AI enhancement models to fix pictures. Once you have removed noise from images with a single click, you can save your file in your desired location. To enhance the compatibility of your enhanced photos, HitPaw FotorPea allows you to export them in JPG or PNG formats.
Key Features
1. Using the dedicated Denoise model, users can remove the noise from their images and upgrade their quality with two diversifying modes within the model.
2. If you have an animated picture with noise, use the Animated model to fix the flaws.
3. Users can upload images with blur and noise to denoise them using the Creative Denoise tool.
Exploring the Functionality of FotorPea to Enhance Indoor Noisy Images
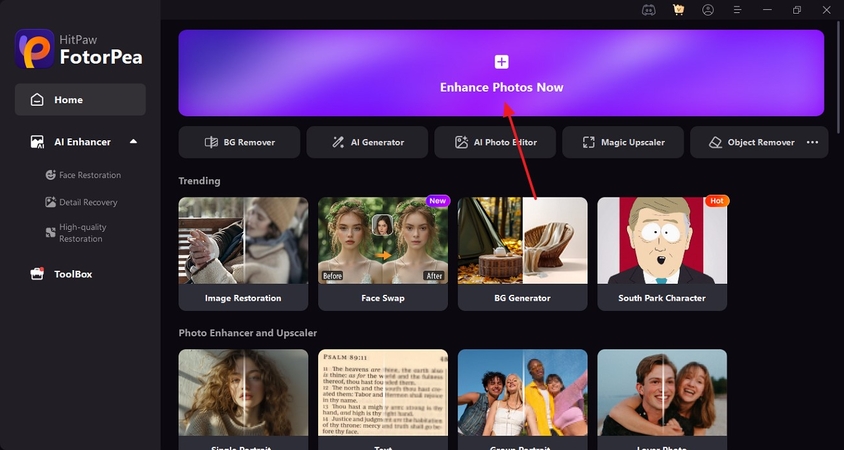
Step 1. Load the Tool to Start Enhancing ImagesTo start, launch HitPaw FotorPea and click “Enhance Pictures Now” to import the image in the next interface.
Step 2. Select the Denoise Model to Process the Image Taken Indoors
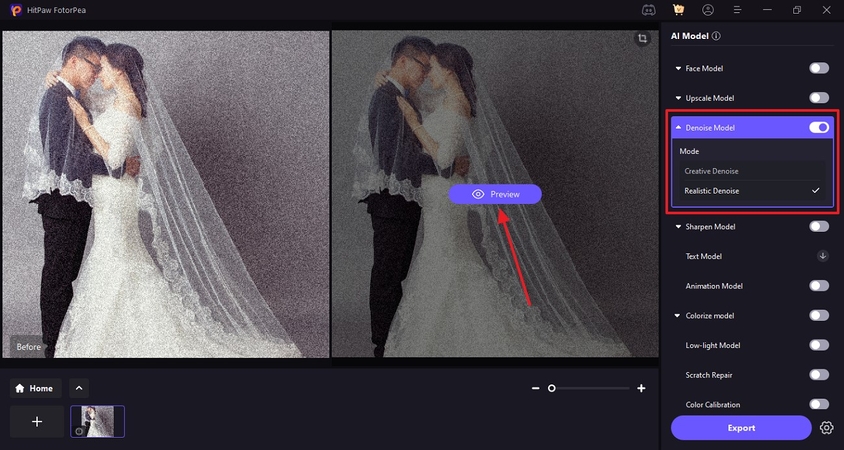
Once the image appears, select the “Realistic Denoise” model and hit the “Preview’ button to see the results.
Step 3. Time to Export the Enhanced File
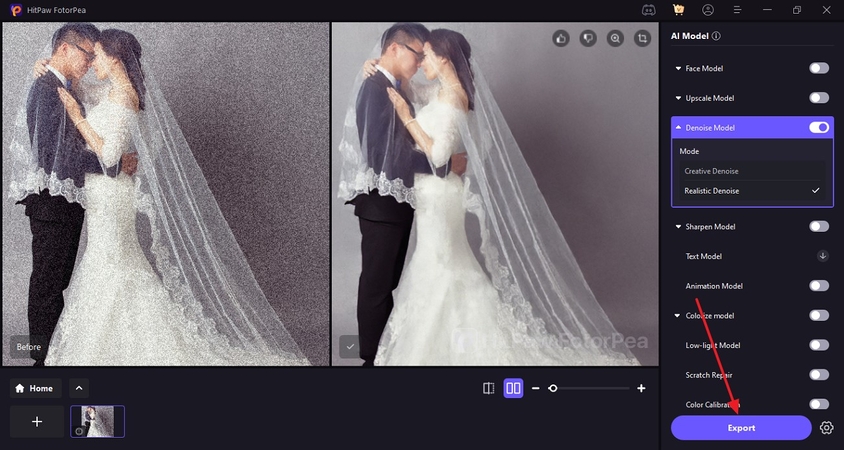
As the picture is enhanced, “Export” it to your device from the bottom right.
2. Adobe Lightroom
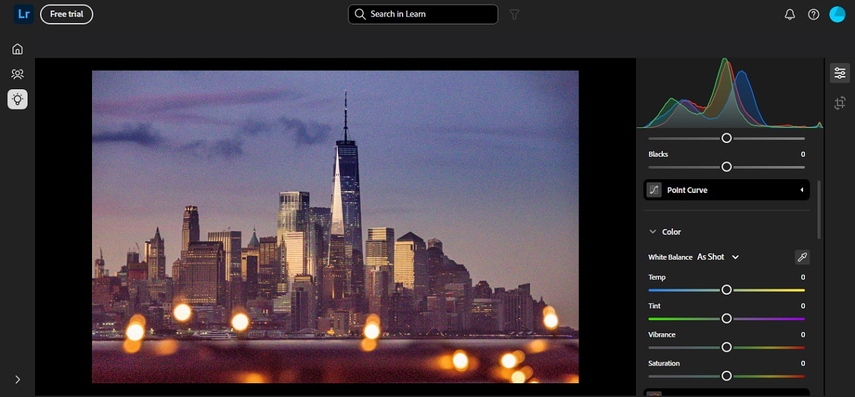
When looking for an advanced image enhancer, use Adobe Lightroom. With its numerous AI models, it makes sure to fix each flaw in your photos and improve indoor camera photos.
Key Features
1. Besides removing grains, you can also adjust the pictures' colors manually.
2. For precise image enhancement, the point curve can be used.
3. From general noise reduction to Color Noise Reduction, everything can be adjusted manually.
Limitations- Unlike most tools, users may need a tutorial to use this once.
- Adobe Lightroom lacks a one-click AI enhancer for indoor pictures.
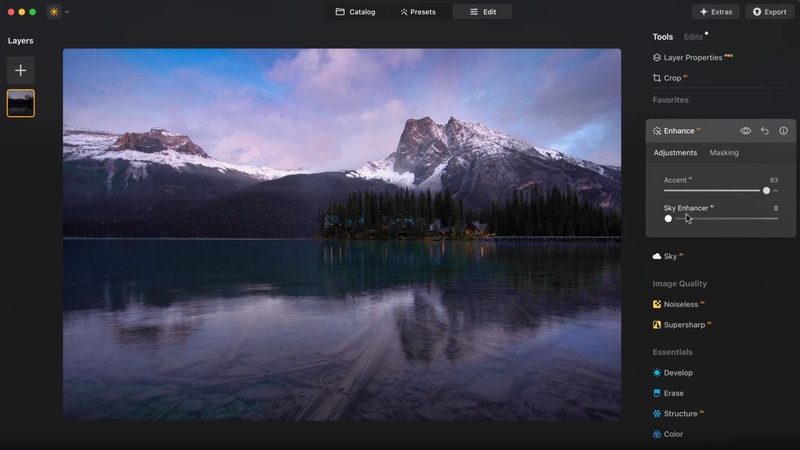
3. Luminar AI
Whether you need to download and use this tool directly or utilize it as a plugin for Photoshop and Lightroom, your choice. Besides providing just a general enhancer, Luminar AI offers various upscale modes.
Key Features
1. From Noiseless to Supersharp, utilize the AI models to generate clean and sharp images.
2. The Sky Balance feature allows you to enhance the appearance of the sky in your images.
3. Besides offering an automated enhancement feature, this tool provides some manual image adjustments.
Limitations- The manual image adjustment is limited in this tool compared to other enhancers.
- This platform’s AI Enhancer sometimes overprocesses images and creates unnatural skin tones in low-light conditions.
4. Canva
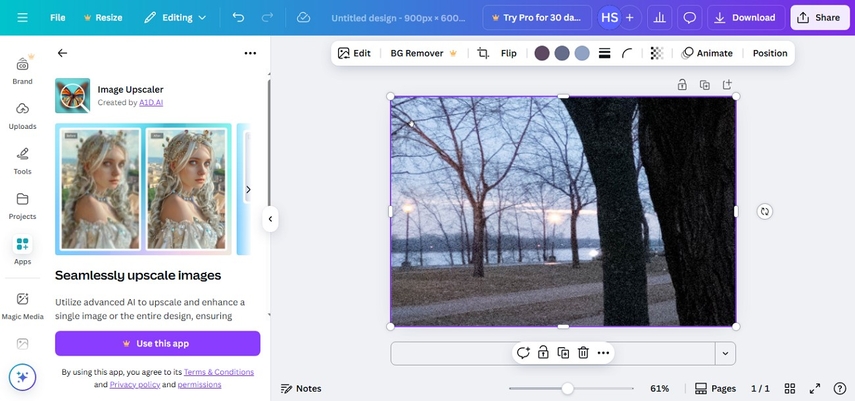
The last enhancer on our list is Canva, an intuitive tool for editing indoor photos for better quality. Besides offering a one-click upscaler, this platform allows you to adjust the color and light manually.
Key Features
1. Supporting an image size up to 50MB, Canva serves as a flexible enhancer.
2. From PDF to PNG and JPG, your enhanced images can be saved across various formats.
3. The indoor photos can be enhanced from 8 to 16 times the original resolution.
Limitations- The image enhancement feature of Canva is limited to the subscribed version.
- Due to having a bad interface, it is challenging to navigate to the enhancement model.
Conclusion
Precisely, this article covered the methods to improve indoor camera photos using various techniques. If you want a deep denoise of your images, use the designated denoise model of HitPaw FotorPea.


 HitPaw Edimakor
 HitPaw VikPea (Video Enhancer)
 HitPaw Univd (Video Converter)


Share this article:
Select the product rating:
Daniel Walker
Editor-in-Chief
This post was written by Editor Daniel Walker whose passion lies in bridging the gap between cutting-edge technology and everyday creativity. The content he created inspires the audience to embrace digital tools confidently.
View all ArticlesLeave a Comment
Create your review for HitPaw articles