Full Guide for Photographers on How to Use a Light Meter
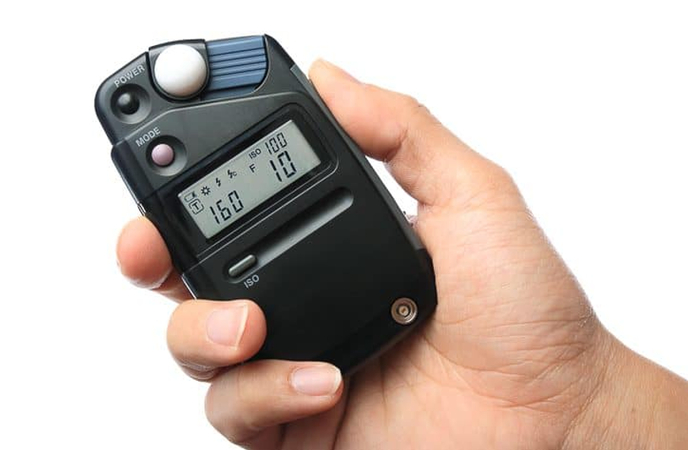
How to Use a Light Meter is not just a lesson in camera technique-it's a gateway to true creative control. A light meter is a light meter device that evaluates the brightness in a scene and provides precise exposure data so photographers can manually set their camera's aperture, shutter speed, and ISO.
In this guide, we'll walk you through everything you need to know about light meter photography-types of meters, how they work, and exactly how to use one, whether you're working in natural light, artificial setups, or shooting film.
Part 1: What is a Light Meter?

At its core, a light meter is a device designed to read the brightness of a scene and recommend exposure settings accordingly. The readings guide photographers in achieving correct exposure-a balance between light sensitivity (ISO), lens aperture, and shutter speed.
Handheld light meters were once the norm before cameras had built-in metering systems. Today, they're still widely used by professionals who demand higher accuracy and want to bypass the potential misjudgments of reflective metering inside cameras.
Part 2: Types of Light Meters
Understanding the type of meter to use is essential. Each one serves a different purpose:
Incident Light Meters
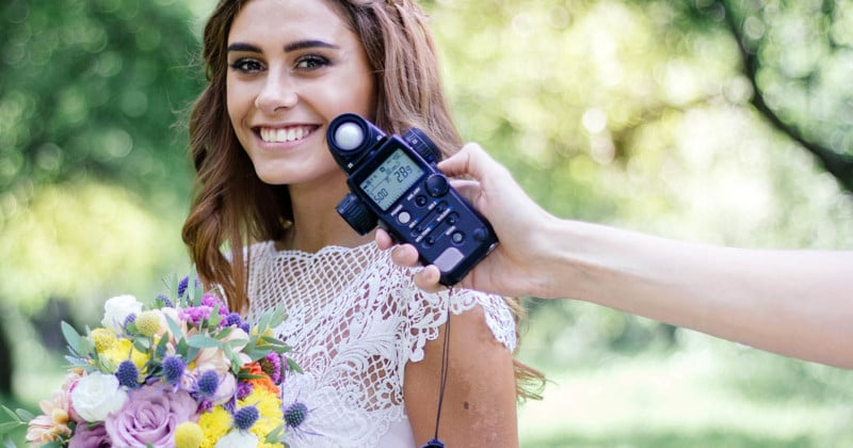
These meters measure the light falling onto the subject. They use a white dome to simulate the way light wraps around a subject's face or object. You place the meter at the subject's location and point the dome toward the camera or the primary light source. This reading gives you the most neutral and accurate result because it's unaffected by subject color or reflectivity.
This type is especially useful for portraiture, interviews, or product photography. For instance, in a studio setting with strobes or constant lights, an incident meter ensures your lighting ratios and exposure are on point.
Reflective Light Meters
Reflective meters read the light bouncing off the subject and back toward the camera. These are built into nearly every digital camera. While they're convenient, they are influenced by the tonal range of your subject. A subject wearing a white shirt will bounce more light back to the meter, often causing underexposure. A subject in a black suit may cause overexposure because the meter compensates.
Reflective readings are better than nothing, but they demand experience. Using gray cards can help normalize these readings.
Spot Meters
Spot meters take readings from a very small part of the frame-typically 1% to 5%. They are excellent for high-contrast situations where you need to expose for a specific element in the scene, like a subject's face in a bright background or a lit window in a dark room.
PetaPixel notes that many photographers use spot meters to control their exposure zone, especially useful in the zone system popularized by Ansel Adams for black-and-white film.
Part 3: Why Use a Light Meter?

While built-in meters are convenient, they don't always deliver accurate results, especially in complex lighting conditions. A camera light meter gives you more control, reliability, and consistency.
More Accurate Than In-Camera Meters
Most in-camera meters are reflective and calibrated to expose everything as middle gray. That works in average lighting, but fails in extremes. A white snowy field or a black backdrop can confuse the meter and cause inaccurate exposure. A light meter for cameras removes guesswork by reading light independently from the subject's tone.
Reliable for Studio and Flash Work
When working with strobes or continuous lights, accuracy is everything. Built-in meters can't read flash output, but handheld meters with flash metering capabilities can. They help balance ambient and artificial light and ensure skin tones are properly exposed, even across different lighting setups or camera angles.
Perfect for Film Photography
Film is not as forgiving as digital. You can't check the histogram, and post-processing latitude is limited. Many analog shooters use light meter photography to eliminate exposure errors before they happen. Even a half-stop misjudgment in slide film can ruin a photo.
Part 4:How to Use a Light Meter: Step-by-Step Guide

Preparation
Before you begin:
- Set your ISO to match your camera or film stock.
- Choose your metering mode: incident or reflective.
- Decide your exposure priority: do you care more about motion (shutter speed) or depth of field (aperture)?
Your meter may ask you to input values for two sides of the exposure triangle. The meter will then provide the third value-whether that's aperture, shutter speed, or ISO.
This preparation allows the meter to calculate the right exposure specifically for your lighting environment and creative goal.
Taking Readings
In incident mode:
- Stand at the subject's position.
- Point the dome toward the light source or camera.
- Press the measurement button.
- Use the suggested settings in your camera.
In reflective mode:
- Stand behind the camera.
- Aim the meter at the subject.
- Use a gray card for more accuracy if available.
- Adjust camera settings to match meter readings.
Always meter again if the lighting changes significantly, especially outdoors.
Adjusting Camera Settings
Use the meter's recommended values to set your aperture and shutter speed. If you're shooting handheld, ensure your shutter speed isn't too slow to avoid motion blur. If shooting a portrait, prioritize aperture to control background blur.
After setting your values, take a test shot. Use the histogram to check for overexposure or underexposure. Adjust as needed and re-meter if required.
Application in Different Scenarios
- Weddings: In bright outdoor ceremonies or dimly lit receptions, metering helps you expose the bride's dress and groom's suit properly.
- Events: In fluctuating lighting, spot metering allows you to expose for faces, not stage lights.
- Documentary: Reflective metering with spot or center-weighted focus allows quick adaptation to changing conditions without relying on auto exposure.
Advanced Techniques for Using a Light Meter
Flash Photography
When using strobes or speedlights, first take an ambient light reading. Then use your meter's flash mode. Trigger the flash via sync cable or optical sensor. The meter will read the total light (flash + ambient) and suggest exposure settings.
This is particularly useful in balancing environmental light and artificial fill light for natural-looking results.
Landscape Photography
Landscape photographers often meter for shadows and highlights separately, then average the two or prioritize based on creative intention. For example, if shooting during golden hour, a spot meter can ensure the sunlit portions of your landscape aren't blown out.
Low-Light Photography
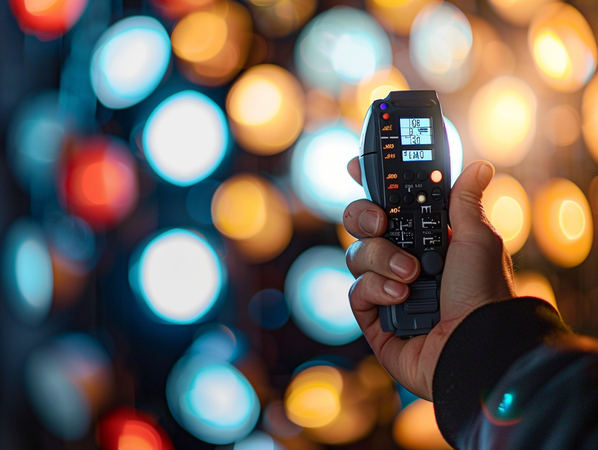
Light meters excel in challenging lighting, such as night scenes or interiors lit only by candles or lamps. Instead of relying on guesswork, you can confidently set long exposure times with low ISO and wide apertures to maximize image quality.
Using the Zone System
Some advanced photographers assign tones to zones (from pure black to pure white) and use spot metering to expose elements according to where they should fall in the tonal range. This method gives full tonal control, especially in black-and-white photography.
An Amazing App for Photo Enhancer: HitPaw Fotorpea
After capturing a well-exposed shot, you might still want to enhance contrast, clarity, or resolution. That's where HitPaw Photo Enhancer becomes invaluable.

This AI-powered tool allows you to upscale photos, improve lighting, remove blur, and bring out fine details in portraits, nature shots, and more. Whether fixing low-light images or optimizing vintage scans, HitPaw delivers incredible results in a few clicks.
Why photographers love it:
- Sharpens soft images without introducing grain
- Enhances portraits by refining skin and details
- Upscales small files for printing or high-res web display
- Works for both beginners and professionals
Part 5: How to Read a Light Meter
- 1.Set your ISO
- 2.Chooseincident or reflective
- 3.Point the meter appropriately:
- Toward the light for the incident
- Toward the subject for reflection
- 4.Press the measure
- 5.Use the recommended exposure settings.
- 6.Take a test shot and adjust as needed.
Repeat the process if lighting changes or if you move your subject or camera.
Part 6: Conclusion
Learning how to use a light meter for cameras separates guesswork from control. It elevates your craft by giving you the confidence that your exposure is accurate and intentional, every single time.
Whether you're photographing a wedding, a commercial product, or a timeless portrait, knowing how to use a light meter makes your workflow smoother and your results more professional.
Use your light meter regularly. Make it a part of your shooting process. As you become more comfortable, you'll wonder how you ever lived without it.
Part 7: FAQs
Q1. How to calculate light with a light meter?
A1. Set your ISO, then use incident or reflective mode to take a reading. The meter gives you either an aperture or a shutter speed to complete your exposure triangle.
Q2. Is it worth using a light meter?
A2. Absolutely. It gives you control, consistency, and accuracy-especially in studio, film, or mixed-lighting scenarios where in-camera meters often fail.
Q3. Do light meters work with LED lights?
A3. Yes, most modern meters handle LED lighting well. Be sure to use one with flicker compensation or accurate color temperature handling for studio LEDs.


 HitPaw Univd (Video Converter)
 HitPaw VoicePea
  HitPaw VikPea (Video Enhancer)


Share this article:
Select the product rating:
Daniel Walker
Editor-in-Chief
This post was written by Editor Daniel Walker whose passion lies in bridging the gap between cutting-edge technology and everyday creativity. The content he created inspires the audience to embrace digital tools confidently.
View all ArticlesLeave a Comment
Create your review for HitPaw articles