High ISO Noise Reduction in Photography: The Right Ways
Shooting in the nighttime or low-light conditions can look good, but such images require specific settings. Setting the camera’s ISO factor at high ensures better light distribution in the picture to make the details visible. However, this camera setting could contribute to introducing noise in your photos.
Luckily, there are many effective ways of getting rid of this artifact without compromising the overall image quality. This blog suggests the top tricks for high ISO noise reduction while preserving the details.
Part 1. High ISO and Noise: Establishing a Connection
As mentioned, nighttime photography has its prerequisites that must be catered to. The ISO settings in your camera should be set as high as 3200 or 6400 to boost sensitivity to light. It brings certain noise to the photos in addition to allowing good pictures in dim light.
The camera amplifies the sensor’s signal to make the image brighter when the ISO is raised. However, this amplification also boosts the sensor’s internal electronic interference, which appears as random grains.
There are two types of digital noise that make you look for ISO noise reduction techniques. Luminance noise affects brightness levels and makes photos look grainy without changing their colors. Chroma noise is the colorful grains that disrupt the natural tones of an image. Both types of noise can reduce image quality, but they can often be managed with good camera settings or editing tools.
Part 2. Understanding the Sources of High ISO Noise
To find a sustainable solution to the noisy image issue, you need to get to its root cause. The following points cover the main sources that contribute to elevated ISO noise in photography:
1. Camera Sensors and Amplification Settings
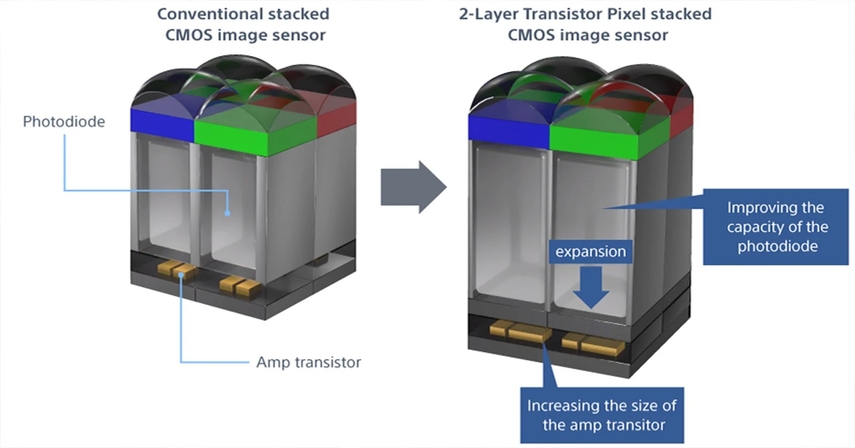
At high ISO settings, the camera boosts the weak signals it receives from the sensor to brighten the image. While this makes low-light shooting possible, it also amplifies electronic noise generated within the sensor. Such factors make photographers opt for effective techniques to reduce noise at high ISO.
2. The Size of the Sensor
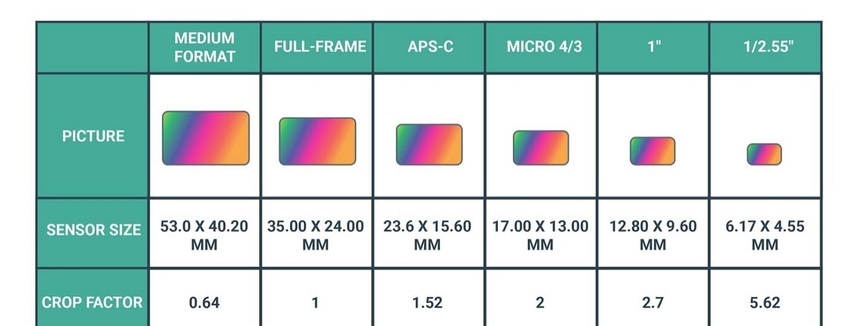
Larger sensors have bigger pixels that can gather light and reduce the need for extensive amplification. Whereas crop sensors have smaller pixels that collect less light and make them more prone to noise at high ISO settings.
3. Environmental Factors
Poor lighting conditions force the camera to rely on higher ISO, which introduces more noise. In very dark environments, the signal-to-noise ratio drops and causes more grain to appear. Higher heat levels increase the likelihood of noise during long exposures.
Part 3. Camera Settings to Minimize High ISO Noise
Now that we know the root causes of this artifact, let’s explore the best settings for high ISO photography to minimize the grain:
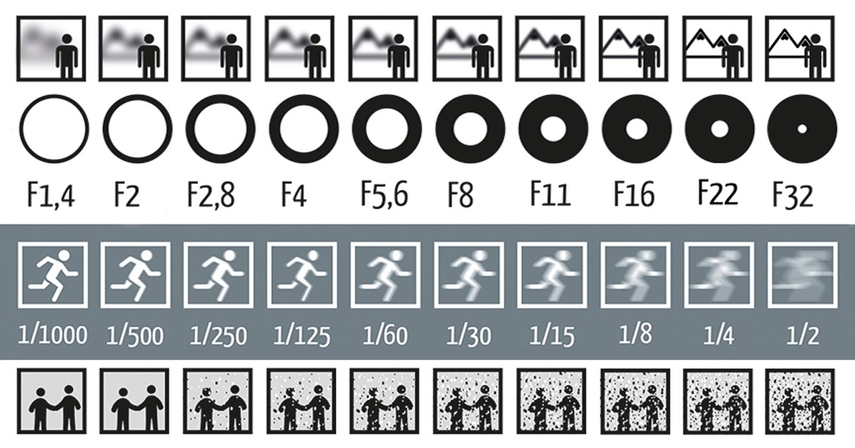
1. Changing the Settings With Varying Lights: Using the ISO at 100 or 200 in bright conditions keeps noise to a minimum and preserves image clarity. An ISO setting at 800 or 1600 may be necessary in low-light settings, but it is best to avoid going higher unless required.
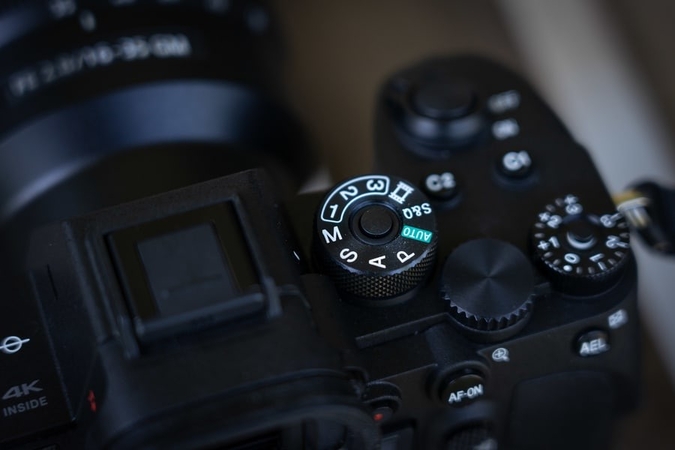
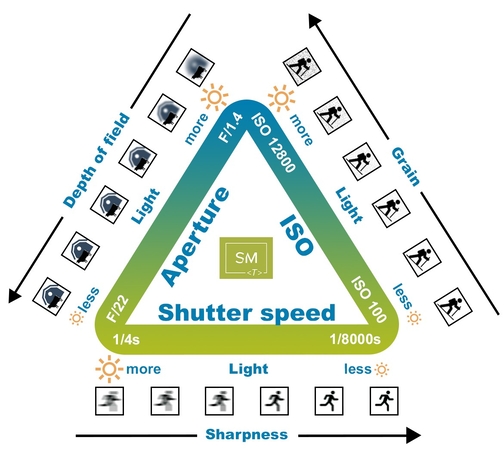
2. A Balance of Aperture and Shutter Speed: Using a lower f-stop allows more light, enabling you to keep ISO low. Slowing down the shutter speed also helps gather light while reducing the need for high ISO settings. You can achieve a well-exposed image with minimal noise by adjusting these settings together.
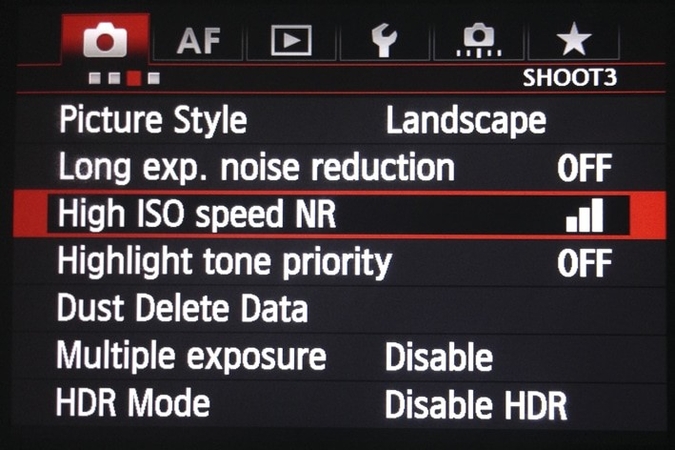
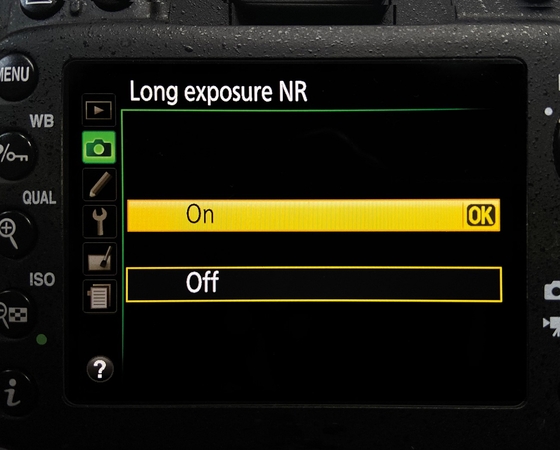
3. Noise Reduction Options: Most modern cameras include in-camera high ISO noise reduction features specifically for high ISO shooting. Enabling these features allows you to naturally get rid of the grain without depending on post-processing.
Part 4. Shooting Techniques to Avoid Excessive Noise
If you cannot try the above settings for some reason, you can prevent the grain during the shooting process. The following tips will help you prevent the artifact while taking the pictures:
1. Using Relevant Exposure
Underexposed photos often require brightening in post-processing, which amplifies both the image and any existing noise. Proper exposure ensures that your image retains detail and color without needing heavy editing adjustments.
2. Preferring RAW Image Format
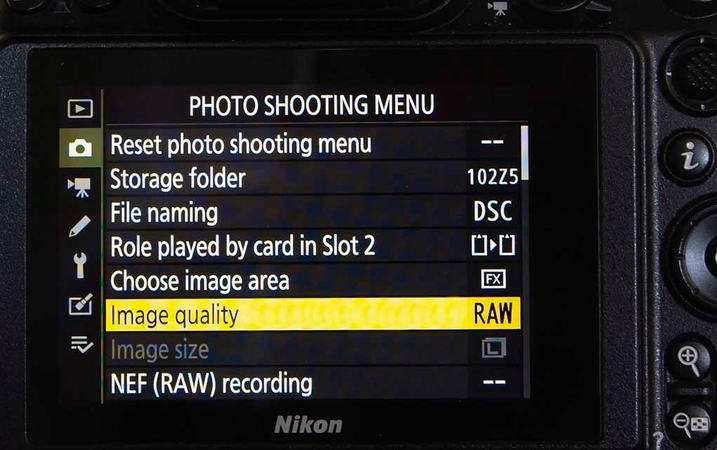
Unlike JPEGs, RAW images retain more detail in shadows and highlights, making high ISO noise reduction easier without losing quality. Noise reduction tools work more effectively on RAW files because of the greater depth of information.
3. Depending on a Tripod and Longer Exposure
In low-light settings, a tripod allows you to use slower shutter speeds without camera shake, helping you gather more light without increasing ISO. Longer exposures with a steady camera capture cleaner, more detailed images in dim conditions.
Part 5. Sensor Technology Innovations for Noise Reduction
Considering the negative impacts of a noisy image, the following points will allow you to know the technological advancements for better image quality:
1. BSI Sensors Improve Image Quality: Backside-illuminated sensors are designed with the wiring moved behind the photodiodes to allow more light to hit each pixel. This design increases light sensitivity and reduces noise in low-light conditions.
2. Dual Gain ISO Technology: These sensors operate with two separate amplification circuits: one optimized for low ISO and another for high. When switching to a higher ISO, the sensor activates a separate gain level that better preserves detail and enables noise reduction in high ISO images.
3. AI-Powered Noise Control: Modern cameras use AI-based image processing to analyze and correct noise more intelligently. These innovative systems selectively apply noise reduction and preserve fine textures.
Part 6. Make Noise Reduction Easy: Using FotorPea in Post-Processing
No matter the cause of ISO noise in your images, the artifacts can go away with a single click. With an enhancement tool like HitPaw FotorPea, you can select the desired AI model and upgrade your image quality accordingly. To further boost your image’s visuals, HitPaw FotorPea provides a high-quality export option to its users.
If you need to print the picture after enhancement, you can select the desired DPI before saving the photo to your device. Users looking for speedy results of reducing high ISO noise in photography can enable the High-Res Acceleration option.
Key Features
1. Creative Denoise: If your image is noisy due to blur, use the Creative Denoise model to preserve the image details while removing the blur and the noise.
2. Realistic Denoise: When dealing with pictures of extensive grain, the Realistic Denoise model will help you restore the details and retain the texture.
3. Face Model: Noisy images with faces can be fixed using the Face Model, as it smooths out the pores while preserving the facial detail.
A Complete Walkthrough of Using HitPaw FotorPea to Reduce ISO Noise from an Image
This platform allows for efficient noise reduction while keeping the results efficient. Follow the guide below to learn how to reduce noise in high ISO night photography using HitPaw FotorPea:
Step 1. Enhance Photos Now Using HitPaw FotorPeaTo start the process, launch the main interface of HitPaw FotorPea and select the “Enhance Photos Now” button.

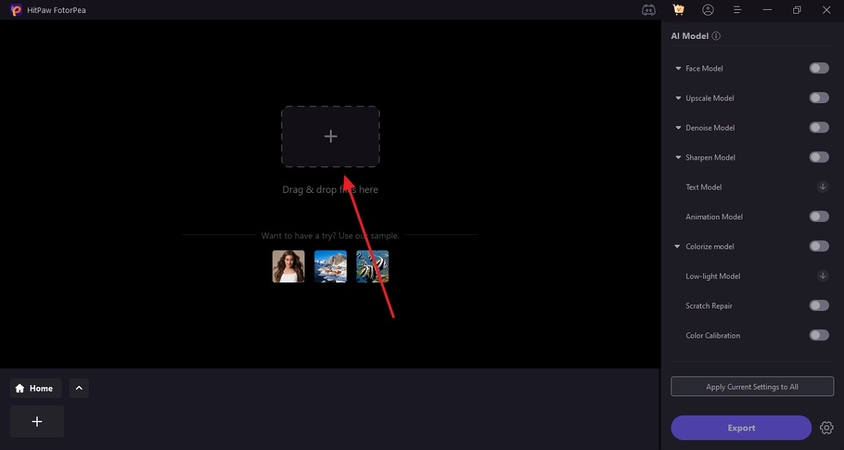
Step 2. Import the Image with Extensive ISO Noise
Using the next screen, press the “+” button to select and import the images with ISO noise.
Step 3. Pick the Realistic Denoise Model to Preview
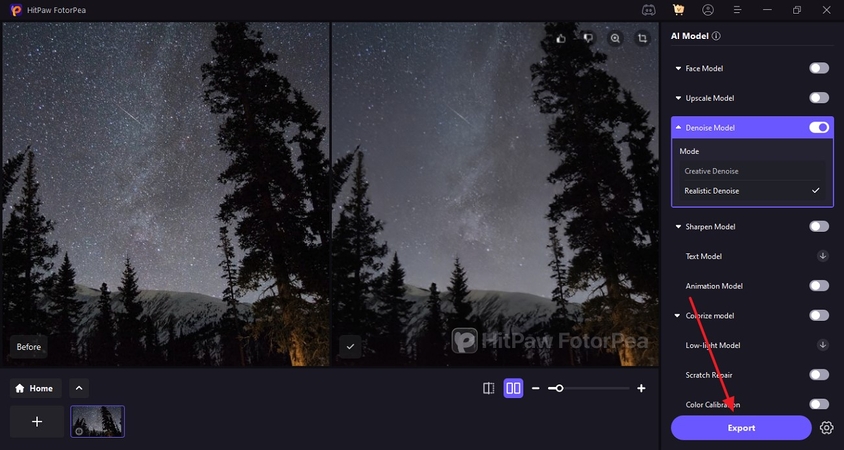
As the imported image appears on the screen, go to the right panel to unfold the “Denoise Model.” Here, select the “Realistic Denoise” model and press “Preview” to unveil the enhanced image.

Step 4. Shift the Enhanced Picture to Your Device
Once the image results appear on the right, navigate to the bottom right to “Export” the results to your PC.
Conclusion
In summary, this article was a detailed guide on high ISO noise reduction using various techniques. If the camera settings and photography techniques do not help, you can use HitPaw FotorPea to address this issue. With numerous AI models to choose from, it allows users to resolve all types of noise from their images.


 HitPaw Edimakor
 HitPaw VikPea (Video Enhancer)
 HitPaw Univd (Video Converter)

Share this article:
Select the product rating:
Daniel Walker
Editor-in-Chief
This post was written by Editor Daniel Walker whose passion lies in bridging the gap between cutting-edge technology and everyday creativity. The content he created inspires the audience to embrace digital tools confidently.
View all ArticlesLeave a Comment
Create your review for HitPaw articles