The Complete Guide to Reflectors in Photography You Should Know
1. What Is a Reflector?

A reflector in photography is an object with a reflective surface designed to bounce light onto a subject. Whether it's sunlight, studio strobes, or flash units, the reflector redirects light back, enabling control over shadows, highlights, and overall image balance.
Light manipulation lies at the heart of quality photography. It shapes mood, brings out textures, and determines depth in an image. The ability to introduce or remove light precisely can elevate an average shot into a masterpiece. A reflector can mimic a secondary light source without the cost or setup complexity of additional equipment.
In studio or location shoots, a reflector provides more than just additional light: it offers photography light reflector control, allowing photographers to soften harsh backlight, brighten dim shadows, and achieve captivating eye catchlights that bring portraits to life.
2. Types of Reflectors

Reflectors come in diverse materials, colors, shapes, and sizes-each suited for specific aesthetic and lighting needs.
Material and Color Options
- White Reflectors offer soft, neutral, and even light. They are ideal for reducing shadows in portrait work without altering the color temperature. This makes them especially helpful for skin tones and for achieving a balanced, natural look.
- Silver Reflectors provide bright, specular bounce light. They are excellent for when you need crisp highlights or help in low-light scenes. Though silver reflectors intensify light contrast, precise angling helps manage that effect and avoids harsh shadows.
- Gold Reflectors cast a warm, golden tone-perfect for sunlit outdoor portraits and skin-rich imagery. They mimic golden hour warmth and enhance complexion appeal. These are especially flattering in portrait shoots, adding a sun-kissed glow to the skin.
- Black Reflectors (Flags) do not reflect light. Instead, they absorb it, creating dramatic shadows and added contrast. They're favored in high-contrast editorial or commercial portrait work and can help control light spill in more technical setups.
- Translucent Diffusers, though not strictly reflective, scatter light passing through them to soften a direct source-such as midday sun-providing natural, believable softness. They are commonly used in outdoor sessions when the sunlight is too strong.
Shapes and Sizes
- Circular Reflectors are lightweight and portable. They're most commonly used in portrait photography due to their simplicity and the appealing catchlights they create in the eyes.
- Rectangular or Oval Panels offer broader coverage and are great for lighting larger areas or groups. Their even light distribution makes them a favorite in commercial and studio photography.
- Collapsible 5-in-1 Reflectors usually include five surfaces-white, silver, gold, black, and a translucent diffuser. These kits offer maximum flexibility and are perfect for photographers who shoot in multiple lighting conditions or want to travel light.
When selecting reflectors for your work, consider your genre. For portraits, white or gold is generally preferred. For product shots, silver helps highlight detail. In landscape settings, white or silver can help subtly lift shadows in the foreground or on subjects.
3. How to Use a Reflector in Photography
Understanding how to use a reflector goes beyond simply pointing it toward your subject. Masterful placement and angling transform ordinary shots.
Placement Techniques
The position of the reflector relative to the light source and subject is crucial. If your subject is backlit, place the reflector in front to bounce light onto their face. In harsh sunlight, place the reflector to the side or underneath the subject to soften shadows and reduce squinting. Indoors, place it opposite a window or artificial light source to create a balanced fill and minimize hard contrasts.
Reflectors inherently serve as fill light, balancing exposure by brightening shadowed areas without overwhelming the primary light. This allows for subtle enhancement rather than overpowering the image with extra lighting.
Adjusting Angles for Optimal Light
Even a small tilt in angle can drastically change the quality of light. Holding the reflector flat against the subject softens shadows evenly. Tilting it up or down can sculpt facial features or emphasize texture. When placed above the subject, reflectors produce soft, natural overhead light that mimics skylight.
Reflectors can also simulate a larger light source. When flash or strobe is used, bouncing it off a reflector spreads the light across a broader surface area, resulting in a gentler and more flattering beam.
4. Creative Applications of Reflectors

In Different Photography Genres
- Portrait Photography: Reflectors enhance skin tones, fill in shadows, and produce pleasing highlights. A gold reflector during golden hour adds warmth, while silver can enhance cheekbones and facial contours with high contrast. White reflectors help maintain a soft, even glow-perfect for children or lifestyle portraits.
- Product Photography: Reflectors are invaluable for eliminating harsh shadows and bringing out texture. They help illuminate details that might be lost under direct lighting. In flat-lay or macro product shots, reflectors improve visibility and polish without needing a complicated lighting rig.
- Landscape Photography: Reflectors can balance light in shadowed areas of a landscape, especially when photographing people in natural settings. If a person is standing under trees or in shade, a well-placed reflector can lift their exposure to match the brighter background, creating harmony in the scene.
Using Reflectors with Flash
Mixing flash and reflectors brings out the best of both lighting worlds. Bounce flash off a reflector to soften the harshness of a direct flash. This setup reduces red-eye and creates more ambient-looking lighting. Reflectors can also be used to sculpt flash, creating light falloff or emphasizing certain features while keeping other areas more muted.
Combining flash and reflectors allows you to blend natural and artificial light seamlessly. You can warm up a cool flash using a gold reflector or tone down a bright pop with a white or translucent one. This hybrid technique is often used in weddings, fashion, and editorial shoots.
5. Tips for Choosing and Using Reflectors
To make the most of your reflection toolbox, here are practical tips.
Selecting the Right Reflector
- Size: Large reflectors offer broader, softer light but can be unwieldy. Smaller reflectors are portable and ideal for headshots or tight spaces.
- Portability: Collapsible reflectors are a must for travel and location shooting. Choose ones that fold into a small bag for easy transport.
- Material Kit: 5-in-1 or even 10-in-1 kits provide multiple surfaces in one tool. These are cost-effective and extremely versatile.
- Budget Alternatives: If you're on a tight budget, create DIY reflectors using materials like white foam boards, aluminum foil, or silver car sunshades. Even light-colored walls or ceilings can act as natural reflectors in indoor settings.
Practical Tips for Use
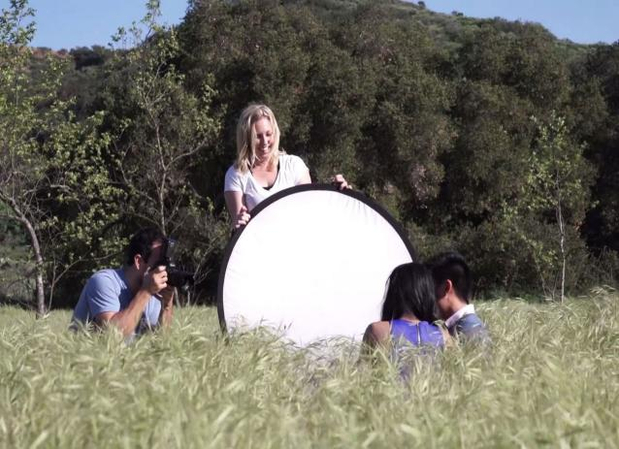
- Get Assistance: Holding a camera and reflector at the same time can be difficult. Ask a friend, assistant, or use a light stand with clamps to hold the reflector at the right angle.
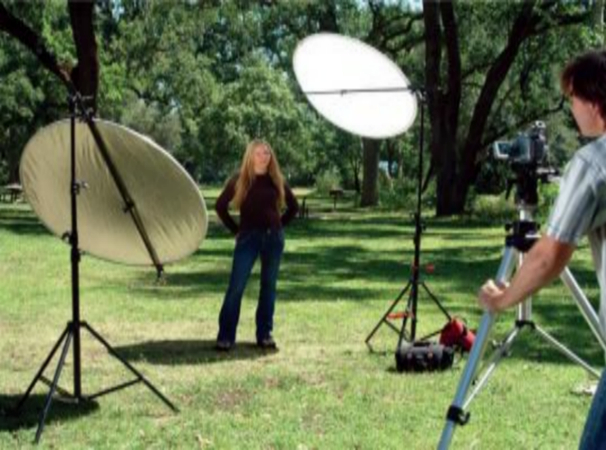
- Use Stands: When shooting outdoors, wind can make reflectors difficult to manage. A weighted stand or reflector holder helps keep it steady and in the desired position.
- Experiment with Distance and Angle: The closer the reflector is to the subject, the stronger the effect. Moving it back will make the light softer and more diffused. Don't be afraid to try different angles and positions to discover what works best for your subject.
- Using Black Flags: Black reflectors or flags are underused but very effective for subtractive lighting. Use them to block light from hitting parts of your subject or background for a more dramatic, moody feel.
Technical Highlight: Catchlights
A well-positioned reflector adds bright spots in the subject's eyes known as catchlights. These small reflections add life and dimension to portraits. Circular reflectors produce round catchlights, while square or shaped reflectors add a unique aesthetic.
Flash + Reflector Techniques
If you're using off-camera flash, direct it onto a reflector instead of the subject. This creates a broader light source and helps you avoid the harsh, artificial look of direct flash. You can also combine multiple reflectors and light modifiers to shape the light exactly how you want it.
Lowering flash power and using reflectors together allows for better control and a more natural mix of ambient and artificial light. This technique is especially effective in events and low-light environments.
DIY Reflector Ideas
- Aluminum foil on cardboard for silver bounce
- White foam boards for soft, neutral fill
- Translucent shower curtain or white sheet for diffused overhead light
- Black poster board for subtractive lighting
These cost-effective solutions offer excellent performance when you're just starting or shooting in makeshift setups.
App Spotlight: HitPaw Fotorpea Photo Enhancer

While reflectors help you achieve the best lighting during a shoot, post-processing is where you refine and perfect those results. HitPaw Photo Enhancer is an AI-powered tool designed to upscale image resolution, reduce noise, and enhance clarity without manual editing.
It's beginner-friendly and powerful, making it a great companion for photographers who want professional-looking images quickly. HitPaw can correct lighting inconsistencies, sharpen details, and improve skin textures, especially useful when you shoot with reflectors and want to fine-tune the results.
6. Conclusion
Reflectors are simple yet powerful tools that every photographer should learn to use. They help you control light naturally and affordably, allowing you to shape your images the way you envision them. Whether you shoot outdoors in bright sun or indoors with limited lighting, reflectors offer flexibility, consistency, and creative possibilities.
From learning how to use a reflector to mastering advanced techniques for fill light and contrast control, reflectors deserve a permanent place in your gear bag. In every genre-from photography with reflector for portraits to product and landscape work-they prove their value.
Try it out, and don't forget to share your reflection tips and experiences!


 HitPaw Univd (Video Converter)
 HitPaw VoicePea
  HitPaw VikPea (Video Enhancer)


Share this article:
Select the product rating:
Daniel Walker
Editor-in-Chief
This post was written by Editor Daniel Walker whose passion lies in bridging the gap between cutting-edge technology and everyday creativity. The content he created inspires the audience to embrace digital tools confidently.
View all ArticlesLeave a Comment
Create your review for HitPaw articles