Canon R10 High ISO Noise: Effective Reduction Strategies
Although the Canon R10 offers remarkable features for its cost, numerous users experience irritating problems when performing photography in dim lighting. This grain distortion can obscure details, mute colors, and spoil otherwise beautiful pictures, particularly in low light.
To take clear and crisp photos with this camera, it is important to know why this noise occurs and how to prevent it. This guide will present the main reasons for this problem and recommend the most effective tools to resolve it if you face Canon R10's high ISO noise.

Part 1. Causes Behind the Canon R10 High ISO Noise in Photos
Before you know a solution for Canon R10 high ISO noise reduction, let's understand why it happens in the first place.
1. Sensor Limitations: It uses an ASP-C sensor, which is smaller than a full frame and gathers less light at night.
2. Electronic Interference: The camera amplifies the signal from the sensor at high ISO levels, which can also boost electronic interference and result in grainy images.
3. Post-Processing Artifacts: Noise reduction or sharpening algorithms can sometimes introduce blotchy textures, especially in JPEG files, which makes the noise more noticeable.
4. Heat Buildup During Long Exposure: When you shoot long exposure at high ISO, the sensor can heat up, creating thermal noise that adds random color specks and distortions.
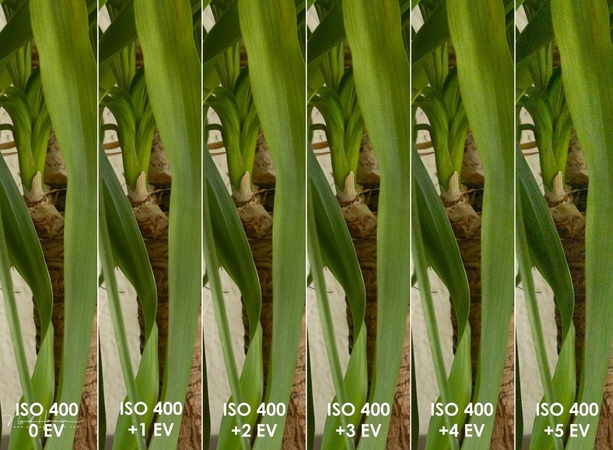
5. Underexposure at High ISO: If your image is underexposed and later brightened, noise becomes more prominent in shadows since you are lighting the weakest part of the photo.
Part 2. How to Avoid Canon R10 High ISO Noise
Now that you know the reason behind this issue, let’s explore some of the main approaches to Canon R10 noise reduction settings that you can utilize:
Approach 1. Utilize High ISO Speed Noise Reduction
The camera has an integrated function that reduce image blurriness at elevated ISO levels. Noise reduction level can be modified to match your shooting circumstances. Plus, it is particularly effective when capturing images at elevated ISO settings.
Approach 2. Employ Multi-Shot Noise Reduction
You can apply this feature, which captures 4 consecutive images and combines them into a single photo while reducing noise. Note that multi-shot noise reduction is available only when you shoot in JPEG mode instead of RAW or RAW+JPEG.
Approach 3. Optimize ISO and Other Camera Settings
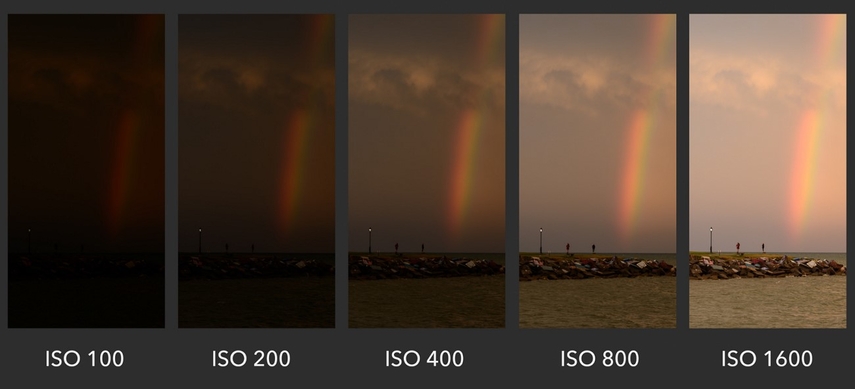
Manually setting your ISO allows for better control over image noise. Make sure to not go beyond 1600 ISO in the dark environment. Moreover, make sure to utilize (like f/1.8 or f/2.8) to let in more light and keep it low. Canon R10 low-light photography tips include lowering your shutter speed to around 1/6s or slower if shooting handheld in stable conditions.
Approach 4. Shoot in RAW Format
Shooting in RAW format on this camera preserves all the original image data captured by the sensor, unlike JPEG, which discards the details. He gives you so much more flexibility when editing, specifically for noise reduction or color correction. Moreover, RAW files handle high ISO better because they don’t have baked-in noise reduction like JPEG.
Approach 5. Apply the 'Expose to the Right' (ETTR) Technique
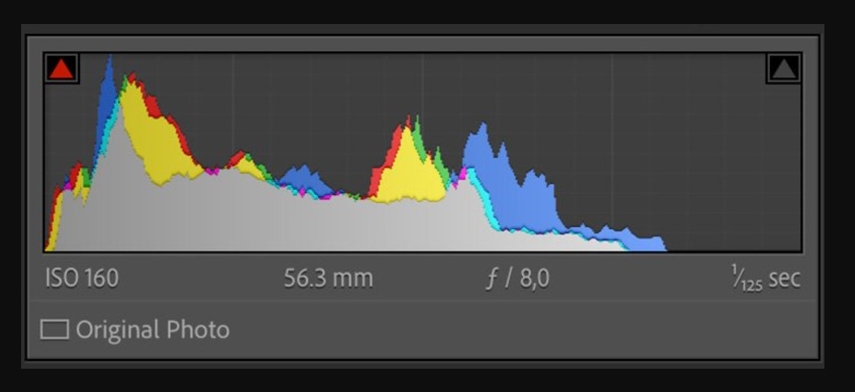
This method is a powerful way to reduce noise while shooting, and you just need to slightly overexpose your photos. This technique is used so that the histogram shifts to the right without blowing out the highlights. If you want to know how to use ETTR on camera, follow the given guide:
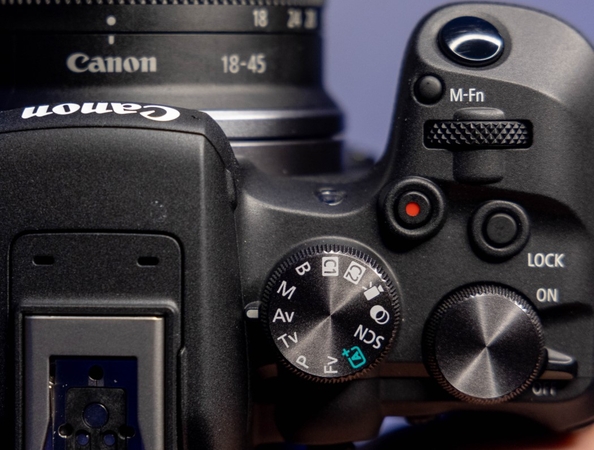
1. Use Manual (M) or Aperture Priority (Av) mode for complete control.
2. Raise your exposure slightly using exposure concentration (+0.3 to +1 EV), but check the histogram to avoid highlight clipping.
3. Turn off Highlight Tone Priority, which limits your dynamic range.
4. Check for binkies (highlight warnings) on the LCD to ensure you are not losing details.
5. In post processing, reduce the exposure to normal as this way your shadow will be cleaner and less noisy.
Part 3. Best Canon R10 Noise Reduction Software: Denoising Photos with HitPaw FotorPea
Sometimes, grainy effects still appear on the photos even after making the approaches mentioned above. In this case, it is advised to use a reliable Canon R10 noise reduction software, HitPaw FotorPea. It is an AI-powered platform that offers various tools to edit photos, which include AI Enhancer and AI Photo Editor. After enhancing the picture, it lets you check the before and after results with its preview feature.
Moreover, you can reduce the noise of more than one image at a time, which is suitable for professionals to save their time and effort. The tool offers many AI Models, such as AI Colorize, which makes the image vibrant and defines its visuals. The Sharpen model improves the edges of the subject and fixes the lens blur with just one click.
Key Features
1. Denoise Model: This model further offers Creative and Realistic Denoise models that extract the artifacts from the noisy images.
2. Upscale Image: You can also use its Upscale Model to enlarge and sharpen the photos using its high-quality, fast, and high-fidelity.
3. Enhance Low-Light Photos: It brightens the images taken in a dim environment using its Low-Light Model.
A Complete Guide to Removing Noise with HitPaw FotorPea
Now that you know the features of HitPaw FotorPea, let's learn the Canon R10 noise reduction guide using this tool:
Step 1. Access the Tool and Choose AI EnhancerOpen HitPaw FotorPea and press the “Enhance Photos Now” button to pick the AI Enhancer tool.

Step 2. Select the Denoise Model and Preview It
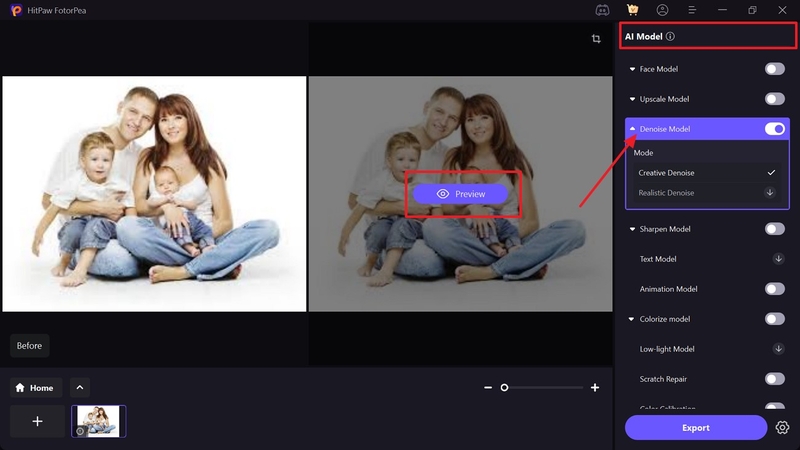
Next, under the “AI Model” section, toggle the “Denoise Model” and enable the “Creative Denoise” option from there. Once done, click the “Preview” button to start the enhancement process.
Step 3. Check Results and Download Enhanced Photo
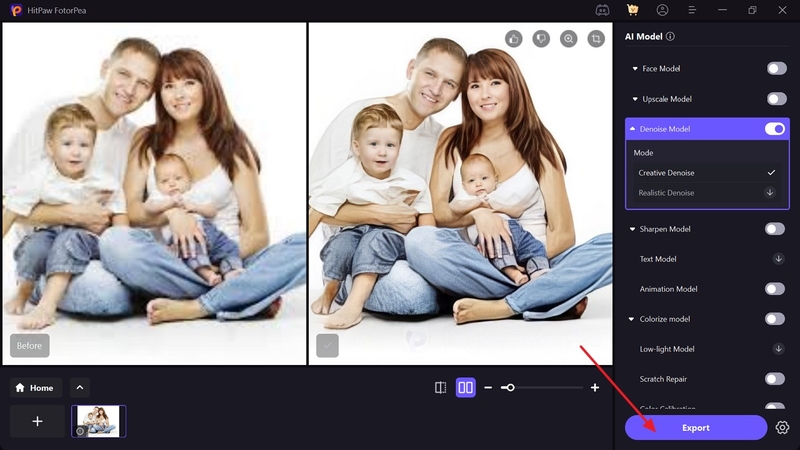
Afterward, review the before and after results, then hit the “Export” button to save it on your device.
Part 4. 5 Online Tools for Noise Reduction in Canon R10 Photos
To control low-light conditions when shooting, the following online tools are the perfect companion for Canon R10 ISO noise control:
1. Visual Paradigm
Key Features
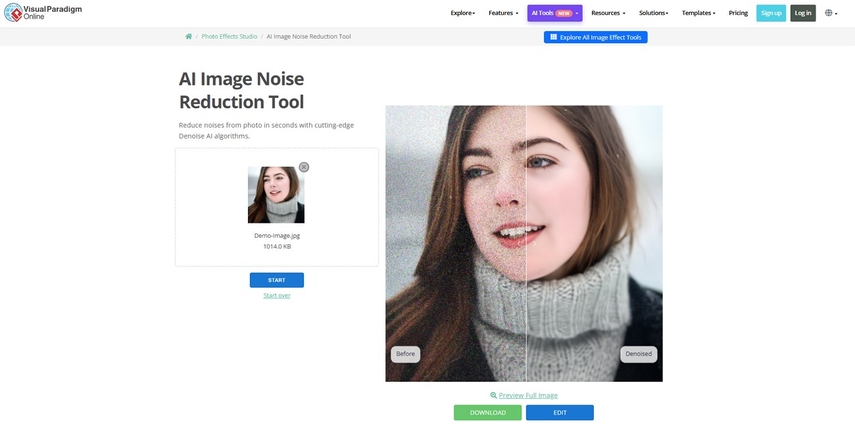
1. It allows users to drop an image or try denoising on AI-generated pictures.
2. You can preview full before and after images for a detailed comparison of the result.
3. After removing noise, users can either download or opt for further editing.
Limitations- The platform doesn’t offer a quality adjustment function before downloading.
- For editing, the tool lacks many advanced editing properties for precise enhancement.
2. Nero AI
Key Features
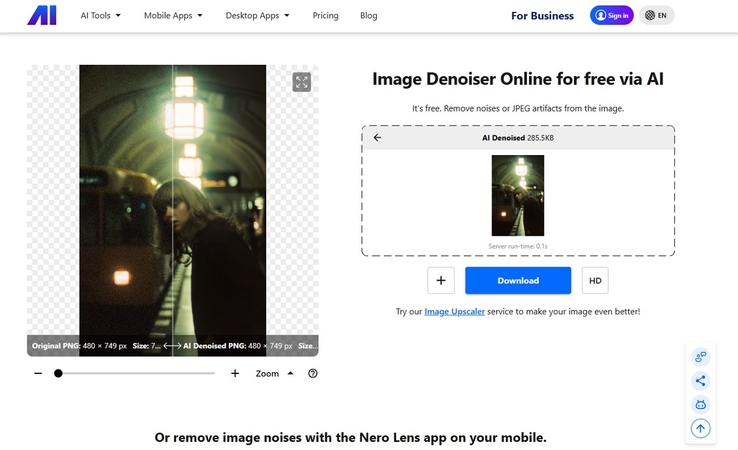
1. For Canon R10 high ISO noise reduction, it allows users to upload multiple grainy photos.
2. When comparing results, you can zoom in and out of an image for better analysis.
3. It displays the original and denoised image size and pixels on the screen.
Limitations- To remove noise from images, you need to pay 1-2 credits per picture.
- There is no option to edit a denoised image for further upscaling.
3. Picsart

Key Features
1. Its denoiser is an all-in-one tool that allows brightening, sharpening, and more.
2. After denoising, you can preview your images before heading to download.
3. The Editor tool allows you to edit the generated result using AI assistance.
Limitations- With the Picsart Free plan, users can only do standard photo editing.
- To download images in multiple formats, you need the Picsart Plus plan.
4. Fotor

Key Features
1. For denoising, you can upload an image from a computer, Fotor Cloud, or Dropbox.
2. Its denoising function allows editors to adjust Luminance and Color Noise through the slider.
3. You can further alter the Intensity and Roughness of Film Grains in the picture.
Limitations- In the Fotor Basic plan, users can only access limited elements and features.
- To download an image in HD and transparent PNG, you need a Fotor Pro subscription.
5. Media.io

Key Features
1. It offers an automated function to denoise images by simply dropping them on the platform.
2. With its AI assistance, the tool analyzes the picture and delivers results at an HD level.
3. Besides images, you can also remove grain from videos by simply uploading them.
Limitations- Editors require a Standard plan to download images or videos without a watermark.
- To download images in 1080P quality, you need to have the Standard and Premium plans.
Conclusion
Wrapping up the above guide, the Canon R10 high ISO noise issue is an emerging concern, although it's a versatile camera. It's seen that as you push the ISO higher to capture that perfect night, it adds unwanted grain to the shot. To address this, only an innovative post-processing platform like HitPaw FotorPea is suggested because of its AI models.


 HitPaw Edimakor
 HitPaw VikPea (Video Enhancer)
 HitPaw Univd (Video Converter)
 ![[Step-by-Step] How to Use Object Eraser on iPhone Photos](https://images.hitpaw.com/topics/fotorpea/guide-to-use-iphone-object-eraser.jpg)



Share this article:
Select the product rating:
Daniel Walker
Editor-in-Chief
This post was written by Editor Daniel Walker whose passion lies in bridging the gap between cutting-edge technology and everyday creativity. The content he created inspires the audience to embrace digital tools confidently.
View all ArticlesLeave a Comment
Create your review for HitPaw articles