How to Remove Blemishes in Photoshop Easily: Detailed Tutorial
In the field of portrait editing, one of the most obvious and fundamental skills one would like to learn is blemish removal. Acne, scars, and any other unexpected skin flaws might be hard to deal with, but using Photoshop, you can achieve natural-looking, clear skin with the help of the plethora of powerful tools.
Many people still find Adobe Photoshop difficult to use and don't know how to remove blemishes in Photoshop. For your convenience, we provide a detailed method for removing blemishes using Photoshop's tools in the following article.
Part 1. How to Correct Blemishes in Photoshop? Detailed Guides With 5 Tools
Now, if you are wondering how to correct blemishes in Photoshop, this section will cover you with detailed guides on using Photoshop's tools:
Spot Healing Brush Tool
Spot healing tool is one of the fastest ways of eliminating the blemishes on the face of a portrait in Photoshop. This filter is perfect for the removal of small pimples, wrinkles, and dust spots through a few clicks.
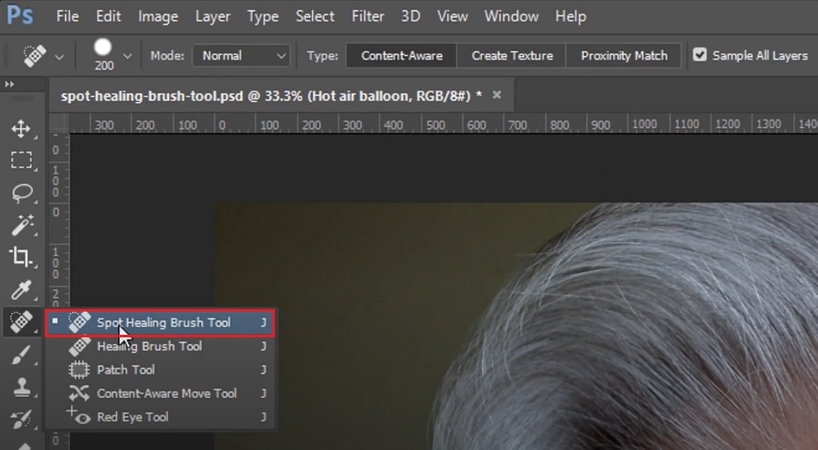
Step 1.As you enter Photoshop, open the image you want to edit. Then, right-click on the Brush tool to select the "Spot Healing Tool".

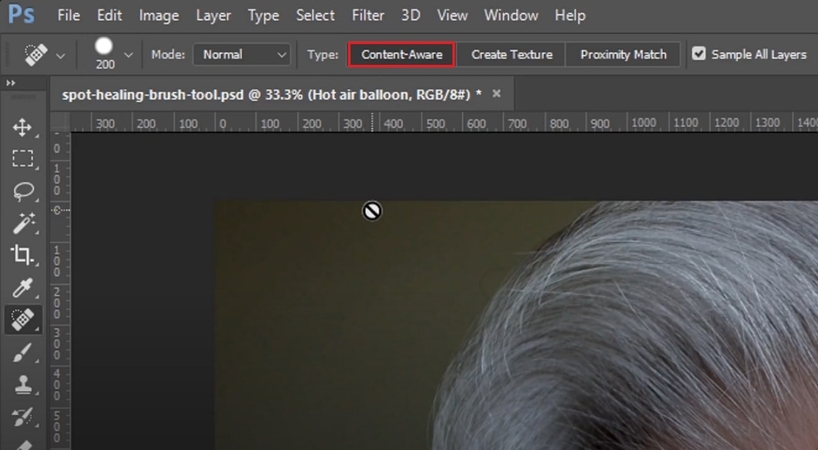
Step 2.Before you start using this tool, make sure you have selected the "Content-Aware" option within the "Type" menu in the toolbar.

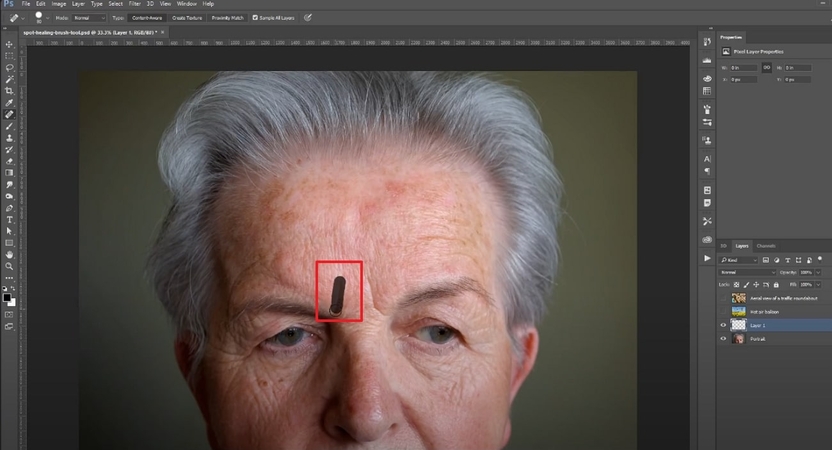
Step 3.Afterwards, zoom in on your image to the targeted spot and start removing your wrinkles from your forehead. At this point, you can also modify the brush's size depending on your needs to make the editing more efficient.

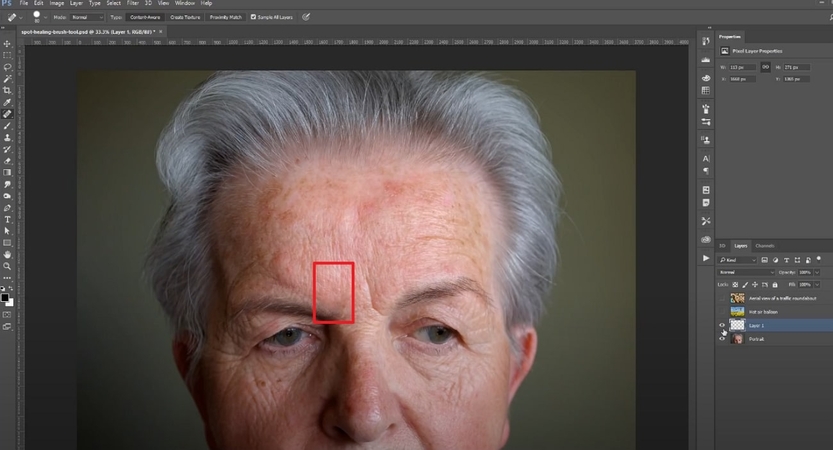
Step 4.Now, wrinkles from the forehead have been cleared from the image. Now, select the "Current Layer" option from the menu and tap the "Share" button to save it.

Healing Brush Tool
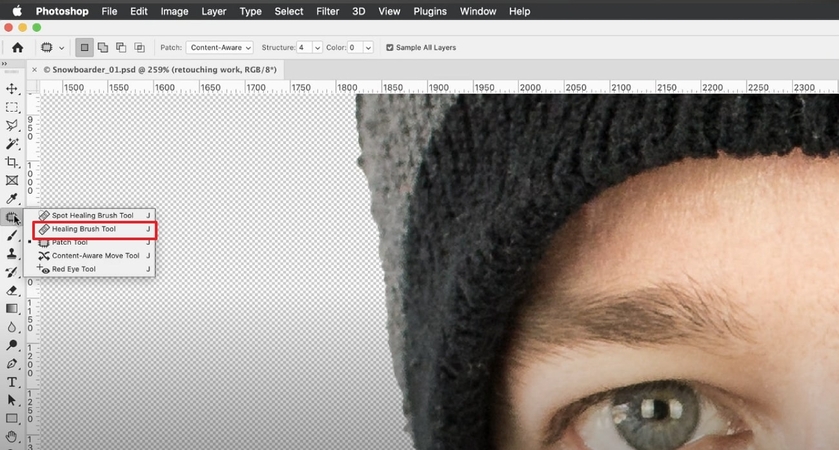
The Healing brush is related to the Spot Healing brush, but it has more control over blending the image than other brush tools. When using this tool, you must manually select the source area using a shortcut key for greater precision. Have a look at the following guide to know how to erase blemishes in Photoshop while using the healing brush tool:
Step 1.Upon opening the desired image in Photoshop, click on the "Healing Brush Tool" from the left panel, or you can hit the J key on the keyboard.

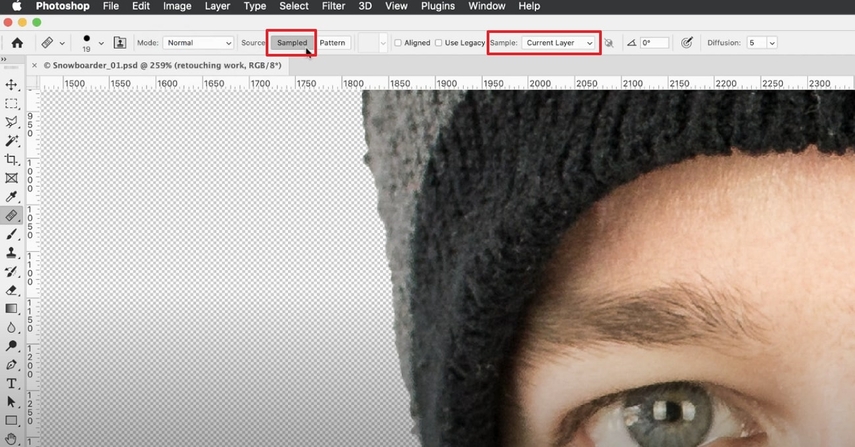
Step 2. Here, tap on the Source menu, choose the "Sampled" option, and click the Sample menu to select the "Current Layer" option

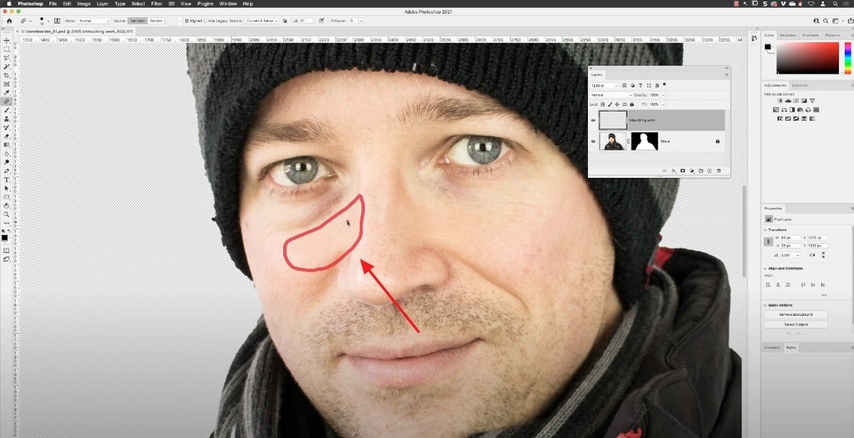
Step 3.Here, select the source area to take it sample and then drag it on the eye bag area to remove the dark circles.

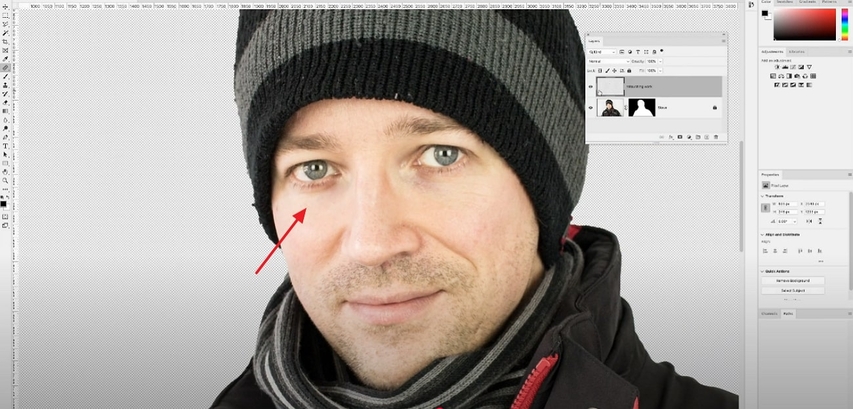
Step 4.Finally, your eye bags have been removed, and your image is ready. Continue repeating this step on all blemishes until you achieve the desired results. Once it's done, click on the "Share" button available at the top-right of the screen to export it to the device

Patch Tool
Unlike brush tools, which are designed to cover smaller areas, it is widely used to remove blemishes from larger areas on your skin. Mostly, users opt for this tool to replace dark circles or wrinkles with smoother and clearer skin patches.
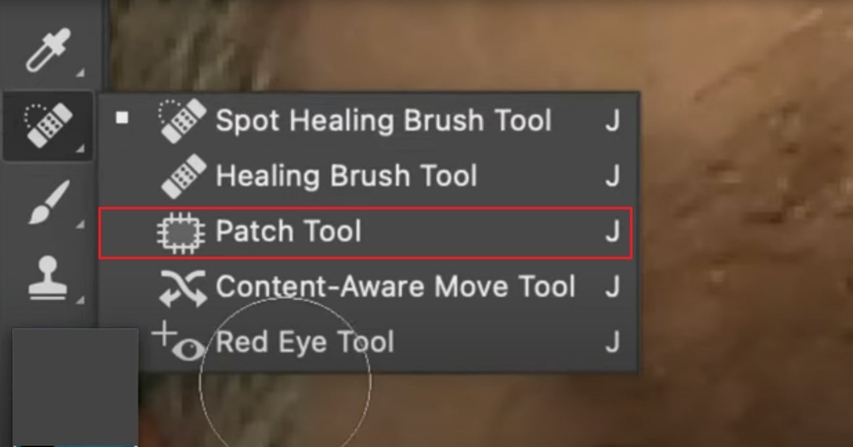
Step 1.As you open the image in Photoshop, right-click on the "Brush" icon in the left tab and select the "Patch" Tool.

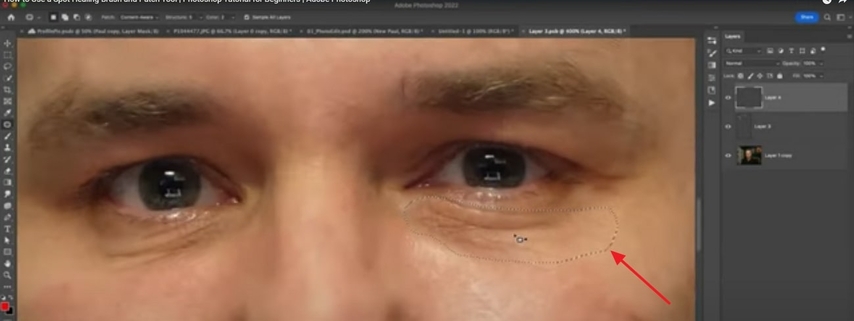
Step 2.Here, highlight the targeted area of your face where you want to add a patch. You can manually drag this patch to place it where you want.

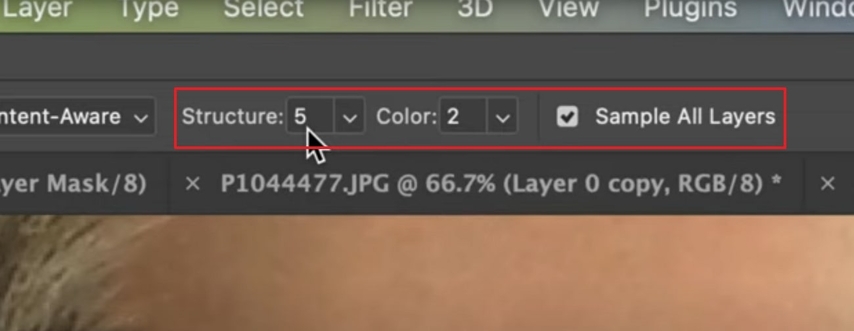
Step 3.At this point, select the "Structure" to 5, "Color" at 2, and enable the "Sample all Layers" setting for the upper tab.

Step 4.After applying patches to the targeted areas, preview the changes and then hit the "Share" button to render them on your device.

Clone Stamp Tool
For natural-looking skin, this tool lets you copy your original skin texture and paste it over the blemishes to hide them. If your picture has tricky skin textures and edges that can't be handled with the brush tool, then you can opt for this Clone Stamp. Let us go through its detailed guide to know how we can utilize this tool to learn how to fix blemishes in Photoshop:
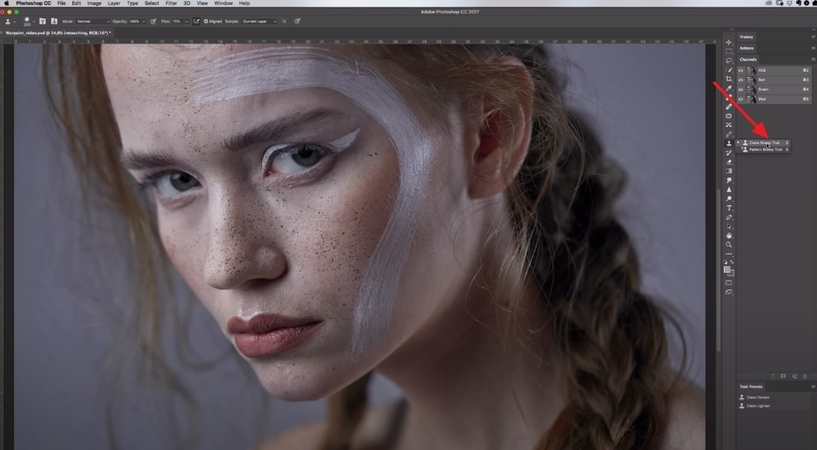
Step 1.Open the Photoshop app, click on the "Stamp" icon, and then select the "Clone Stamp tool" option.

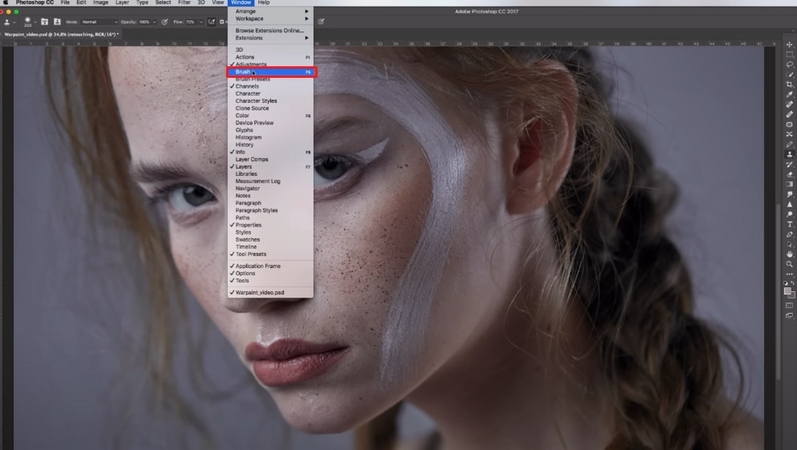
Step 2.Before starting, click on the "Windows" menu and then select the "Brush" option.

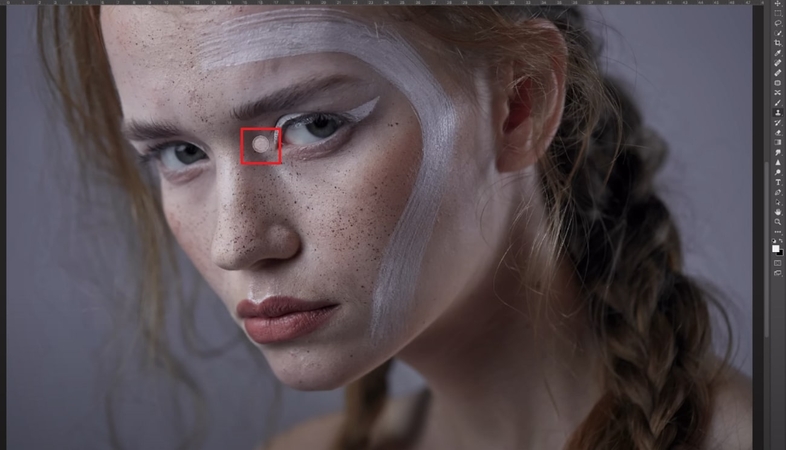
Step 3.Then, click on the sample area from where you want to take the skin texture. Here you can change the size of the brush by using "[" and "]" brackets.

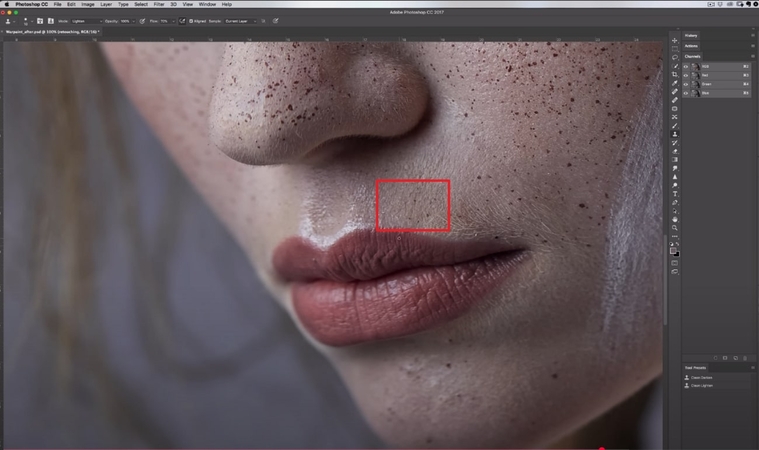
Step 4.Now, after tapping on the target area to remove all the freckles. After making all the changes, click the "Share" button to save it to the desired folder on your device.

Content-Aware Fill
For a seamless and natural-looking repair, it intelligently fills the selected area with surrounding pixels. This is ideal for removing unwanted objects from images, such as face imperfections and background items. So, if you want to explore how to edit blemishes on Photoshop, then kindly have a look at the following detailed guide:
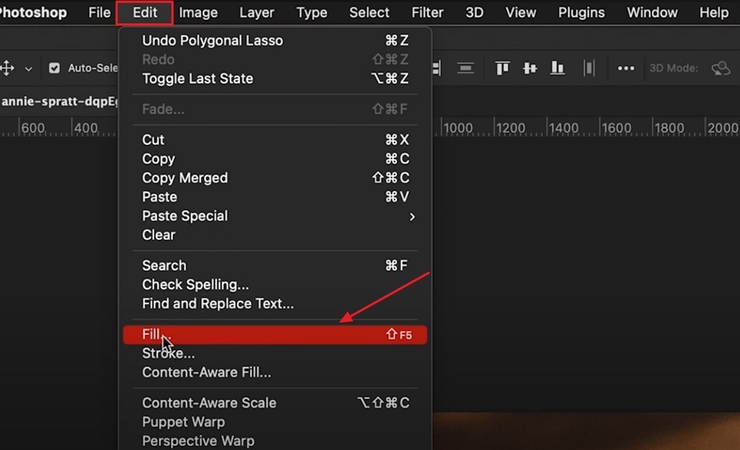
Step 1.Start by selecting the specific area of the image that you want to remove, then click on the "Edit" menu to select the "Fill" option.

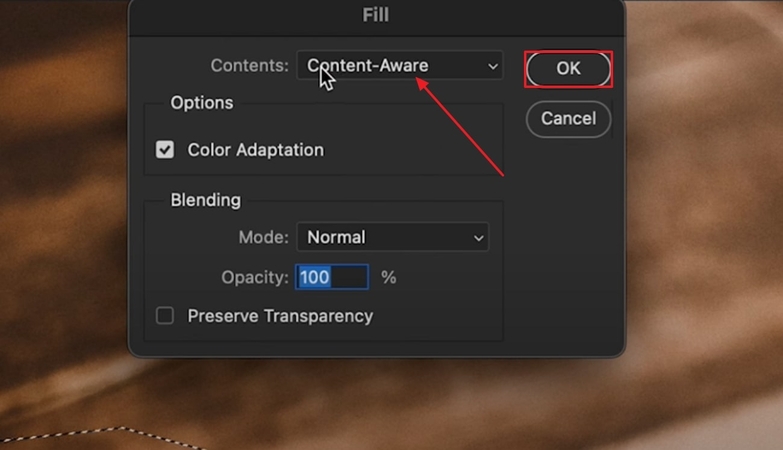
Step 2.Next, a pop-up menu will appear, allowing you to select the "Content Aware" option. Then, click the "OK" button to apply the changes to the image.

Part 2. Pro Tips for Natural-Looking Blemish Removal | Get Best Results
After learning how to edit blemishes in Photoshop, you need to know the following tips for creating natural-looking blemishes:
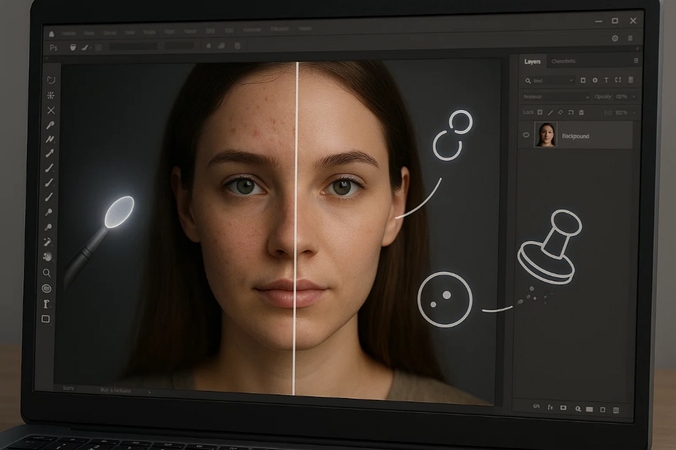
- 1. Avoid Over-Editing:Do not over-retouch your photographs, as it can remove natural pores and fine details, giving your photographs a plastic look.
- 2. Apply a Combination of Tools:Combining the tools, like using the spot healing brush and the Clone stamp tool together to create more realistic results, is always a good idea.
- 3. Adjust Brush Hardness:Soften the edges of your brush and lower the opacity when necessary, as a stiff brush or 100percent opaque will cause hard edges.
- 4. Always Check Before/After:Regularly toggle your edited layer's visibility on and off or use side-by-side before/after comparisons.
Part 3. Photoshop Alternative: Remove Blemishes Fast With HitPaw FotorPea
All the detailed guidance on blemish removal in Photoshop aside, the interface still feels overwhelming to you. Even though you gave it a try, you were unable to edit the image and remove its blemishes. To counter all difficulties, we recommend using HitPaw FotorPea (formerly HitPaw Photo Enhancer), a progressive photo editing and enhancement facility. Known for its AI models, the platform has recently introduced its dedicated AI Replace tool, which allows you to change picture properties via simple prompts.
Features of FotorPea
- 1.Allows you to add a detailed prompt to specify things you want to add or remove in the image.
- 2.Provides an eraser tool to remove unwanted elements from photos, making them cleaner.
- 3.Gives users the ability to create their own innovations using the AI generator tool
- 4.Let you restore old pixelated pictures to visually appealing ones by using its Image Restoration tool.
- 5.Offers the option to upscales your image quality up to 8x without ruining it using the Upscale Model.
Quick Guide to Removing Blemishes in HitPaw FotorPea
To know how this AI Replace feature helps you remove blemishes from your face picture across FotorPea, follow this stepwise expert guide:
Step 1. Access AI Replace in FotorPea
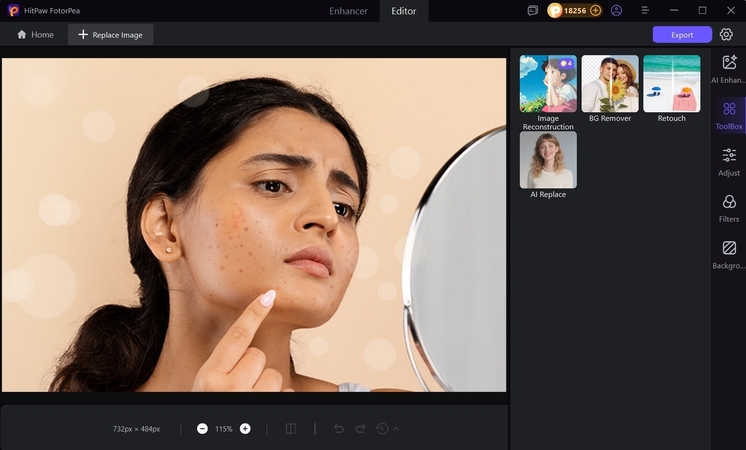
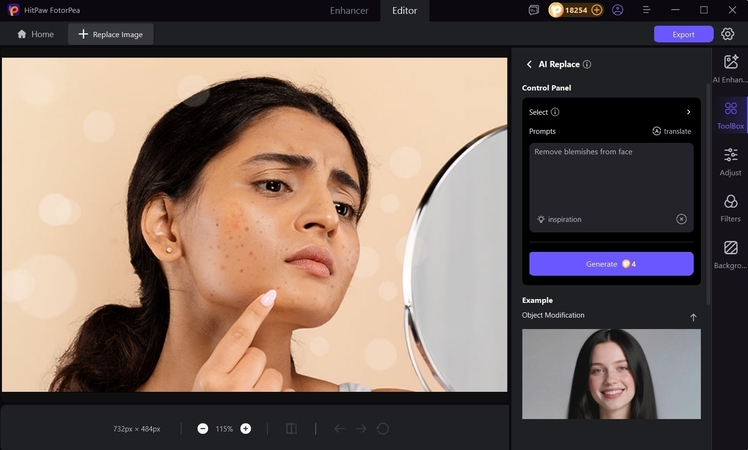
As you start using HitPaw FotorPea, look for the "AI Replace" feature in the "Toolbox" of "AI Photo Editor" section to import the base image.
Step 2. Enter Prompt to Remove Blemishes
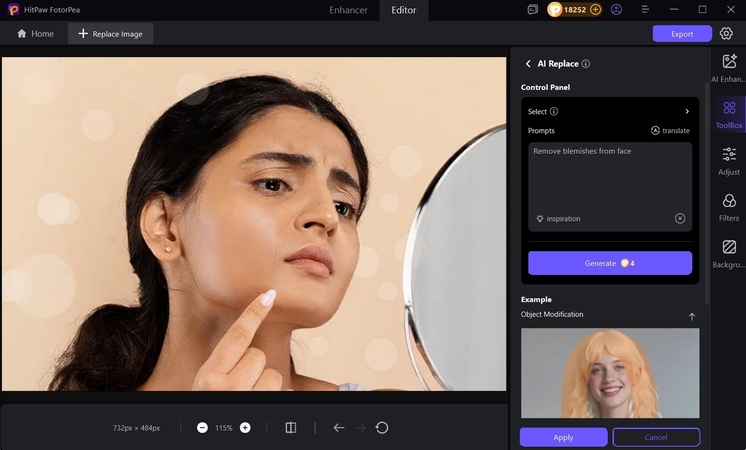
Continue onto the next screen to provide the prompt to remove blemishes across the set space. Once you've added an appropriate prompt, click the "Generate" button to execute.
Step 3. Export The Generated Outcome to the Device
As the outcome is generated, hit the "Export" button to get it saved to the device.
Part 4. FAQs on Removing Blemishes in Photoshop
There are numerous tools available to remove blemishes in Photoshop with ease. However, the Spot Healing tool is considered the easiest, as you simply select it and target the blemish area.
Most people overdo their editing, which eventually looks fake or unreal when they post it. You can avoid this by using fewer tools and removing lighter tones.
Yes, blemishes can be removed in Photoshop without losing skin texture by applying careful retouching techniques that preserve natural details. You can use the Spot Healing Brush and Healing Brush that can efficiently blend with the image texture.
Most people now use AI technology to retouch their images to make them visually appealing in just seconds. Users can opt for image refining tools like HitPaw FotorPea, where you simply need to select the target area and write a prompt.
Conclusion
Summing up, in this article, we have provided you with the efficient methods to know how to remove blemishes in Photoshop. However, if you find this tool a bit difficult, then we recommend using an AI-driven tool, HitPaw FotorPea, which has newly launched its advanced in paint feature.
Leave a Comment
Create your review for HitPaw articles


