Student ID Card Photo: Requirements, Create and Upload Tips
Many schools have strict requirements for ID card images, things like proper dress code, lighting, etc. A quick selfie with your phone just cannot work if it doesn't meet the standards, and no one wants to be stuck with a bad student ID card photo. Therefore, in this guide, we’ll walk you through the core requirements of an ideal student ID and show you how to create a professional one.
Part 1. Core Requirements for Student ID Card Photos
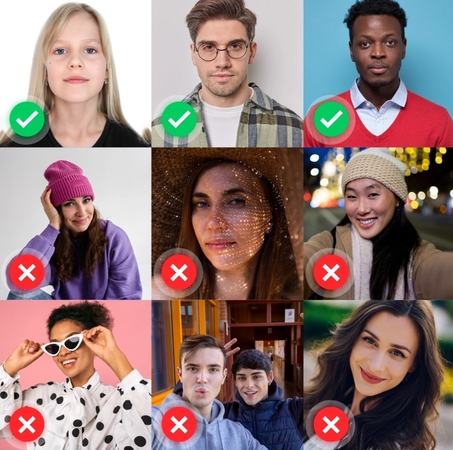
Before we get to know how to create one, the following are some requirements that you should keep in mind when making a photo for a student ID:
1. A recent picture taken within the last 6 months to accurately reflect your current appearance for identification purposes.
2. Keep a neutral expression, which assures your eyes are clearly visible and your mouth is closed.
3. Do not wear any accessories, and only hijabs are allowed if they don’t cast shadows on your face.
4. Maintain the background of your photo plain, such as white, cream, or blue, with no texture or distracting elements.
5. Wear dark colored clothing without logos or patterns, as this helps create contrast against the background and ensures a clean look.
Size Specifications for ID Photos of Major Countries
As different countries have different requirements, here is a comprehensive tale of various places' specifications:
| Country | United States | United Kingdom | South Korea | Canada | Australia |
|---|---|---|---|---|---|
| Dimensions | 51 x 51 mm | 35 x 45 mm | 35 x 45 mm | 35 x 45 mm | 35 x 45 mm |
| Pixels | 600 x 600 px | 600 x 750 px | 413 x 531 px | 420 x 540 px | Not specified |
| File Size | ≤ 240 KB | 50 KB – 10 MB | ≤ 100 KB | 60 – 240 KB | ≤ 2 MB |
| File Format | JPEG | JPEG | JPEG | JPEG | JPEG |
| Background Color | White or Off-White | White or Light Grey | White | White or Light-Colored | Plain Light-Colored |
Part 2. How to Create a Perfect Student ID Photo
The following section will introduce you to a reliable tool that comes in PC and online versions and helps you get the perfect student ID card image:
Create a student ID Card Picture with HitPaw FotorPea on PC
It can be overwhelming to create a university card picture as there are so many requirements and specifications to keep in mind. Therefore, HitPaw FotorPea simplifies the entire process with ready-to-use ID photo templates based on the standard dimensions. Its built-in smart cropping, background remover, and AI enhancement tools help you generate a professional university card photo.
Key Features
1. You can automatically remove the background of your target ID image to get the plain one for an official picture.
2. The tool offers an Eraser tool to regain the part that you accidentally removed from your student ID image.
3. From the country section, choose the various options for your university ID photo to meet the institute's requirements.
4. HitPaw FotorPea lets you add backgrounds to your student ID photos for a clean and professional look.
How To Adopt ID Photo Function to Create Student ID Card on FotorPea
Before any further delays, let's learn how to use FotorPea to create a university ID photo:
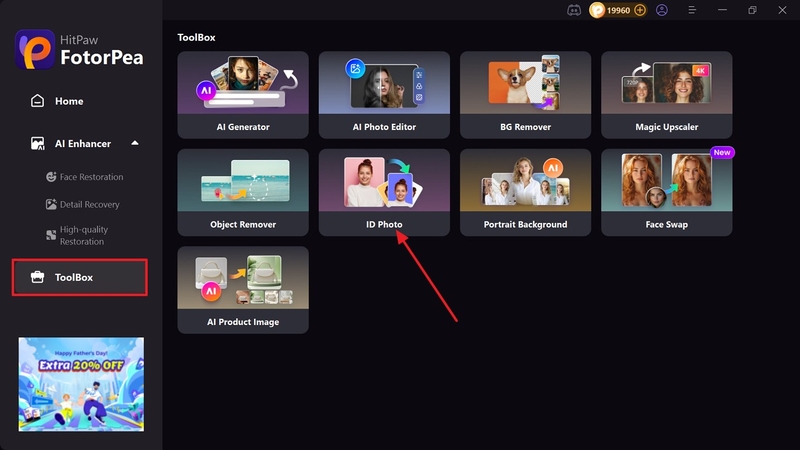
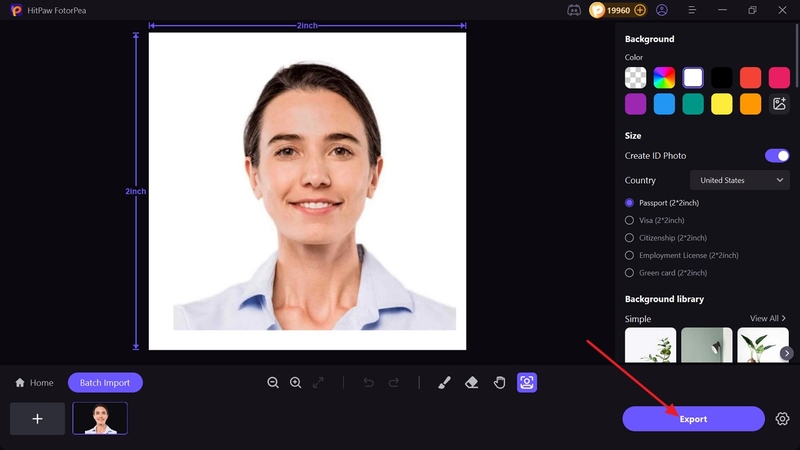
Step 1. Choose the ID Photos from the ToolboxOpen the tool and from the side panel, choose the “Toolbox” tab to select the “ID Photo” tool.
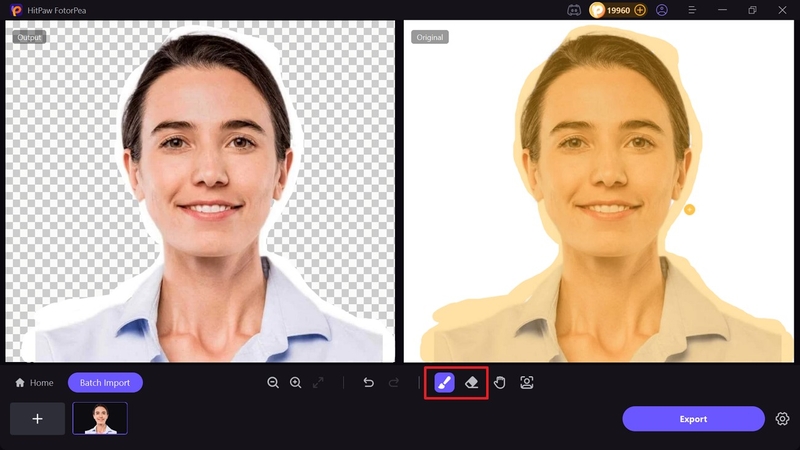
Step 2. Remove the Background Using a Brush
Next, pick the “Brush or Eraser Selection” tool to highlight the parts, and HitPaw FotorPea will automatically remove them for you.
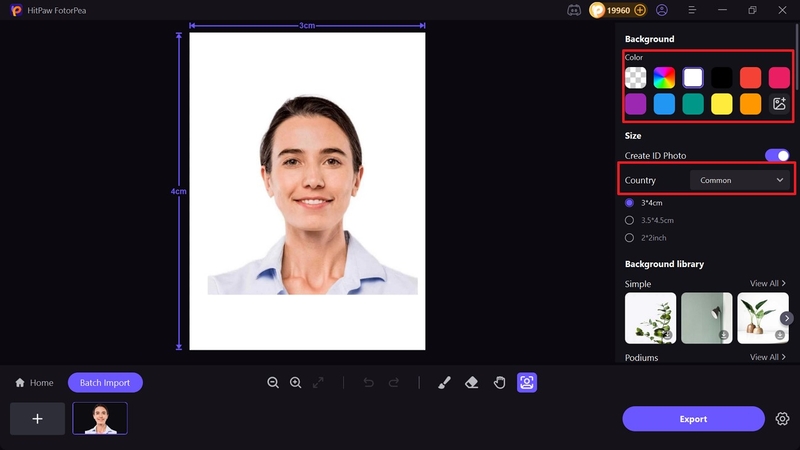
Step 3. Add Background and Choose Country and Size
Afterward, choose the desired background and pick the preferred “Country” from the expanded list.
Step 4. Check Results and Download It
Once you are done choosing the background, check the results, and if you are satisfied, hit the “Export” button to download it to your device.
Create Student ID Card Pictures with HitPaw Passport Photo Maker Online
If you want to create an ID photo on the go and don’t want to download any software, use HitPaw's Photo Online Tool. The platform provides a seamless experience to the people who want to create ID pictures, as well as passports to international standards. It instantly adds a professional background to your photos and turns them into HD by following the given steps:
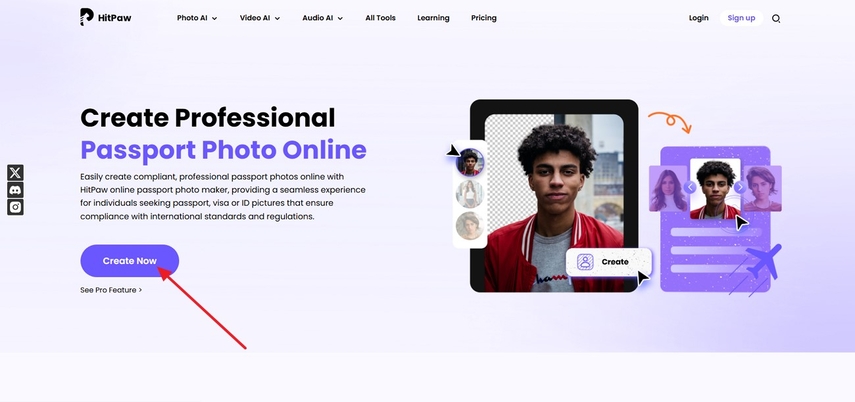
Step 1. Get Your Hands on HitPaw Passport Maker on a BrowserSearch for the tool and select the “Create Now” button from the main interface of HitPaw Passport Maker Online.
Step 2. Upload the Image You Want for Your ID Photo
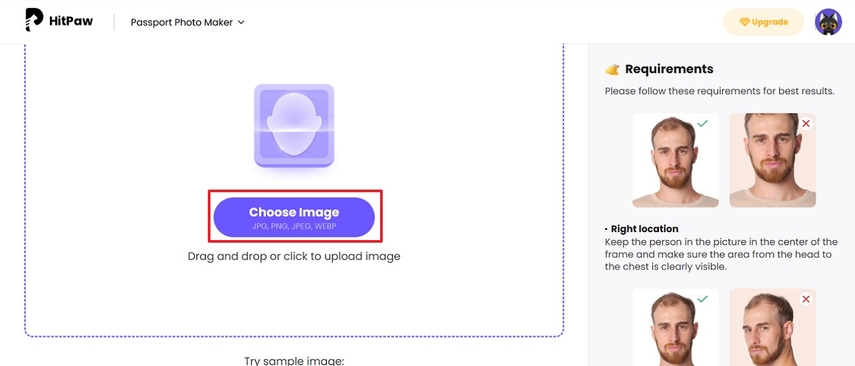
Next, click the “Choose Image” option to upload the image that you want to create a Student ID for and proceed.
Step 3. Select the National Standard Size
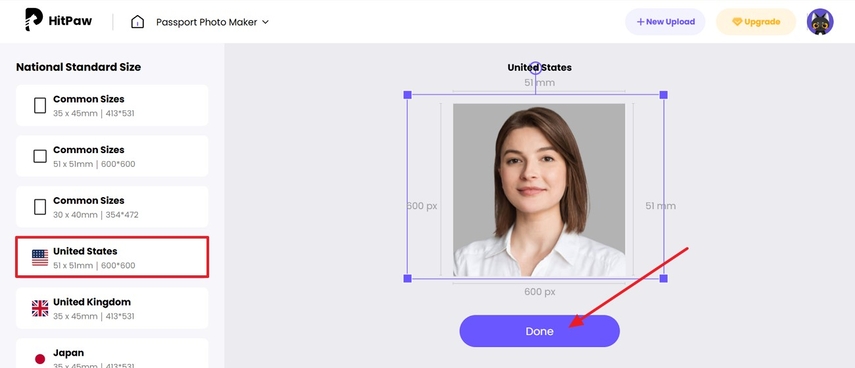
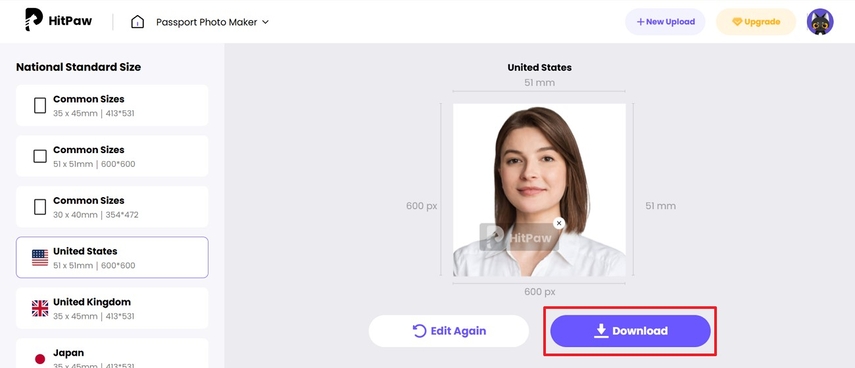
Once done, choose the “United States” or any desired one under the “National Standard Size” section and adjust the photo by dragging the box. Afterward, once you fit in the template, press the “Done” button to complete the process.
Step 4. Preview and Export the Image
Afterwards, check the result if it's worth closing and hit the “Download” button to save the ID picture on your device.
Part 3. How to Upload a University Card Photo
Now that you know how to make your ID picture student, let's learn how to upload it on your university portal:
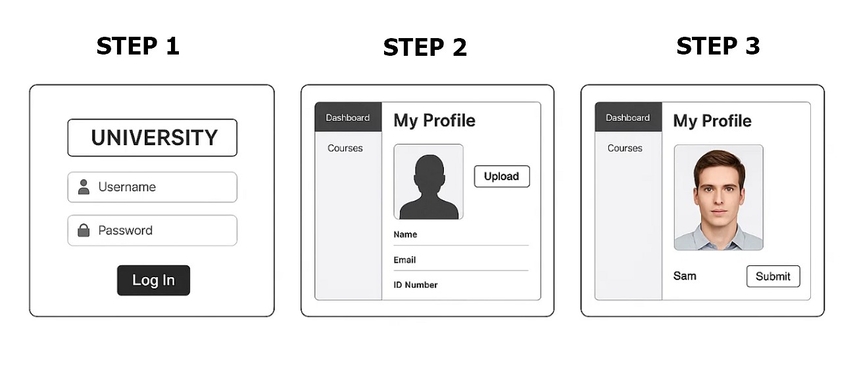
Instructions. Open your university or school’s official portal and log in using your student credentials. Navigate to the profile and click the “Upload” button to import the picture you just made with HitPaw Passport Maker. Upon doing so, press the “Submit” button or save to upload the image and complete the process.
Common Reasons for Upload Failure and Solutions
To avoid common mistakes that can lead to your photo being rejected, here are some quick solutions you can follow:
1. Size Discrepancy: Fix the proportion of the image by using tools like ID or Passport Maker to automatically crop your photos based on your country’s official template.
2. Background and Shadow Issues: Avoid background and shadow issues by shooting with a uniform light source and replacing the background.
3. Accessory Violations: Correct expressions and accessory violations by maintaining neutral expression and removing all jewelry.
4. Old or Edited Photos: Prevent rejections due to edited or outdated photos by turning off the filter and always using the original, recent image.
5. File Size or Format Errors: Check that the size and format are correct by compressing the oversized files and converting them.
Part 4. Tips to Create the Perfect Student ID Card Image
The following section will discuss the tips to help you get the perfect student card photo:
1. Lighting
- Use soft lighting by positioning yourself near a window with natural light or use artificial light to avoid hard shadows.
- Place the light source in front and slightly above eye level to illuminate the face evenly.
2. Composition
- Center the face in the frame with the head and shoulders fully visible to ensure the top of the head isn’t cropped.
- Keep the camera straight to avoid distortion or tilted appearances in the final picture.
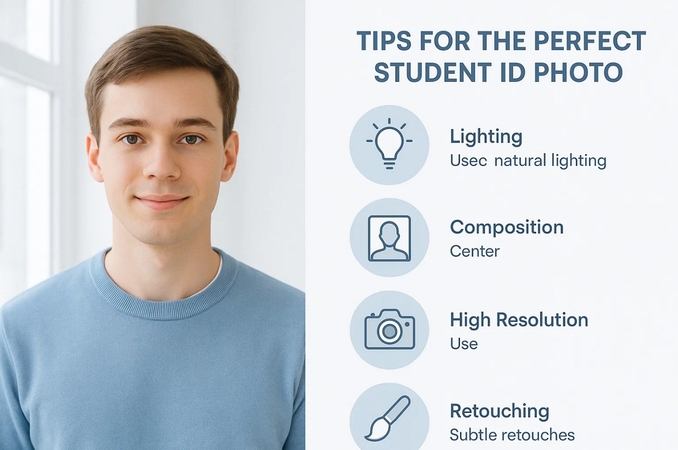
3. Camera Settings
- Set your camera to high-resolution mode for clear and detailed face features while using a small aperture (f/8–f/11) to ensure a deep depth.
4. Post-Processing
- Crop the photo to the required aspect ratio and resize it to meet the correct pixel dimensions.
- Make suitable adjustments of brightness and contrast to enhance clarity.
- Apply retouching to remove minor blemishes but avoid changing facial features to keep the image realistic and authentic.
Part 5. FAQs on Student ID Card Photo
Q1. What is the ideal size for a student ID card photo?
A1. The ideal size typically depends on your institution, but a common standard is 2x2 inches (600x600 pixels). Always check your school’s photo guidelines to confirm the proper dimensions.
Q2. Are there specific dress codes for student ID photos?
A2. Most institutions recommend wearing dark, solid tops to contrast with light backgrounds. Avoid uniforms, patterns, or clothing with logos for a professional look.
Q3. How can I change the background of my ID photo?
A3. You can use tools like HitPaw FotorPea to use a background remover tool which automatically removes surroundings from the subject. Check that the new background is plain, light-colored, such as white or blue.
Conclusion
In conclusion, the student's photo ID card can be overwhelming when you have to follow the regulations. Therefore, this guide has covered all the requirements and tips to make a perfect image. Plus, we have introduced you to a reliable tool, HitPaw FotorPea, and an online tool, HitPaw Passport Maker Online, to get the ideal picture for your student ID card.


 HitPaw Edimakor
 HitPaw VikPea (Video Enhancer)
 HitPaw Univd (Video Converter)


Share this article:
Select the product rating:
Daniel Walker
Editor-in-Chief
This post was written by Editor Daniel Walker whose passion lies in bridging the gap between cutting-edge technology and everyday creativity. The content he created inspires the audience to embrace digital tools confidently.
View all ArticlesLeave a Comment
Create your review for HitPaw articles