How to Overlay My Video onto A Screen at An Angle (with AI Tools)
You may have always wondered and thought about "how can I AI overlay my video onto a screen at an angle and how professionals achieve this?". Video experts are able to do that-to position a video on a moving phone display or a laptop or even a movie screen television. This amazing visual effect is now among the most demanded tricks in the contemporary video editing process that allows the commonplace footage to look carefully polished and draws viewers even in the social media sphere or business productions.
Although conventional video editing required frame-by-frame edits and complex mathematics in order to create realism in the screen overlays, modern-day AI tools have made this process much more welcoming to creators of any skill level.
This guide demystifies creating angled video overlays by explaining the essentials and showing how AI simplifies complex processes into sleeker versions.
Part 1: The Magic of Angled Screen Overlays and How AI Helps
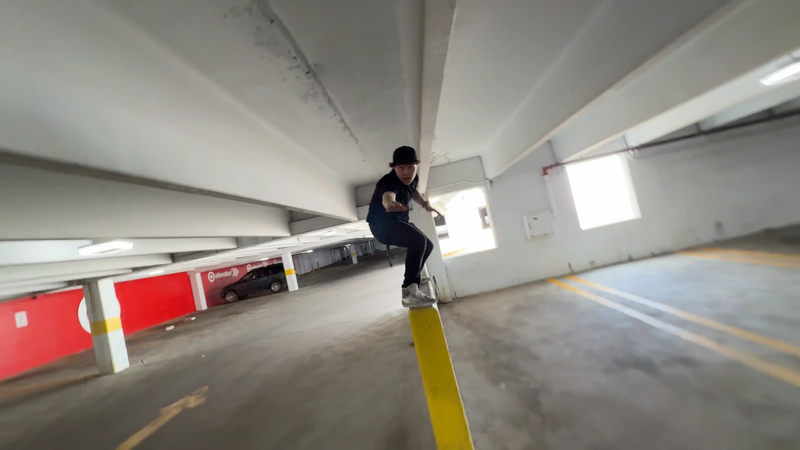
Angled screen overlays are immensely popular due to a number of valuable reasons:
- Storytelling: Employs the ability to create immersive experiences that remove the boundary between the digital and physical world
- Quality: Shows professional quality and care about details
- Multitasking: Ideal use with product demos, application showcases, testimonials, and marketing campaigns
- Viewer Engagement: Dynamic visual elements keep viewers' interest in the content
- Versatility: Ideal use as an enhanced tool to display products and applications, testimonials, and marketing campaigns
The Technical Basis of the Magic
The magic of learning how to AI overlay my video onto a screen on a slant originates because of the advanced mix of two basic video editing skills:
1. Motion Tracking
This course of action will digitally evaluate and track movement of your target screen throughout your footage. Each nuance of a move, turn, and angle shift should be accurately laid out so that your overlapping video clip follows the original screen asynchronously flawlessly.
2. Corner Pinning
This method can warp your overlay video to fit the precise geometry, angle, and view of the tracked screen. It takes into consideration depth, rotation, and scaling of changes that take place as the screen traverses the three-dimensional space.
Revolutionary AI Advantage
This is where artificial intelligence changes everything when you AI overlay my video over a screen at an angle:
- Automated Tracking: AI automates the most demanding and labor-intensive facets of the process
- Intelligent Recognition: Machine learning algorithms identify screens and forecast movement patterns
- Consistent Accuracy: Maintains a steady level of tracking precision, even as lighting conditions change
- Time Efficiency: Saves hours of manual tracking work into minutes of assembly
- Superior Results: In many applications, provides superior tracking results than traditional manual movements
Part 2: A Step-by-Step Guide to the AI-Assisted Workflow
Step 1: Preparing your Footage
Never obscure the screen, have high contrast, and proper lighting during AI detection. Align the overlay with the aspect ratio of the screen, and choose the correct format either vertical or horizontal.
Step 2: Track with AI-Based Tracking
Put a box around the screen on the first frame. The AI will learn movement, edges, and paths to anticipate them to keep the overlay at constant alignment, despite the moving screen being visually out of sight.
Step 3: Corner Pin Effect
You can anchor your overlay to tracking information to have it track with the screen, as well. The system readjusts itself, fine-tunes alignment and corrects tracking errors when necessary.
Step 4: Re-Think and Patch
Complete it by manipulating the levels of opacity, motion blur, and correcting your colour. Soft edges aid in the blending of the overlay to achieve a realistic and finished appearance.
Part 3: 3 Recommended Tools for AI-Powered Overlay Effects
It is imperative to choose the correct software that can be used with sufficient AI-assisted capabilities to produce professional results when you wish to AI overlay my video on a screen at an angle.
1. Adobe After Effects
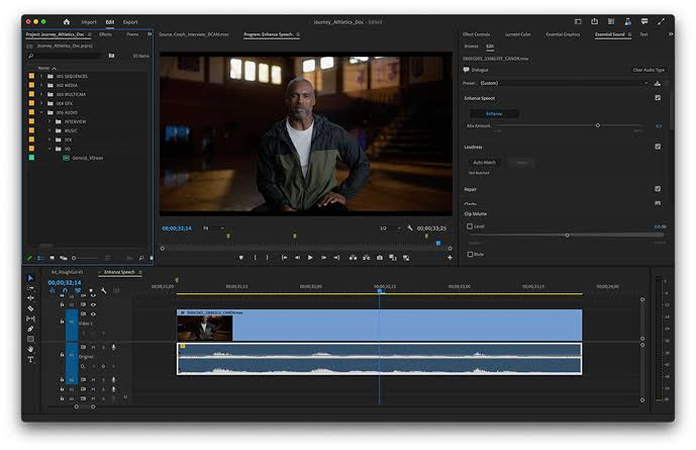
Professionally recognized software with unmatched accuracy to work on intricate motion graphics and the visual effects. Its motion tracking and feature detection and recognition is machine learning enhanced.
Pros:
- Unmatched precision and control over every effect aspect
- Extensive third-party plugins and community resources
- Industry-standard workflows familiar to professionals
Cons:
- Steep learning curve for beginners
- Subscription-based pricing model
- Resource-intensive system requirements
2. DaVinci Resolve
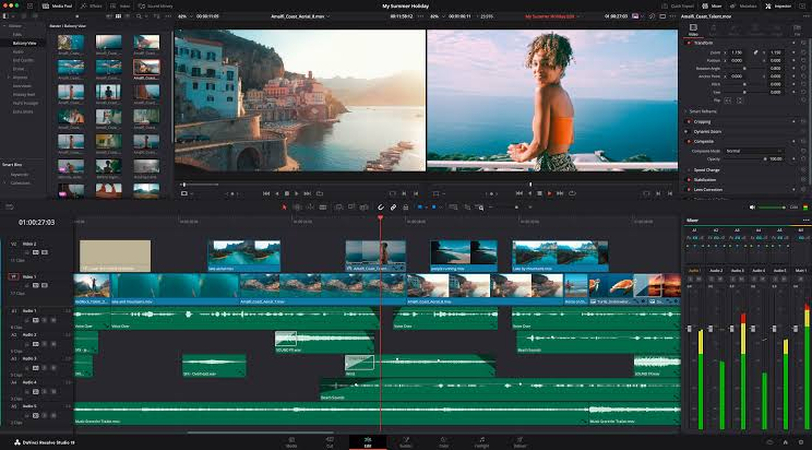
The professional-grade solution provided by Blackmagic Design, which has an advanced feature both as freeware and commercial product. It enables AI-enabled object identification and tracking and auto corner pin suggestion.
Pros:
- Robust free version with professional capabilities
- Integrated color correction and audio post-production
- Excellent performance optimization across platforms
Cons:
- Complex interface potentially overwhelming for newcomers
- Limited template library compared to competitors
- Hardware acceleration requires compatible graphics cards
3. CapCut
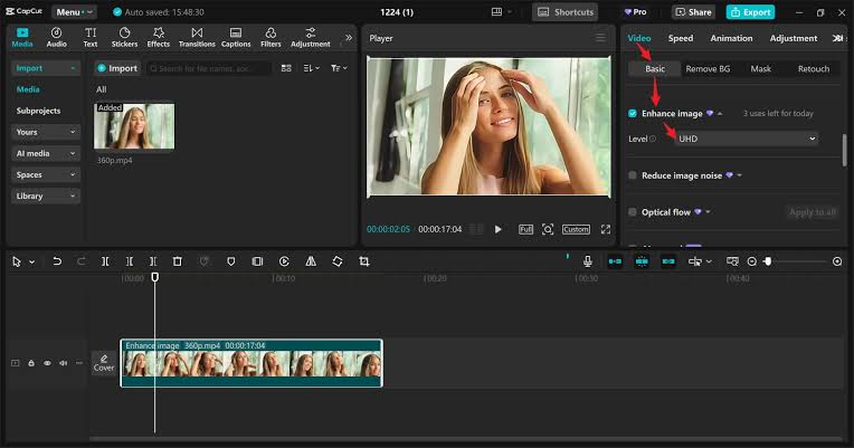
Capcut is a rapidly developing platform for novices and casual users. TikTok provides access to a screen overlay that is powered by AI and allows mobile and desktop creators to make it available. It possesses the one-tap tracking recognition system as well as the smart stabilization being applied to various screen types.
Pros:
- Completely free with no watermarks or limitations
- Intuitive interface perfect for beginners
- Cross-platform compatibility between mobile and desktop versions
Cons:
- Limited advanced customization options
- Slower processing speeds for complex projects
- Fewer professional-grade features than premium alternatives
Bonus Tip: Finalizing Your Video with HitPaw VikPea
Your video may lose much meaning even when accurately monitored and factory-thin layering is established, since quality defects may surface clearly following extreme editing procedures.
The Importance of Video Enhancement for AI Video at an Angle
Once you successfully AI my video on a screen at an angle, quality enhancement makes sure:
- Professional Presentation: Your carefully crafted overlays deserve the highest quality output
- Detail Preservation: Maintain fine details that make overlay effects more convincing
- Consistency: Uniform quality throughout your entire project
- Viewer Experience: Higher quality keeps audiences engaged longer
HitPaw VikPea for AI-powered Video Overlay & Enhancement
HitPaw VikPea is the next generation in the application of AI to video enhancement, employing the power of advanced artificial intelligence to optimize all areas of your video quality.
Key Features of HitPaw VikPea
- AI Video Enhancer to a Crisp 8K with Lots of Details: Convert lower-res format video to an incredible 8K quality Upscale every detail to achieve a more authentic overlay
- Unblur, Colorize, and Enhance Colors: Smart AI is used to unblur motion-blurred footage or bring unclear focus into focus, and enhance color vibrancy so it pops with overlays.
- Night Scene Enhancement to Produce Clear, Low-Light Video: Best used in low visibility situations where on-screen data is difficult to see Helps keep tracking data on in harsh situations
- Cloud-Accelerated Processing for Fast, Stable, and Large-Scale Tasks: Handle large video files without overwhelming local hardware Maintain consistent processing speeds regardless of project complexity
- Fix Bad or Unplayable Videos in Instant AI One Click Fix: Recover failed or damaged source footage Recover otherwise unusable overlay project files
Steps to Enhance Video Quality with HitPaw VikPea
Step 1: Install and Download
Go to the official website and download HitPaw VikPea. After it is installed, start the application and launch it.
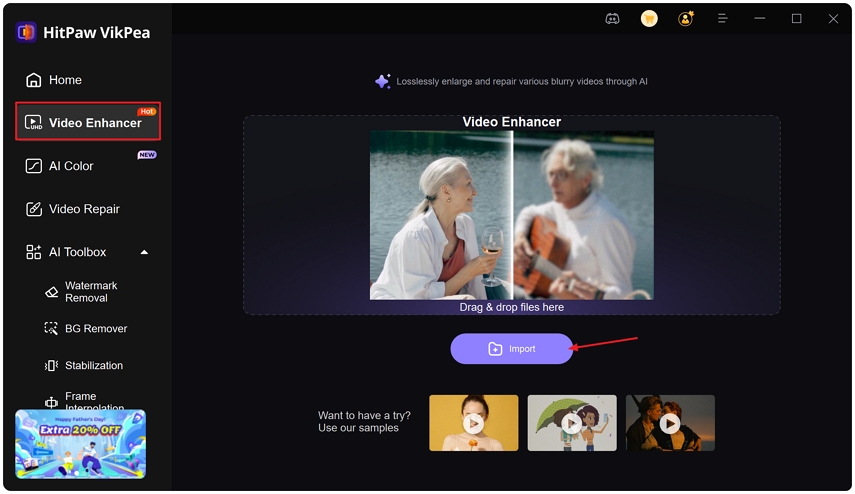
Step 2: Get Your Footage into Video Enhancer
Click on the left panel to open the Video Enhancer module. Press the icon of a plus or drag your video into the interface.
Step 3: Use the Appropriate AI Model
Along with a general model that applies enhancement overall, there are multiple specialized models that can be applied to the video as per particular enhancement needs.
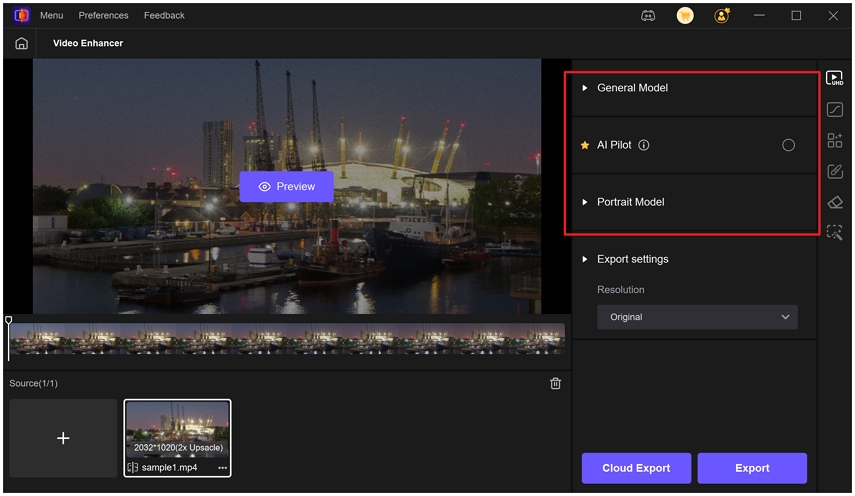
Choose your preview length (3 or 5 sec). In case you need to improve only a few elements of the video, use the Cut tool. Fix the output resolution and format.
Tips: In case you are not sure what model to use, use AI Pilot. It will automatically examine your video and advise the most suitable enhancement.
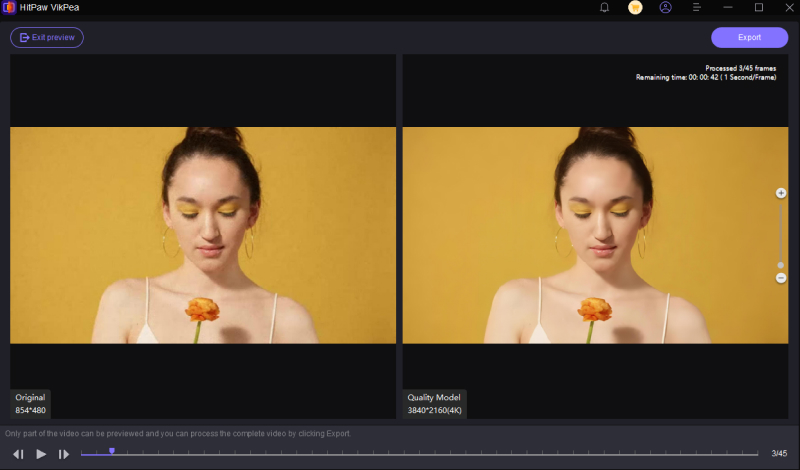
Step 4: Preview the video
You can check before and after results of the video and preview it and make necessary tweaks wherever needed.
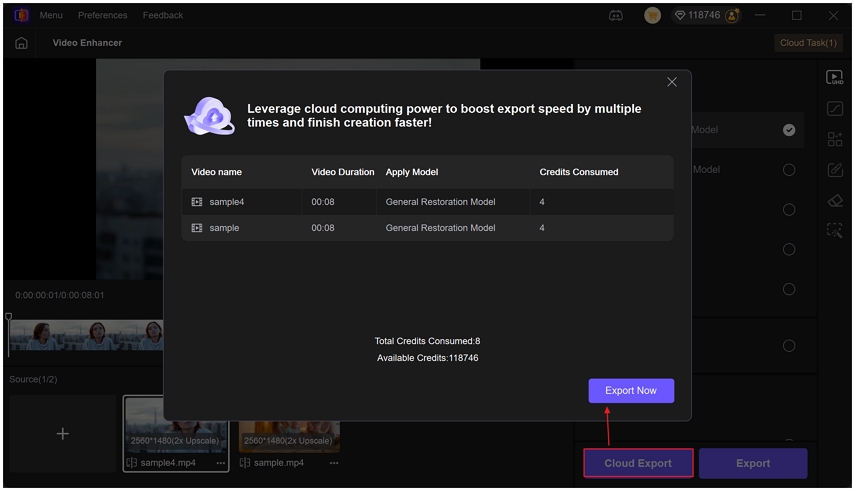
Step 5: Save and Export (or Cloud Export)
Once you are prepared with the preview, go to Export or Cloud Export and export the video. Once you have edited it, save the refined copy in your device.
Conclusion
Angled screen overlays are one of the most effective visual effects in current video editing. The AI-enabled process we have seen converts a complex manual workflow into a streamlined process with better results that are automated. Depending on what you need, whether it is the full control of Adobe After Effects, full-fledged features in DaVinci Resolve, or simple and no-nonsense CapCut, the point is to employ the instruments that suit your demands.
One remembers the final touch-up process through HitPaw VikPea where your overlay effects are displayed in the best possible condition to bring the difference of being good and being excellent.
Leave a Comment
Create your review for HitPaw articles


