Sensor Noise Reduction in Photography [A Conditional Guide]
Sometimes, when you take pictures in low light, you might notice tiny specks or grainy dots in your photos. These are caused by sensor noise, and they can ruin the image’s fine details and overall quality. There are different types of sensor noise and one common type is random noise, which often appears when you are using a high ISO setting.
You will often find yourself shooting on low-light situations where you need high ISO as a photographer. Therefore, learning how to control noise while keeping your images visually appealing is essential. In this guide, we discuss the ways to perform sensor noise reduction to ensure you get usable images at high ISOs.
Part 1. Image Sensor Noise Reduction Basics
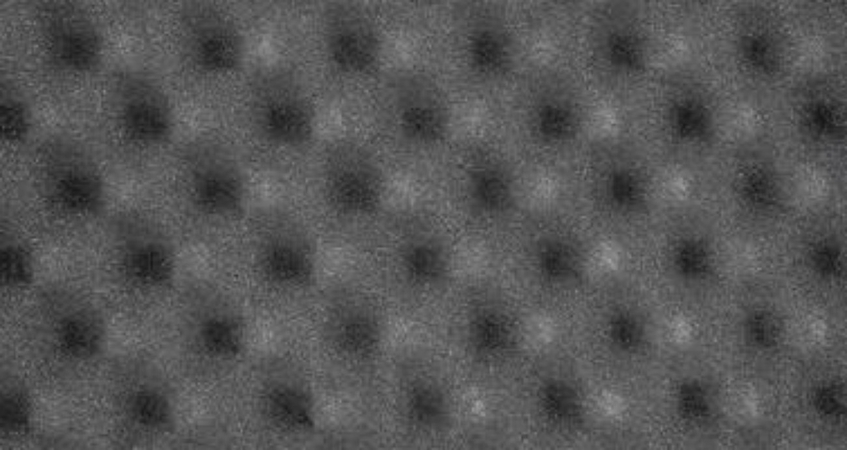
Sensors convert light photons into electrical charges at photosites, which are then read out digitally. Noise results from this conversion, such as shot noise from light's nature and read noise through electronic readout. Moreover, dark current occurs due to thermal energy and fixed-pattern noise from the manufacturing variations.
- CMOS: CMOS sensors are advanced and can now match CCDs in noise performance due to their improved design.
- CCD: CCD sensors offer very low read noise due to their centralized readout process of converting light into electrical charge.
Part 2. Digital Camera Noise Reduction Techniques
Having understood noise reduction in photography, let’s have a look at the techniques:
1. In-Camera Noise Reduction (Hardware + Software)
Modern cameras combine advanced sensors and processors to reduce noise before saving the image. Hardware like BSI sensors and software algorithms work together to minimize grain while preserving detail.
2. Differences in Noise Handling Across Camera Brands
Each brand uses unique algorithms and default NR settings, affecting image sharpness and color. Sony, Canon, and all brands handle high-ISO noise differently, especially in JPEGs vs. RAW.
3. Case Examples From DSLR and Mirrorless Cameras
From Canon's High ISO NR to Sony’s Multi Frame NR, techniques vary by camera and brand. Features like IBIS and long exposure NR on models like the Nikon Z7 or Fujifilm X-T5 show how brands tackle noise creatively.
Part 3. Noise Reduction in Photography: Why It Matters
The noise in your images doesn’t look attractive and you can’t use them professionally. Here’s why digital camera noise reduction is significant in photography:
1. Noise reduction helps to maintain the features of an image, especially its original sharpness.
2. By removing distracting speckles, you can create a more visually pleasing image.
3. Photographers must balance noise removal with the preservation of essential sharpness to achieve a natural result.
4. In low light, increasing ISO boosts the sensor’s signal but also amplifies noise, making noise reduction essential.
5. High ISO reduces dynamic range, so noise reduction helps preserve detail in shadows and highlights.
6. Without noise reduction, high-ISO images look grainy, limiting usable ISO and creative flexibility in low light.
Part 4. Sensor Noise Suppression Methods
Having discussed why image sensor noise reduction matters, here are some methods to suppress it:
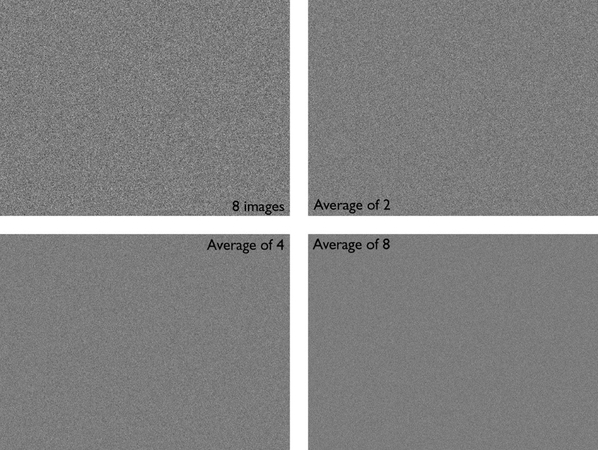
1. Multi-frame Noise Reduction
This technique involves capturing multiple identical images in rapid succession. By stacking these frames, you reduce random noise and get a final clear image with an improved signal-to-noise ratio.
2. Dark Frame Subtraction
Dark frame subtraction helps to minimize thermal noise and hot pixels, especially in long-exposure photographs. After it takes the main exposure, the camera takes a second “dark frame” with closed shutters and captures the noise that the sensor generates internally.
3. On-chip and Post Processing Solutions
It includes analog-to-digital converters at each pixel or sophisticated readout designs that minimize noise before the data leaves the sensor. However, the camera's internal image processor applies post-processing algorithms and uses advanced filtering and detail preservation techniques to reduce visible noise.

Part 5. Best Settings to Minimize Camera Sensor Noise
As we have discussed, noise reduction techniques are important, but they can worsen the image quality. Let's dive into the best settings to minimize camera sensor noise for worthy results:
1. Adjusting ISO, Aperture, and Shutter Speed
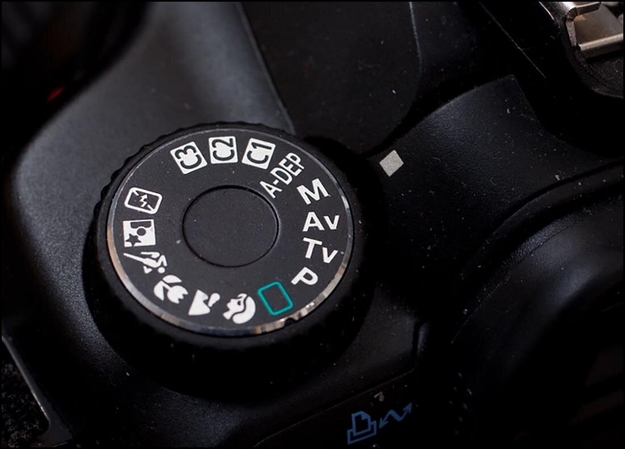
The higher the ISO, the higher the noise, so keep your camera ISO ideally low at 100 or 200 to get the best outcome. Plus, selecting the aperture depends on the environment; for example, setting it to f/1.8 to f/4 in low light and indoor settings creates a depth of field. However, the ideal shutter speed begins with 1/60th for hand-held shots.
2. Monitoring White Balance and Exposure
To get a well-adjusted white balance, set it on manual mode by balancing it depending on the light conditions, such as Tungsten for indoor shootings. While monitoring exposure is tricky, as under-exposed pictures are more likely to have noise when brightened up, to maintain it, use Matrix Metering and ETTR techniques.
3. Customize Settings for Night and Indoor Settings
Customizing and saving profiles depending on the surroundings makes it easier every time. To set the Night camera settings, choose ISO 100-400 with manual white balance and set the shutter speed to 1-10. However, set the ISO to 200-800 for an indoor profile and the shutter speed to 1/60 or above, depending on the shot.
Part 6. Manage Sensor Noise Post-Processing: Using HitPaw FotorPea
Suppose after learning sensor noise suppression its importance, you took pictures using all the techniques. After completing the shoot, you discover that your images are not as good as you thought. But there is nothing you can do right now, as the deadline is just around the corner. To tackle these issues, there are numerous photo-enhancing tools like HitPaw FotorPea to upscale your pictures.
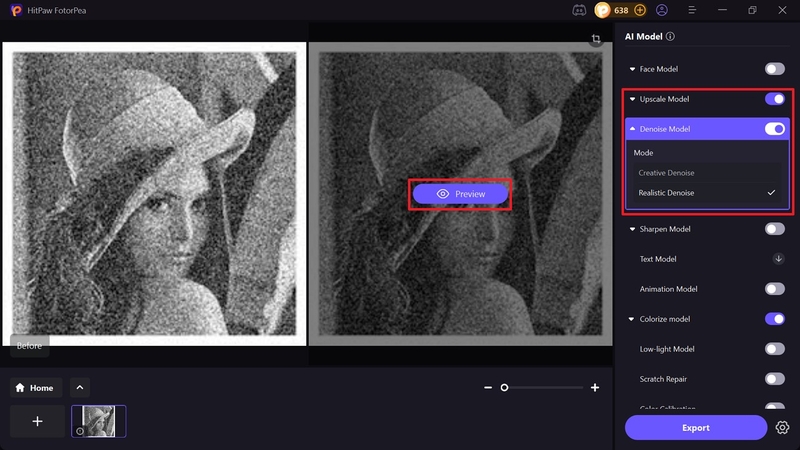
One can use the denoise model, which comes in two modes one of them is the realistic mode. It is mainly used to remove any sensor noise in your photographs. Additionally, you can toggle to other AI models, like the Upscale Model, to sharpen your pictures without ruining their charm. Unlike other tools, FotorPea offers a batch-processing facility that lets you enhance multiple images to save manual effort.
Key Features
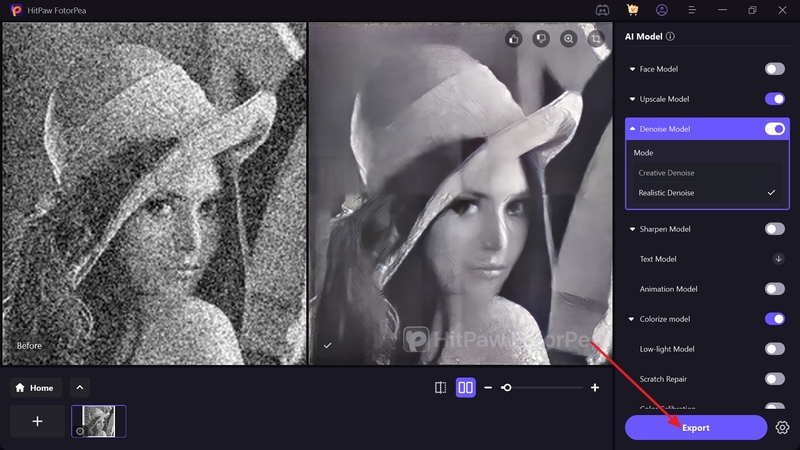
1. Preview: Users can activate the Eye icon after image enhancement to determine if the results are worth considering.
2. Colorize Model: To add color to black and white images, users can use this model to make them more lively.
3. Face Model: One can use the Face Model to sharpen and repair your blurred faces from sensor noise photos, making them more transparent.
Steps to Enhance Photos Using the HitPaw FotorPea
Now that you know how to reduce sensor noise in low-light photography, look at how to use the Hitpaw FotorPea app to enhance your photos.
Step 1. Launch HitPaw FotorPea to begin Noise RemovalEnter the HitPaw FotorPea app to hit the “Enhance Photos Now” button to import your required photo into this interface.

Step 2. Enable Denoise Model to hit Preview
As your photograph is imported, enable the "Denoise Model," then select its "Realistic Denoise" mode and hit the "Preview" button to start with photo upscaling.
Step 3. Hit the Eye or Export Results
Later, select the “Eye” icon from this interface to preview your photo or the “File” icon to see the image saved in your device folder.
Conclusion
To summarize, this article elaborated on sensor noise reduction and why it is significant. It discussed a tool, HitPaw FotorPea, that helps to minimize sensor noise without demanding you to learn manual editing skills. With FotorPea, you can utilize AI models to fix images quickly, such as its Denoise model. This model is perfect for removing noise and blur from heavy and low-quality images.


 HitPaw Edimakor
 HitPaw VikPea (Video Enhancer)
 HitPaw Univd (Video Converter)




Share this article:
Select the product rating:
Daniel Walker
Editor-in-Chief
This post was written by Editor Daniel Walker whose passion lies in bridging the gap between cutting-edge technology and everyday creativity. The content he created inspires the audience to embrace digital tools confidently.
View all ArticlesLeave a Comment
Create your review for HitPaw articles